Big Sur Itinerary: How to Plan an Amazing Big Sur Road Trip
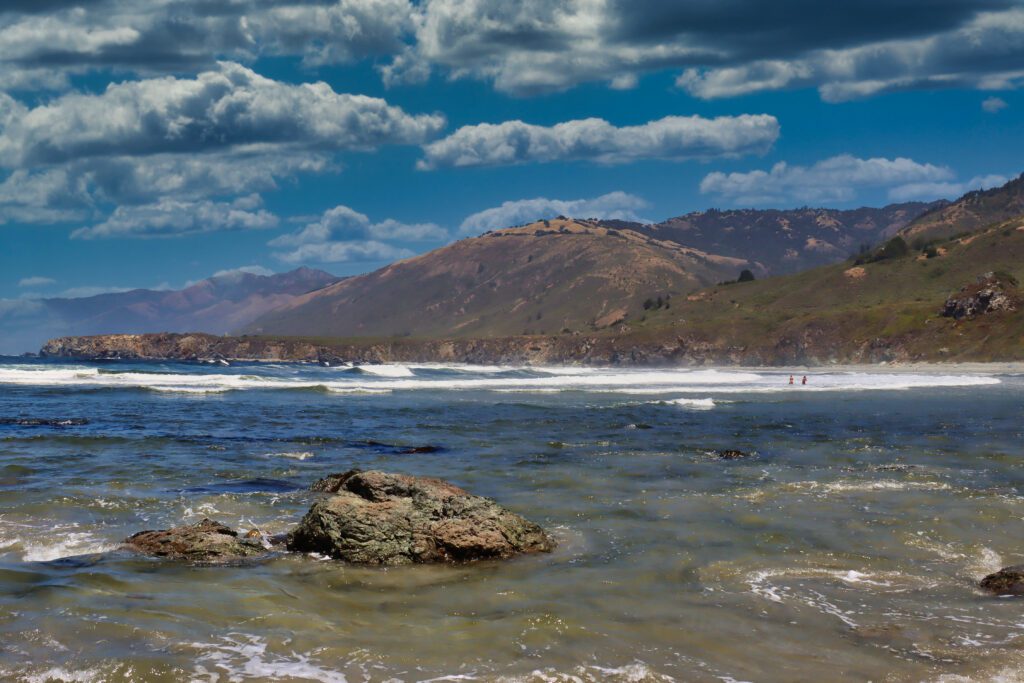
Big Sur is one of the most stunning parts of California, and is popular for people who want a getaway out in nature. Visitors flock to this slice of central California paradise to hike amongst the redwood trees, enjoy the beaches, and take in the views of the beautiful rocky coastline and mountain range. On a Big Sur road trip, you’ll see an incredible diversity of landscapes.
As a California native who has spent her life traveling up and down the coast, I’m here to break down everything you need to know about visiting this area, as well as offer a 2-day Big Sur itinerary that covers the most breathtaking spots that you won’t want to miss.

Disclaimer: Some of the links in this post, like hotel and vacation rental links, are affiliate links, meaning at no additional cost to you we make a little bit of money if you click through and book. That being said, we would absolutely never recommend something to you that we don’t stand behind 100%.
Where is Big Sur
The geography of Big Sur can be a bit confusing, so here’s what you need to know about the area before you visit.
Big Sur is a stretch of the central California coast, located between Carmel-by-the-Sea to the north and San Simeon to the south. It’s known for the rugged coastline and the beautiful Santa Lucia Mountains to the east. It’s a perfect stop along the Pacific Coast Highway, which runs from Mendocino in Northern California allll the way down to Santa Monica.
When people mention Big Sur, they are typically talking about the region, which spans over 70 miles north to south. This isn’t to be confused with the very small unincorporated town called Big Sur, which is right in the middle of the Big Sur region. Unless otherwise stated, when “Big Sur” is mentioned in this guide, we’re talking about the larger region.
Big Sur is unique in that it consists of multiple state parks and reserves, and also has land managed by Los Padres National Forest throughout. Starting from the north, there is Garrapata State Park, Point Sur State Historic Park, Andrew Molera State Park, Pfeiffer Big Sur State Park, Julia Pfeiffer Burns State Park, John Little State Natural Reserve, and Limekiln State Park.
Highway 1 runs through Big Sur, and is the only major road in the area. There are incredible sights to see along the entire approximately 70-mile stretch, but many of the most popular sights are located in and between Andrew Molera and Julia Pfeiffer Burns State Parks.

Planning a Trip to California? We’ve got plenty of California travel guides to help you plan an amazing trip.
- 3 Days in San Francisco: A Complete Long Weekend Itinerary
- 14 Incredible Day Trips from San Francisco
- How to Spend a Perfect Weekend in Los Angeles (2 Day Itinerary)
- How to Spend One Amazing Day in Los Angeles (2 Ways!)
- The Best Places to Stay in Los Angeles (An L.A. Local’s Guide)
- A Perfect Weekend Itinerary For San Diego (2 Days)
- How to Spend One Amazing Day in San Diego
- Where to Stay in San Diego: A Complete Guide from a Local
- A Complete Joshua Tree Itinerary (Weekend Guide)
- A Complete Pacific Coast Highway Road Trip Guide (SF to SD)
How to Get to Big Sur
If you plan on visiting Big Sur, you’ll absolutely need a car. It’s highly unlikely that you’ll be able to get a rideshare in the area, and since the region is so spread out, you need a car to get from point A to point B.
With that in mind, here is how to get to Big Sur by car from San Francisco and Los Angeles, which are the two biggest cities nearby (and the two cities with the most reliable airports, if you’re coming from somewhere out of the area).
From San Francisco
Take Highway 101 south. Once you get to Prunedale, take exit 336 to merge onto Highway 156 west towards Monterey. After Castroville, Highway 156 will merge with Highway 1 south, and you’ll follow it into Big Sur.
From Los Angeles
Take I-5 north. Once you hit Lost Hills, take exit 278 and turn left on Highway 46 (going west). Follow this highway to Paso Robles, where you’ll get onto Highway 101 south. Take exit 228 onto Highway 46 west towards Cambria. Follow until you hit Highway 1, turning right to follow it to Big Sur.
Tips for Planning a Big Sur Road Trip
To make the most of your road trip, here are a few things you should know before hitting the road!
Pay the State Park Fees
You’ll be traveling in and out of different parks as you explore Big Sur, so it’s important to get a day use pass. A pass costs $10 per car, per day, and allows you to freely access the different state parks within the area. Some day use parking lots will have an attendant at a kiosk, while others will require self-registration.
Keep in mind that you may still need to pay a separate parking fee when visiting areas managed by Los Padres National Forest. We’ll cover which spots require an additional fee in the itinerary below.
Check Road Conditions in Advance
If you’re taking a Big Sur road trip, it’s incredibly important that you’re aware of the road conditions. Landslides are pretty common in this area, and they can lead to closures of portions of Highway 1.
Since you’ll be spending pretty much all of your driving time on this highway during your time in Big Sur, a closure could throw a wrench in your plans, and you may need to make some changes.
Be sure you’re keeping an eye on the road conditions in the days leading up to your road trip. Check them here.
Have Your Itinerary Ready Before You Go
Whether you’re using the itinerary below or coming up with your own, if you want to make the most of your visit, you want to come in with a plan.
Big Sur stretches over 70 miles, and a lot of the must-see sights are far away from each other. Make a list of the main sights that you want to see and activities you want to do, and then figure out what order you should check out those spots so that you’re efficient.
While you can leave a little wiggle room for spontaneity, you want to come in with a plan so that you don’t waste your time driving more than you need to. In addition to saving time, it will save you gas, which leads us to the next point.
Plan Ahead for Gas
Gas stations in Big Sur are few and far between, and unsurprisingly, they aren’t cheap. That said, if you’re running low on gas while you’re driving through the area, definitely bite the bullet and pay the high price at the first gas station you see – you likely won’t pass another gas station for miles!
To the best of your ability, try to fill up the tank outside of Big Sur. As you’re driving to the area, if you’re coming from the south, try filling up in Paso Robles, and if you’re coming from the north, fill up in Monterey or Carmel-by-the-Sea.
If you plan on staying outside of Big Sur but exploring the area during the day, be sure to top off the tank each day before you drive in.
Of course, if you’re actually staying in Big Sur for a few days, you might not have a choice other than to pay the premium price.
Bring Plenty of Food and Water
While there are some restaurants and general stores in Big Sur, there aren’t many options, and they’re mostly concentrated in one area (and they generally aren’t too kind on the wallet!).
Outside of the area where the restaurants and shops are concentrated, you’re not going to find any stores to pick up food, so it’s essential that you’re prepared. Be sure you bring lots of food and water with you – it’s better to be over prepared for this trip.
Be Aware of Local Wildlife
You’re in the great outdoors – so expect to run into some wildlife! There are a few creatures you should be aware of during your visit.
Ticks often latch on when a “host” brushes by grass, so be sure to do some regular skin checks (and seek out medical attention if you find one). Bobcats, mountain lions, skunks, and raccoons also live in the area.
The California Parks and Recreation Department has a quick guide on what to do when you encounter these animals.
Download Your Maps Ahead of Time
You’ll be going in and out of service as you drive through Big Sur, so you’ll want to be sure you’re prepared to travel while you’re offline. If you plan on using Google Maps, download the maps of the areas you’ll be exploring by dropping a pin in the area and then pressing the “Download” button under the “Directions” button.
This will save the map of the area to your phone so that you can use navigation when you’re out of service. You can also save different spots – like trailheads or the campground you’re staying at – so that you can more easily navigate to them while you’re traveling.
Drive Safely
Most importantly, you’ll want to make sure you’re being safe! Highway 1 does get narrow and windy in sections, so put that phone away and keep your eyes focused on the road.
If you need to take a driving break, pull out at one of the turnouts.
You’ll see plenty of turnouts as you drive along the highway, but please make sure you’re stopping at a spot that has adequate space for you to park completely off the road.
A Complete 2-Day Big Sur Itinerary: A Perfect Weekend in Big Sur
Below is the full 2-day itinerary to use during your visit. The first day focuses on the northern side of Big Sur, and then on the second day you’ll pick up where you left off and continue exploring the southern area of the region.
This itinerary is based on the assumption that you’ll be arriving from the north, but if you’re coming from the south, just reverse the order (start with Sand Dollar Beach at the end of the second day itinerary, and work your way backwards).
Day 1: Explore the North Side of Big Sur
Spend your first day in Big Sur exploring the beautiful coast and checking out some of the most iconic spots! Important note: be sure to bring lunch, snacks, and plenty of water with you.
The general stores and restaurants in the area are concentrated around the towns of Big Sur and Posts, which you might not get to until the later afternoon.
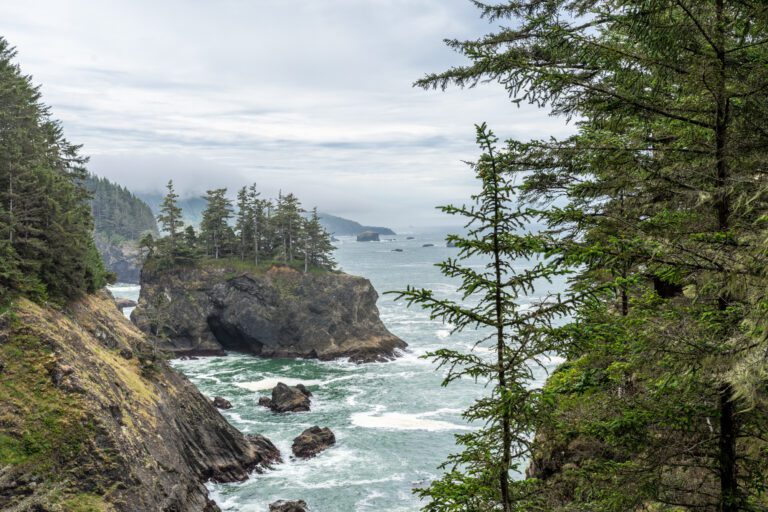
Hike Around Point Lobos State Natural Reserve
Start the day by hiking along the coast and enjoying the scenic views of Point Lobos State Natural Reserve, which is just north of Big Sur. Point Lobos Loop Trail takes you throughout the reserve, and there are plenty of trail off-shoots that give you amazing views of the coves and rocky coastline.
While the entire trail system linked above is 6.7 miles long, you don’t need to do the whole loop – you’ll have two more hiking opportunities later in the day, so save your energy if you need to.
There are a ton of beautiful spots on the southern coastal side of the reserve, so I’d recommend focusing your time in this region. Start by making your way from where you parked to Bird Island Lookout, and then hike north along the Bird Island Trail to walk by China Cove.
Continue up the trail to connect to Point Lobos South Shore Trail, a 2.5-mile out-and-back trail that will take you out to Sea Lion Point. Of course, adjust the order depending on where you’re able to snag a parking spot.
All the trails are interconnected, so if there are other spots you want to see, you can easily get from point to point by foot.
Speaking of parking, there are a few small parking lots sprinkled throughout the reserve, and it costs $10 per vehicle to park.
Keep in mind that on a busy day, there’s a good chance you’ll need to park on Highway 1 and walk into the park. There is a no parking zone immediately around the park entrance, but you can park on the road just less than a quarter mile south.
Explore Soberanes Point
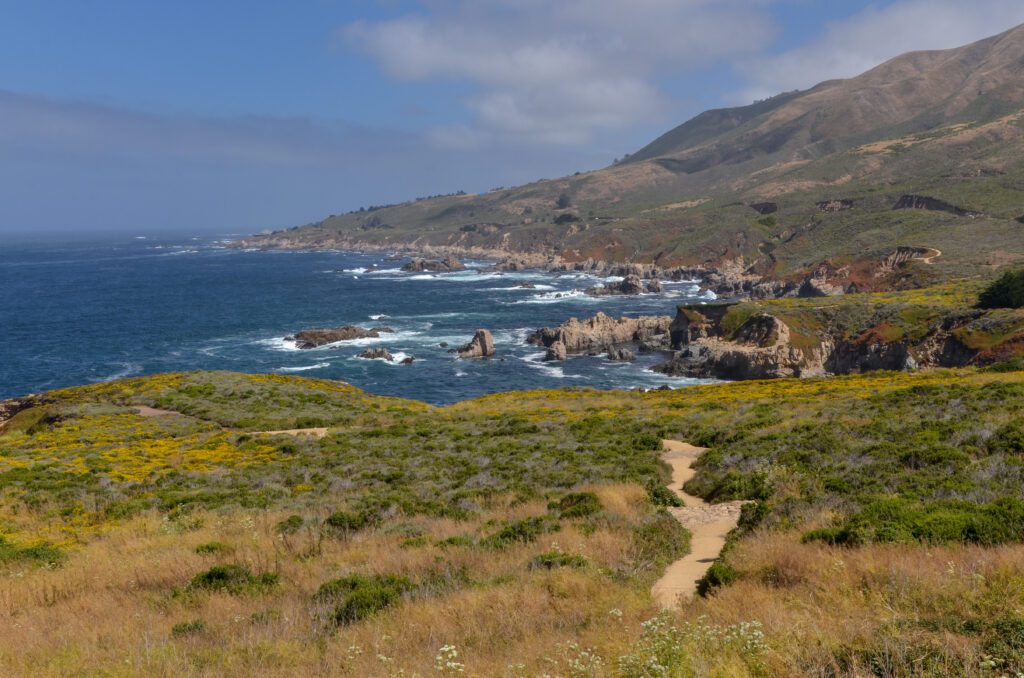
Next, you’ll drive five miles south (less than a 10-minute drive) to explore Soberanes Point in Garrapata State Park.
This easy walking path loop (which is 1.8 miles long) takes you up to Whale Peak, where you can get amazing 360 views of the area from above, and then leads you around the cliff edges to get views of the rocky coast below.
If you’re feeling hungry, find a nice scenic spot right off the trail to sit down and enjoy lunch before heading back to the car!
You can park by Gate 8, where there is plenty of roadside space for cars on both sides of the road. There are also some spots further down the road closer to Whale Peak.
However, most of the parking space is on the eastern side of the road, so if you’re driving south, you’ll need to find a place to safely turn around. Both of these parking areas have easy access points to the trail.
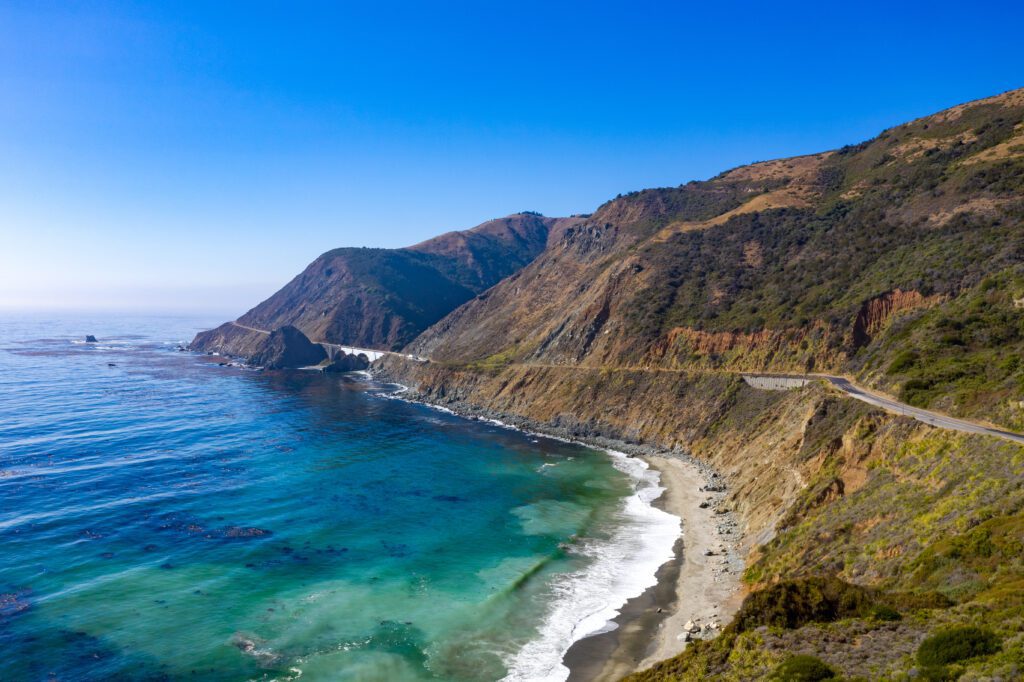
Take in the View of Bixby Bridge

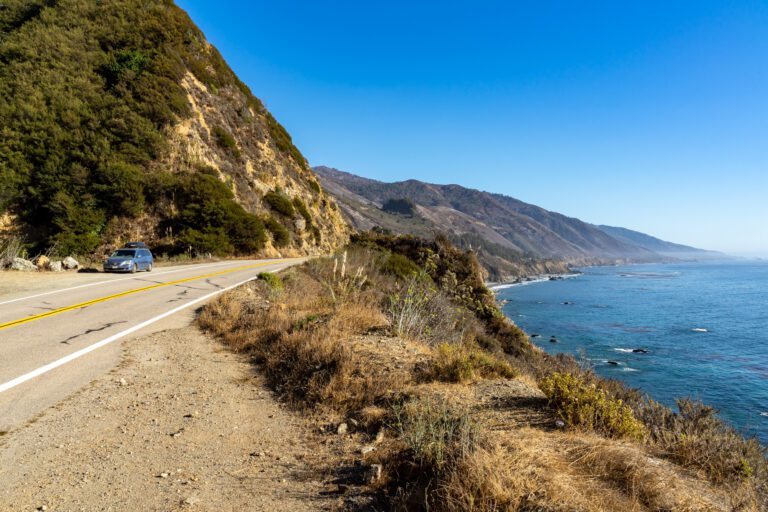
After Soberanes Point, it’s time to see one of the most-photographed spots in Big Sur: Bixby Bridge.
This iconic concrete bridge – which was built in the 1930s – is a must-see if you’re spending 2 days in Big Sur. It’s the tallest of its kind, and is set against the backdrop of the gorgeous Big Sur coast.
You can get the best view of Bixby Bridge from Castle Rock Viewpoint, which is about six miles south (a 10-minute drive) of Soberanes Point.
There’s a small parking lot here that you’ll see on your right, and the area gets crowded – you may need to wait a bit to get a parking spot. Thankfully, the viewpoint is right off the road, so people cycle in and out pretty quickly.
Heads up: before getting to the next point (which is about a 20-minute drive south, just under 13 miles), you’ll pass through the town of Big Sur, where Big Sur River Inn General Store & Deli is located. If you need some snacks or drinks, this is a good place to stop.
Hike Buzzards Roost Trail
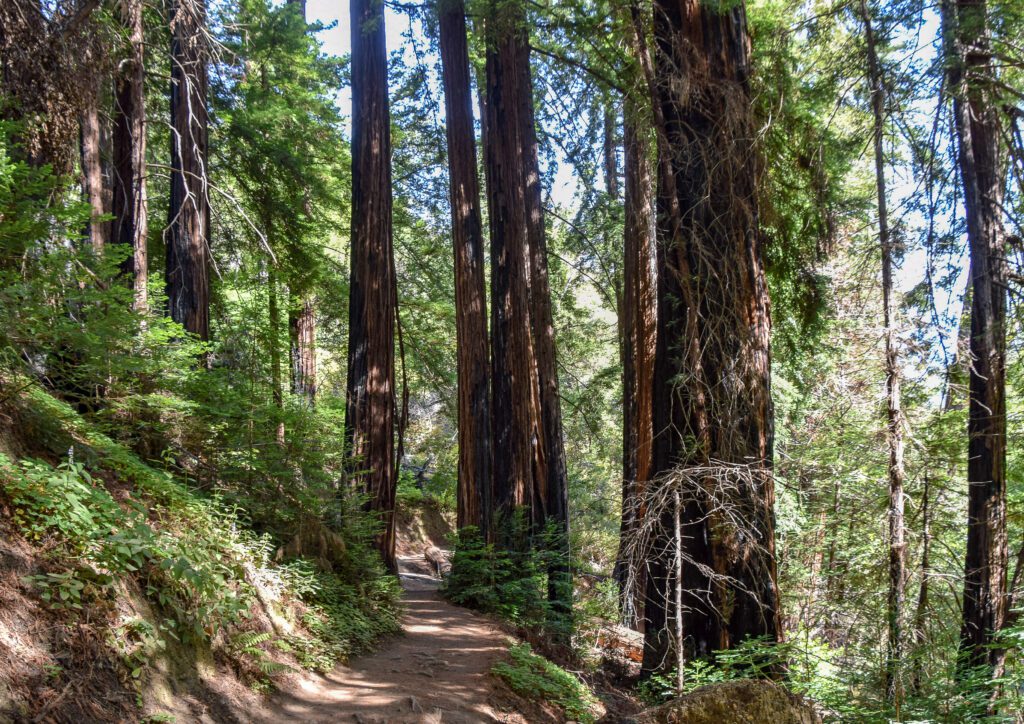
At this point you’ve spent a lot of time exploring along the coast – now it’s time to enjoy some hiking amongst the trees! Buzzards Roost Trail is a 2.6-mile loop trail located in Pfeiffer Big Sur State Park. It’s about a 20-minute drive from Bixby Bridge. This trail brings you through beautiful redwood trees, and out to an open viewpoint where you can see the ocean and mountain range.
For parking, you’ll want to park in the Pfeiffer Big Sur State Park day use lots. They’re on the left side of Highway 1 as you’re driving south, and you’ll enter on Pfeiffer Big Sur Road (look for the Pfeiffer Big Sur State Park Big Sur Lodge sign).
Follow the signs towards the Buzzard’s Roost trailhead, located across the river from the Redwood Deck. Follow the path underneath Highway 1, and you’ll be on your way!
End the Day at Pfeiffer Beach
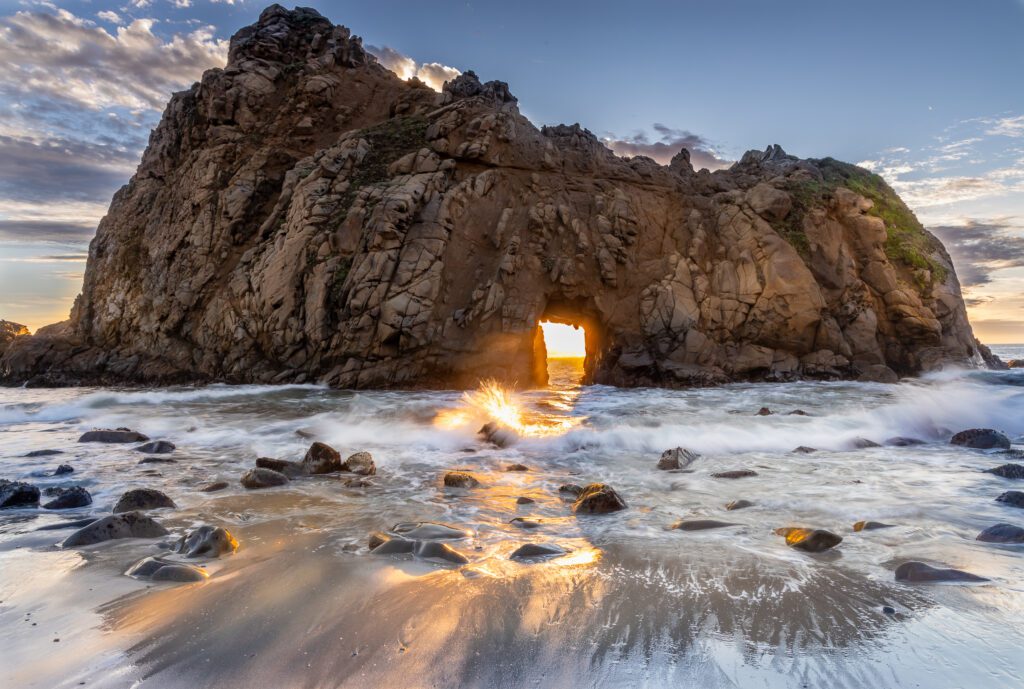
After your hike, head to Pfeiffer Beach – another iconic Big Sur spot, known for its purple sand and massive rock formations.
If you’re visiting around November or December, you’ll definitely want to be here during sunset.
For a few weeks in the winter, the sun perfectly aligns to shine right through Keyhole Arch, one of the giant rock formations the beach is known for. Even if you aren’t visiting during that time frame, this beach is the perfect spot to enjoy the sunset, walk around, or set out a blanket and take in the views.
Pfeiffer Beach is only about a 10-minute drive from the Pfeiffer Big Sur State Park day use lot where you’ll want to park for Buzzards Roost, but it’s easy to miss.
After exiting the lot back onto Highway 1, you’ll drive south for a mile. On your right, you’ll see a sharp turn to get onto Sycamore Canyon Road (which isn’t clearly marked). The road is narrow, so carefully drive down the road for just over two miles until you reach the entrance kiosk.
Despite seemingly being part of Pfeiffer Big Sur State Park (especially considering it shares a name!) Pfeiffer Beach is actually a part of Los Padres National Forest, and requires a $12 fee for parking.
Day 2: Continue Exploring Further South
Now it’s time to continue hiking and sightseeing on the southern side of Big Sur! Once you get past McWay Falls (the second stop of the day), you should experience less crowds, since the southern part is generally less explored by tourists compared to the northern part.
Like yesterday, you’ll want to bring some lunch, snacks, and water, as you’re not going to find anywhere to eat or buy food once you are past the restaurants and stores in the Posts/Big Sur area.
Hike to Partington Cove
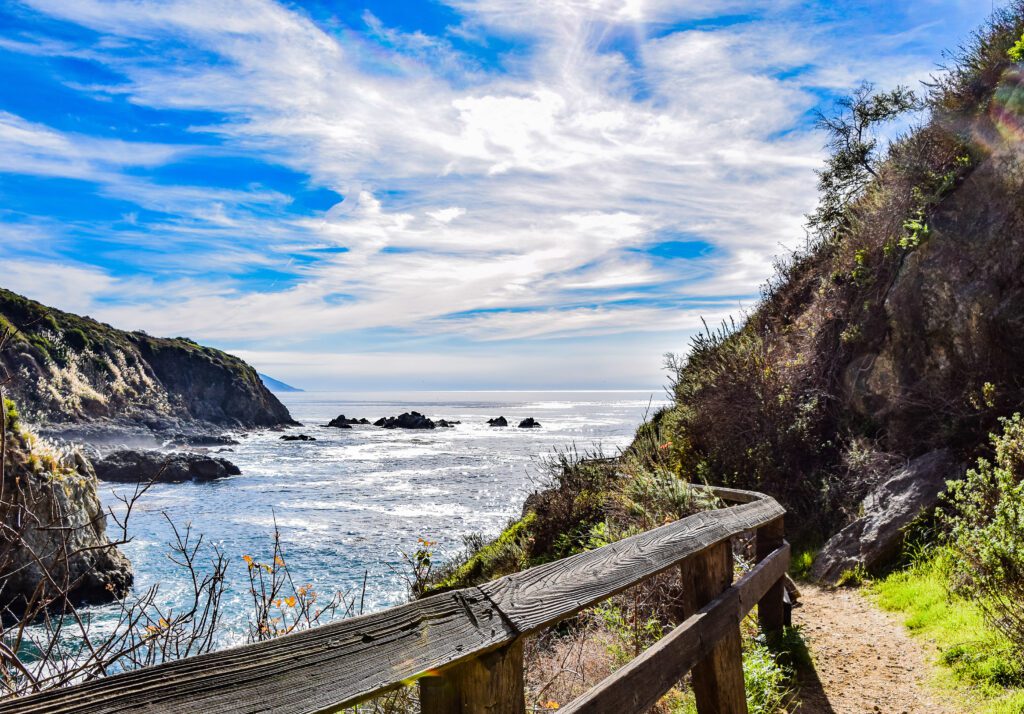
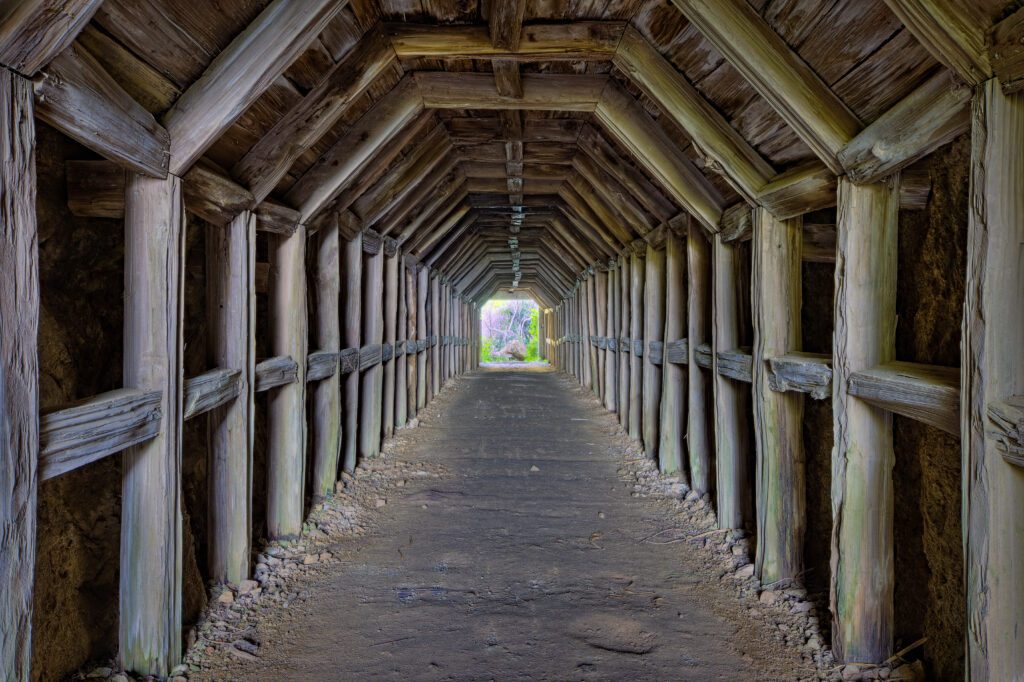
Start day 2 with a quick hike to Partington Cove. Partington Cove Trail is a 1.1 mile out-and-back trail that splits off to two points of interest. The northern part of the trail leads you to a small rocky beach, and the southern part takes you above Partington Cove after hiking through a 60-foot tunnel. This tunnel dates back to the 1880s, when a man named John Partington used the area to transport tanbark to build ships.
There isn’t a parking lot at the trailhead, but there is enough room off the road on both sides to park. You’ll see a green gate right off Highway 1, which is where you’ll start your hike!
Check Out the Iconic McWay Falls
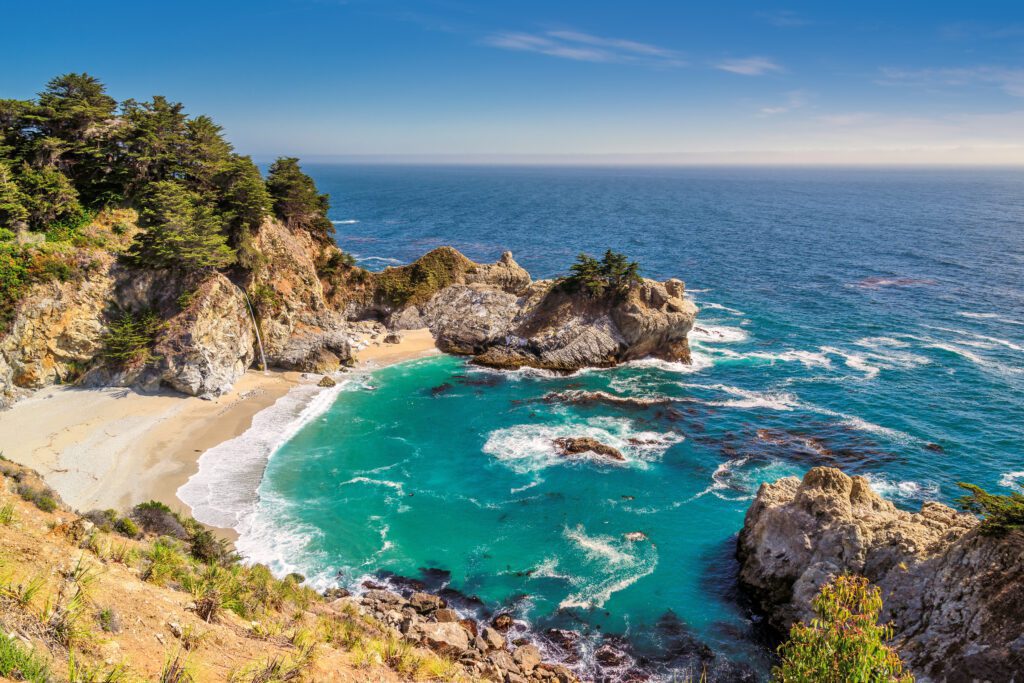
A weekend in Big Sur isn’t complete without a stop at McWay Falls, located in Julia Pfeiffer Burns State Park. This beautiful waterfall falls right on the beach, and is located in a scenic cove.
While you can’t get down to the base of the falls, there is a 0.6-mile out-and-back walking trail that gives you incredible views of the falls and the beautiful beach below.
Keep in mind that there definitely will be crowds here, no matter when you’re visiting – this is one of the most popular spots in Big Sur.
Park at McWay Waterfall Parking, which is on the east side of Highway 1. The trail will take you through a tunnel under the highway, and out towards the viewpoint. If you don’t already have a day use pass for the day, you’ll need to pay the $10 fee at the parking lot – you’ll find self registration instructions in the lot (don’t forget to do this – you run the risk of getting fined if you don’t!).
Enjoy the View at Big Creek Cove Vista Point
After stopping by McWay Falls, you’ll continue driving south for just under 9 miles (about a 15-minute drive) and make a quick stop at the Big Creek Cove Vista Point, which is located right off the road.
This is a great spot to stretch your legs for a moment, take some photos of the Big Sur coastline, eat a snack (or lunch), and enjoy the view.
Hike Hare Creek and Limekiln Trail
Very important disclosure: at the time of writing this guide, this trail (and others in Limekiln State Park) is closed indefinitely due to damage from the Dolan fire in late 2020. If you’re interested in hiking in this area, be sure to check the Limekiln State Park website first to see the status of the trails. An alternative trail a bit further south can be found below if Limekiln trails are still closed during your visit.
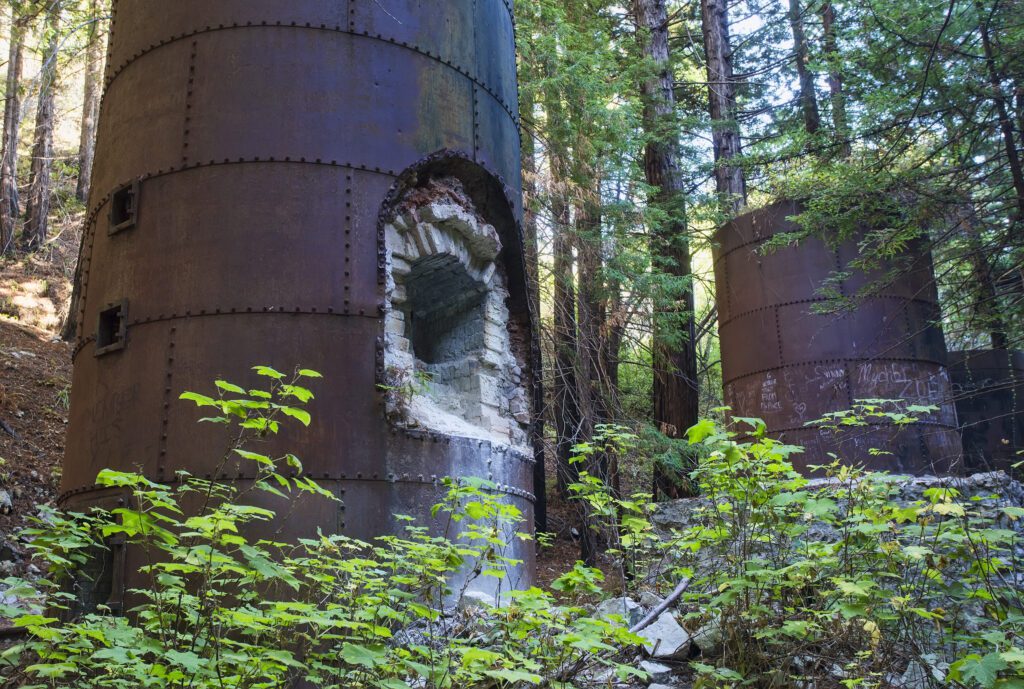
If things have opened up for your visit, you’ll drive south for just under 7 miles (less than a 15-minute drive) to hike Hare Creek and Limekiln Trail. The out-and-back trail is 2.2-miles long, and takes you along the creek and through the dense forest. As you hike up north, the trail leads you to a group of lime kiln ruins.
These kilns – which haven’t been in use since the late 1800s – once purified limestone to make concrete, some of which was used for the construction of nearby cities, including San Francisco and Monterey. There is also an off-shoot that takes you to the base of Limekiln Falls, which is about 100-feet tall.
To park, you’ll simply turn left off the highway where you see the Limekiln State Park sign. Follow that road to the entrance kiosk, and park in one of the spots. You’ll be able to use your day use pass from earlier to park.
Hike Mill Creek Trail (Alternative to Lime Kiln SP): If you are unable to hike in Limekiln State Park (or want to get another hike in), you’ll head a bit further south to Mill Creek Trail, which is about 3.5 miles down the road (less than 10-minute drive). This out-and-back trail is 2.2 miles long, and takes you through the dense trees and along a creek, where you’ll see small waterfalls. The trailhead is located on Nacimiento Fergusson Road. There’s a small dirt section right off the road in front of the trailhead where you can park. If there isn’t any space, you can go further up the road a few feet, and you’ll find another dirt patch on the opposite side of the road.
Hang Out at Sand Dollar Beach
To end your second day in Big Sur, head down to Sand Dollar Beach, which is just over 5 miles south of Mill Creek Trail. This spacious beach – which is part of Los Padres National Forest – is an amazing place to watch the sunset. It is also known for the large rock formations in the water, as well as its incredible tide pools.
This beach is also particularly nice because it doesn’t get super crowded, since it is further south and away from many of the main sights of Big Sur. You’ll deal with far less crowds here than at Pfeiffer Beach.
For parking, you’ll want to park at the Sand Dollar Day Use Lot, and then follow the short path to the stairs down to the beach. Keep in mind that, since it is part of Los Padres, you will have to pay $10 to park in the day use area.
What to do with Three Days in Big Sur
If you have an extra day in Big Sur, spend a bit of time exploring Andrew Molera State Park, which is just north of Pfeiffer Big Sur State Park. One of the best trails in the park is the Creamery Meadows, Bluffs, Panorama, and Ridge Trail Loop, which is 8-miles long.
As you hike, you’ll pass through groves of trees and open meadows, and get plenty of amazing views of the coastline. You can also go off the main trail for a quick detour down to Molera Beach. For the best views, hike clockwise (hike down the Creamery Meadows Trail, and then veer left to the Ridge Trail).
If you’re not up for a long hike, consider doing a tour of Point Sur Lighthouse at Point Sur State Historic Park, which is just north of Andrew Molera State Park. The lighthouse was constructed in 1889, and is still operational.
These three-hour volunteer-led tours are available year-round, and happen on Saturdays, Sundays, and Wednesdays (but check the website for the most up-to-date information).
After your tour, you can do a shorter hike in Andrew Molera State Park. The Creamery Meadows Trail is 2.4-miles long. This out-and-back trail takes you right down to the water, so you can get some final beach time before you head home!
What to Do with One Day in Big Sur
You can still see plenty if you only have one day in Big Sur. I’d recommend focusing on the sights on the northern side of Big Sur, since the must-see spots are more concentrated in this area.
If you’re coming from the north, start your day with a hike at Soberanes Point, and then drive down to Castle Rock Viewpoint to get a glimpse of the iconic Bixby Creek Bridge.
For lunch, you can either bring your own or stop at a spot around the towns of Big Sur or Posts (you’ll find a few recommendations below).
Next, head over to Pfeiffer Beach to spend some time at the water. If you’re up for another hike, continue making your way south to Julia Pfeiffer Burns State Park to hike at Partington Cove.
Finally, end your day with a stop at McWay Falls.
If you’re coming from the south, just reverse the order, starting your day with McWay Falls.
Hiking in Big Sur
Hiking is truly one of the best ways to experience Big Sur, and there are trails for visitors of all skill levels. Since Big Sur is prone to landslides (and has experienced recent fires), it’s important to check trail conditions on the website for the park where you plan to hike before you go.
It’s not uncommon for trails (or portions of trails) to have to be closed down due to damage. Luckily, there are plenty of hikes across Big Sur, so if one you’re interested in is closed, you’ll easily find another!
We’ve covered quite a few hikes above, but here are a few more options if you have more time or want to making any adjustments to the itinerary – starting from the north and moving south:
Garrapata Beach Calla Lily Valley Trail: This easy 1.1-mile hike (with an elevation gain of 150 feet) is pretty year-round, but is particularly special in the late winter or early spring, as this is when the calla lilies are in bloom. It takes you through Calla Lily Valley, and along the coast.
Soberanes Canyon Trail: This challenging trail in Garrapata State Park takes you through the canyon and along a creek, and offers views of the coast. It is a 2.8-mile out-and-back trail with a 492 foot elevation gain.
Pfeiffer Falls Trail: If you’re looking for a beautiful hike out to a waterfall, this trail in Pfeiffer Big Sur State Park is a great choice. The 1.3-mile out-and-back hike (which has an elevation gain of 403 feet) takes you to Pfeiffer Falls. For those who want a bit more, on the way back you can follow the off-shoot to take the Valley View Trail, which gives you a nice view of the valley below (this will add about half a mile to your hike).
Manuel Peak Trail: For those looking for more of a challenge, this 9.7-mile and 3395-foot elevation gain out-and-back trail in Pfeiffer Big Sur State Park is a great choice. This hike offers incredible views of the mountain range and coastline below.
Timber Top and Boranda Trail: This Los Padres National Forest hike – situated between Pfeiffer Big Sur and Julia Pfeiffer Burns State Parks – is a difficult but rewarding 5.3-mile out-and-back hike with a 2,503-foot elevation gain. This hike takes you up the mountain for sweeping views of the coast.
Where to Stay in Big Sur
There are a variety of campgrounds and hotels in the region, so I’ve included some of the best options below. Regardless of the accommodation you choose, remember to book as soon as you can – both hotels and campgrounds fill up fast year-round!
In general, you have three options here. You can camp in Big Sur, which is competitive but gorgeous. You can stay at a hotel within Big Sur, which is an amazing experience, but is going to cost you. Or you can stay in Carmel / Monterey, the gateway to Big Sur if you’re coming from the Bay Area.
Camping in Big Sur
Camping in Big Sur is one of the best ways to fully experience the beauty of the area. There is an abundance of both state park run and privately-owned campgrounds, and they tend to be open year-round.
Big Sur is a very popular camping area, and reservations are highly recommended (and sometimes required). Reservations can fill up fast – often six months in advance for summer weekends. Even during the winter, reservations get snagged quickly.
Once you’ve committed to visiting, be sure to look for campground reservations online right away! Here are a few of the best campgrounds in Big Sur.
Pfeiffer Big Sur Campground
This centrally-located spot is one of the best campgrounds in Big Sur. It’s situated right by the Big Sur River, and is shaded by beautiful redwood trees. There are 189 tent and RV sites available for reservation, and there are restroom and shower facilities on-site. Fees range from $35 to $50 per night.
Since it is so popular, be sure to make your reservation on Reserve California as soon as possible. Day-of walk-ups are possible in the event that there is a cancellation or no-show, but reservations are still highly recommended.
Ventana Campground
Just a couple miles south of Pfeiffer Big Sur Campground is Ventana Campground, which is privately-owned.
This campground is set amongst a gorgeous dense forest of redwoods, and is conveniently located near a small grocery store and deli and many restaurants (although the campground itself is still tucked away from the action – it still feels very secluded).
There are restroom and shower facilities on-site, and each site has a picnic table and fire ring.
There are 63 tent campsites, a handful of which are hike-in sites. For those who aren’t quite sold on the idea of tent camping, there are also 15 “glamping” sites.
This private campground is definitely on the pricier side, with tent sites costing $80 per night.
Reservations (which are required) can be made online. They open up 13 months in advance, and while they don’t fill up as quickly as some of the state park campgrounds, you should still reserve as soon as possible!
Kirk Creek Campground
If you want a campsite with ocean views, Kirk Creek Campground is your best choice. This campground is located just south of Limekiln State Park (in the southern part of Big Sur), within Los Padres National Forest.
The site sits atop an ocean bluff – so you can fall asleep listening to ocean waves. There are 40 tent and RV campsites available, with vault toilets dispersed around the campground. Fees are $35 per night.
Reservations for Kirk Creek can be made online via Recreation.gov. This campsite is popular, so be sure to make your reservation well in advance. Dates open up six months out, and they often fill up quickly.
Hotels in Big Sur
Another option is to stay at a hotel in Big Sur. There are a variety of hotels along Highway 1 in Big Sur, ranging from upscale resorts to more lowkey inns. This is going to be more expensive than staying in the nearby cities and towns, but is easily the best option in terms of location and convenience.
These are some of the best accommodations, all of which are centrally located:
- Big Sur Lodge: This rustic lodge is located in the middle of Pfeiffer Big Sur State Park, nestled amongst the redwood trees. There are both rooms and larger cottages available, and there is also an outdoor pool, outdoor bar, coffee shop, and restaurant on-site.
- Big Sur River Inn: This riverside inn – which opened in 1934 – sits right between Andrew Molera State Park and Pfeiffer Big Sur State Park. There are both suites and rooms available, and the property has an outdoor pool, as well as a restaurant and full-service bar.
- Glen Oaks Big Sur: This modern yet rustic hotel has a variety of cabins, each offering different amenities, including kitchens or kitchenettes, indoor and/or outdoor fireplaces, and private soaking tubs. There are also rooms within the lodge, some of which come with fireplaces and private outdoor spaces. Glen Oaks also has a restaurant on-site.
Hotels in Monterey and Carmel-by-the-Sea
If you’re not staying in Big Sur, Monterey and Carmel-by-the-Sea are the best places to make your home base – especially if you’re arriving from the north.
However, keep in mind that this will add a good amount of driving time to your trip, as these towns are a long distance from many of the main sights in Big Sur. Carmel, for example, is almost 40 miles north of McWay Falls – that’s about an hour-long drive. Tack on another 30 minutes to get down to Limekiln State Park.
If at all possible, I’d highly recommend staying within Big Sur so that you can spend more time exploring and less time driving.
That said, if these towns are a better option for you, it can be done – just be ready to drive! Carmel and Monterey both have a ton of restaurants (great for grabbing breakfast before heading out, or dinner after a long day of exploring Big Sur), and are popular destinations on their own.
Here are some of the best hotels in the area:
- Green Gables Inn: This charming Victorian inn is located right on the water, and is just a short drive north of Monterey. There are 11 guest rooms and suites available, and your stay includes breakfast, a mini picnic with wine, and bicycles to explore the town.
- Hofsas House: Hofsas House is a casually elegant European-style hotel located in Carmel, steps away from great dining and shopping. There are 37 uniquely decorated rooms available, and the property has an outdoor pool and deck with views of the ocean.
- Carmel Green Lantern Inn: This boutique inn is just a few blocks from the beach, and near all the amazing dining Carmel has to offer. The property offers 17 guest rooms and suites.
- Carmel Mission Inn: Carmel Mission Inn is located on Highway 1, just a short drive away from the main dining and shopping area in Carmel. This modern hotel offers rooms and suites, and has a pool, fitness center, and restaurant.
Where to Eat and Drink Near Big Sur
Below you’ll find a few restaurant recommendations, many of which also make a good stop if you just want to enjoy a drink. All of the restaurants are located in the towns of Posts and Big Sur.
Keep in mind that many restaurants in the area aren’t open seven days a week, so be sure to check each businesses’ website for the most current hours.
Big Sur Bakery: This rustic restaurant and bakery is known for its delicious comfort food, including wood-fired pizza. The restaurant is open for lunch and dinner service, and the bakery (where you can get to-go meals, pastries, and coffee) opens in the morning.
Big Sur Taphouse: If you want a refreshing beer and some delicious pub food, this spot is for you. Big Sur Taphouse has a rotating tap of 13 beers, as well as an extensive food menu (with plenty of vegan and vegetarian options). This spot has indoor seating, as well as a spacious outdoor patio, and is open for lunch and dinner, as well as brunch on the weekends.
Big Sur Deli: This family-owned full-service deli is attached to a general store, and is the best place to go if you want made-to-order to-go sandwiches, burritos, salads, and more. In the morning, they also have breakfast sandwiches, pastries, and other breakfast items, as well as coffee. Big Sur Deli is open daily from 7:00am to 8:00pm.
Nepenthe: This restaurant is the place to go for a meal with a view, as it is perched on a cliff overlooking the ocean. The restaurant offers classic California fare and an extensive wine list, and is open for lunch and dinner service. If you need a breakfast spot, Cafe Kevah is also available on-site. This cafe offers classic breakfast meals, as well as coffee and pastries.
Deetjen’s: This casual, homey, and eclectic-style restaurant (located in the Deetjen’s Hotel) offers simple and hearty cuisine, including plenty of delicious meat and seafood dishes. Deetjen’s also has a wine and beer menu. It is open for breakfast and dinner service, and reservations for dinner are required.
Big Sur Roadhouse: Big Sur Roadhouse (which is part of the Glen Oaks Hotel) is a modern-rustic restaurant serving classic California food made with local ingredients. It is open for breakfast and lunch service, and they also serve wine and beer.
Fernwood Tavern: This casual restaurant is a part of Fernwood Resort, and is a popular spot for pizza, burgers, and other pub food. The tavern also has a full bar, and indoor and outdoor dining is available. Additionally, Fernwood Tavern frequently has live music (typically on Saturdays).
Sierra Mar: This restaurant (located in Post Ranch Inn) is an upscale spot serving a four-course, prix fixe menu. It is perched right on a cliff, offering incredible views of the ocean. Sierra Mar serves California cuisine, and is open for dinner service for those not staying at the hotel. Reservations are highly recommended.
When to Visit Big Sur
Generally, the weather in Big Sur is pretty mild year-round and the parks are open during all seasons, so there definitely isn’t a bad time to visit. Let’s talk about what you can expect during each season, and the pros and cons of visiting Big Sur during the different times of the year.
The summer is a great time to visit, since this is when the weather is the most pleasant. Big Sur has warm but not overly hot summers, with average temperatures in the mid to high 70s.
The major con, however, is that you’ll be battling more crowds during this time. For some of the most popular spots (like Bixby Creek Bridge, Pfeiffer Beach, and McWay Falls), expect to share the experience with a lot of other visitors! There’s also a higher likelihood that you’ll deal with some fog if you visit during the summer.
The warmer weather continues into the fall, with average temperatures during the day in the high 60s to mid 70s. Fog also generally isn’t as heavy during this time. This makes the fall a really nice time to visit – if you have flexibility, I’d recommend visiting during this time of the year.
You’ll likely have warm but mild weather, and won’t have to deal with the swarms of crowds like you’ll experience in the summer. That said, keep in mind that this is still a fairly popular time to visit, so don’t expect to have the area completely to yourself!
Winter and spring are still great times to visit Big Sur, and there are far less visitors during these seasons. It doesn’t get too cold during the day, as the daytime temperatures are normally in the 50s or 60s (although be prepared for cooler weather at night!).
However, the chance of rain is much higher during this time. Big Sur is also prone to landslides during this season, which can cause road closures along Highway 1. You’ll need to check road conditions before making your trip during the winter and spring.
Plan an Unforgettable California Adventure
Heading to California? We’ve got all sorts of super detailed, in-depth California travel guides written by locals to help you plan an amazing trip.
- San Francisco: We’ve got a guide to spending 3 days in SF, one day in San Francisco for planning a shorter trip, and a complete guide to finding the perfect place to stay in San Francisco. We also have guides to 14 perfect weekend getaways from San Francisco and the best day trips in the Bay Area. Oh, we almost forgot, here are the 15 best hikes near San Francisco, written by two Bay Area locals.
- Los Angeles: Read our perfect 2 Day L.A. itinerary, our guide to spending one amazing day in L.A. (with two versions!), and a guide to helping you figure out where to stay.
- San Diego: Learn how to spend a day in San Diego, a weekend in San Diego, and where you should stay.
- Lake Tahoe: Plan the perfect summertime adventure with our 3 day Tahoe itinerary, guide to the best hikes, and our guide to the best things to do in Tahoe.
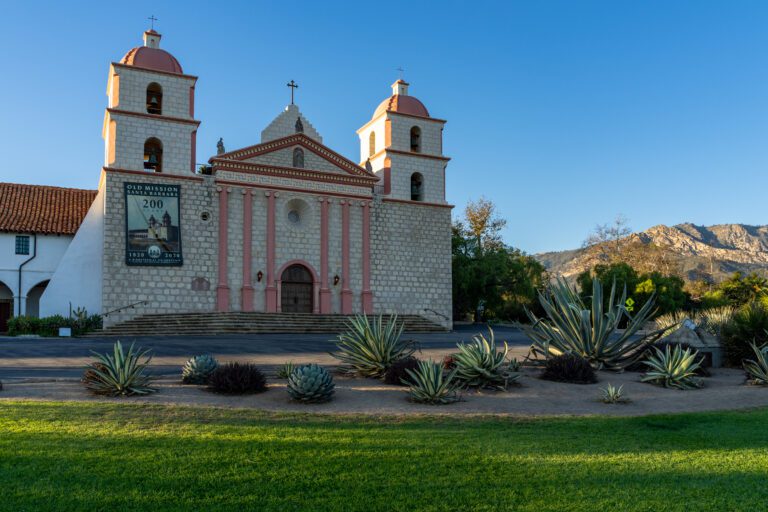
- Santa Barbara: We have a guide to planning a weekend in Santa Barbara, and a guide to a day trip to Santa Barbara from Los Angeles if you’re pressed for time.
- Mammoth Lakes: To plan a perfect getaway in the Eastern Sierra, read our guide to the best things to do in Mammoth Lakes in the summer. Plus, our guide to the best hikes in Mammoth, featuring the epic climb to the top of Duck Pass.
- Big Sur: Plan the perfect weekend away with our complete Big Sur itinerary.
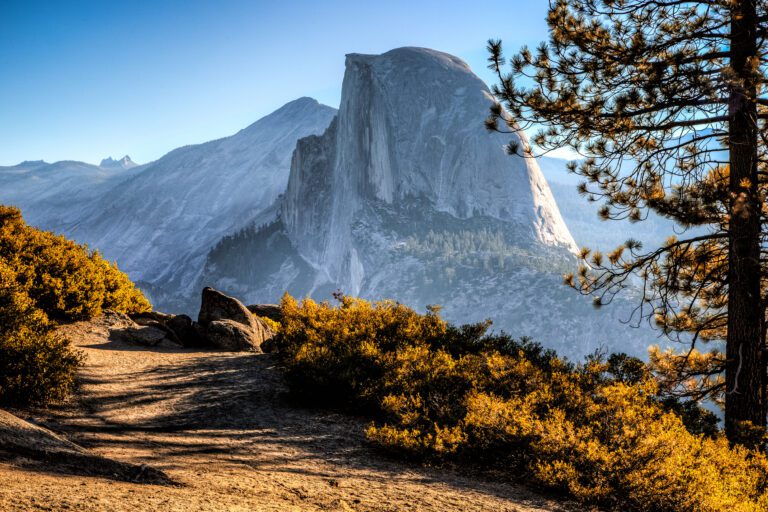
- Yosemite National Park: Plan an amazing trip with our guide to planning an amazing Yosemite itinerary, and our guide to choosing where to stay at Yosemite.
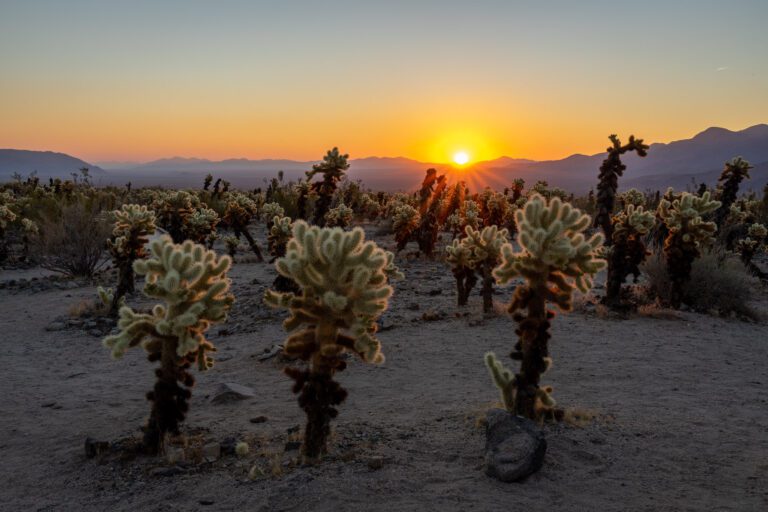
- Joshua Tree National Park: Plan the perfect trip with our perfect weekend itinerary (or a day trip, if you have less time), a guide to the best hikes, and some cool places to stay in Joshua Tree.
- Death Valley National Park: We have a SUPER detailed guide to planning the perfect Death Valley itinerary, and a guide to the best hikes in Death Valley National Park.
- California Road Trips: See the best of the Pacific Coast Highway on our San Francisco to San Diego road trip, or make the trip up Highway from on a Los Angeles to SanFrancisco road trip. If you’re more into mountains than beaches, a Highway 395 road trip from Los Angeles to Lake Tahoe might be more your speed.