How to Hike the Amazing Mt. Tallac Trail in South Lake Tahoe
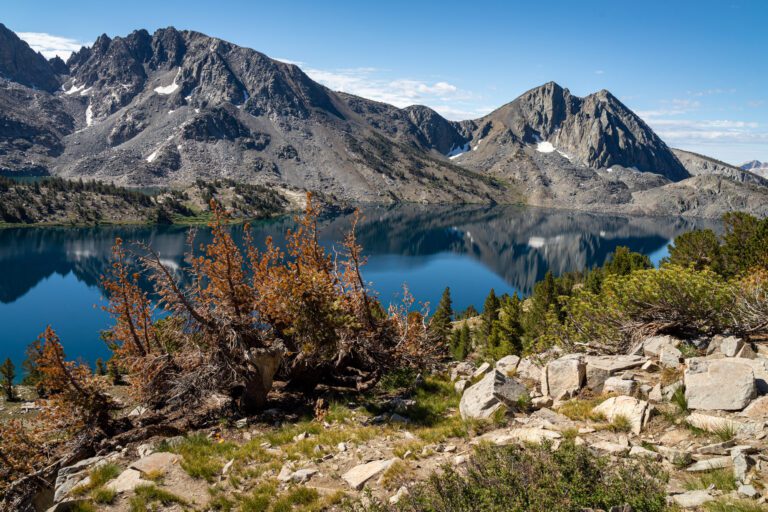
The climb up to the summit of Mt. Tallac is one of the best hikes in Lake Tahoe, but you’re going to earn the payoff with a never-ending strenuous climb on rocky terrain. The reward for that climbing is an unmatched view of Lake Tahoe, Fallen Leaf Lake, and the entire Tahoe Basin.
Before we get into the details of the hike, the very first thing that you need to know to hike the Mt. Tallac Trail in Lake Tahoe is that you’re going to spend the entire second half of the hike up to the summit (that’s just under 3 miles, for you math people out there) believing that you’re just ¼ mile away from the summit. That tip alone is worth the price of admission here. Which is, of course, free. We liked this trail, though we agreed that it’s among the hardest hikes that we have done in recent memory.
In this trail guide, we’re going to give you the information you need to safely and confidently hike Mt. Tallac. By the end, you’ll know exactly what to expect over the course of your hike and get some tips that are based on our personal experience hiking this trail.
If that sounds good to you, let’s get into the trail report.
Disclaimer: Some of the links below are affiliate links, which means that if you click on one and purchase something, we make a small portion of the sale at no additional cost to you. It goes without saying that we would never recommend something we wouldn’t use or do ourselves.
Trail Overview and Details
Before we get into the other details you need to know to hike up to Mt. Tallac, here is an overview of the trail.
Distance: 10.5 miles
Elevation Gain: 3,400 feet
Trail Type: Out and Back
Trailhead Location: Mt. Tallac Trailhead
Highlights: Stunning views of Lake Tahoe and Fallen Leaf Lake.
Starting Altitude: 6,400 feet
Highest Altitude Reached: 9,735 feet
Dog Friendly? Yes! But there’s a lot of hiking over loose rock and shale, which can be tough on their paws. Plus, it’s HOT in the summer.
Getting to the Trailhead
The trailhead is between South Lake Tahoe and Emerald Bay, along the western shore of the lake. Mt. Tallac towers above Fallen Leaf Lake, and the trailhead is at the northwest corner of the lake.
From South Lake Tahoe, head north on Emerald Bay Road, past Camp Richardson and Pope Beach. Just after Fallen Leaf Lake Road, turn left onto Mt. Tallac Road and follow the signs for the Mt. Tallac Trailhead.
We got to the parking lot at 6:30am and found NO BATHROOMS at the trailhead, which is good to know before you leave your hotel or campsite. There’s also no trash and no bear box to store food.
When we arrived, there was plenty of parking. When we left, cars were strewn about along the road to the trailhead. You can only park on one side of the road – it was the right side when we were there – so if you show up later in the morning, plan on adding a bit of walking to reach the start of the trail.
Tips for Hiking Mt. Tallac
Start EARLY. This hike is very exposed, especially later in the day as the sun climbs high in the sky. In the morning, we found that most of the first quarter of the hike was fairly shaded. Not so much on our way back down – it was essentially full sun all the way, with a few shady spots. There is exactly zero shade on the rocky ascent, which is the hardest part of the hike. Get an early start to beat the heat on that climb. I can’t imagine climbing that section at noon – we were roasting even on our way down.
You need more than 2L of water per person. We went through 6L of water between the two of us, and easily could have gone through more if we’d had it. I would also suggest a method of filtering water, just in case (we use a Platypus Gravity Filter, which we love), but there’s nowhere to filter water once you get up past the rocky switchbacks. However, there are two small lakes early on in the hike, which would make a good spot to take a water break on the way down since there’s plenty of shade to be had too. I carry a 3L hydration reservoir (this one) and two 1L Platypus collapsible water bottles on bigger hikes.
Snacks galore. I made the mistake of saying to myself “you’re so close – don’t stop for snacks now!” Rookie mistake. Eat early and often to keep your legs going on the climb. Carbs carbs carbs.
There’s a lot of climbing on loose rock and shale, which means good footwear is a must. This is not a hike to do in your Nikes. I’d recommend a hiking boot with good ankle support (Alysha loves her Columbia Newton Ridge boots, and I’m a fan of Salomon hiking boots).
Speaking of climbing, what goes up must come down. And the way down is steep. We swear by trekking poles to save our knees on steep descents. We used to think trekking poles were lame, but some Germans in New Zealand (for some reason, Germans love trekking poles) showed us their value, and we’ve never looked back. Here is our recommended pair.
Take the shade when you can get it. Shady spots on the second half of the climb to the summit, which is the hardest part of the hike, are few and far between. Take them when you can get them, believe us.
The altitude is no joke. Like most hikes in the Sierras, this hike starts at over 6,000 feet. If you’re coming from sea level (aka L.A. or San Francisco), then you’re going to need a day or more to acclimate to the elevation before tackling this hike, which gets up to just under 10,000 feet at the summit. Take your time and stay hydrated before and during the hike.
A Complete Overview of the Mt. Tallac Hike
We’re going to break this hike into five parts to help you know exactly what to expect when you hit the trail. They are:
- The Ridgeline
- Two Lakes
- The Stairs
- The Rocky Climb
- The Meadows and the Final Ascent
You’ll find a description of each part of the trail, along with elevation gain and distance for each, in their respective sections below.
A note about the mileage / elevation numbers: they reflect the distance and elevation gain you’ll experience during that particular section of trail, NOT the cumulative distance / gain of the trail to that point. We chose to do it this way to help you understand which parts of the trail are going to be harder (and easier) so that you know what to expect going in.
The Ridgeline
Distance: 1.6 miles
Elevation Gain: 600 feet
This first part of the hike climbs from the trailhead up to the boundary of the Desolation Wilderness, which is about a mile and a half from the trailhead.
From the trailhead, you’ll briefly enter a relatively sparse forest that climbs gradually to reach a ridgeline. The ridgeline skirts the western side of Fallen Leaf Lake for just under a mile, and has some nice views over your left shoulder back towards Lake Tahoe.
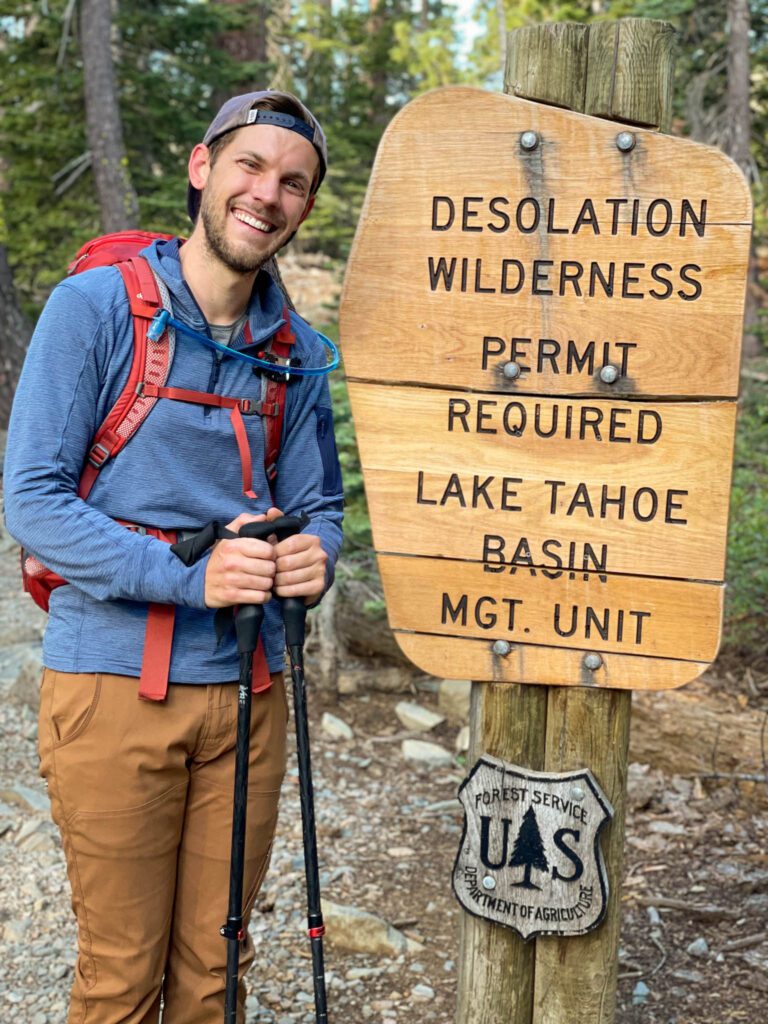
At the 1.5 mile mark, you’ll reach the boundary of the Desolation Wilderness, which is marked with a classic US Forest Service sign that you’re obviously going to want to get a picture with.
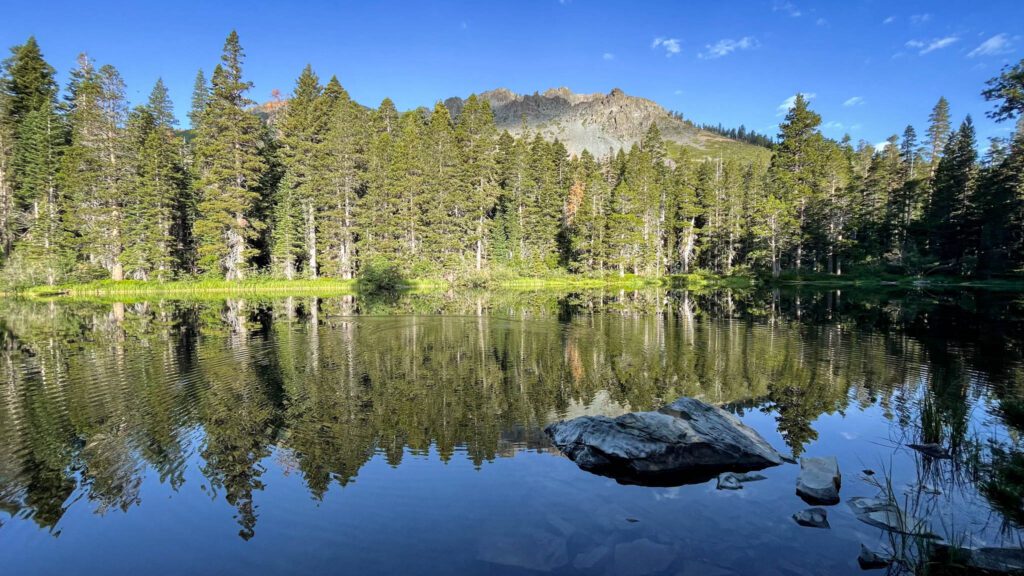
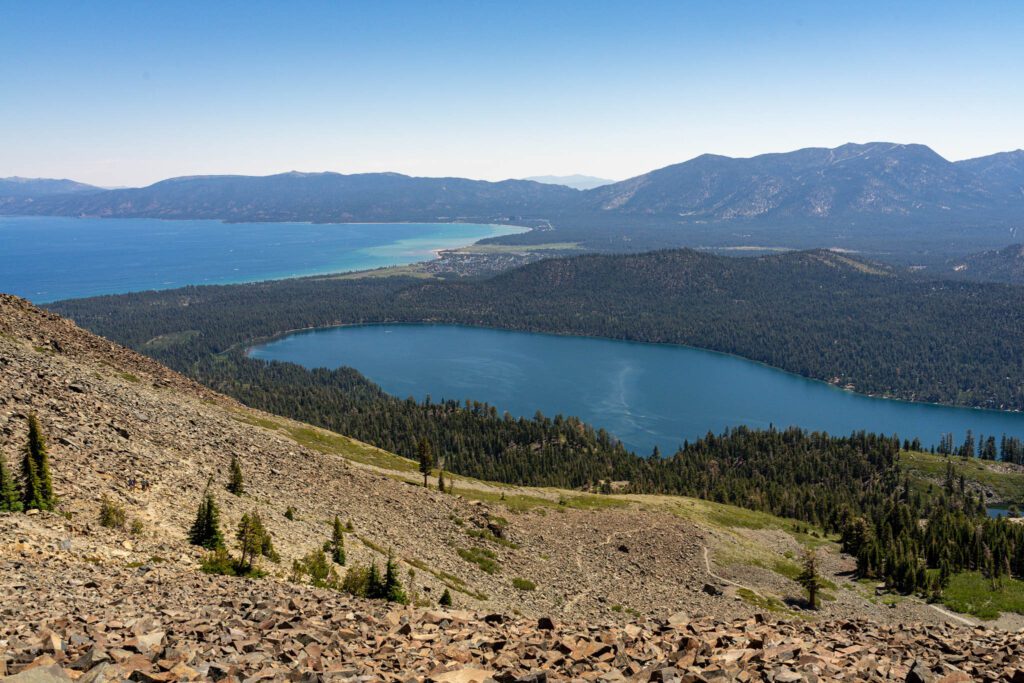
Two Lakes
Distance: 1.2 miles
Elevation Gain: 600 feet
This section of trail, along with the one above, concludes the easiest part of the hike. This section is largely forested (which you’re going to love on the way back down), and passes two lakes.
The first lake, Floating Island Lake, is nothing spectacular, but it’s a good, shady spot to take a second to drink some water, grab some snacks, and strip off any extra layers. The trail continues past the lake, climbing gradually on your way to Cathedral Lake. There’s a trail junction along the way – stay right. Left goes down to the shore of Fallen Leaf Lake.

Cathedral Lake is more photogenic, so it’s worth stopping to snap a few pictures (watch out for mosquitoes).
It also marks the end of the fun and games. At this point, you’re about halfway to the summit in terms of distance, but you’ve done less than half of the climbing. Really, only about a third of the climbing – 35% if you’re being generous. This is where the real fun begins. If your idea of fun is a seemingly never ending climb, that is.
This is a good spot for water and snacks in the shade, because there isn’t much shade from here on out.
The Stairs
Distance: 0.5 miles
Elevation Gain: 650 feet
I told you this trail starts to get intense once you leave Cathedral Lake.
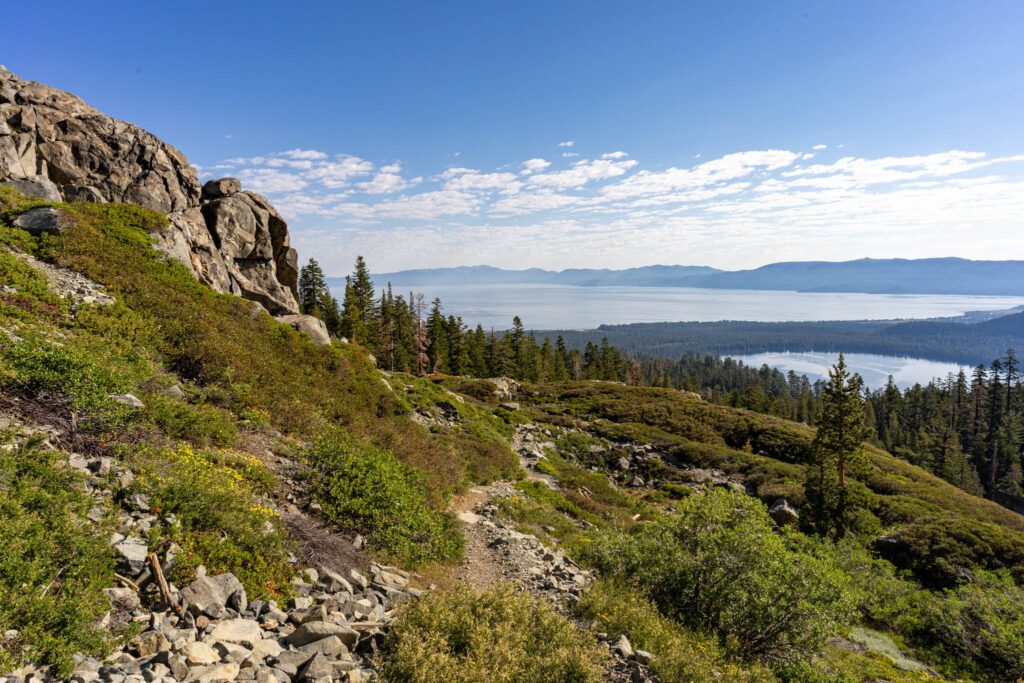
From Cathedral Lake, the trail turns into a steep ascent via stairs built into the side of the mountain. While your thighs are almost guaranteed to be burning, your eyes will be popping with the views back out over Fallen Leaf Lake and Lake Tahoe, which get better and better the higher you climb.
The Rocky Climb
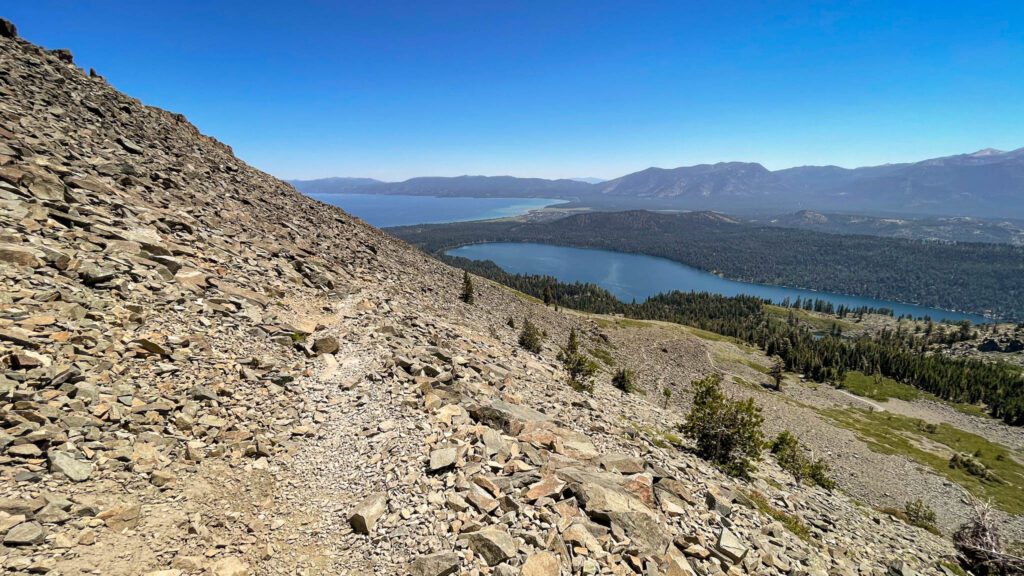
Distance: 0.6 miles
Elevation Gain: 550 feet
The end of the stairs leads you to the base of a rocky mountain face. Yes, that’s the way you’re going.
A note before we move on: the end of the trail is NOT at the top of this ascent. We spent the whole, miserable climb saying to ourselves “we just gotta make it to the top of this and the summit will be right there!” I’m here to tell you that we were factually incorrect to save you from the misery of realizing that there’s still a mile of climbing to go from the top.
The trail climbs the face of the mountain, and the trail goes from well-packed dirt and stairs to loose rock and shale (which Alysha calls “little rocks” – they are, undoubtedly, the WORST).
This is the hardest, worst part of the hike. There’s no getting around it. Take it slow, take water and snack breaks, and you’re going to make it.
At the top, you’ll find a few shady spots along the first little flat section of trail. It’s worth stopping and relaxing before moving on.
The Meadows and the Final Ascent
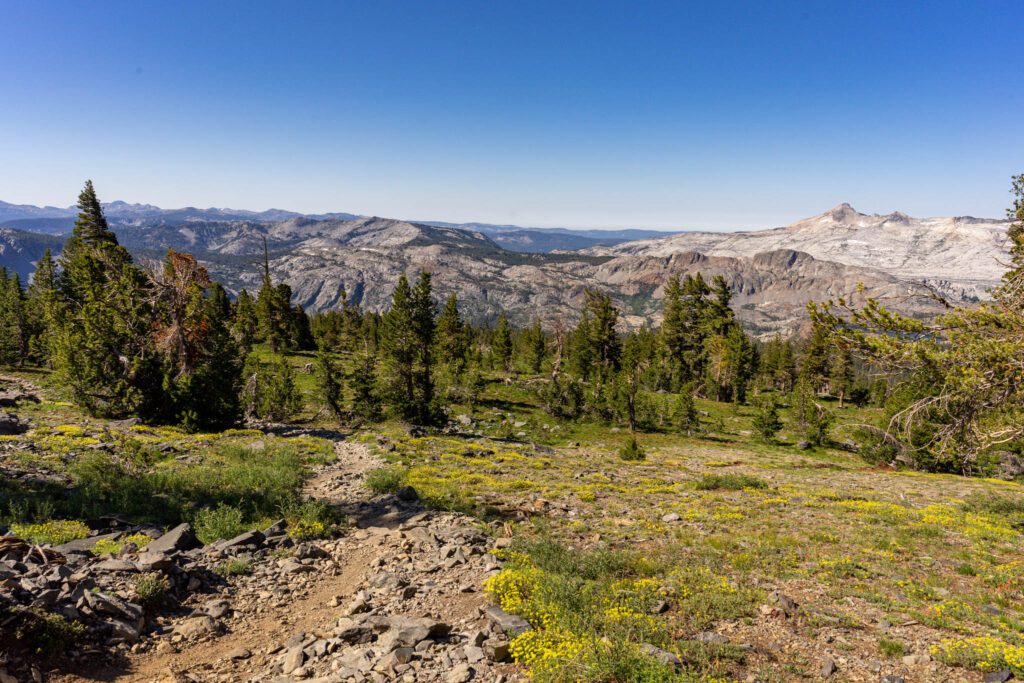
Distance: 1.3 miles
Elevation Gain: 1,000 feet
You might be thinking that this hike gets easier once you get to the top of that steep climb. You’d be wrong.
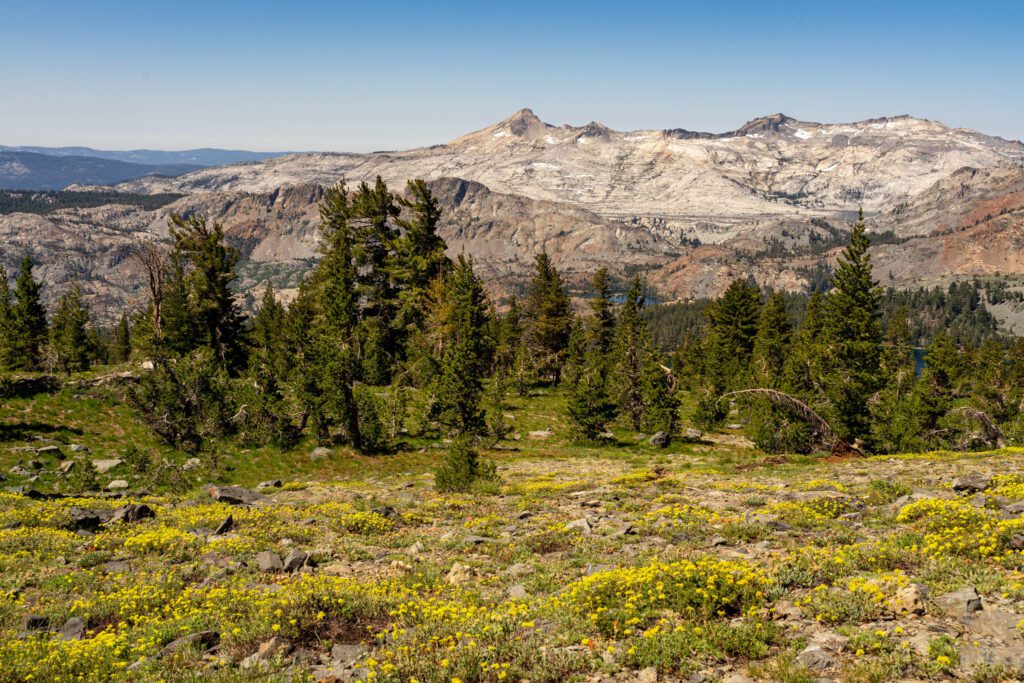
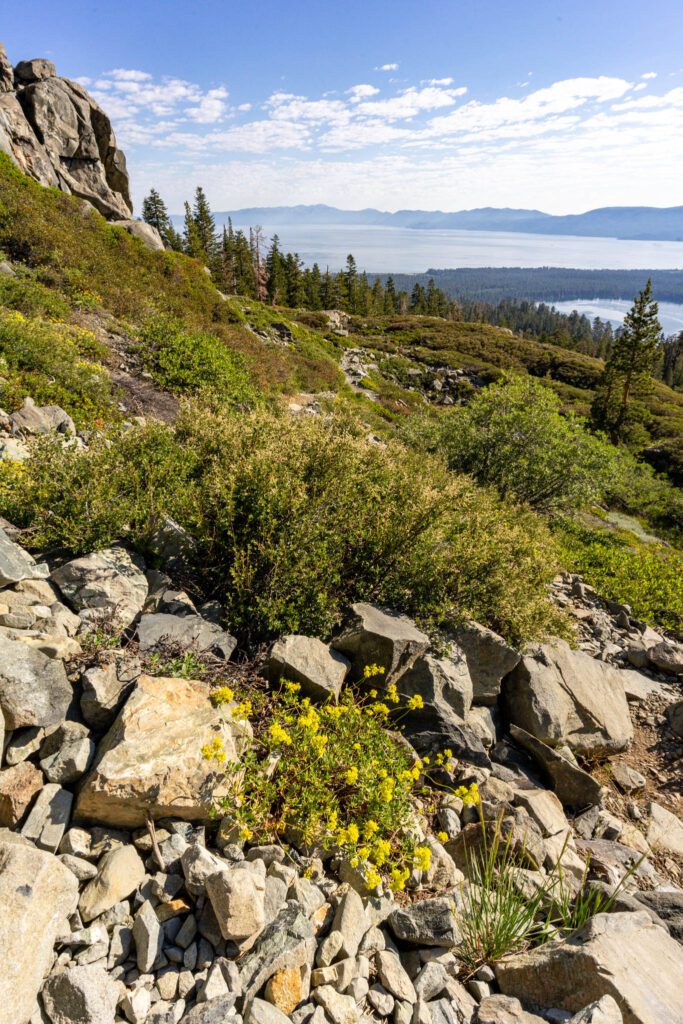
The hike flattens out for a very short distance before starting yet another climb to the summit. You’ll be hiking through open meadows, which are filled with a blanket of wildflowers in the summer (usually July, but it depends on the rain and snow from the previous winter). There are some nice views of the Sierras out to the west, while the lake is hidden behind the mountain on your right (all the better for the reveal at the summit).
The meadow section of the hike – which lasts for about a mile – isn’t particularly difficult, though there are some steep sections here and there. The hardest part is that you’ve been hiking for more than four miles – climbing all the way – and you think you’re really close to the summit when in reality you’ve still got a ways to go.
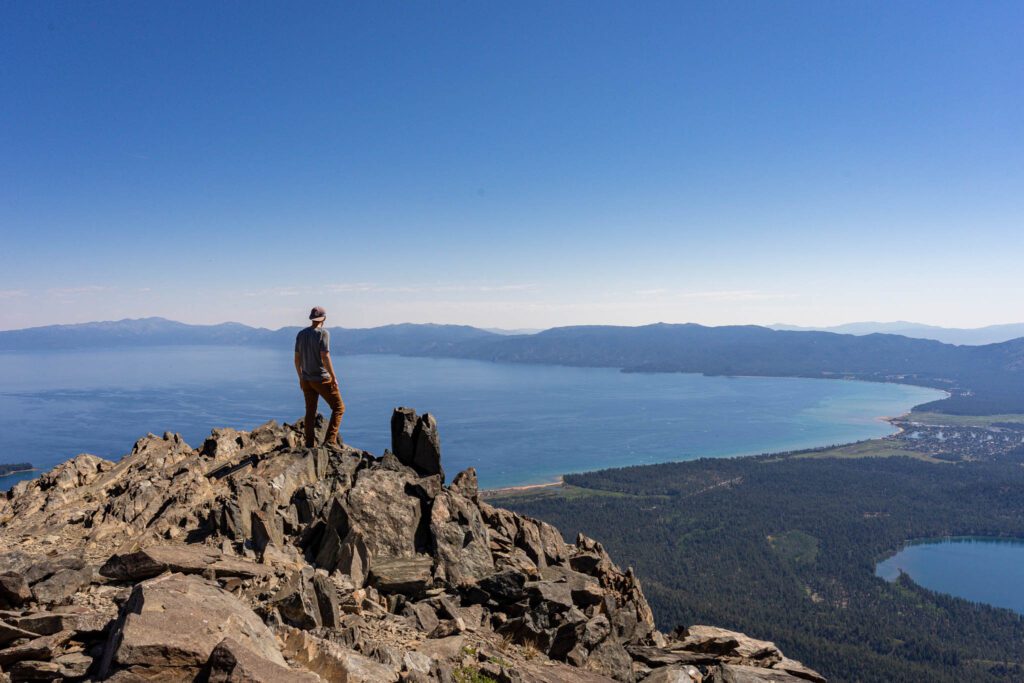
After a mile of open green meadows, the trail takes a hard right and turns back to a steep, rocky ascent for a quarter of a mile, which brings you to the summit of Mt. Tallac at a whopping 9,735 feet above sea level.
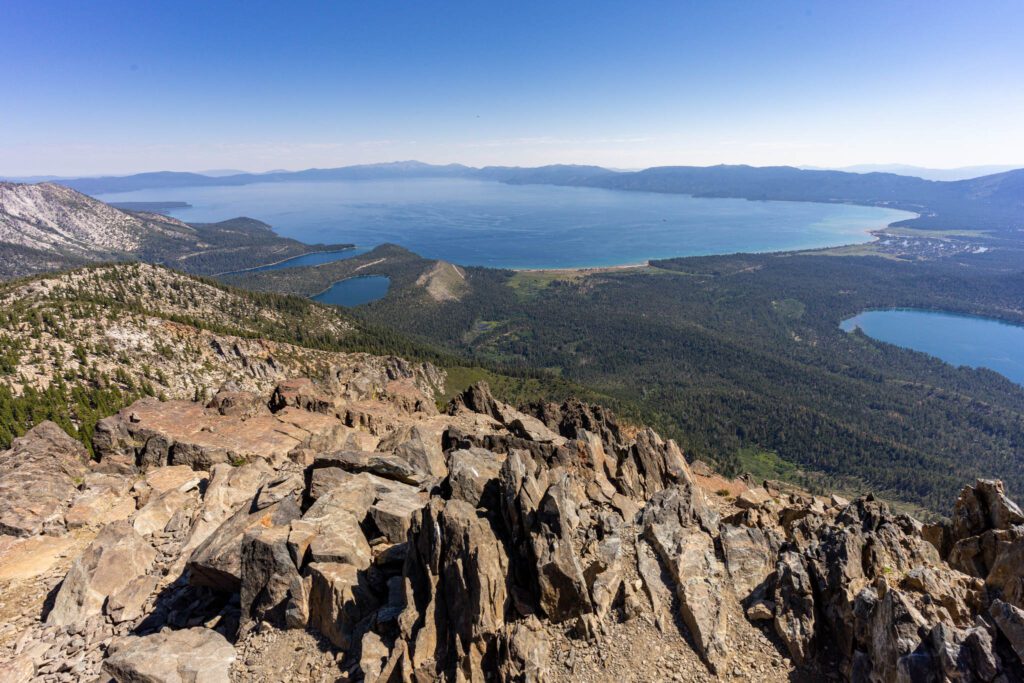
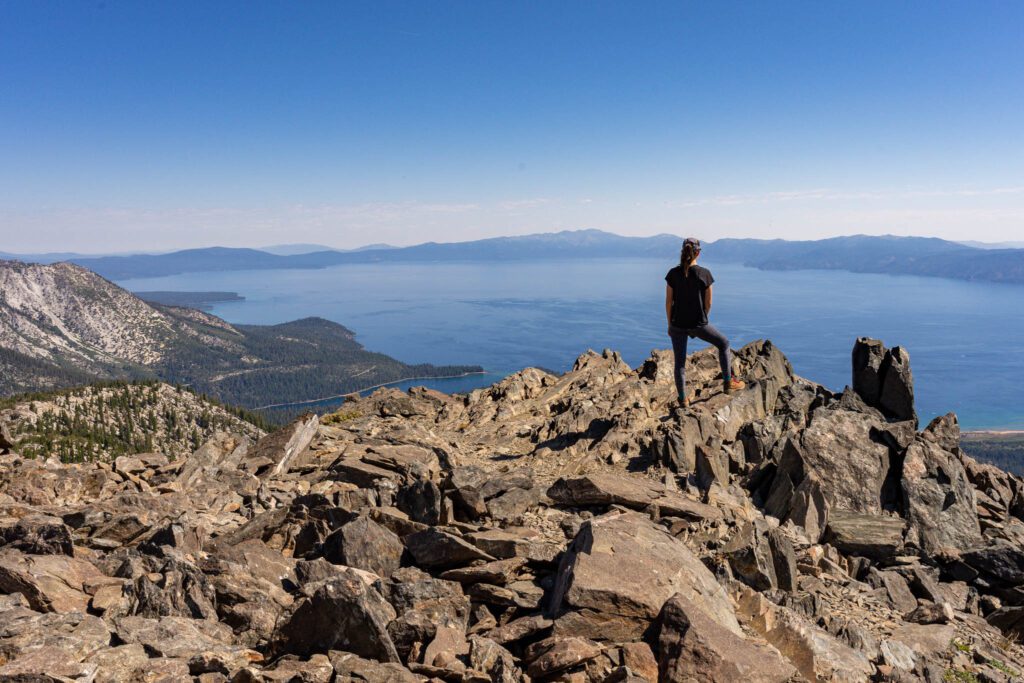
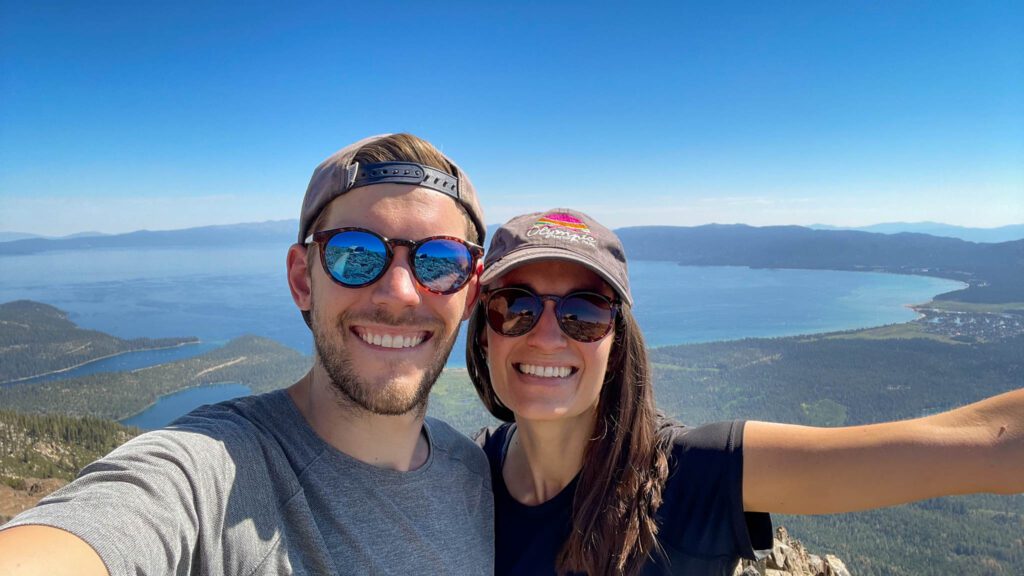
The views of Tahoe and the Lake Tahoe Basin are nothing short of spectacular. When the sun is high in the sky, the lake is a deep blue color, with pops of emerald along the shoreline where the water is shallow.
There are two things that might ruin that view for you: flies and chipmunks. Do. Not. Feed. The. Chipmunks. They are so used to humans, and clearly they get fed. Don’t do it.
The trail takes you back the way you came. It’s going to be hot, so make sure you drink plenty of water and have a good, hearty snack before you make the journey back to the trailhead.
When to Hike the Mt. Tallac Trail
After we did this hike, we were at Freebird Chai in Tahoe (highly recommended!) and mentioned that we’d tackled Tallac the day before, in July. Multiple locals laughed at us and told us that they would never, ever do that climb in the summer.
It’s a “right before the snow comes” or “right after the snow melts” hike, which means early summer (Memorial Day and early June) and fall (September – October).
Obviously you can hike this trail in the summer – we did it, and we’re still here – but it’s going to be HOT. Again, I cannot stress this enough if you’re doing it in the summer, start as early as humanly possible. And thank me later.
Once snow falls, this hike becomes un-hikeable. Usually, the first snow descends on Tahoe in mid-to-late October, and leaves in the late spring or early summer. Snow will linger around the summit of Mt. Tallac through May and well into June most years.