The Best Cameras for Hiking and Backpacking: Take Amazing Pictures On The Trail
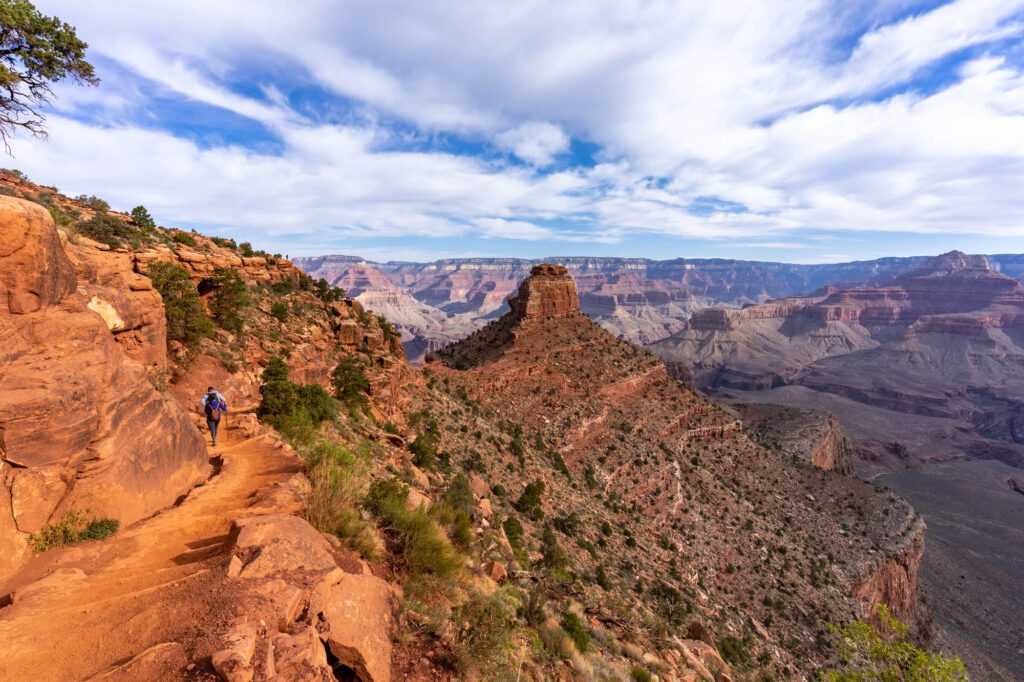
Are you an avid hiker looking to up your photo game? Or maybe you’re just getting into it and want to capture some of the incredible images you’re seeing with your own eyes to share with the world. Either way, over the past five years, I’ve been in your shoes, moving from a novice hiker and photographer, to a more advanced hiker… and a more advanced novice photographer?
My point is that after spending the last year on a perpetual road trip, hiking all day and catching too many sunrises and sunsets to count, I have some thoughts on how to choose the best camera for hiking. And over the past five years, I’ve moved from a compact camera to a full-frame mirrorless camera (and back down to an APS-C camera), which means I’ve had to make the exact same decision that you’re trying to make right now.
In the guide below, I’ll give you the things to look for in a hiking camera, along with three cameras I think are going to be perfect for taking amazing photos on your hikes. Plus, alternatives to consider (and their tradeoffs), lens recommendations, and how to carry and protect your camera gear on a hike.
Sound good? Off we go!
Disclaimer: Some of the links below are affiliate links, which means that if you click on one and purchase something, we make a small portion of the sale at no additional cost to you. It goes without saying that we would never recommend something we wouldn’t use or do ourselves.
What to Look For in a Camera You’ll Use for Hiking
Here are some elements to consider when you’re evaluating cameras, and SURPRISE you’ll see us take into account the same things in our camera roundups below.
We’ve done our best to order these from most important to least important, but it also kind of depends on your particular needs.
Cost
This is likely going to be the most important factor for which camera you choose. If you only have a couple hundred dollars to spend, that’s going to narrow your choices from the jump.
Here are some broad recommendations for what cameras to look at for a given budget. Keep in mind that these ranges are mostly for the camera body and MAYBE a kit lens. If you want a better lens, you’ll need to invest above and beyond these general ranges (more on that below).
- $100-$200: Honestly, if you have one of the newer smartphone models, I’d say stick with that. You’re not going to get much of an upgrade here.
- $500-$700: Look at an older (potentially used) model of a point-and-shoot camera, like the Sony RX100 III or Canon Powershot G7 X Mark II. Or, stick with your smartphone. My Apple iPhone 12 Pro takes pretty fantastic pictures.
- $1,000: I’d go with an older APS-C mirrorless camera. Read below for our picks from the Sony a6XXX line, which is far and away the best combination of image quality and size.
- $1,500: Choose between the Sony a6100 and the Sony a6400 body (we have a comparison below) and spend the extra money on the Sony 18-135mm f3.5-5.6 OSS lens, which is a solid all-around lens for hiking.
- $2,000+: Start thinking about either the Sony A7 III, a full-frame mirrorless camera that is top of the line in basically every performance category that matters, or one of the Fujifilm X-T models, which are the best APS-C cameras available, but are bigger and bulkier than the Sony APS-C cameras mentioned above (and thus, maybe not as good for hiking). Keep in mind that lenses for these cameras are going to be expensive, and we’d generally recommend splurging on a nice lens rather than a nice camera body.
Size and Weight
This is the second most important factor when you’re looking at cameras to carry on your various hiking adventures.
Wrapped up in the size/weight conversation is camera type. Broadly speaking, there are three or four camera types to think about here. Sure, there are other ways to look at it, but these are the most instructive, at least in my mind. The options below are ordered by size/weight, from biggest to smallest.
- Full-frame DSLR cameras: Often bigger and bulkier, but top-notch image quality make these a popular choice for professionals. There’s a reason 95+ percent of pro photographers that I’ve talked to use Nikon or Canon.
- Mirrorless Cameras: A relative newcomer on the scene, mirrorless cameras come in a bunch of different shapes and sizes (which you’ll see below). They remove the mirror component from the DSLR above, which allows for similar image quality in a smaller package. You can find mirrorless full-frame cameras, which are what we use to take most of our photos.
- Point-and-shoot Cameras: These are the cameras that you see the vast majority of tourists using in any given place. They’re simple, compact, and take perfectly good pictures if your only plan with your photos is to make a family photo album or post them on Instagram. Plus, they’re usually small enough to fit in a jacket pocket – the ideal size for the trail, particularly backpacking.
- Action Cameras: GoPro is the main player here. We used to use a GoPro for photos on our trips. At one point, I switched to a point-and-shoot camera (the Sony RX100 III) and realized that photos on a GoPro are just…not great. If photo quality is what you’re looking for, you can do better. However, they’re good for action shots – particularly video – and they come in a tiny package. They’re also going to be protected from the elements, so if you want to do some underwater stuff, they’re going to be your best bet.
We’re going to completely discard full-frame DSLR cameras from our roundup below because, while they’re great for pro photographers shooting a wedding, they’re big and bulky. When you’re talking about hiking, they’re not the best choice.
We’re also not going to cover action cameras. While we have some experience using them, we’re much more knowledgeable about using normal cameras, and think they’re a better choice for most hikers who want to get nice pictures of the amazing landscapes they’re exploring.

Weather Protection / Sealing
Some cameras are protected from water, dust, and even cold temperatures. This is more of a nice-to-have (rather than a must-have) unless you plan on taking your camera out for lengthy backpacking trips or extended periods of inclement weather. Most of the cameras at the higher end are weather sealed, while the cameras at lower price points aren’t.
This likely isn’t going to be the deciding factor (the variables above are much, much more likely to be), but it could come into the equation if you’re choosing between two similar cameras.
Image Stabilization
“Do I need in-camera image stabilization?” is another question where the answer is “it depends.”
Image stabilization, at a high level, reduces the constant shaking your hands do when you’re taking a picture to make for a smoother picture. This matters at lower shutter speeds, and can buy you as much as three to four stops of light (sometimes more), which means you can shoot handheld in more low-light situations (like at dawn or dusk) before you have to put the camera on a tripod. The bottom line is image stabilization gives you a better chance of taking photos that aren’t blurry in more situations.
There are two forms of image stabilization worth talking about here: In-camera stabilization and lens stabilization.
Most lenses mentioned below have built in image stabilization, with the exception of “prime” lenses (lenses that only have one focal length). You can tell whether or not a given lens has image stabilization by looking for the letters “OSS” – which stands for Optical Steady Shot – on Sony brand lenses. The exact letters used vary by brand, but you’ll be able to look at the lens specs page on B&H photo, where they have a category for image stabilization.
In-camera stabilization means you can use any lens whether or not it has built-in stabilization and the camera body will stabilize the shot. Again, this allows you to shoot in a wider variety of conditions without ending up with blurry photos or using a tripod. This comes at a price – generally only the top-of-the-line cameras have in-body stabilization. I would say it’s a nice-to-have, not a must-have.
If you’re using a camera and lens combination where neither has stabilization (like, for example, the Sony a6400 and the Sigma 16mm f1.4), then you’ll need to use a tripod in low light situations like dawn or dusk.
We think that, for the majority of hikers, in-camera image stabilization isn’t going to be something you need. That’s for two reasons. One, you’ll likely be hiking in good light, even if you start early in the morning, so you’re not going to be utilizing that stabilization so much. Two, most lenses you’re going to use will be stabilized unless you’re an advanced photographer using prime lenses.
Sensor Size
Size doesn’t matter as much as you think it does. Sensor size, I mean. I read this guide to sensor size a while back, and it helped me wrap my head around how to think about sensor size and the advantages of larger sensors. It’s worth a read if you have the same question.
There are two places where sensor size matters enough to even think about it.
First is low-light situations. A larger sensor means more light gets in, which means you’ll be able to shoot handheld (without a tripod) for longer, and your photos will come out better at higher ISO numbers. If you’re hiking midday or when the sun is out, this probably doesn’t matter at all.
You can easily work through this issue with smaller sensors by simply putting the camera on a tripod, but most people probably don’t want to carry a tripod on their hikes (we do so our selfies are better than the “arm outstretched with a phone” variety).
This really matters most if you’re planning on hiking at dawn or dusk, when the light is relatively low. And people who are doing hikes at those times are also probably more likely to be willing to carry a tripod.
Second is if you’re planning on printing your pictures at sizes above 24” x 36”. I will say that the exact size where you’re going to need a bigger sensor depends on a lot of things, namely your ISO (higher ISO means you’re going to need to print smaller), but this is a good general rule. Compact cameras with smaller sensors can reliably print at these sizes with quality that’s good enough for most people if you’re shooting at around 100 ISO.
At higher ISO numbers or bigger print sizes, you’re going to want a bigger sensor like the ones found in APS-C or full-frame cameras below.
At the end of the day, we take photos primarily for this website, and occasionally to print smaller sizes. 99% of people won’t need those capabilities that in-body image stabilization provides, particularly for landscape and hiking photos.
Battery Life
Battery life is an important consideration, especially for backpacking. This might surprise you, but the bigger the battery, the longer the battery life. Either way, you’ll want to carry extra batteries, just in case.
The Best Cameras for Hiking and Backpacking
Now, onto the part you’re actually here for: the cameras.
The cameras below are our picks for those of you looking for a camera to use for taking pictures while you’re hiking and backpacking.
You should know that I’m a Sony fanboy. I own multiple Sony cameras – from their point-and-shoot to their full-frame cameras. I love the value and image quality to weight ratio they provide, which I think makes them ideal cameras for hiking and backpacking. Which is why you’ll see them in basically every category below. However, I’ve also given some alternatives from other brands.
As you might imagine, each camera is part of a lineup of different models that have evolved over the years. We’re going to give you the newest version of that lineup. However, you should know that the majority of new camera releases really…aren’t that different. They add some of the bells and whistles – touchscreens and the like – that are nice to have, but the image quality probably isn’t changing that much between one model and the next.
For that reason, we’ll also include older versions of the cameras below that would be a good choice if you’re on a tighter budget. We’ll also give you the tradeoff you’re making by choosing that older model over the newest version.
Now, onto the cameras!
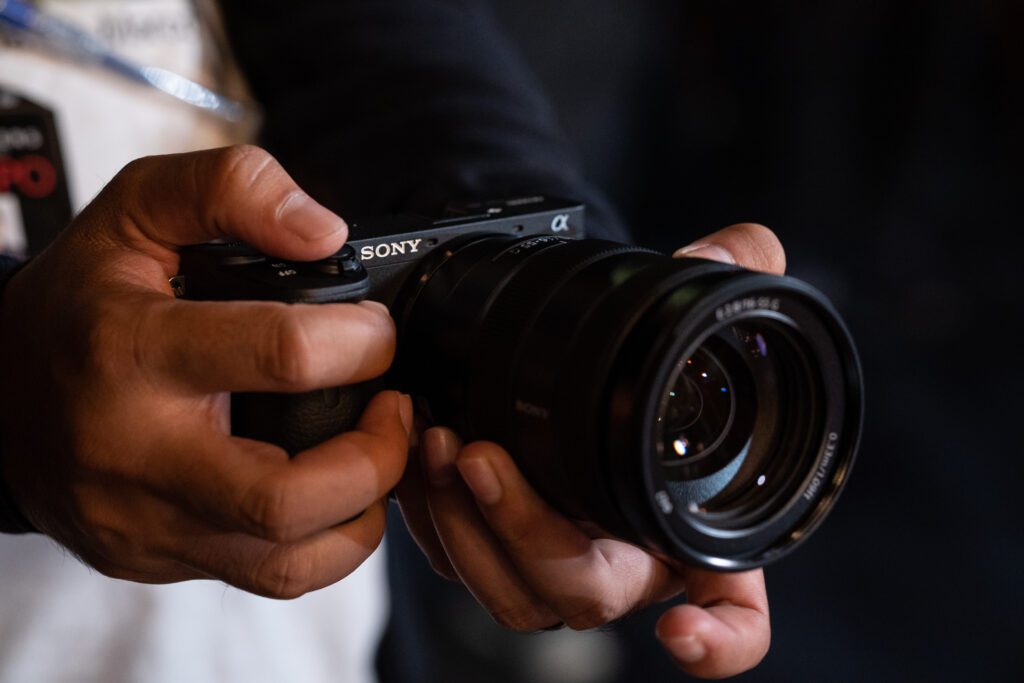
Sony RX100 VII: The Best Compact Camera for Hiking
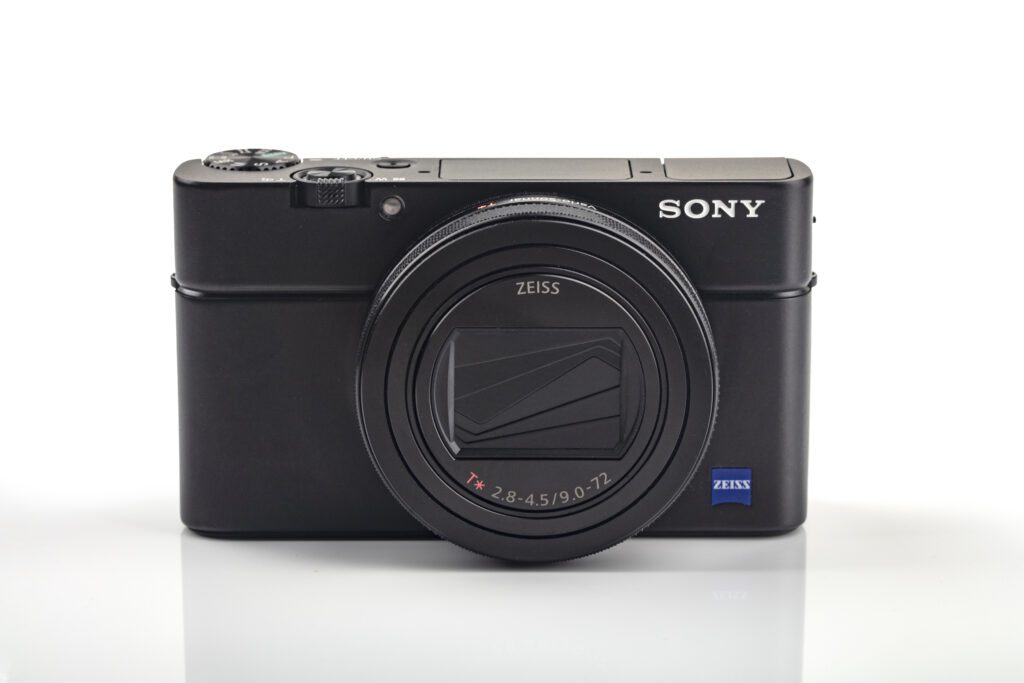
- Size: 4″ x 2.3″ x 1.7″
- Weight: 300g
- Weather Sealed? No
- In-body Image Stabilization? Yes – Optical
- Sensor Size: 20MP BSI-CMOS Sensor
- Cost: $1,298
The RX100 III was the first camera I ever bought for a trip to Australia where we took it all over the place, from cities to hiking trails to beaches, and just about everything in between. What I learned is that this camera is an absolute beast when you consider the footprint it comes in.
Now let’s fast forward six years from that trip to the present day. Sony’s compact camera line has continued to evolve, and the latest model – the Sony RX100 VII – is one of the best cameras on the market if you’re looking for an incredible quality:footprint ratio.
At just 102 mm x 58 mm x 43 mm (4” x 2.3” x 1.7″), this camera packs quite the punch for something that fits comfortably in your jacket pocket.
It has a 24-200mm f2.8-4.5 lens, which adds a nice telephoto length from older models that gives you more versatility (at a cost, which we’ll touch on below). You’ll also get Sony’s best-in-class autofocus, image stabilization, and a tilting touchscreen LCD. Plus, the 1” BMI-CMOS sensor is about as big as you’re going to get in this camera size.
Best For: People who want the best image quality to size and weight ratio out there.
Pros
Here are the things we like about the RX100 VII.
- The image quality to size ratio here is borderline unbeatable. If you’re not planning on blowing up prints to hang on the wall, you’ll be plenty happy with the images that come out of the Sony RX100 VII.
- The 24-200mm f2.8-4.5 lens gives you a nice range of focal lengths, perfect for everything from landscapes to portraits to wildlife (although it’s a little on the short end to capture far away animals). More on the tradeoff you’re making here in the cons section below.
- The camera is light and small enough for hiking and backpacking. It’ll fit in your jacket pocket or the top pocket of your backpack pretty easily, and won’t add too much weight to your pack on longer overnight trips.
- The pop up viewfinder is a must for us – we’ve tried taking pictures using just the LCD, and it’s borderline impossible when the sun is high in the sky.
Cons
Here are some of the things about this camera that we don’t like as much.
- First of all, the cost. At over $1,000, this is an expensive camera. Sure, it’s packed with features, but at the end of the day, $1,000 is a lot to ask for a point-and-shoot camera.
- The zoom lens, which is a 24-200mm lens with an aperture range of f2.8-4.5, has added focal length to make it a more versatile camera, but the cost of that addition is a slower lens with a bigger minimum aperture (older models had a 24-70mm f1.8-2.8 lens). For most people, we don’t think you’ll need that extra 130mm all that often, and we’d rather have the faster lens.
- The other thing to keep in mind is that it’s not weather sealed, so it’s not well-protected from water and dust, which you’re sure to encounter if you’re hiking in the western United States.
Alternatives to Consider
There are a couple of good point-and-shoot camera options here that will cut the cost in half, if not more.
Canon Powershot G5 X MII
The Canon Powershot G5 X MII is essentially a carbon copy of the latest and greatest Sony RX cameras with a slightly shorter – but faster – lens (24-120mm f1.8-2.8) that we like a lot. Same sensor, roughly the same size, and similar features. We like the lens better than the Sony here.
Sony RX100 Mark III
The Sony RX100 Mark III is the camera I own, and it’s a great little camera. Plus, it’s almost 50% cheaper than the latest version above, and it has the old 24-70mm f1.8-2.8 lens, which is perfect for most people and applications while hiking (though you probably won’t be able to capture that grizzly bear from a safe distance). It’s the first RX100 model that has a pop up viewfinder too, which is a must-have for hiking because good luck seeing that LCD in the midday sunlight.
Canon Powershot G7 X MII
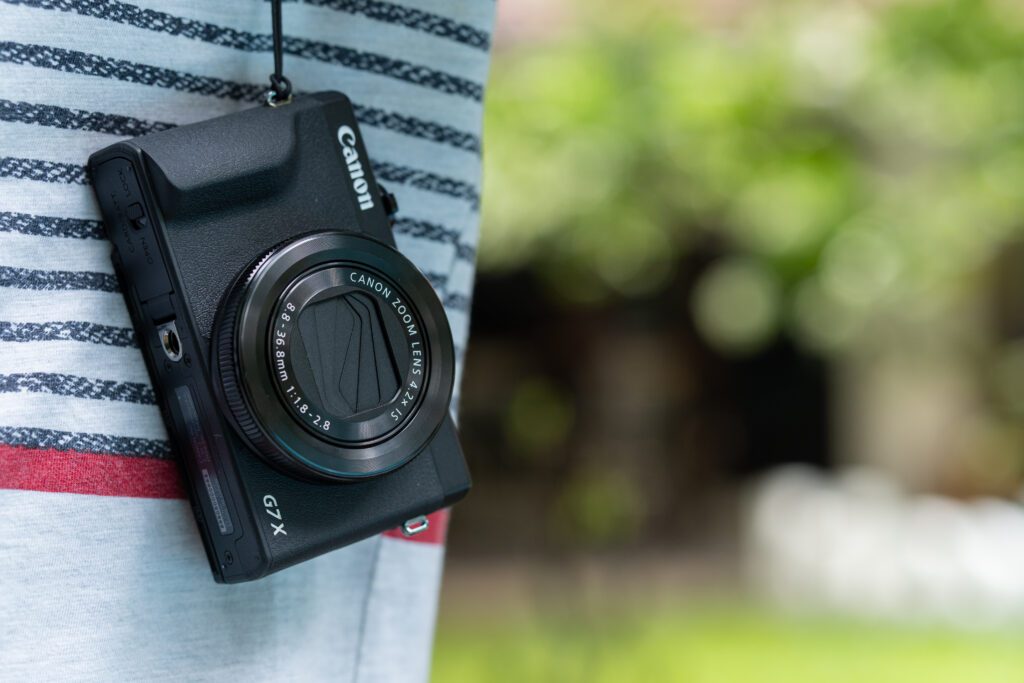
Note that we’re recommending an older version of this camera than the newest model, which gets mixed reviews. The Canon Powershot G7 X MII doesn’t have a viewfinder, which is a con for us, but we like the fast 24-100mm f1.8-2.8 lens and the price – which is about half the price of the latest Sony point-and-shoot cameras.
Olympus Tough TG-6
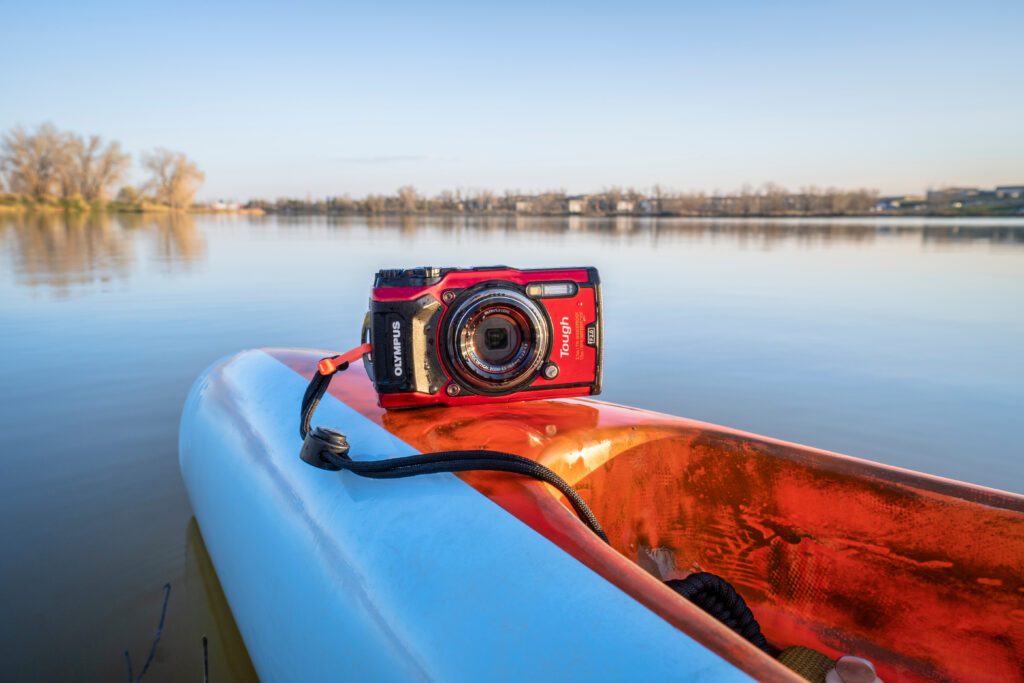
If you need a waterproof camera that will stand up to everything nature throws at you, the Olympus Tough TG-6 is your best bet. It’s waterproof (up to 50 feet), freezeproof (down to 14 degrees F), shockproof, dustproof, and crushproof. Basically, anything that happens on the trail, your camera will be the last thing you’re worried about. The tradeoff is marginally lower image quality, with a smaller sensor and a worse lens (25-100mm f2-4.9). Still, for the average hiker who wants a camera they can bring along on their backpacking trip without worrying about it getting rained on, this is a good pick.
Sony a6400: Best Combination of Value + Size + Image Quality
- Size: 4.7″ x 2.6″ x 2.4″
- Weight: 403g
- Weather Sealed? Yes
- In-body Image Stabilization? No
- Sensor Size: 24 MP APS-C CMOS Sensor
- Cost: $898 (body only)
For most people, Sony’s a6XXX range of cameras is going to be your best bet for hiking and backpacking if you’re looking for a camera with interchangeable lenses that is lightweight and small enough to fit in your crowded hiking backpack.
There are three cameras to consider within this range, and which you choose will depend on your budget and the features you’re looking for.
We’re going to cover the Sony a6400, which is the middle option of the bunch. The more expensive Sony a6600 and the cheaper Sony a6100 are good alternatives that we’ll cover in the alternatives section below.
The Sony a6400 is a great camera, especially given the size of the camera body. It’s good for video too – I feel like every Youtube video I watch these days is shot on a Sony a6400. The lens selection, which used to be a con for this line of cameras, is slowly but surely improving as third parties like Sigma are investing in creating new lenses for the APS-C line of Sony cameras.
Best For: Hobbyists who want great image quality and features in a smaller footprint than full-frame cameras.
Pros
Here are the things we like about the Sony a6400.
- Size. At just 4.7 x 2.6 x 2.4″ and 14.2 oz, this camera is tiny. At least compared to the competition. And the best part is there really aren’t that many tradeoffs for that size. It’s plenty light for hiking or backpacking, and is one of the best travel cameras around.
- Image Quality. Between the 24.2MP APS-C Exmor CMOS Sensor and the best-in-class autofocus, the image quality here is top notch.
- Weather Sealing. This camera is weather sealed and will stand up to the elements just fine, as long as you’re not dunking it in a lake. Or something.
Cons
Here are some of the things about this camera that we don’t like as much.
- No in-body image stabilization. This means two things. You’ll either want to make sure your lenses are have built-in image stabilization (look for “OSS” on Sony lenses, which means the lens itself is stabilized) OR if you’re using a prime lens or a lens without image stabilization, you’ll want to make sure you have a tripod for low-light situations like sunrise and sunset. If in-camera image stabilization is a must, spend the extra $200 for the Sony a6600, which has it.
Lens Recommendations
Sony makes a couple of great all-purpose lenses – one for wider shots and one that’s significantly more versatile. Sigma, one of my favorite companies for third party Sony lenses, also makes some good sharp and fast prime lenses, though they don’t have image stabilization.
- Sony 18-135mm f3.5-5.6 OSS. Great workhorse lens that is sharp and covers a wide range of focal lengths, from landscape to telephoto zoom. It is stabilized.
- Sony 10-18mm f4 OSS. Good wide angle zoom for landscape photos. We wish it was a little brighter, but also don’t want to pay more than what it already costs, which is not particularly cheap. It is stabilized.
- Sigma 16mm f1.4. A great prime lens for both landscape photography and video. No image stabilization though, which is a consideration but probably not a deal breaker.
The Alternatives (aka the other Sony APS-C Cameras)
Like I mentioned above, Sony makes a couple of other cameras in this lineup that are worth considering, depending on what you’re looking for.
I actually would put these Sony cameras in a league of their own given the quality and size. There are a couple of non-Sony cameras that we like, which you’ll see below.
You’ll see the other alternatives from Fujifilm and Olympus in the next section because of their footprints, which are closer to Sony’s full frame cameras than the a6XXX lineup.
The Sony a6100
The newer version of Sony’s budget workhorse camera (the a6000), this camera is a good budget option for new photographers.
The biggest difference (only difference?) between the Sony a6100 and the a6400 we covered above is weather sealing, which could be an important factor for hiking, but it depends on how often you think you’re going to be getting wet and/or dusty (probably not at the same time) when you’re carrying your camera. Worst case scenario, you can put the camera back in your pack during those times.
You’ll also get slightly worse autofocus and LCD on the a6100, but those are not make-or-break features in our opinion. The sensors and camera bodies are identical, so image quality is going to be the same between these two models. But you’ll save $250 by choosing the a6100.
It comes down to what weather sealing and slightly better autofocus are worth to you, and we wouldn’t fault you for choosing either one.
The Sony a6600
On the more expensive side is the Sony a6600, which we should note is 100g heavier than the 6400, and the body is slightly bigger (120mm x 67mm x 69 mm) in the grip area, which might actually be a good thing if you have bigger hands.
The biggest difference here is in-body image stabilization, which means you’ll get better low-light performance out of lenses without image stabilization, like that nifty Sigma 16mm f1.4 lens we cover below. However, it’s probably not worth the upgrade if you’re not planning on using it handheld in low light situations, like around sunrise or sunset.
The other big change is battery life, which is twice as good as the a6400 (810 shots vs. 420 shots). That’s why the camera is slightly bigger in the grip area, and heavier.
Fujifilm X-T30
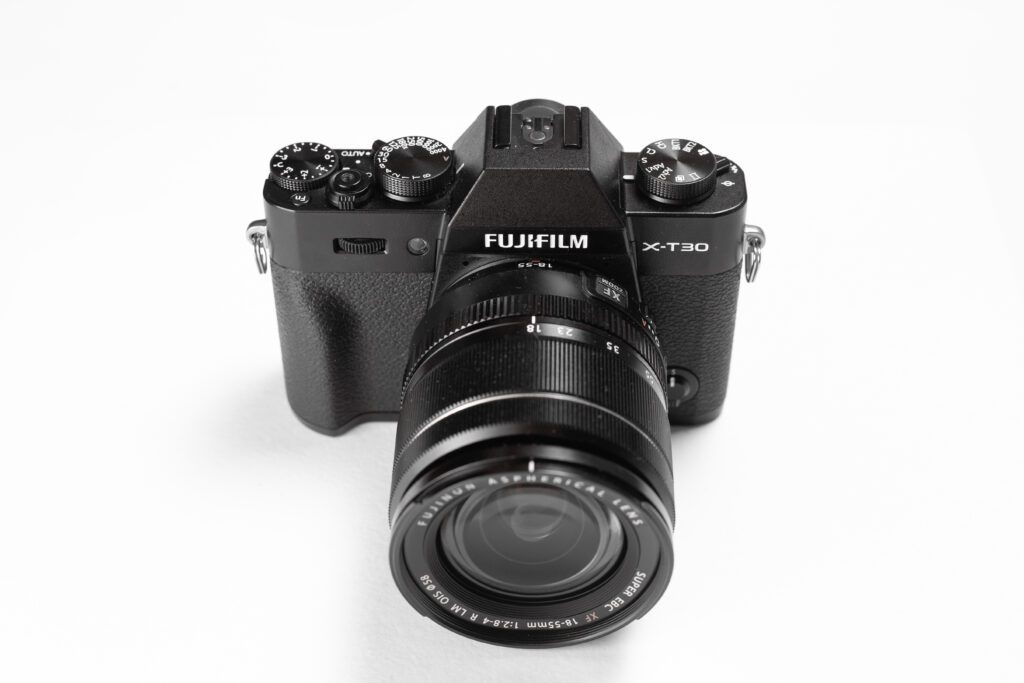
The Fujifilm X-T30 is the best alternative to the Sony a6400 that we’ve found.
It’s a similar size (it’s 16mm taller, and otherwise identical), actually has a bigger sensor, and the image quality and camera performance is nearly identical to Sony (though the autofocus is slightly worse). It doesn’t have in-body stabilization either. And the price point is right at $899 (body only).
Fujifilm does have a nice lens selection, especially their compact prime lenses which are great for hiking and traveling, but there isn’t a whole lot of third party investment, which means they’re going to be expensive. The Fujifilm lenses are on-par with the Sony lenses, but more expensive than the Sigma and other third party alternatives that exist for the Sony a6XXX line.
Sony A7 III: Best Overall Camera for Hiking

- Size: 5″ x 3.8″ x 2.9″
- Weight: 650g
- Weather Sealed? Yes
- In-body Image Stabilization? Yes
- Sensor Size: 24 MP BSI-CMOS Sensor
- Cost: $1,999 (body only)
Now, you could absolutely go for the Sony A7R IV, which is widely considered one of the best cameras around, period. However, I also know that we (and probably you too) don’t exactly have several grand lying around.
So instead, we’re recommending the smaller sensor version – the Sony A7 III – which comes at a much more affordable price point and has all the features you’ll need if you’re an advanced hobbyist (like us) who’s ready for the next step up in terms of camera bodies.
We use the Sony A7 II – an earlier version of this camera for most of our photos. It’s a fantastic camera with a full-frame 24MP sensor, excellent image quality, and a relatively compact footprint when you compare it to other full frame cameras. But there are a couple of things that we wish were better – battery life and autofocus are the two that come to mind first.
The Sony A7 III takes that foundation and adds better autofocus, a touch screen, significantly better battery life, and other bells and whistles that make it a worthy step up from the camera we have now.
When we need a new camera, the A7 III is the one we’re going to be going for.
Best For: More advanced photographers who want an all-around fantastic camera that performs well on the trail, and also in low light situations.
Pros
Here are the things we like about the Sony A7 III.
- Great low-light performance. I have shot with my camera just after sunrise handheld at 800 ISO, and you can barely even tell that it’s not on a tripod.
- Good lens selection. A lot of times, full-frame lenses are considered to be expensive. But here, you have a nice selection of pro-level lenses – like the Tamron and Sigma versions – that are roughly half the price of the equivalent Sony lenses. And equally as good, if not better in some aspects.
- In-Body Image Stabilization. The A7 III has in-body image stabilization, so you don’t need to worry about lenses that have OSS (or the equivalent).
Cons
Here are some of the things about this camera that we don’t like as much.
- Size. It’s certainly larger than the a6XXX series above, but if you anticipate needing that low-light performance and image stabilization, then the tradeoff will be worth it. Lenses are also bigger than some of the APS-C cameras mentioned above.
- Price. At just under $2,000 for the body alone, this is not going to be a cheap date.
Lens Recommendations
I have most of the lenses below, and can wholeheartedly recommend them to you. You’ll notice a trend here – I love Tamron’s lenses for Sony full frame cameras because they’re often lighter than the Sony equivalent, which is an important factor to consider when you’re talking about hiking.
- Tamron 28-75mm f2.8. I love this lens, and this is what’s on my camera 90+ percent of the time. The range is great for landscape and portraits, though I do wish it was 4mm wider to get to 24mm. It’s also super affordable.
- Tamron 17-28mm f2.8. Hey, what do you know, a perfect companion to the Tamron above! This is a great lens for wide-angle shots if you’re trying to get that “flower in foreground, Rainier in background” style shot.
- Sigma’s comparable lineup – the Sigma 14-24mm f/2.8 and Sigma 24-70mm f/2.8 might be an even better combination thanks to the slightly wider angle on both lenses. But they’re slightly more expensive so I went with Tamron when I bought my camera.
Alternatives to Consider
There are a couple of good point-and-shoot camera options here that will cut the cost in half, if not more.
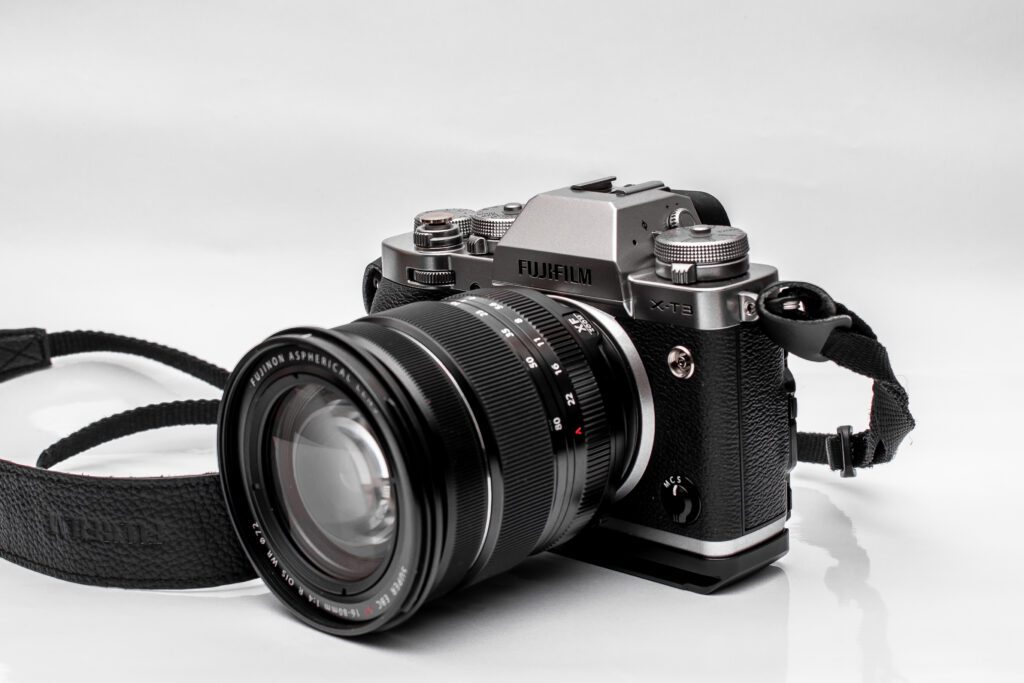
Fujifilm X-T4. First of all, this is an APS-C sensor, NOT a full frame. That being said, we don’t think it really matters that much for most people who plan on using it while hiking. Plus, this is the best APS-C camera out there, in our opinion. Yes, even better than the Sony a6XXX series. HOWEVER, it’s significantly larger, which means it might not be the best for hiking if you’re worried about every extra ounce in your backpack.
Fujifilm X-T3. Everything we mentioned above, except slightly worse on the video front, no in-body image stabilization, and a smaller price tag. It’s one generation back, and other than stabilization, there aren’t a whole lot of changes.
Olympus OM-D E-M1 III. The Olympus cameras are intriguing. But they have a smaller sensor and a bigger body than the Sony a6XXX range, which is a tough combination to swallow for people looking for an amazing hiking camera. And when you start comparing them to the Sony A7 III, it’s really not a competition (at least in my book). Battery life is also SIGNIFICANTLY worse, though it does have in-body image stabilization and environmental sealing. Olympus does have a good selection of lenses, but they’re not much cheaper than the full-frame options from Sony. You can get the previous version – the Olympus OM-D E-M1 II – for a good price now that the newer III is out.
How to Protect (and Carry) Your Camera on the Hiking Trail
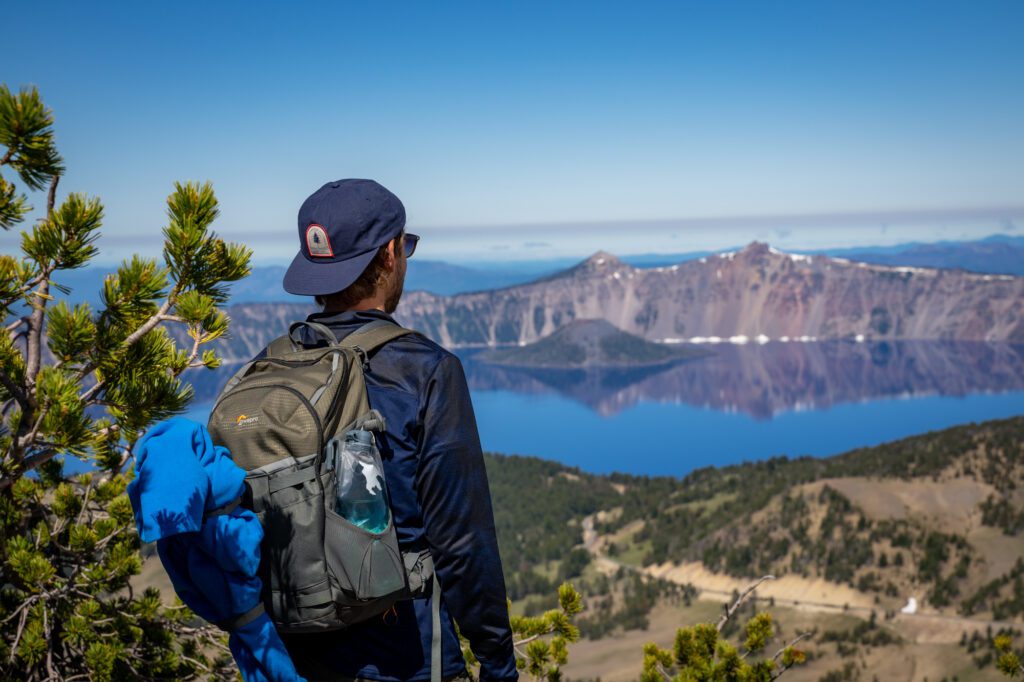
When it comes to carrying your camera on the hiking trail, you essentially have two options: Buy a hiking backpack made specifically for cameras, or buy a padded insert to put into your normal hiking backpack.
I’m a strong believer in the latter – putting a camera insert inside my normal hiking backpack. I’ve found that backpacks made specifically for cameras are both more expensive and less comfortable, which are the two main factors I’m considering.
Camera Insert + Regular Daypack
This is my preferred method of carrying camera gear on hikes because it’s more comfortable and much more affordable.
I have the Tenba BYOB 10, which is a padded camera insert that fits inside my daypack (I use either the Deuter Trail 30 – my #1 daypack recommendation – or the Osprey Talon 22) and the insert fits my camera + lens and an additional lens, along with filters and everything else. It wouldn’t fit a telephoto lens, like a 70-200, but that’s not something I usually need for hiking anyway.
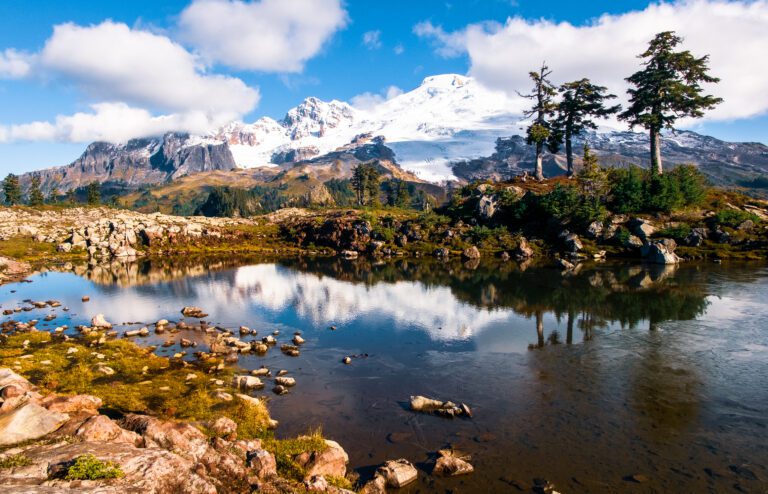
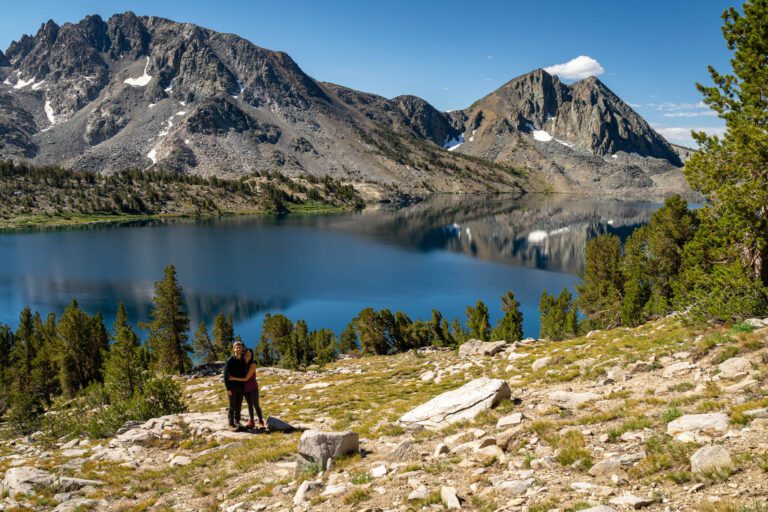
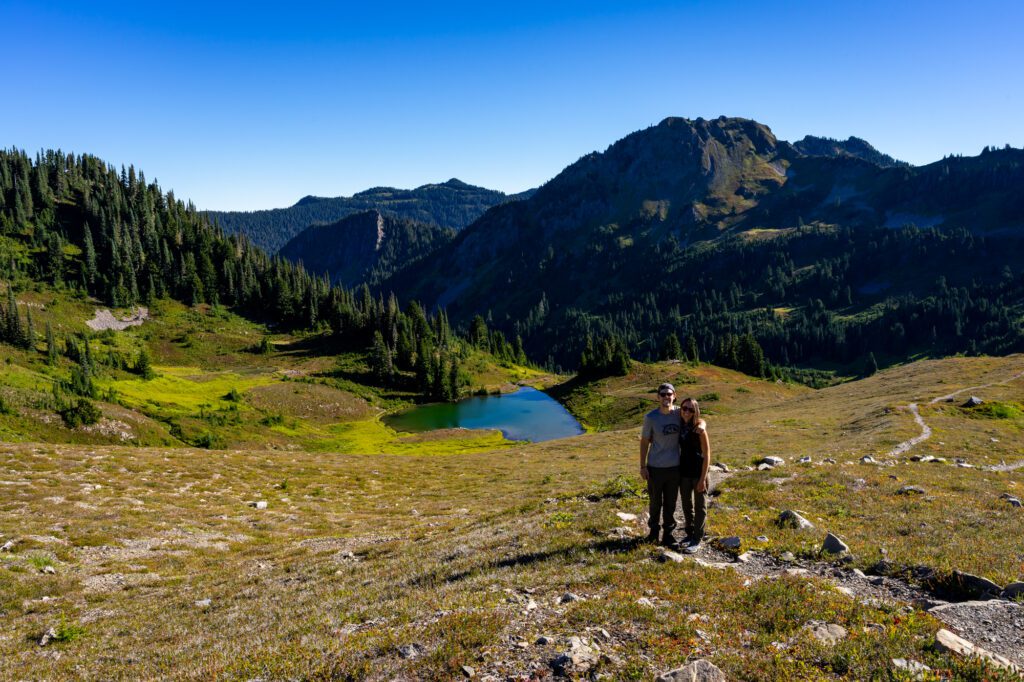
If I’m carrying it, I put my tripod (I LOVE Peak Design’s Travel Tripod for its compactness) in my water bottle pocket. Using a tripod has transformed our selfies from the “arm-outstretched-where-do-I-look” variety to something more like this (where people ask “wait, who took that picture?” Answer: basically a robot).
One thing that I don’t like about the camera insert + hiking daypack combination is that you need to either have someone get into your backpack for you and hand you your camera OR stop, take off the backpack, and root around for your camera.
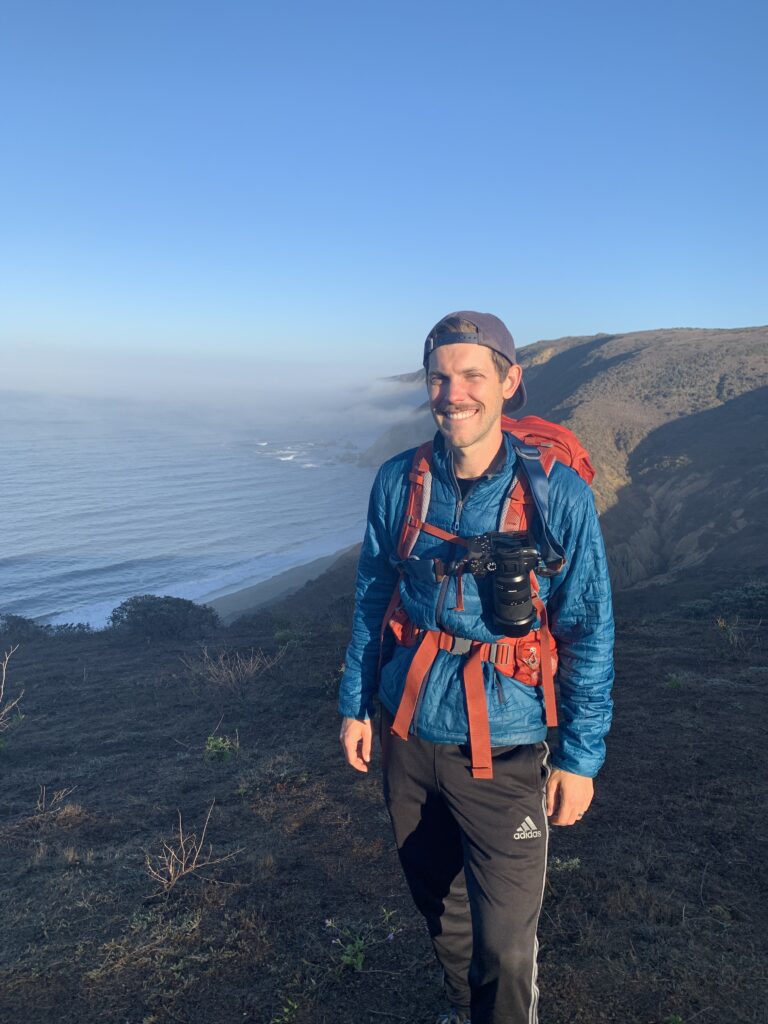
But I solve that problem with the Peak Design Capture Clip, which clips right onto the front strap of my backpack and allows me to clip on my camera so that it’s easily accessible throughout the hike.
A Camera-Specific Hiking Backpack
If you insist on a hiking backpack made specifically for carrying a camera and associated equipment, be prepared to pay for it. The only reason I would consider going this route is if you need to carry more than this: a camera body + lens, and an extra lens.
If you need to carry, for example, multiple bodies, a few different lenses, and a drone, this route might be right for you.
There are some good options out there, but the biggest con for me is that most of them don’t have enough room to carry both the camera gear and the stuff you need for a long hike – like the snacks, water, and layers.
Look at the Lowepro Flipside Trek (which I actually have, and it’s a good pack that’s not quite as comfortable as a regular hiking backpack) or the Shimoda Designs Action X30 (which, after doing this research, I kind of like and might buy in the future). The Shimoda Explore 40 is another good alternative.