The 10 Best Hikes in Death Valley National Park
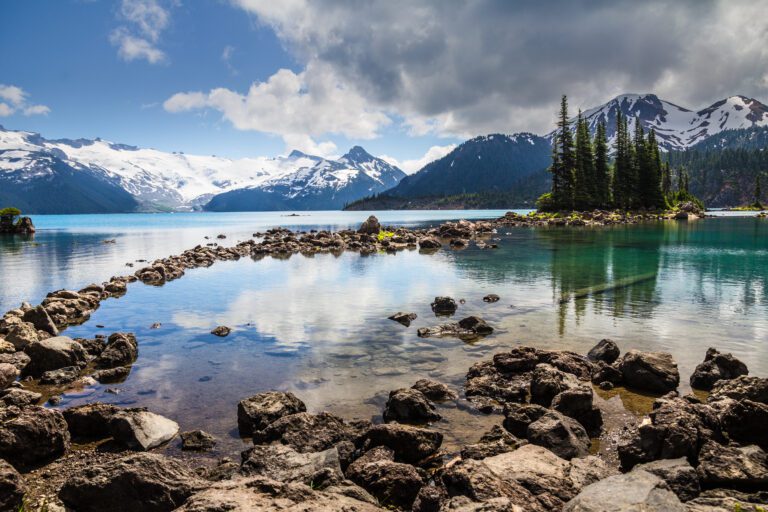
Spanning 3.4 million acres, Death Valley is the largest national park in the continental US. A land of extremes, it’s the hottest, driest, and lowest point in the country. And despite its name, there’s actually plenty of life in the park, along with an incredible and varied landscape of massive salt flats, rolling sand dunes, winding canyons, snow capped mountain peaks, volcanic craters, and even waterfalls.
Death Valley is also home to some really incredible hikes where you can get up close to many interesting sights and unique geological features, and be rewarded with otherworldly views and vistas. I’ve explored many of these over different visits and bring you this guide to the best hikes in Death Valley to help you make the most of your time.
Psst! Heading to Death Valley? We have a super detailed guide to planning a perfect Death Valley itinerary with one, two, and three day options.
Interested in exploring the national parks on the West Coast? Don’t miss our complete guide to all 13 West Coast National Parks where you’ll find an overview of things to do, places to stay, and links to our more detailed guides on each park.

Planning a Trip to California? We’ve got plenty of California travel guides to help you plan an amazing trip.
- 3 Days in San Francisco: A Complete Long Weekend Itinerary
- 14 Incredible Day Trips from San Francisco
- How to Spend a Perfect Weekend in Los Angeles (2 Day Itinerary)
- How to Spend One Amazing Day in Los Angeles (2 Ways!)
- The Best Places to Stay in Los Angeles (An L.A. Local’s Guide)
- A Perfect Weekend Itinerary For San Diego (2 Days)
- How to Spend One Amazing Day in San Diego
- Where to Stay in San Diego: A Complete Guide from a Local
- A Complete Joshua Tree Itinerary (Weekend Guide)
- A Complete Pacific Coast Highway Road Trip Guide (SF to SD)
Disclaimer: Some of the links in this post, like hotel and vacation rental links, are affiliate links, meaning at no additional cost to you we make a little bit of money if you click through and book. That being said, we would absolutely never recommend something to you that we don’t stand behind 100%.
When to Visit Death Valley (for Hiking)
Fall, winter, and spring at the best times to visit Death Valley. November to March are typically the best times to go hiking. Fall and spring are particularly popular, so make sure you plan your accommodations well in advance during those times.
It’s still quite hot in September, but temperatures become more comfortable by October. All the valley level campgrounds should be open by mid-October. Expect highs from the 70s to low 90s and lows in the 50s and 60s.
You are in a desert, and winters can get cold. It can get close to freezing at night, while daytime highs can hover around the 60s. This is usually the wettest part of the year, and snow at higher elevations is not uncommon. Check the weather with a ranger before setting out, as flash floods can be an issue.
Spring is a popular time to visit, particularly after a wet season to see wildflowers in bloom. April is a really popular month, so expect larger crowds everywhere. Early spring will see comfortable daytime temperatures in the 70s and 80s, but by late spring they creep up past 90s.
Summer is brutally hot. Really, it’s not worth visiting then, unless you plan to just view everything from inside your car or you plan to stick to higher elevation areas. With temperatures that routinely exceed 110 and even 120, it’s not safe to be out much past sunrise or before sunset, which really limits your options.
Tips for Visiting (and Hiking) in Death Valley National Park
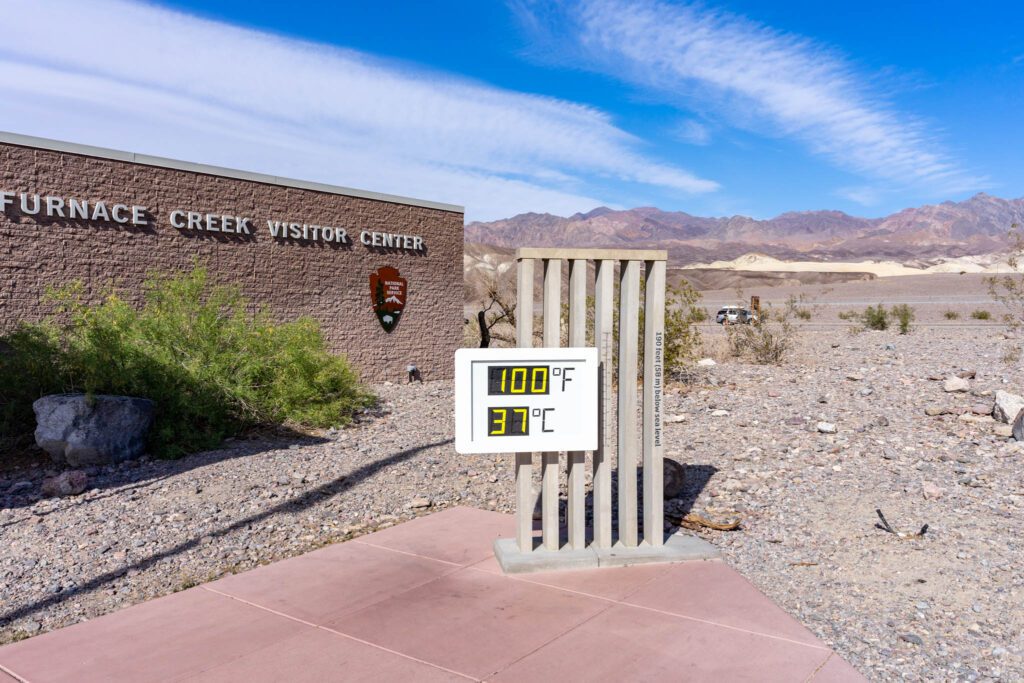
- The heat in Death Valley is no joke, with one of the highest recorded temperatures on the planet (134 degrees in 1913). Recently, temperatures have hit the high 120s numerous times. Even if you’re visiting outside of summer, you need to be prepared for the heat, as it can still get hot in the spring and fall. Make sure you have sun protection (sunscreen, hat, loose long-sleeves), and drink plenty of water—more than you think you need, since it’s also a very dry environment.
- Wear sturdy shoes or boots with good traction and ankle support. Many hikes are over rocky or uneven areas and may involve scrambling. For winter hikes at higher elevations (such as Telescope Peak), you’ll want to be properly prepared with winter clothing, crampons, and even an ice axe.
- It’s incredibly dry in Death Valley, which means you’ll want to drink even more water than usual. Plan to carry at least one gallon (to consume throughout the day, not on one hike) if hiking in warm weather (and even two liters in cooler temperatures). There are very few springs in the park. Even if you do come across one, make sure to treat the water first. You can fill up water at Furnace Creek Visitor Center, Stovepipe Wells Village, Panamint Springs, and most campgrounds. Furnace Creek will be your best bet as the water there is actually cold, unlike pretty much everywhere else.
- Many trailheads require a 4WD, or at least a high clearance vehicle, to get there. In some cases regular cars can make it, but it’s not guaranteed and a big risk to take in remote places with no cell coverage. Off-road tires are not a bad idea if you have them. At the very least, bring a spare tire (or two). The 4×4 roads are not maintained and flats often occur.
- Fill up on gas outside of the park. There is gas at Furnace Creek (24 hours, unleaded and diesel), Stovepipe Wells (24 hours, unleaded only), and Panamint Springs (7:00 am-9:30 pm, unleaded only), but you will be paying $1-2 more per gallon than outside the park. If you plan on exploring remote areas, it’s a good idea to carry some extra gas.
- Many of the Death Valley hikes below don’t follow a traditional, defined trail, and instead follow the terrain (such as many of the canyons and dunes). Be sure to grab a map of the trail you plan on hiking from the Visitor Center or elsewhere before starting off.
- Some hikes involve scrambling over dry falls, boulders, or other obstacles in canyons and elsewhere. Please use good judgment and an abundance of caution when doing so. If you don’t have the right footwear (with good traction and support), have height issues, aren’t a confident climber, or you’re by yourself, it’s best to turn back or look for alternate ways around. You’re in a remote area with a harsh environment and help may not get to you in time if something goes wrong. It’s not worth the risk. There’s plenty to see and do without putting your life in danger.
- Cell coverage is very spotty in the park (best around Furnace Creek and Stovepipe Wells). It’s important to have paper maps or have online maps downloaded on your phone.
The 10 Best Hikes in Death Valley: A Detailed Guide to Hiking in Death Valley National Park
Death Valley is massive and you’ll most likely only have a few days to visit. To make the most of your time, we’ve listed below the best hikes in the park. Some of these hikes take you to or past some of the most epic and interesting views and sights in the valley. Others are just fun hiking experiences. A few are all of the above.
Given the vastness of the park, we’ve organized the hikes by region: north, south, and west, using Furnace Creek as the reference point. The hikes closest to Furnace Creek are listed first, with each subsequent hike further away in its respective direction.
North of Furnace Creek
The first two hikes, while north of Furnace Creek, are still fairly centrally located and close to Stovepipe Wells. The last two hikes are in the far northern park of the park and will take some time to get to.
Mosaic Canyon
- Length: 4 miles
- Elevation Gain: 1,200 ft.
- Trail Type: Out and Back
- Difficulty: Moderate
- Trailhead Location
- 4WD / High-Clearance Required? No. The road is usually passable for most cars, assuming no recent rains.
- Notes: Large gravel parking area, not recommended for buses and large RVs.
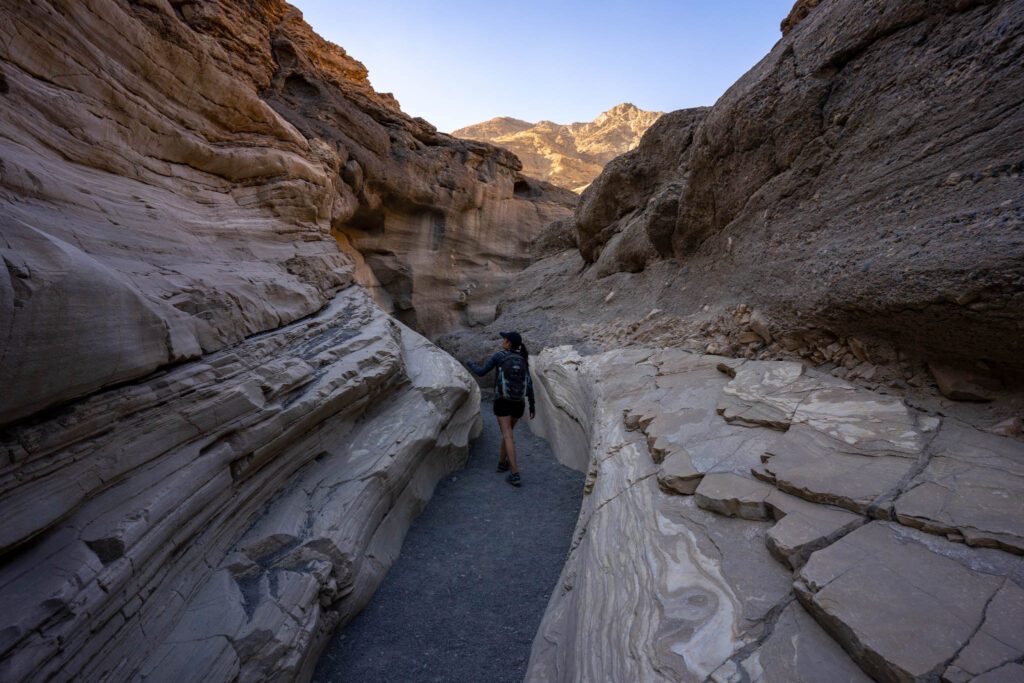
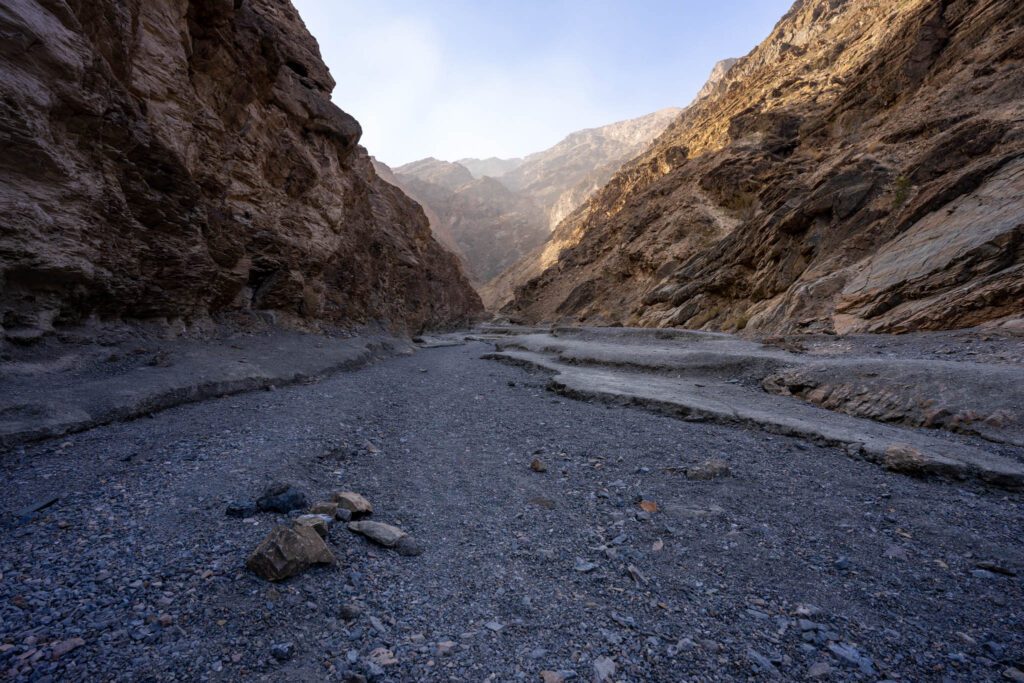
This is one of the most popular hikes in Death Valley and it’s easy to see why, though it does mean you’ll likely share the trail with others. It’s a fun hike with some scrambling, plus you get a close-up view of the canyon walls made up of its namesake mosaic breccia conglomerates along with smoothly polished marble. It’s also a fairly easy hike that makes for a good intro to hiking in Death Valley.
From across the Stovepipe Village Campground, take the unpaved Mosaic Canyon Road 2.3 miles to the parking area, then head up the rocky wash into the canyon. The canyon walls will start narrowing after a quarter mile. Notice the smooth dolomite marble walls (and be careful with your step on the slick and slippery surface!). A bit further, you’ll start seeing the breccia—colorful fragments of different types of rock that are naturally cemented together.
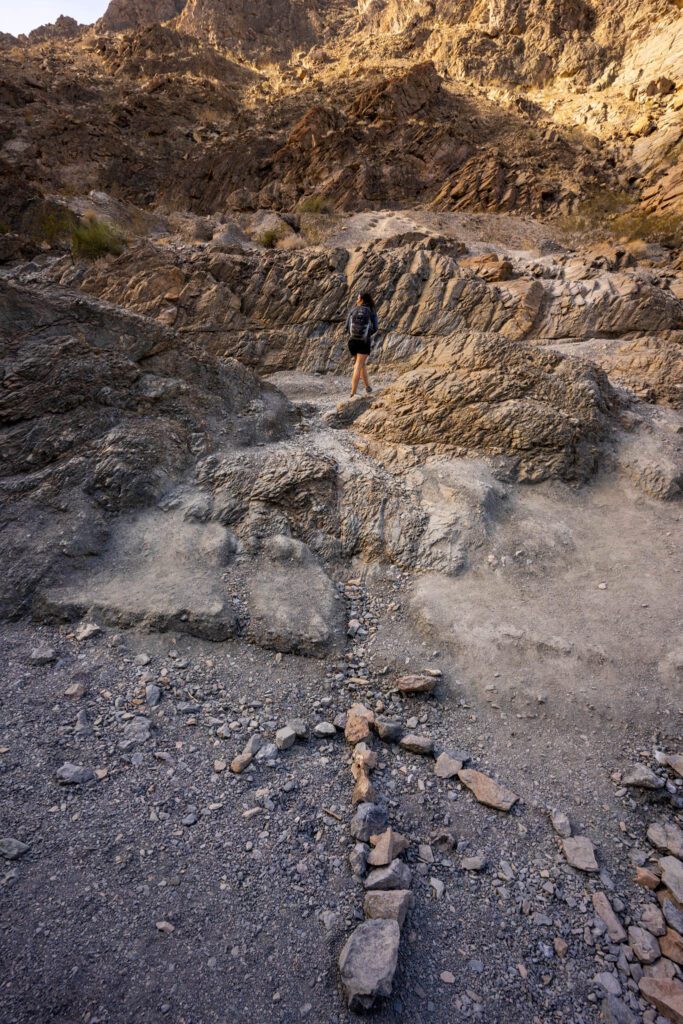
Some people turn around after just 0.5 miles, which is arguably the most interesting part of the hike with its narrow and twisty turns, but it’s worth going further. You’ll pass by several fairly small dry falls and large boulders that you can scramble over.
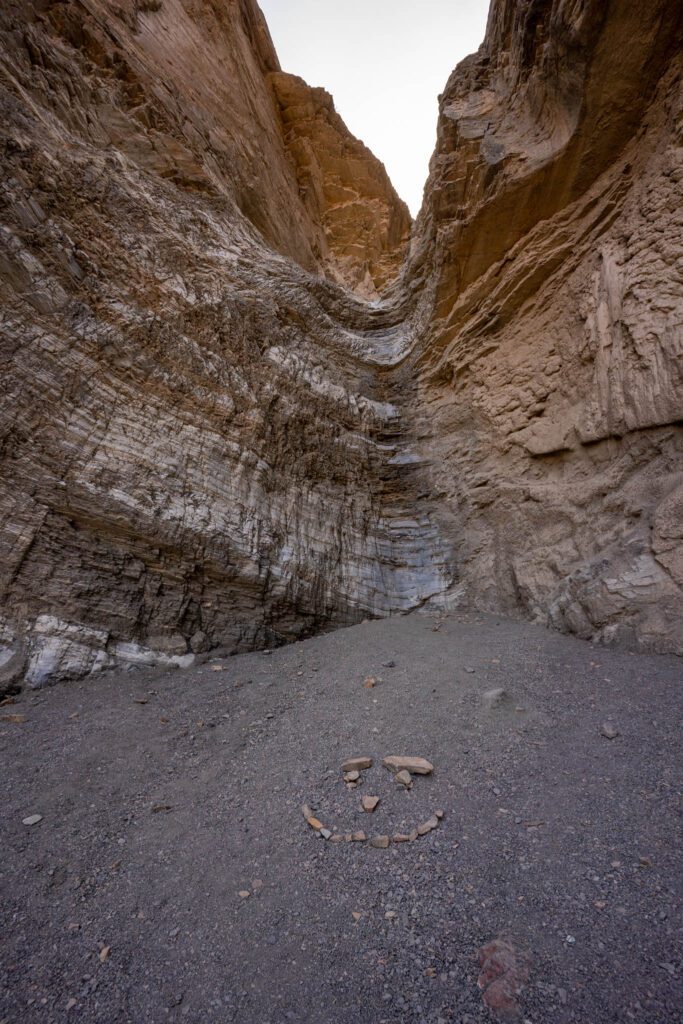
About 1.3 miles in, you’ll reach a boulder jam that you squeeze through on the east (left hand) side. You’ll enter a second set of narrows, and after another 0.2 miles, you’ll encounter a 20-foot dry fall. Don’t try to climb this one. Instead, backtrack a bit and look for a path up the western (right hand side) wall, which will take you up and over.
You’ll soon enter a third set of narrows and eventually dead end at an amphitheater and an impassable 25-foot dry fall, which is also the end of the trail.
Mesquite Flat Sand Dunes
- Length: 2 miles
- Elevation Gain: 130 ft.
- Trail Type: Out & Back
- Difficulty: Easy – Moderate
- Trailhead Location
- 4WD / High-Clearance Required? No
- Notes: Paved parking lot large enough for buses and RVs, and vault toilet at trailhead.
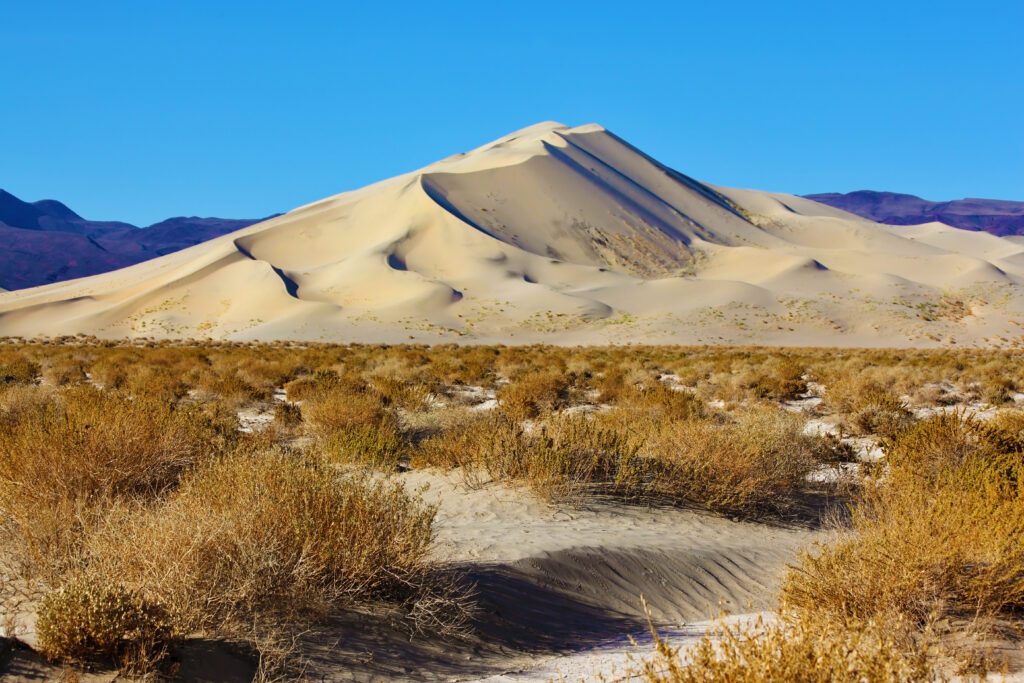
Located 2.1 miles east of Stovepipe Wells Village, the Mesquite Flat Sand Dunes are the most famous, and easily accessible, of the seven dunes in Death Valley. This otherworldly spot is a sight to behold and fun to explore.
It’s about 1 mile to the summit of the highest dune (Star Dune, at around 130 feet), which is what we’ve used as a reference for the distance of this hike, but you can certainly continue further. The entire area covers around 14 square miles. There’s also no set trail, and you can wander as you wish, over and around sand dunes of different sizes and shapes and mostly flat areas of hardened playa, mesquite brush, and creosote. Just plan on taking longer than you would on flat ground, as it can be slow going over deep sand.
Make sure you have plenty of water and sun protection and be aware that it can be disorienting navigating around sand dunes. This is also the only area where sandboarding is permitted. Bring along a sled, old snowboard, or even cardboard if you want to try it.
Sunset or sunrise are the best times for the most dramatic views (and photos!). The sun low in the sky will cast long and deep shadows and make the sand glow. Sunrise also has the benefit of unspoiled terrain and a better chance of seeing animal tracks in the sand. Full moon nights are also great.
Little Hebe Loop + Ubehebe Crater Loop
- Length: 2.8 miles (2 mile crater rim loop; 0.5 mile crater floor out-and-back; 0.3 mile Little Hebe loop or 1 mile lollipop loop from parking lot)
- Elevation Gain: 850 ft.
- Trail Type: Loop
- Difficulty: Moderate
- Trailhead Location
- 4WD / High-Clearance Required? No
- Other: Paved lot big enough for buses and large RVs. No restroom (closest is 5 miles east at the unstaffed Grapevine Ranger Station).
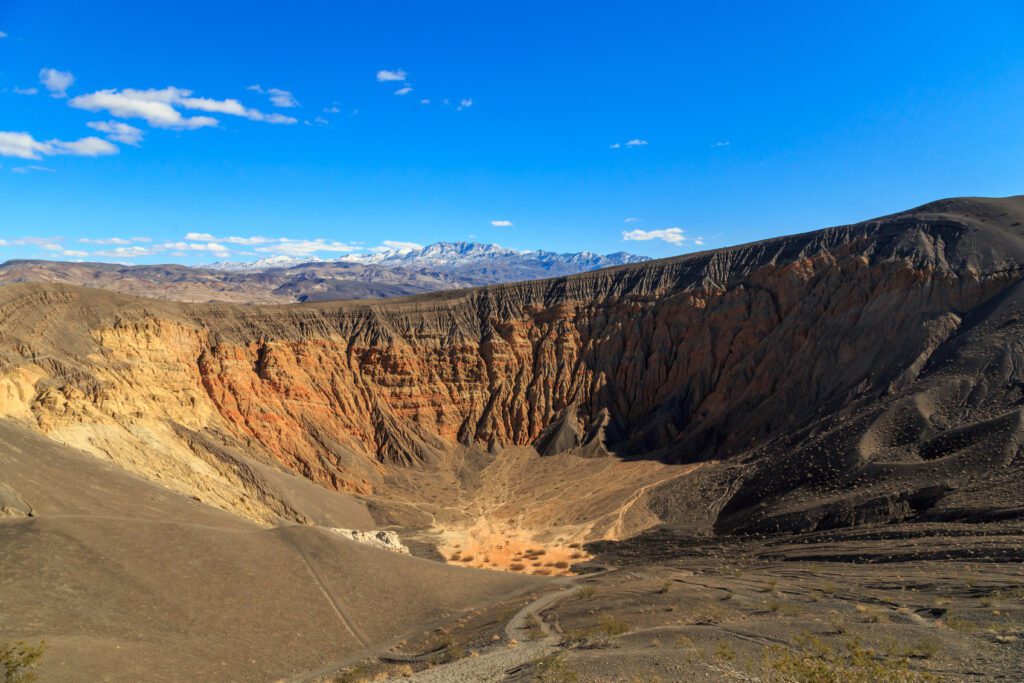
For someplace that has some truly unique geography, Ubehebe Crater still stands out. It’s a maar volcanic crater that formed as a result of a steam eruption (when rising magma came into contact with groundwater), but you might as well be standing on Mars. Spanning about half a mile across and 600 feet deep, it’s a sight to behold. There’s also a smaller crater just to the south worth checking out, all part of the chain of 13 craters in the park’s north.
You actually have three different options: hike the easy 2-mile loop around the crater rim, with a 350-foot elevation gain; a half-mile hike out-and-back to the crater floor with a 500-foot descent and strenuous climb back up; and a hike to Little Hebe, a smaller and much younger crater. If you have the time, I recommend doing all three.

From the parking lot, you can walk right to the rim of Ubehebe, with a path heading down the crater. It’s only about a quarter mile long, but you lose 500 feet that you will have to regain. At the bottom, enjoy the surreal 360-degree views. The hike back to the rim will be the toughest part of this hike and you have two options: looking up, the trail on the left is steeper but shorter, with looser rock, while the trail to the right is technically longer, less steep and easier.
Once you get to the rim, you have the option of doing the loop in either direction. The only real difference is if you want to deal with the uphill section first (counterclockwise) or last (clockwise). Whichever way you go, be careful of getting too close to the rim’s edge.
The side trail to Little Hebe can be found at around 7 o’clock if you’re looking at a clock. The trail around it is a little over a quarter mile and you’ll get great views of the sharp, gray volcanic cinder. Continue the loop around Ubehebe Crater and you will end up back in the parking lot.
Eureka Sand Dunes
- Length: 3 miles
- Elevation Gain: 700 ft.
- Trail Type: Out and Back
- Difficulty: Moderate
- Trailhead Location
- 4WD / High-Clearance Required? 4WD with high clearance required.
Located at 3,000 feet in the remote Eureka Valley in the northwest section of the park, these are the tallest sand dunes in Death Valley and California, and possibly all of North America at nearly 700 feet, despite being only 3 miles long by 1 mile wide. These dunes also offer great views of the Last Chance Mountains.
There is no set trail so you can wander as you wish, though keep an eye on the parking lot for the way back. It may be easiest to aim towards the highest dunes, though look for more gently sloped ways up. It will be tough and slow going over the steep and deep sand, so build in plenty of extra time. If you are visiting when the sand is completely dry, you might experience the unique phenomenon of singing sand – as sand avalanches off the highest dune, it makes a low humming sound not unlike that of a bass note from a pipe organ or a passing plane.
As with the Mesquite Sand Dunes, the best time to visit is near sunrise or sunset. There is a dry camp at the base of the dunes if you want to spend the night after a late start, or want to get an early start in the morning. Sand boarding is not permitted here. Nor is off-roading. Please also be careful of delicate local plants and animals, some of which (five beetles and three plants) can only be found here.
South of Furnace Creek
These four hikes can be all found off of Badwater Road, south of Furnace Creek.
Golden Canyon / Gower Gulch / Badlands Loop
- Length: 4.3 – 7.8 miles
- Elevation Gain: 750 ft.
- Trail Type: Loop
- Difficulty: Moderate
- Trailhead Location
- 4WD / High-Clearance Required? No
- Notes: The parking lot is popular and fills up early.
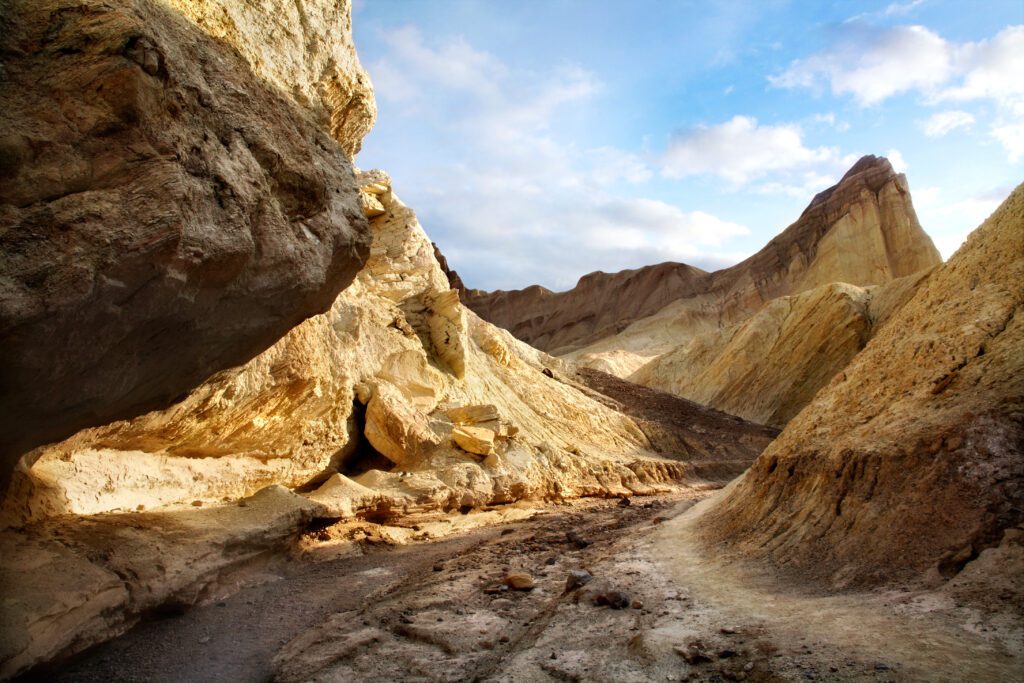
This is another popular hike, which passes by some truly spectacular terrain of golden canyons and badlands, and some of the most distinctive landmarks in Death Valley.
There are several different variations of this hike:
- Badlands Loop, 2.7 miles
- Golden Canyon to Red Cathedral, 3 miles
- Golden Canyon and Gower Gulch, 4.3 miles
- The complete circuit (Golden Canyon, Red Cathedral, Badlands Loop to Zabriskie Point, Gower Gulch), 7.8 miles
I recommend doing the entire thing if you have the time. It should take you four to five hours. You can start at either Zabriskie Point or Golden Canyon. The route description below starts and ends at Golden Canyon.
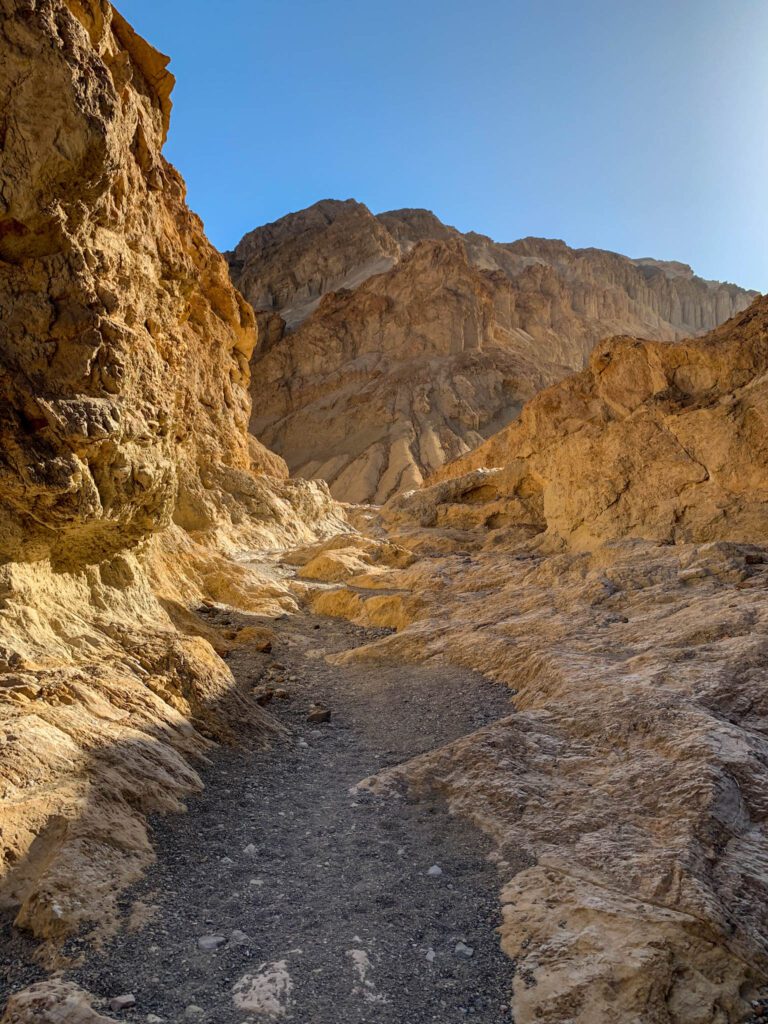
You’ll find the Golden Canyon Trailhead just off Badwater Road. A short and dark section of narrows opens up after 0.25 miles and you see why it’s called Golden Canyon, with gold-colored walls and surreal badlands. There are several side canyons off the main trail worth exploring. At about 0.75 miles, bear right and stay on the main wash when the road forks.
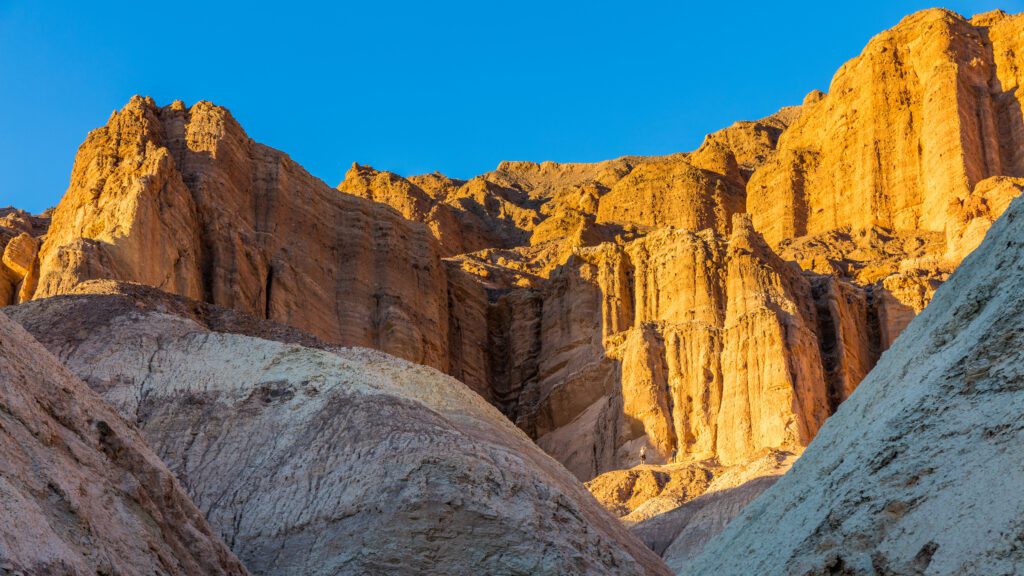
At 1 mile, you’ll hit a signed junction. I recommend taking the left fork and doing the 1 mile out-and-back side spur to see the Red Cathedral, with its soaring red-stained walls, fluted pillars, and deep grooves.
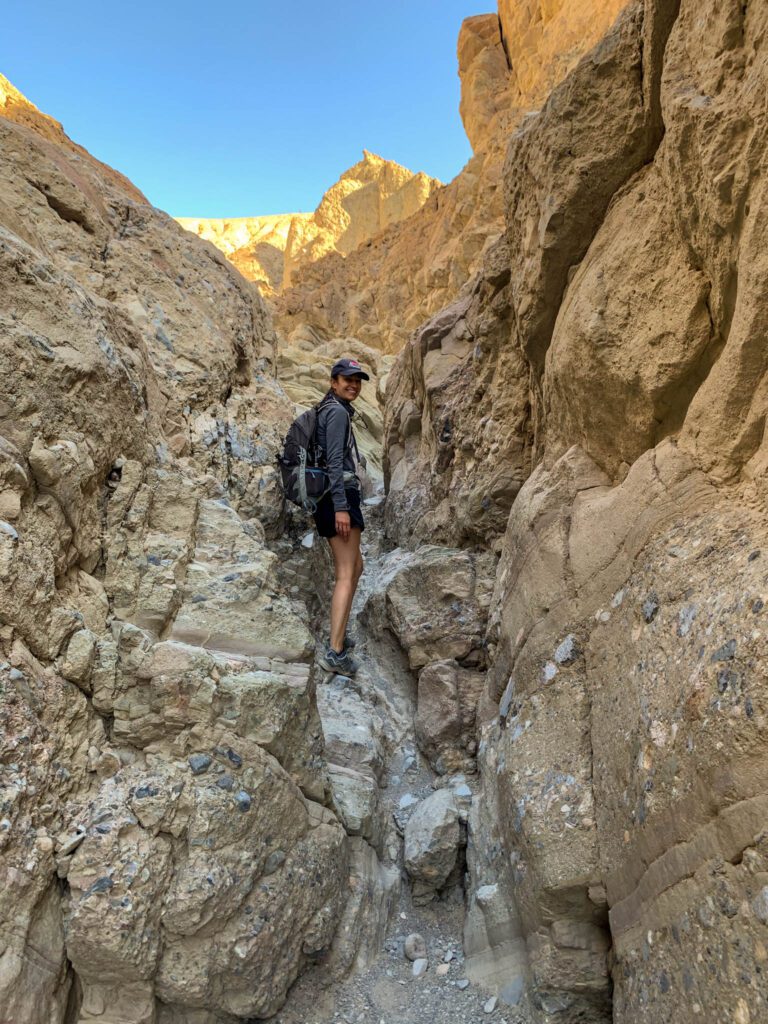
Take a left at the next fork (1.2 miles) and a right at the one after that (1.4 miles). You’ll enter a narrow slot canyon, pass by the remnants of an old rusty ladder, and do a bit of scrambling, then end up with the Red Cathedral right in front of you. If you’re here near sunset, it really lives up to its name!
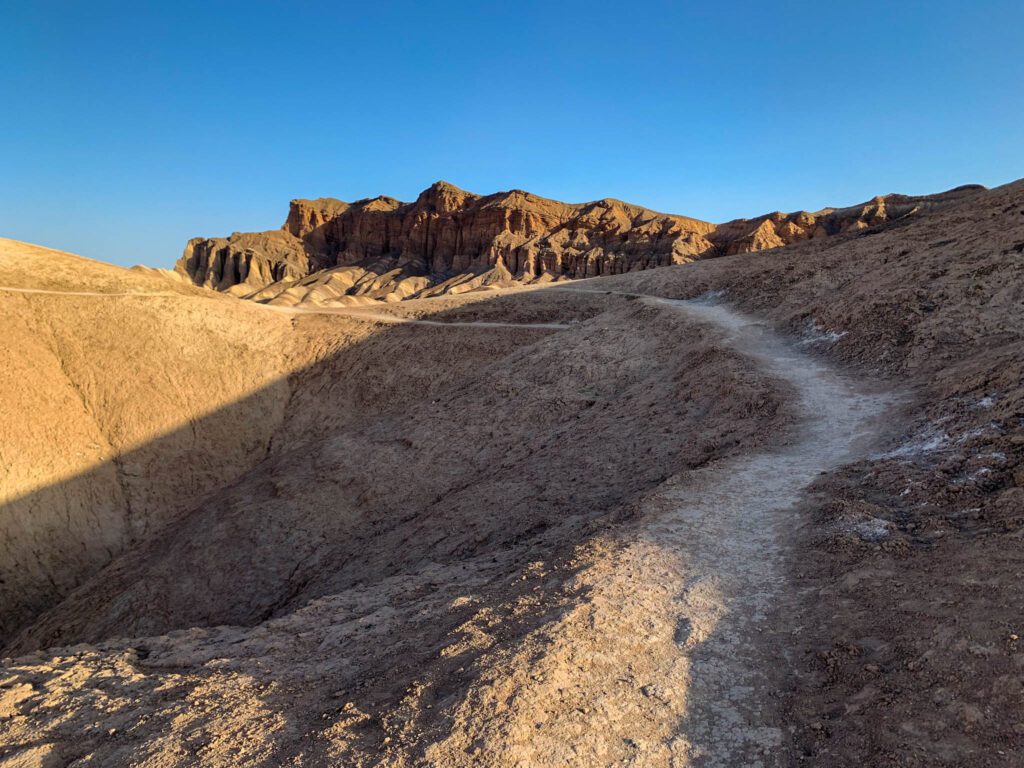
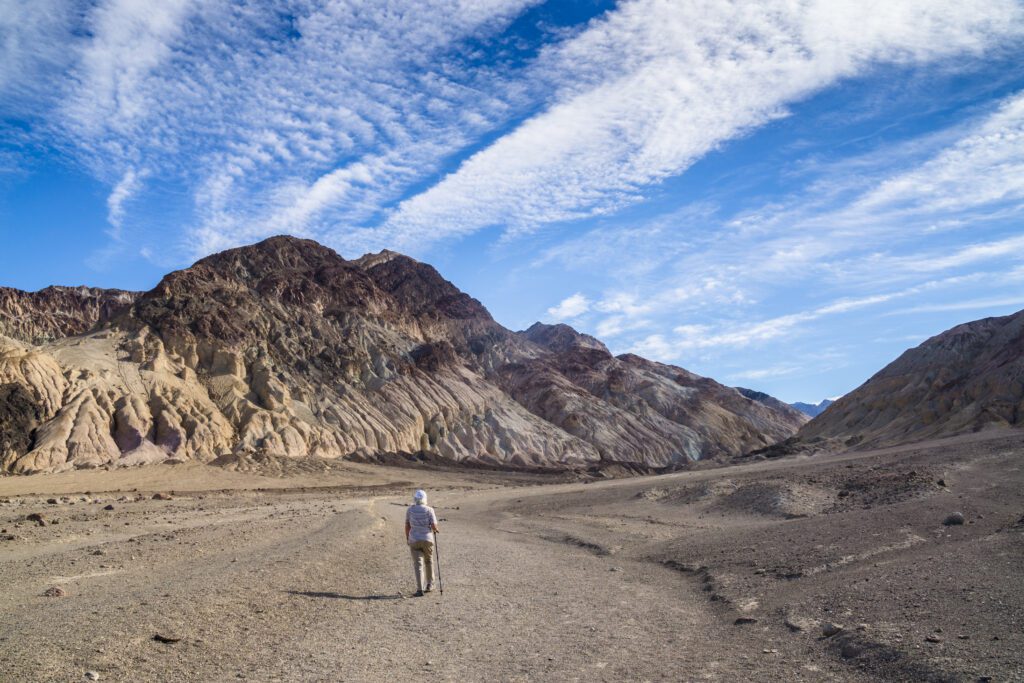
Head back to the Red Cathedral Junction and continue on Golden Canyon Trail, which starts climbing for the next quarter mile up to the badlands. You’ll get a good view of Manly Beacon, the prominent feature seen in so many photos. It’s named after William Manly, a pioneer and prospector who passed through the park in an 1849 expedition credited with naming the park Death Valley.
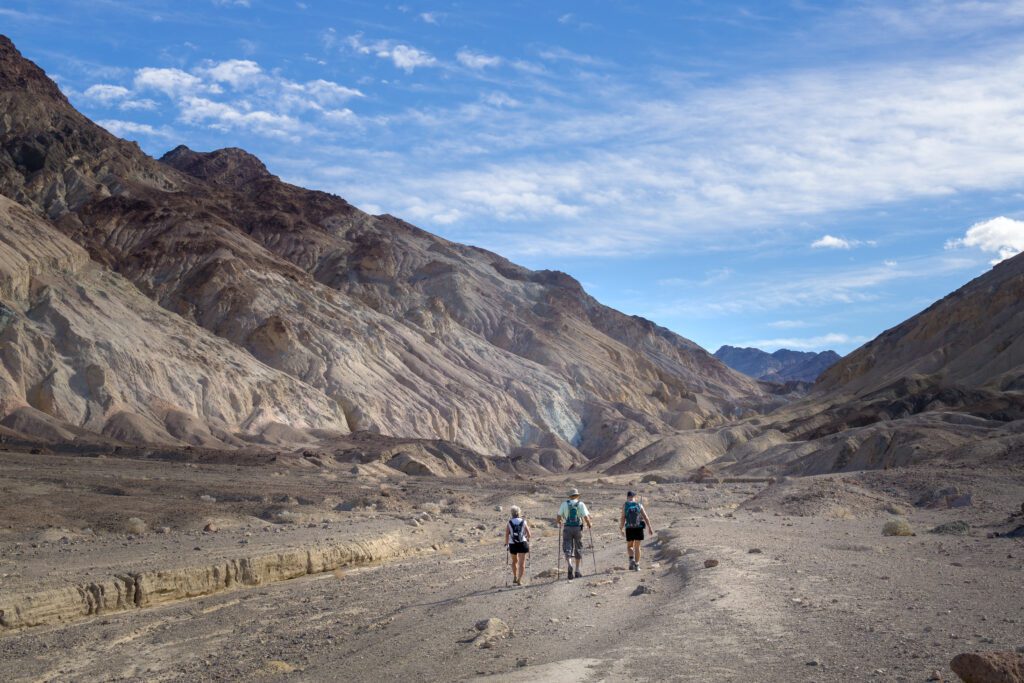
Don’t forget to look back the way you came, at the badlands and Golden Canyon, with the Panamint Range in the background. You’ll go up and down several ridgelines until you reach the Badlands Junction at 2.75 miles. Those completing the circuit should take a left on the Badlands Loop Trail while those doing the Gower Gulch Loop should continue straight.
It’s about 0.6 miles of scenic views on the Badlands Loop before you hit Zabriskie Junction. Those heading to Zabriskie Point should take a left and head towards the parking lot, and then the short paved road to the viewpoint.
From Zabriskie Junction, enter the broad wash of Gower Gulch and continue downhill for nearly a mile until you hit Gower Gulch Junction. Keep straight at the fork. After half a mile, the badlands will be replaced by tall and colorful walls. Afterwards, Gower Gulch narrows to a spiral slot canyon and the wash will end at a 25-foot dryfall.
Leaving the wash behind, you’ll start heading north, going up and down drainages and low ridges until you end up back at the Golden Canyon Trailhead.
Desolation Canyon
- Length: 3.6 miles
- Elevation Gain: 600 ft.
- Trail Type: Out and Back
- Difficulty: Moderate
- Trailhead Location
- 4WD / High-Clearance Required? No. Although unpaved, most cars should be fine.
- Other: Open gravel parking area can fit buses and RVs, but there is no restroom (closest is 1.7 miles north at Golden Canyon).
Located between Golden Canyon and Artists Drive at the northern end of the Black Mountains, this is a fun hike with some scrambling, unique colorful canyon walls, and a great viewpoint at the end. As a bonus, it’s less crowded than Golden Canyon. There’s limited shade at the start and end, so it’s best to do this hike earlier in the day.
Star Wars fans may recognize the canyon from the scenes with the Tusken Raiders and their bantha.
You can find the short and unpaved Desolation Canyon Road 3.7 miles south of CA-190 on Badwater Road. Take the canyon drainage to the east, toward the Black Mountains. After you round the corner, follow the mountains on the left to enter the canyon. Soon, you’ll see colorful canyon walls rising up around you as you gradually go uphill. Much like Artists Drive next door, the colorful walls in shades of pink, purple, yellow, green, and blue are the result of oxidation of various metals and minerals in the rock.
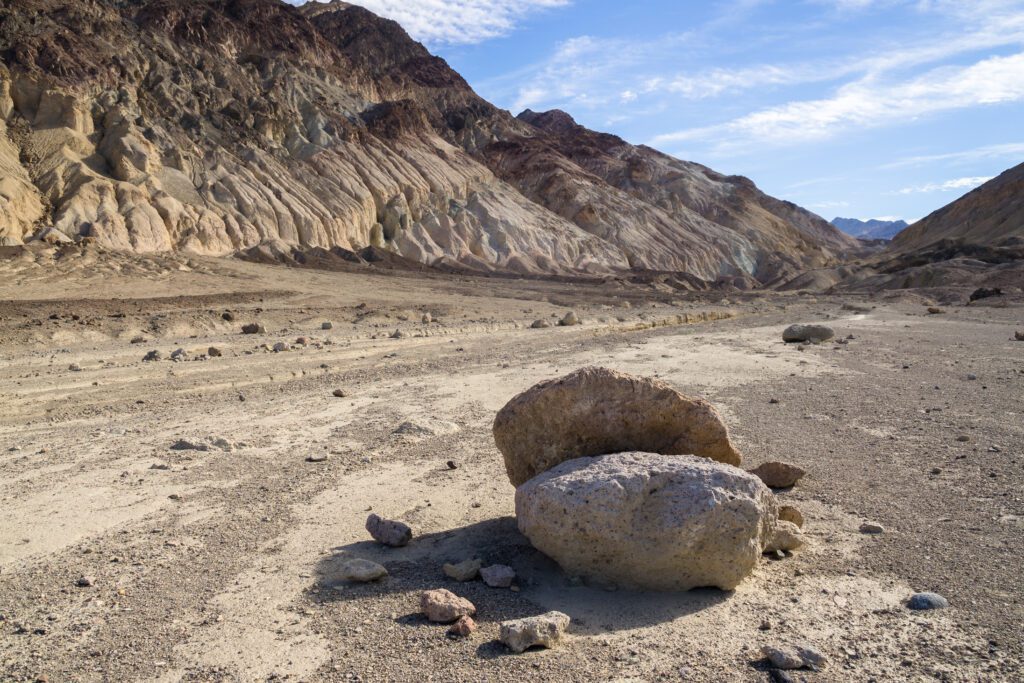
There are several small dry falls to scramble over and side canyons to explore. Always take the right fork if you want to stay in the main canyon. At the end, head up a somewhat steep sandy slope to a ridgeline 600 feet up. Enjoy the panoramic view of Death Valley, including the canyon itself, Artists Drive (which you’re right above), the salt flats, and the Panamint Range in the distance, before heading back the way you came.
Natural Bridge

- Length: 1 mile
- Elevation Gain: 86 ft.
- Trail Type: Out and Back
- Difficulty: Easy
- Trailhead Location
- 4WD / High-Clearance Required? No. Unpaved road is usually good for most vehicles.
- Other: Open and spacious parking area with vault toilet.
This is a quick and easy hike to a large natural bridge (the largest in the park). If you’ve seen the natural bridges in Arches National Park then you may want to skip this as it’s nowhere near as impressive. This one is great for families with kids.
Find Natural Bridge Road 13.5 miles south of CA-190 along Badwater Road. From the parking lot, walk gently uphill along the fairly wide canyon with soaring, vertical walls. Around a half a mile in, the canyon walls start narrowing, and you’ll get to the large natural bridge spanning the canyon, around 35 feet overhead.
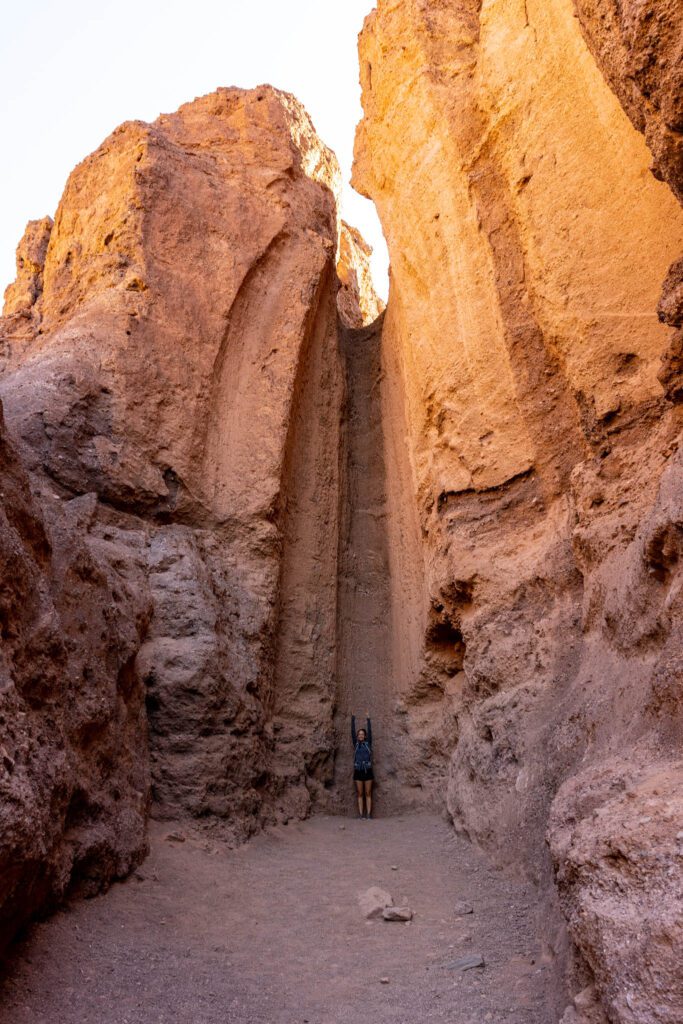
Most people turn around and head back at this point, but it’s worth continuing on just a bit further. You’ll pass by several dry falls until you dead-end at a 30-foot dry fall that you can’t get past.
Sidewinder Canyon
- Length: 5 miles
- Elevation Gain: 1,580 ft.
- Trail Type: Out and Back
- Difficulty: Moderate
- Trailhead Location
- 4WD / High-Clearance Required? No
- Other: Open gravel parking area large enough for buses and RVs, but no restroom. Bring a headlamp.
If you like adventurous hikes, squeezing through tight spaces, and climbing over ledges, then you’ll love Sidewinder Canyon. Don’t attempt this hike if you’re claustrophobic! Some spaces are less than two feet wide. There are several cool slot canyons and side canyons to explore.
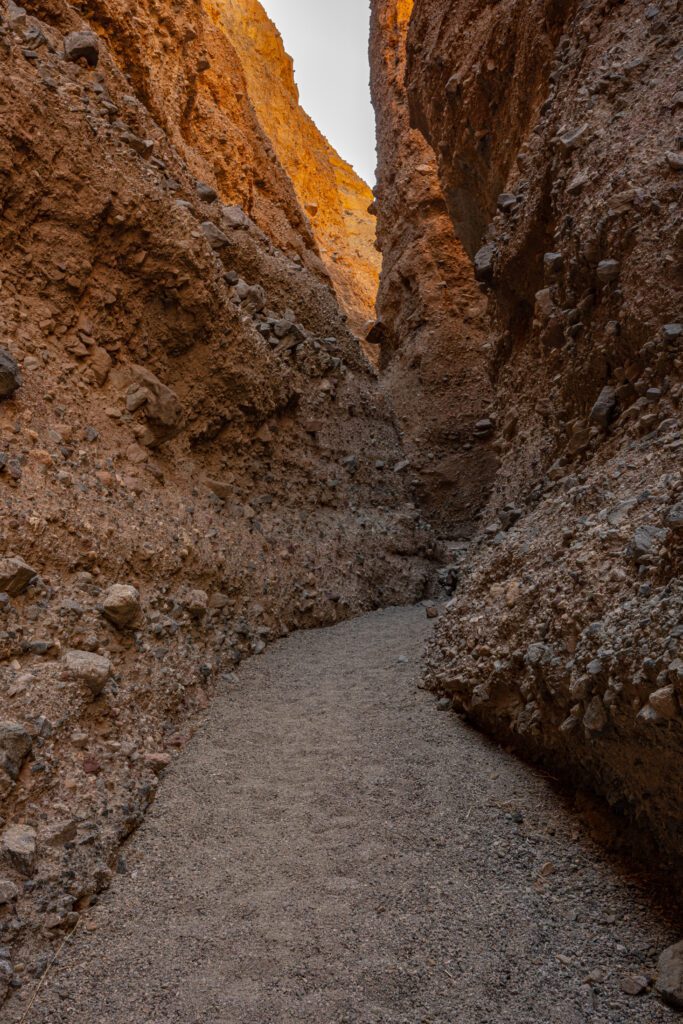
Head 31.5 miles south from CA-190 on Badwater Road and turn down the unmarked gravel access road between mile markers 31 and 32. The access road is less than 0.5 miles long. From the parking area, head south and start climbing up a gravelly alluvial fan towards the large canyon about 1,500 feet away.
From the mouth of the canyon, it’s about 0.6 miles to the first slot canyon. All three will be on the south side of the canyon, or your right side as you’re heading in. There are actually two side canyons on both sides before you get to the first slot canyon, which are worth exploring, perhaps on your way back. Sidewinder Canyon itself stretches for 2 miles.
At 0.6 miles, you will come across a side canyon, with the option to go right or left. Head left where there’s a large pile of boulders, which is actually the start of the first slot canyon. There’s a small crack on the lower left you can crawl into, before climbing up and over an as yet unseen boulder. You’ll then squeeze through a space just 1.5-feet wide. This slot canyon only extends for a short distance (about 0.1 mile) but it gets so dark that you will want a headlamp.
The second slot canyon is only 0.1 miles further, with the entrance right at the canyon wall. There are numerous rock falls and vertical ledges to scramble and climb over. You’ll be rewarded with a natural bridge about 0.3 miles in. You can continue on if you can navigate past several 7- to 8-foot dry falls. You’ll be rewarded with views of hoodoos above the canyons and a path that continues to the top of a ridge and views of Death Valley. Just remember that you have to make your way back to the main canyon.
From the main canyon, it’s another quarter mile to the third slot canyon. There are two natural bridges early on. Afterwards, you need to crawl under and over several obstacles before reaching a large chokestone blocking the way. You used to be able to crawl through a space near the bottom but that has since been filled up. You can try a risky climb up and over the side, but most people turn around at this point.
There’s still more of Sidewinder Canyon to explore, along with a few more side canyons. If you still have time and energy when you get back to the parking lot, you can try tackling the 2-mile long Willow Canyon to the north.
Western Part of Death Valley
These two hikes are located in the far western part of the park.
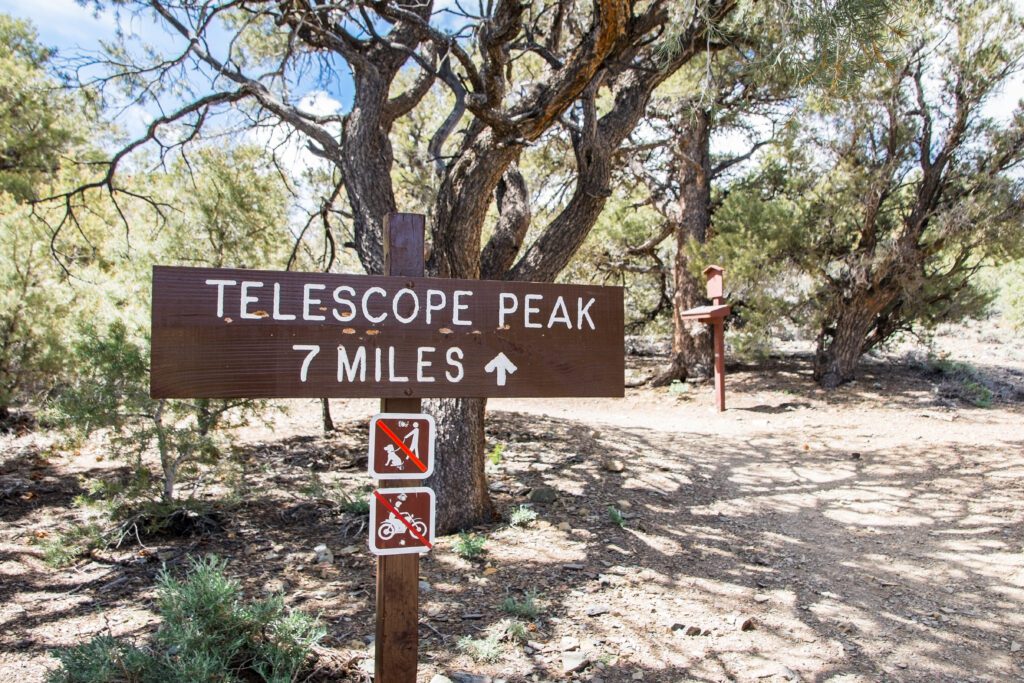
Telescope Peak
- Length: 14 miles
- Elevation Gain: 3,000 ft.
- Trail Type: Out and Back
- Difficulty: Hard
- Trailhead Location
- 4WD / High-Clearance Required? Yes, to reach the trailhead at Mahogany Flat Campground at 8,200 feet, you’ll want a high clearance 4WD for the last 1.5 miles. Otherwise, park at Charcoal Kilns, which adds 1.5 miles to the hike.
- Other: Open gravel parking area with 25 feet vehicle limit and vault toilet. Check the weather conditions (if snow and ice are still on route) before attempting. If you have the time, spend the night at Mahogany Flat before attempting the hike to acclimatize.
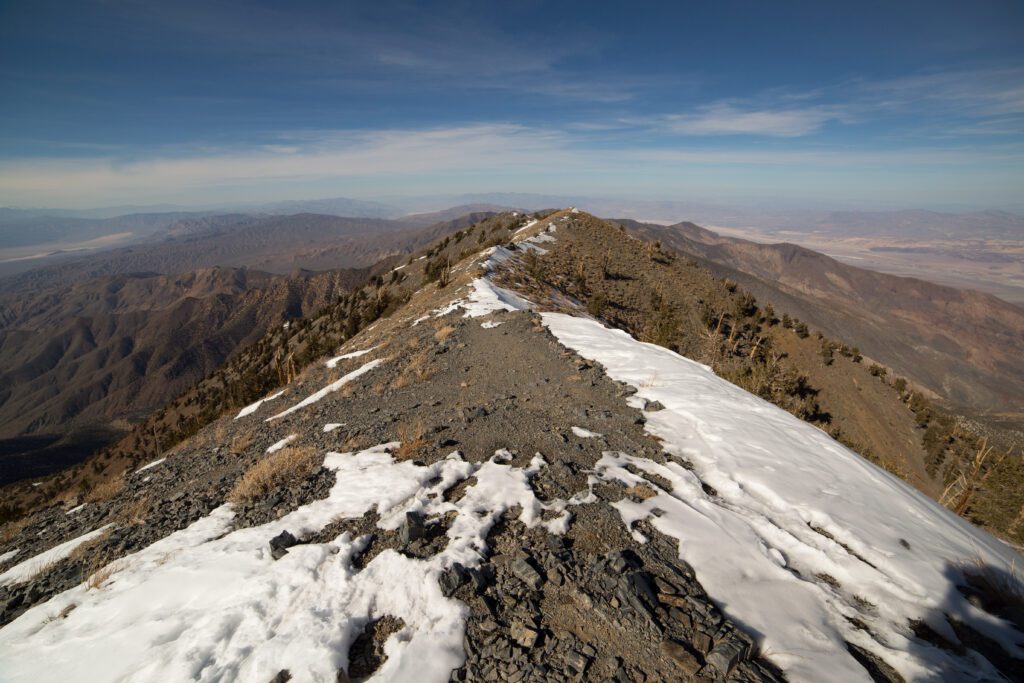
At 11,049, Telescope Peak is the highest point in Death Valley. This classic hike offers incredible views along the way and at the summit. Given its elevation, it’s covered in snow for a good portion of the year. June through October are the best times to attempt this hike. Otherwise, bring snow gear (and the knowledge of how to use it).
The trail starts heading steadily up as it climbs the eastern slope of the Panamint Mountains. For the first mile or so, you’ll be in a forested area of pinyon pine, juniper, and mountain mahogany. The view then opens up to panoramic vistas of Death Valley below. The trail continues to climb steadily below Rogers Peak before leveling out at Arcane Meadows at 2.4 miles. If you plan to overnight, this is a good spot to camp. Enjoy views of both Death Valley and Panamint Valley. The next 1.5 miles is largely along a gently rising and narrow ridgeline.
The next 3 miles will be a series of steep switchbacks as you climb 1,000 feet. Take some time to catch your breath and admire the gnarled ancient bristlecone pines along the way—they are among the oldest living creatures on earth, some more than 5,000 years old! The final push to the summit is along a narrow ledge for the last 0.2 miles. You’ve definitely earned your views, so take some time to enjoy the 360-degree views, including Badwater Basin and Mount Charleston to the east and the Sierra Nevada mountains and Mount Whitney (the highest point in the continental US at 14,505 feet) to the west.
Telescope Peak is said to be named for the great distances visible from its summit, because “you could see no further with a telescope.” Well, someone has apparently left a full sized telescope at the summit to perhaps challenge that, and give extra meaning to the name.
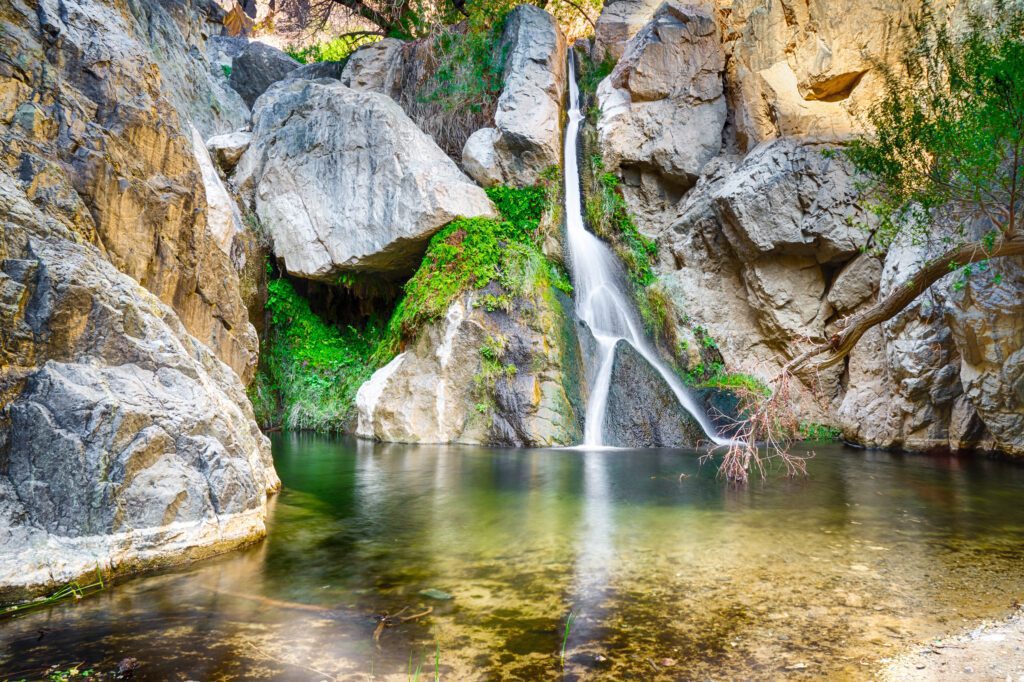
Darwin Falls
- Length: 2 miles
- Elevation Gain: 450 ft.
- Trail Type: Out & Back
- Difficulty: Easy
- Trailhead Location
- 4WD / High-Clearance Required? A high clearance vehicle is recommended but a regular car should be fine.
- Other: Small parking area. No restroom.
A lush oasis with a year-round waterfall in the driest place in the US? You might end up checking your eyes to see if it’s all a mirage. Spoiler: it’s not, and it makes for a unique hike in an otherwise arid landscape.
The falls are located just west of the Panamint Springs Resort, which actually draws its water from the perennial spring that also feeds the waterfall. From Panamint Springs Resort, take CA-190 1.2 miles west, then follow the unpaved Darwin Falls Road for 2.5 miles to the trailhead.
The trail is unmarked but it’s a popular and well-worn one so you shouldn’t have any problems following along. Head past the gate into an open wash which transitions to a canyon and then narrows, with increasingly lush and dense vegetation that includes willows and cattails. The route is largely flat and easy, with a good amount of shade, but rocky at parts, with a few shallow creek crossings and some boulders to scramble over. At the end, you’re rewarded with views of the 20-foot cascade split by a rock just above a shallow pool. Swimming is prohibited here, both to protect the fragile ecosystem and the water source.
It’s also possible to extend the hike and see several more waterfalls. Start by climbing the east canyon walls downstream of the waterfall. If you go all the way to China Garden Spring, plan on an additional 3 miles out and back and 500 feet of elevation gain, with scrambling and one section that requires a technical (though easy) rock climbing move.
Camping in Death Valley
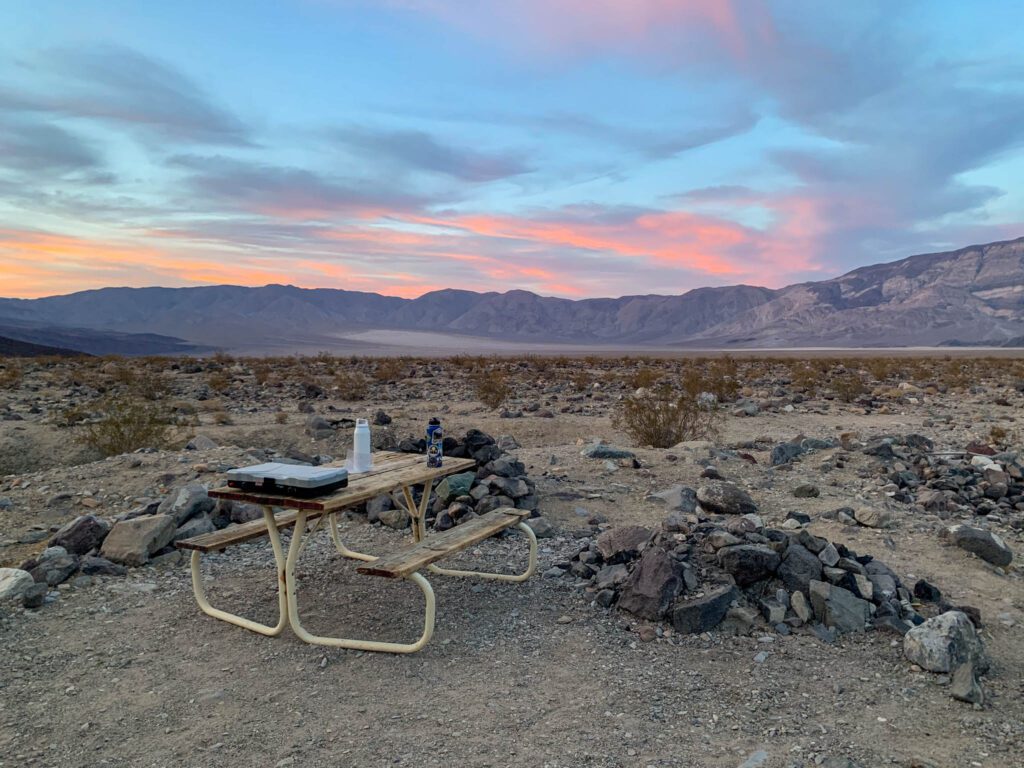
The park offers nine established campgrounds, and it’s free to camp at four of them (Emigrant, Wildrose, Thorndike, Mahogany Flat). With the exception of Furnace Creek (which takes reservations between mid October and mid April), all campgrounds are first-come, first-served. Reservations for Furnace Creek must be made at least two days and up to six months in advance.
Over the summer months when temperatures soar, Furnace Creek is the only below/sea level campground open. Several higher elevation campgrounds offer good alternatives: Mesquite Spring (1,800 feet), Emigrant (2,100 feet), Wildrose (4,100 feet), Thorndike (7,400 feet), and Mahogany Flat (8,200 feet).
Furnace Creek – Located near the Furnace Creek Visitor Center, this is easily the most popular campground in the park. There are 136 campsites, offering picnic tables, fire rings or grills, drinking water, and flush toilets. This is the only campground with RV hookup sites (with 18 sites). The rest are drive-in or walk-in tent-only sites. This is also the only campground that can be reserved, from October 15 to April 15. Make reservations well in advance.
Stovepipe Wells – Located around 30 minutes from Furnace Creek, near the Stovepipe Wells general store, ranger station, and a private RV park, this first-come, first-served campground offers 190 sites, including 28 tent-only sites, drinking water, some picnic tables and fire rings, and flush toilets. The campground is only open from late fall through the spring and offers expansive views of Death Valley and the Mesquite Sand Dunes. Pro tip: For a fee, you can access the swimming pool and showers at Stovepipe Wells Village Resort next door.
Texas Springs – Located in the hills above Furnace Creek, this first-come, first-served campground offers 92 sites, including 26 tent-only sites, drinking water, picnic tables, fire pits, and flush toilets. The campground is only open from late fall through the spring, but has great views of the surrounding areas.
Mesquite Spring – Located at 1,800 feet, just below Grapevine Canyon, this year-round campground is ideal for exploring the northern end of the park. There are 30 sites available, and includes drinking water, picnic tables, fire pits, and flush toilets.
Backcountry camping is permitted along dirt roads at least one mile away from any paved or day-use only dirt road, in previously disturbed areas. Park your vehicle right next to the roadway to minimize impact. Campfires are not permitted, though camp stoves and propane grills are allowed.
There are also three private campgrounds within the park: Panamint Springs Resort (which offers 22 tent sites, 6 full hookup sites 26 dry sites, and tent cabins with cots, fire pits, picnic tables, and showers), Stovepipe Wells Village RV Park (with 14 full hookup sites, which includes access to the pool and WiFi access in the hotel lobby), and Fiddlers Campground (adjacent to the Ranch at Death Valley, and offering sites with no hookups, communal picnic areas and fire pits, and access to the resort’s spring-fed swimming pool, WiFi, and laundry).
Plan an Unforgettable California Adventure
Heading to California? We’ve got all sorts of super detailed, in-depth California travel guides written by locals to help you plan an amazing trip.
- San Francisco: We’ve got a guide to spending 3 days in SF, one day in San Francisco for planning a shorter trip, and a complete guide to finding the perfect place to stay in San Francisco. We also have guides to 14 perfect weekend getaways from San Francisco and the best day trips in the Bay Area. Oh, we almost forgot, here are the 15 best hikes near San Francisco, written by two Bay Area locals.
- Los Angeles: Read our perfect 2 Day L.A. itinerary, our guide to spending one amazing day in L.A. (with two versions!), and a guide to helping you figure out where to stay.
- San Diego: Learn how to spend a day in San Diego, a weekend in San Diego, and where you should stay.
- Lake Tahoe: Plan the perfect summertime adventure with our 3 day Tahoe itinerary, guide to the best hikes, and our guide to the best things to do in Tahoe.
- Santa Barbara: We have a guide to planning a weekend in Santa Barbara, and a guide to a day trip to Santa Barbara from Los Angeles if you’re pressed for time.
- Mammoth Lakes: To plan a perfect getaway in the Eastern Sierra, read our guide to the best things to do in Mammoth Lakes in the summer. Plus, our guide to the best hikes in Mammoth, featuring the epic climb to the top of Duck Pass.
- Big Sur: Plan the perfect weekend away with our complete Big Sur itinerary.
- Yosemite National Park: Plan an amazing trip with our guide to planning an amazing Yosemite itinerary, and our guide to choosing where to stay at Yosemite.
- Joshua Tree National Park: Plan the perfect trip with our perfect weekend itinerary (or a day trip, if you have less time), a guide to the best hikes, and some cool places to stay in Joshua Tree.
- Death Valley National Park: We have a SUPER detailed guide to planning the perfect Death Valley itinerary, and a guide to the best hikes in Death Valley National Park.
- California Road Trips: See the best of the Pacific Coast Highway on our San Francisco to San Diego road trip, or make the trip up Highway from on a Los Angeles to SanFrancisco road trip. If you’re more into mountains than beaches, a Highway 395 road trip from Los Angeles to Lake Tahoe might be more your speed.