12 Amazing Easy Hikes in Washington: A Complete Guide
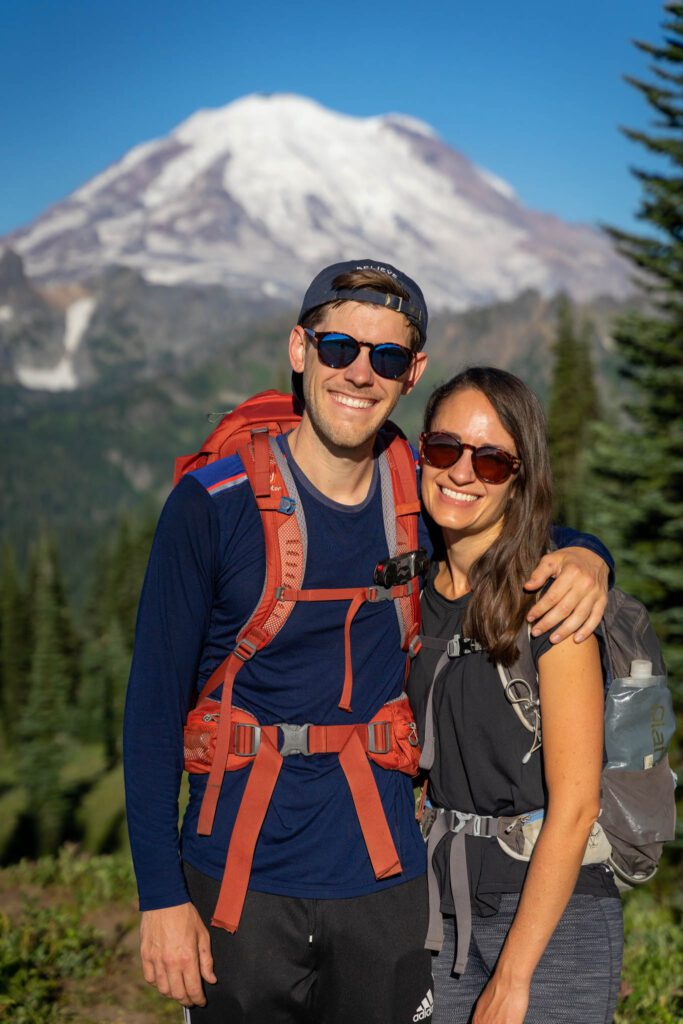
Despite growing up in Washington State in the Seattle area, I (Matt here!) had never spent much time exploring the hiking trails in my home state until the past several years when Alysha completed her goal of turning me into “Mountain Matt”. If you had asked me a few years ago, I never would have said that I would be into hiking .
But here we are. After spending the bulk of the past two years on the road in the western United States, we’ve visited 18 national parks, 10+ states, countless state parks and national monuments, and we still think that Washington State is one of the best hiking destinations in the entire country (for more, read our guide to the best hikes in Washington State).
However, we also totally recognize that not everyone is up for a brutal 12+ mile climb to the top of a mountain. Because, well, that was Matt about five years ago.
While Washington has plenty of those strenuous climbs, it also has a nice array of beginner hikes to choose from that will take you to crystal clear alpine lakes, spectacular mountain views, and towering waterfalls.
In this guide, we’re going to cover our favorite easy hikes in Washington (we’ll also cover what we mean by an easy hike), along with some of the other things you should know before you hit the trail.
Disclaimer: Some of the links in this post, like hotel links, are affiliate links, meaning at no additional cost to you, we make a little bit of money if you click through and book. That being said, we would never recommend something to you that we don’t stand behind 100%.
What to Know Before Hitting the Trail in Washington
Before we get into the specific hikes, let’s talk about things that you should know before you hit the trail for your first hike. Specifically for trails in Washington, which have some unique quirks that are good to know before you get out there.
Prepare to Be Wet
Either because it’s raining or misting, or because you’re going to need to walk through a puddle or seven to get to your destination.
You’ll want to bring a waterproof rain jacket on every single hike you do, especially if it’s not in July or August. You’ll also want to have a pair of waterproof hiking boots for the inevitable puddles you’ll find on the trail.
- Recommended rain jacket: Matt has the Columbia Watertight Jacket (women’s version is here), and it’s an excellent entry-level waterproof jacket at a solid value.
- Recommended hiking boots: Alysha has a pair of Columbia Newton Ridge waterproof boots that she likes, and they’ll cost you less than $100 (which is relatively affordable for waterproof boots).
Be Prepared
Even though the hikes here aren’t the hardest in Washington, you’ll still want to carry enough water and snacks to get you through the hike.
Plan on at least 1 liter of water per person (we love our collapsible Platypus water bottles, which are perfect for hiking!) and a snack or two to keep your energy levels high from start to finish.
Waterfalls are Best in the Spring
There are a ton of amazing waterfalls in Washington State.
The best time to see said waterfalls is in the winter and spring, when the rain makes them surge with a little bit of extra “oomph.” Not all of the waterfalls below are accessible year round, but most are.
Hiking in the Cascades
Hiking in the mountains is strictly a summer / early fall endeavor.
If you want to hike in the mountains – like Mount Rainier, the North Cascades, or Mount Baker – you’re going to need to plan on doing it between July and early October. Otherwise, roads close, trails are snow-covered and icy, and it’s generally a lot less accessible, particularly for beginners.
In the winter, look at hikes closer to the coast for your trips out into nature.
High Clearance Vehicles are Useful to Get to Trailheads
Some of the forest roads used to access these hikes are potholed and bumpy.
We’re particularly sensitive to this because we (used to – RIP) drive “Homer,” our Honda Odyssey – a minivan – to most hikes, and he doesn’t care for the potholes.
We’ll do our best to note where you’ll need a high-clearance, 4WD vehicle to even get to the trailhead (there aren’t that many of them).
Have Access to a Map, Just in Case
A trail map is useful, especially if it has GPS so you can track your location. This is helpful for navigating trail junctions with limited signage.
We subscribe to Alltrails Pro, which allows you to save and download trail maps so you can track your progress. Some people prefer paper maps, but we like the fact that you can see exactly where you are.
With those tips out of the way, let’s talk about our favorite easy hikes in Washington.
12 Great Easy Hikes in Washington State
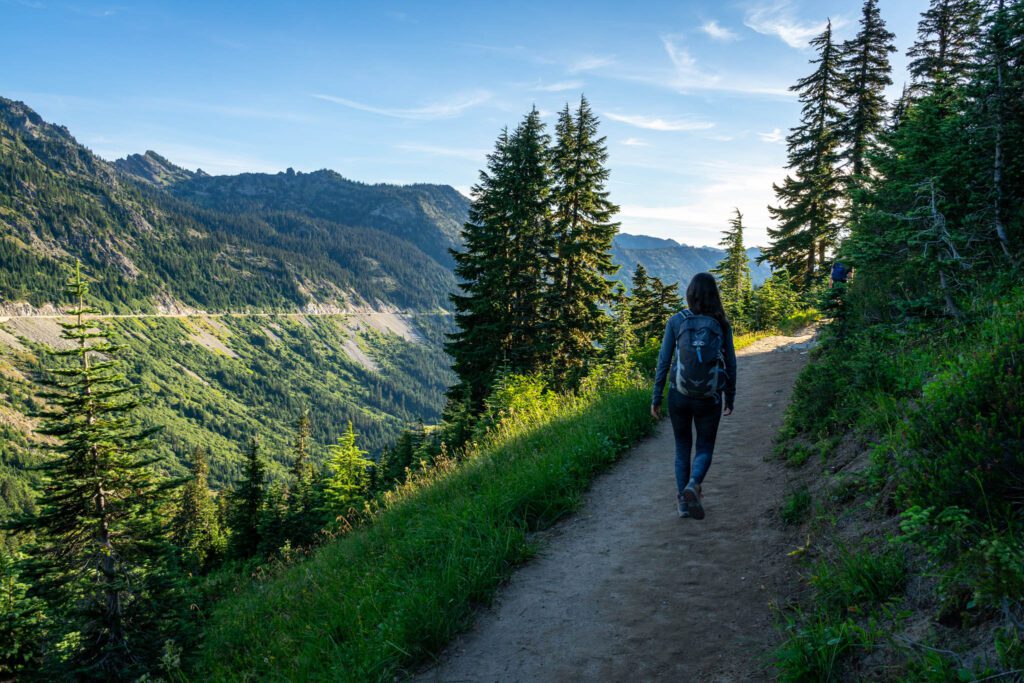
While Washington State is full of epic hikes that climb 3,000 feet straight up the side of a mountain, we totally recognize that not everyone is up for that much of a trek.
Sometimes, it’s nice to just get out into nature and do a quick half day trip!
We hope this list of our favorite beginner hikes in Washington helps you find a hike that fits your fitness and experience level, whether you’re new to this whole hiking thing, or you’re a seasoned trail veteran looking for a quick and easy trail.
What, exactly, is an easy hike, you ask?
For the purposes of this guide, we’re saying that an easy hike is less than 5 miles, and less than 1,000 feet of elevation gain.
These hikes are scattered all over the state, but we’ve included a link to the trailhead location on Google Maps and an interactive map at the bottom. Take a look to find all of the trailheads for these hikes and select the perfect hike for your next adventure.
Now, let’s get into the hikes themselves. We’ve organized them in order of our preference – meaning our favorites are at the top – but every hike on this list is worthwhile. And, it really depends on what you’re looking for and what part of the state you’re in.
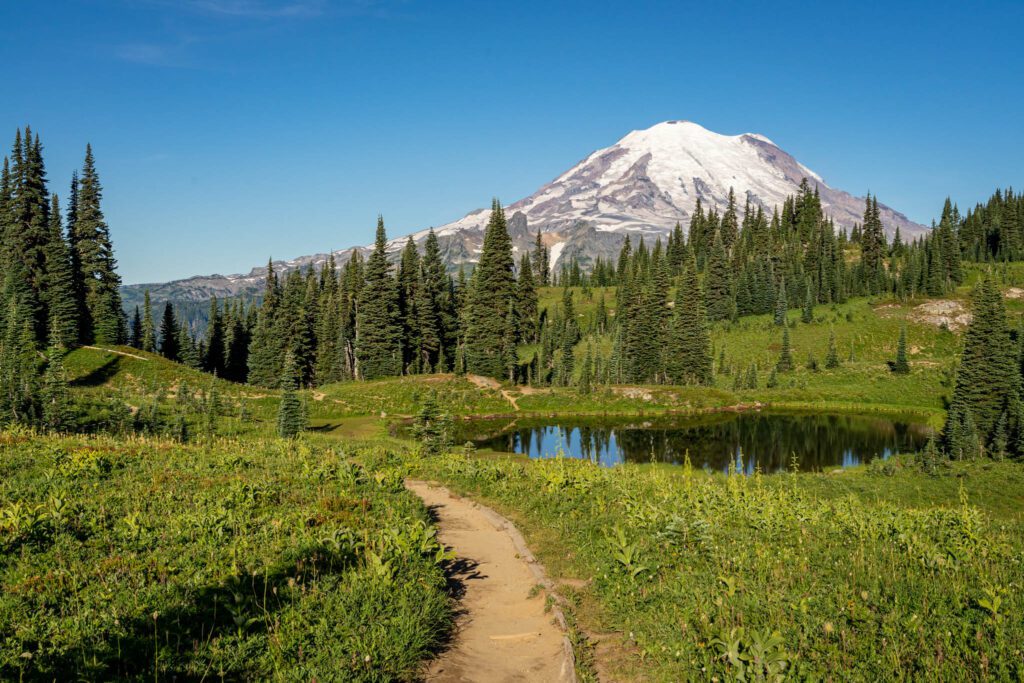
The Naches Peak Loop (Mount Rainier National Park)
- Length: 3.2 miles
- Elevation Gain: 600 ft.
- Season: Summer – Fall
- Trail Type: Loop
- Trailhead Location
- Dog Friendly: No (technically, the PCT is dog-friendly, but not the other half of the hike)
- Pass Required: Northwest Forest Pass
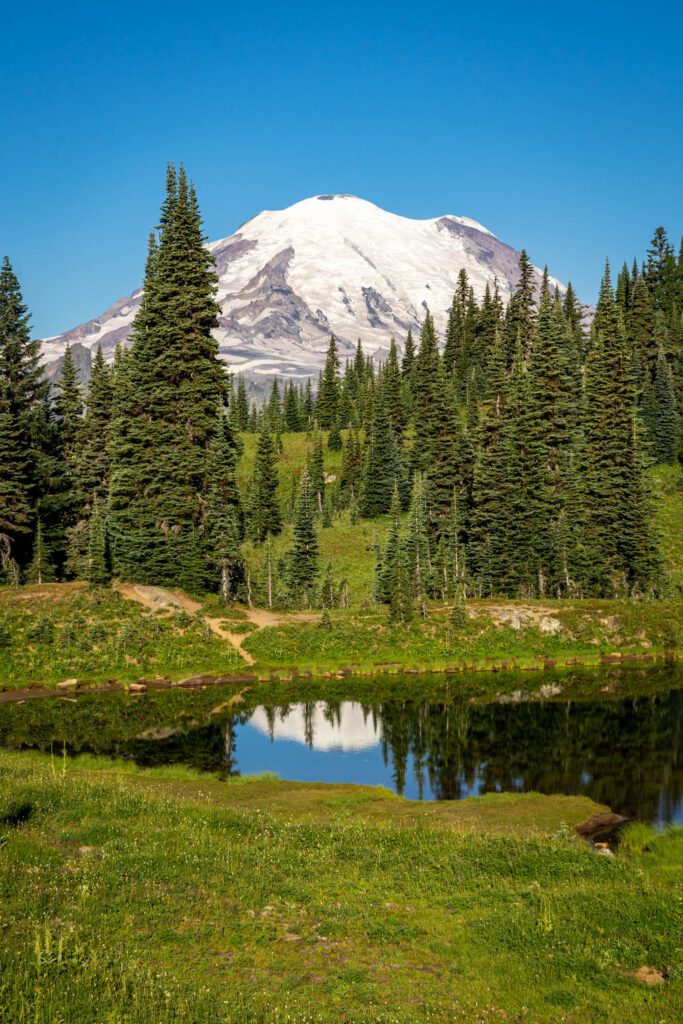
The more hiking we’ve done in the Pacific Northwest, the more our opinion that the Naches Peak Loop is the best bang-for-your-buck hike in the region is solidified. It’s firmly on the list of the best hikes in Mount Rainier National Park in our books.
This hike is on the eastern side of Mount Rainier National Park, outside the park boundary, but close enough to Rainier to have incredible views of the Mountain from the second half of the hike.
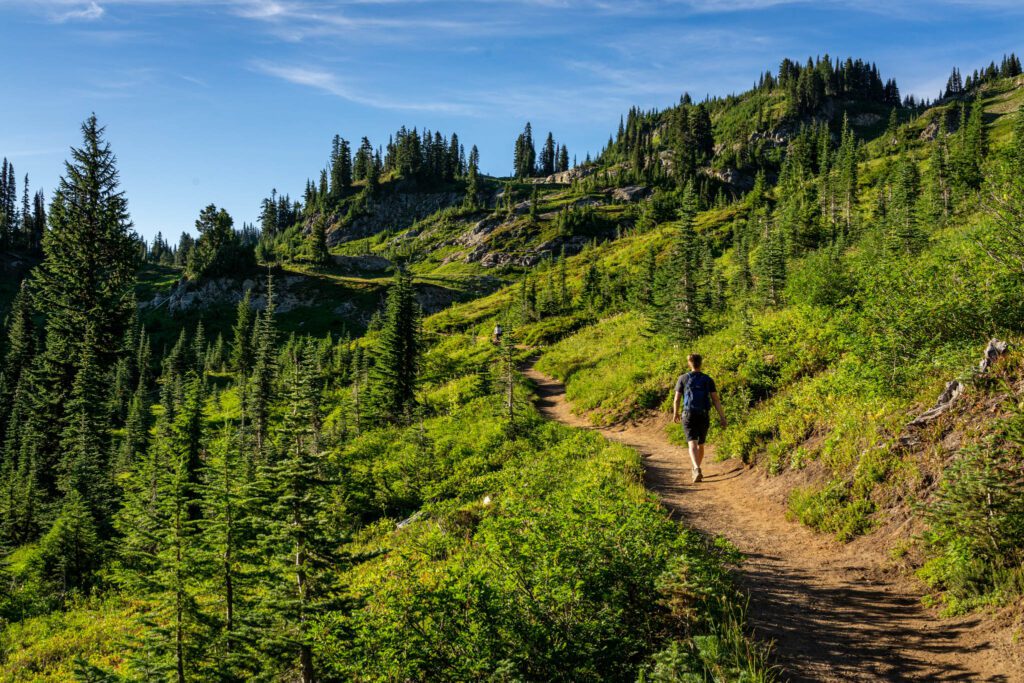
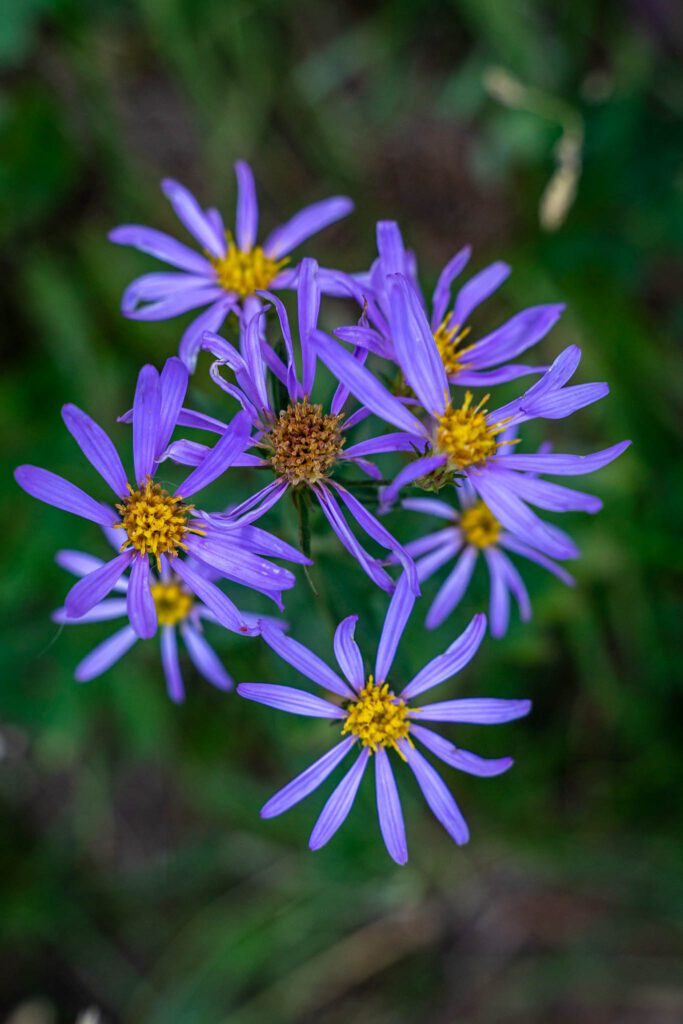
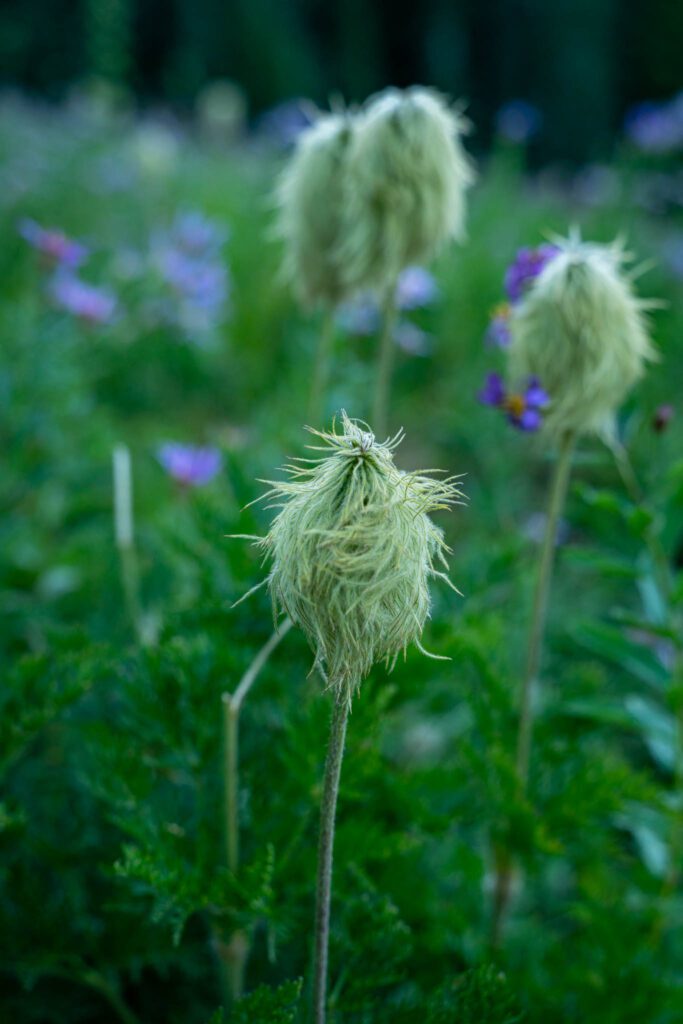
This hike has it all – wildflowers in the summer, a nice alpine lake with reflections of Mount Rainier, and various spectacular mountain views throughout the short hike.
Do this trail clockwise. That will mean you’ll be hiking towards Rainier, with epic views right there out in front of you rather than having to look over your shoulder to see them.
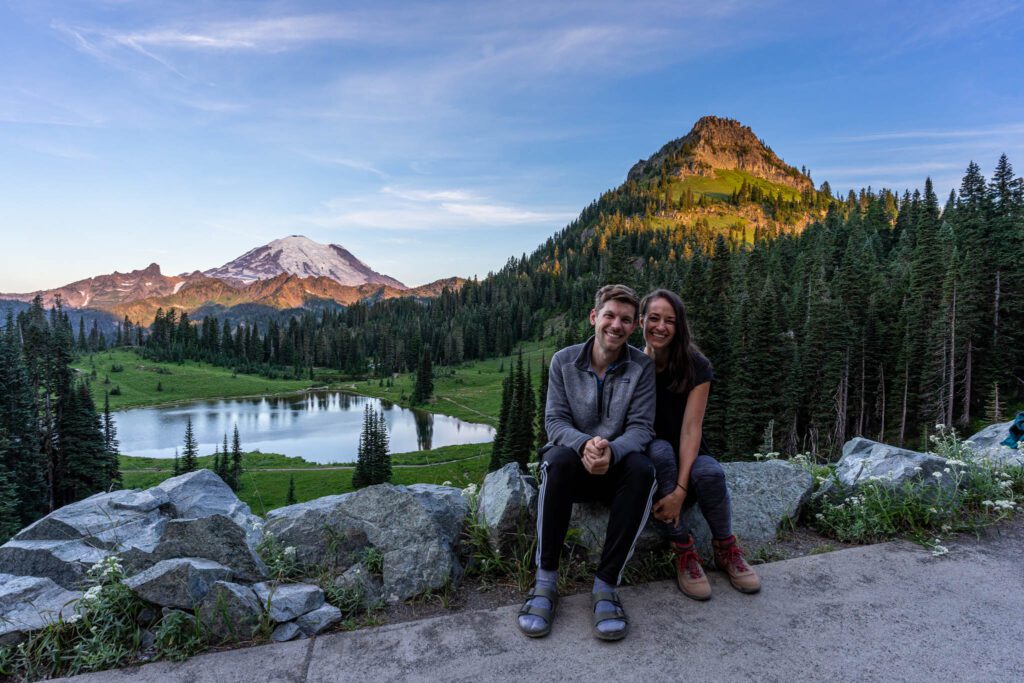
The hike starts from Tipsoo Lake, which is an excellent sunrise / sunset location, and meets up with the Pacific Crest Trail on its way around Naches Peak.
At the highest point in the hike, about 1.6 miles in, you’ll reach a junction with the trail down to Dewey Lake. From there, it’s downhill back to the trailhead, and you’ll be treated to fantastic views almost all the way through.
In particular, there’s a picturesque pond perched in the middle of an alpine meadow in a perfect position for photos, with the towering, snowy peak of Mount Rainier in the background.
Read More: Hiking the Naches Peak Loop Trail at Mount Rainier
The Blue Lake Trail (North Cascades National Park)
- Length: 4.4 miles
- Elevation Gain: 1,000 ft.
- Season: Summer – Fall
- Trail Type: Out and Back
- Trailhead Location
- Dog Friendly: Yes, on a leash
- Pass Required: Northwest Forest Pass
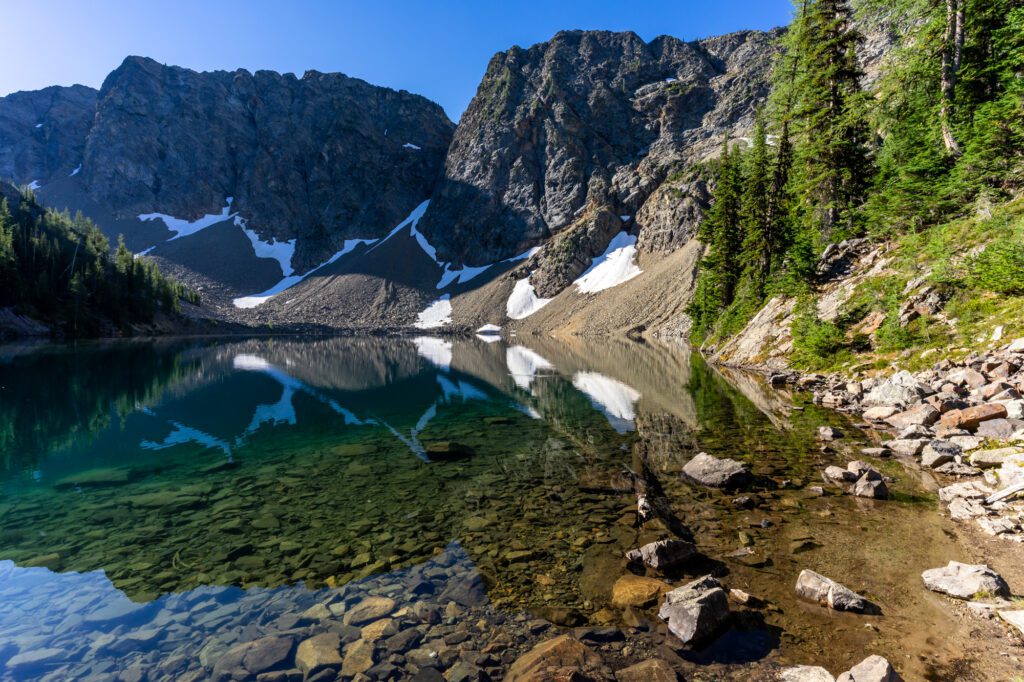
This relatively easy trail is one of our favorite hikes in the North Cascades.
The trailhead for the hike up to Blue Lake is right along the North Cascades Highway, just a few miles before you get up to Washington Pass. This is one of our favorite hikes in the state, and it just happens to fit under the easy category.
The hike is a gradual climb, starting with a portion of the trail that parallels Highway 20 before turning away from the highway and starting the climb up to the lake.
The lake is a sparkling, crystal clear blue-green masterpiece, an excellent example of the alpine lakes you’ll find up and down the Cascades.
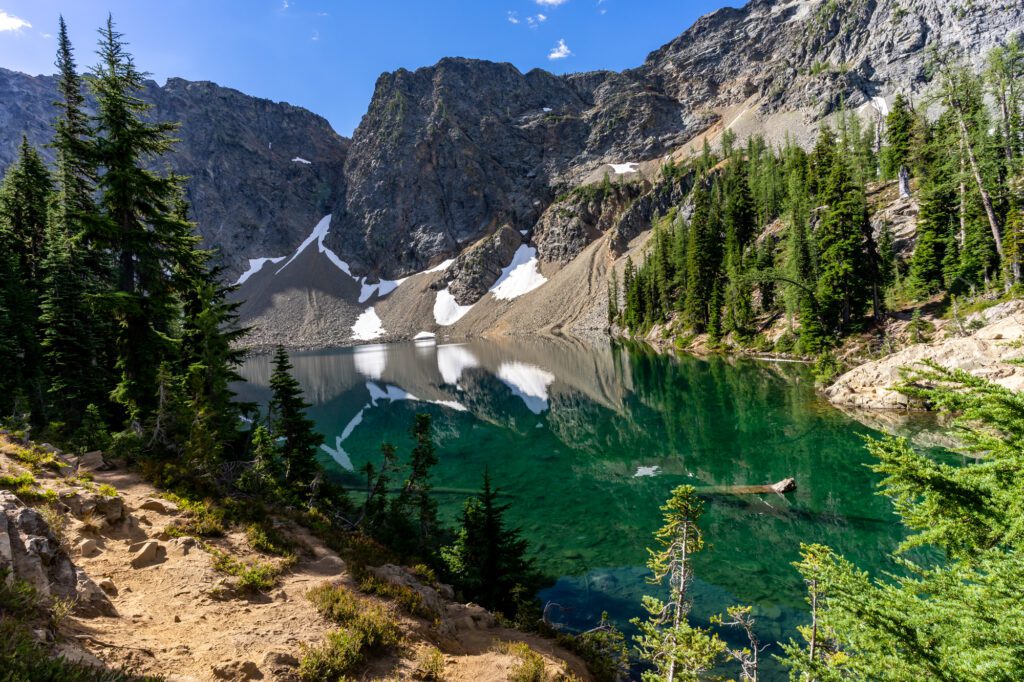
Once you reach the lake, head right at the fork in the trail, where you’ll find a couple of places where you can get down to the lakeshore. Mountain goats are commonly seen on the far shore.
From the north end of the lake (where you first arrive at the lake), there’s a short loop that takes you up and to the right.
You’ll pass a nice tarn with a good view of the Cascades beyond, and there’s another point where you can get down to the lakeshore.
Keep in mind that the road to access this trailhead closes every winter, and snow can linger on the trail well into spring and early summer, which makes this trail firmly in the summer / fall category.
Check road status and conditions here.
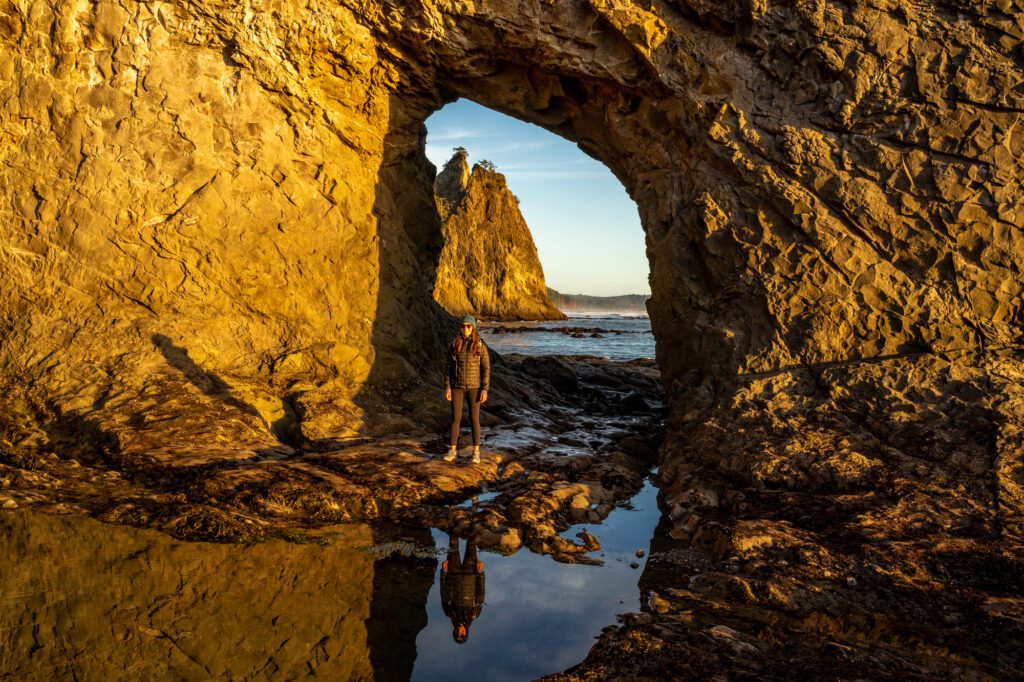
Rialto Beach to Hole in the Wall (Olympic National Park)
- Length: 4 miles
- Elevation Gain: None
- Season: Year Round
- Trail Type: Out and Back
- Difficulty: Easy
- Trailhead Location
- Dog Friendly: Yes, for first half mile of beach
- Pass Required: America the Beautiful Pass or National Park entry
With this trail, we’ve now covered all three national parks in Washington State. The first two are in Mount Rainier National Park and North Cascades National Park, and this one is Olympic National Park along the Pacific Coast.
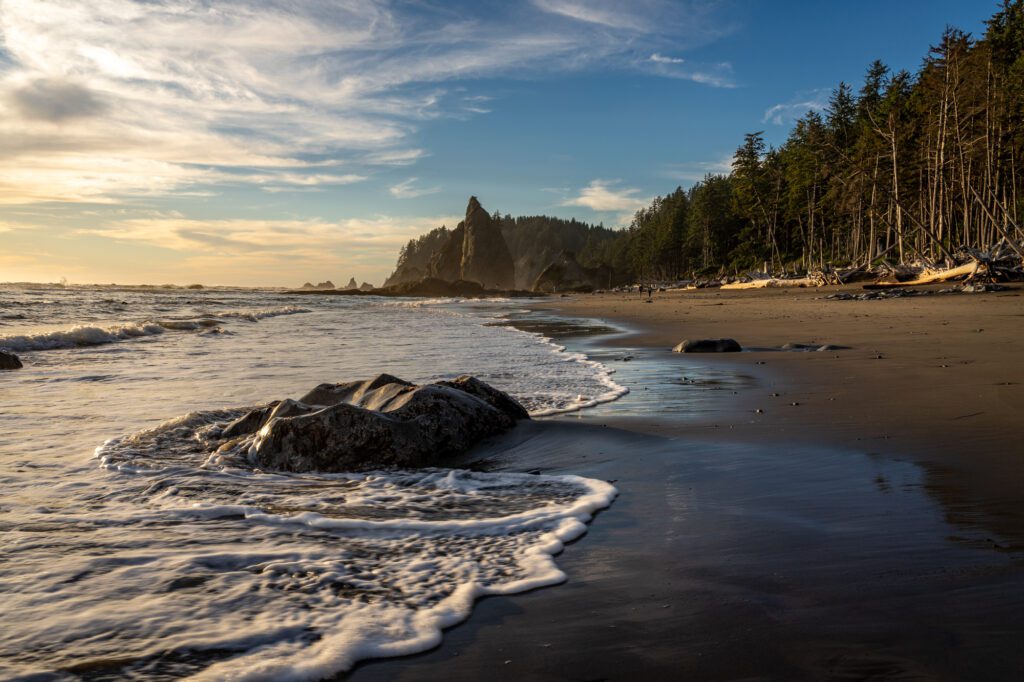
This is more a stroll on the beach than a hike. Despite the fact that this trail is flat, it’s harder than it looks due to the fact that you’re hiking through sand and pebbles.
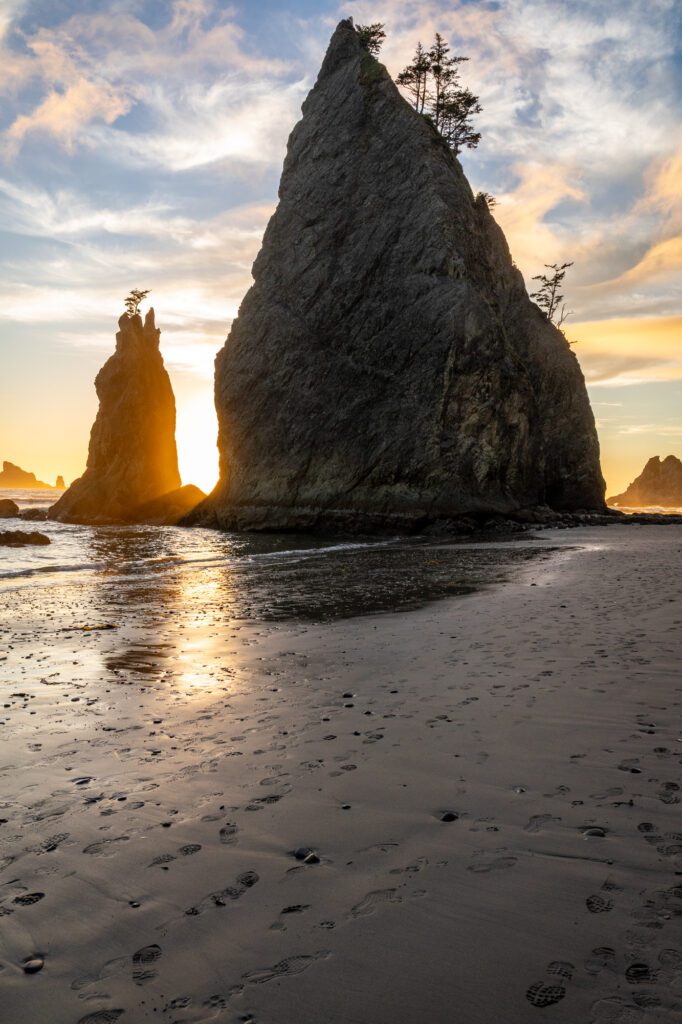
From the parking lot, you’ll head north along the beach. Admire the sea stacks just offshore and the driftwood littered along the beach – which make for great foreground subjects for photography – as you make your way north.
At 0.7 miles, you’ll need to cross a small creek that, depending on the time of year, ranges somewhere between a trickle and a raging river. Waterproof boots will be your friend, especially in the winter and spring when this part of the state is known for getting intense rainfall.
You’ll pass some beautiful sea stacks just before you reach the end of the hike.
We like doing this hike at sunset, when the setting sun (on a clear day, which can be a little hard to come by) lights up the beach in a soft golden glow as the sun dips below the horizon.
This is a good place to see wildlife too. Make sure to keep an eye on the treetops on your right, where we’ve seen multiple bald eagles perched, waiting for their next meal to present itself.
If you’re lucky, you might also see some sea creatures like otters in the shallows.
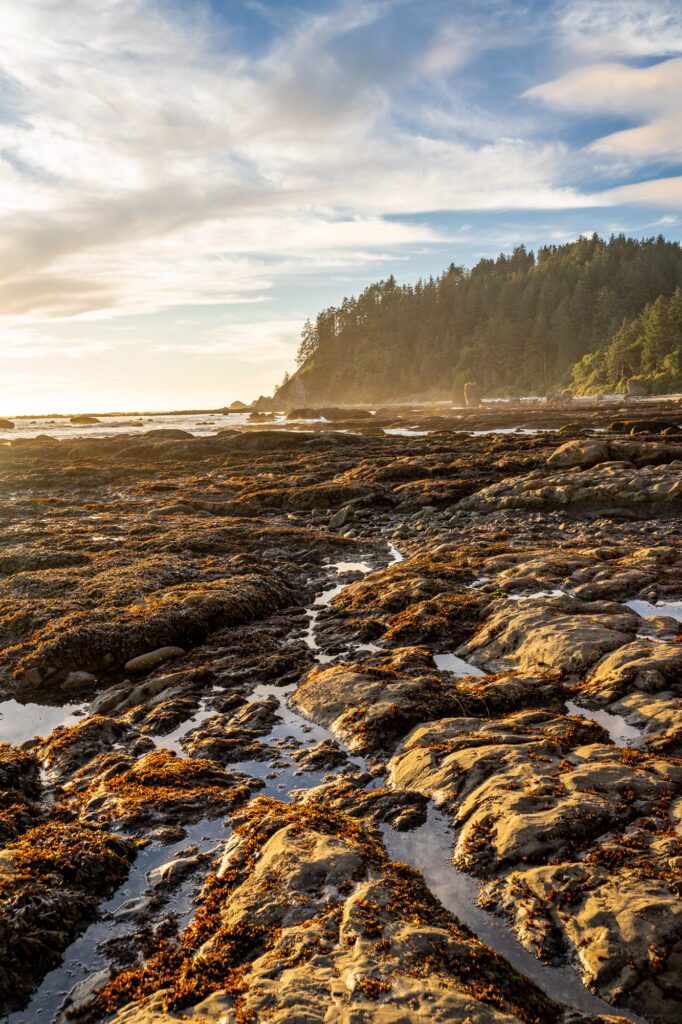
Before you go, make sure you check the tides. You want to do this trail at low tide, when you can get out to Hole in the Wall and explore the tide pools on either side of it. It can be dangerous at high tide, when it may be difficult to find a way back.
Huntoon Point / Artist Point (Mount Baker Wilderness)
- Length: 1.5 miles
- Elevation Gain: 400 ft.
- Season: Summer – Fall
- Trail Type: Out and Back
- Difficulty: Easy
- Trailhead Location
- Dog Friendly: Yes, on a leash
- Pass Required: Northwest Forest Pass
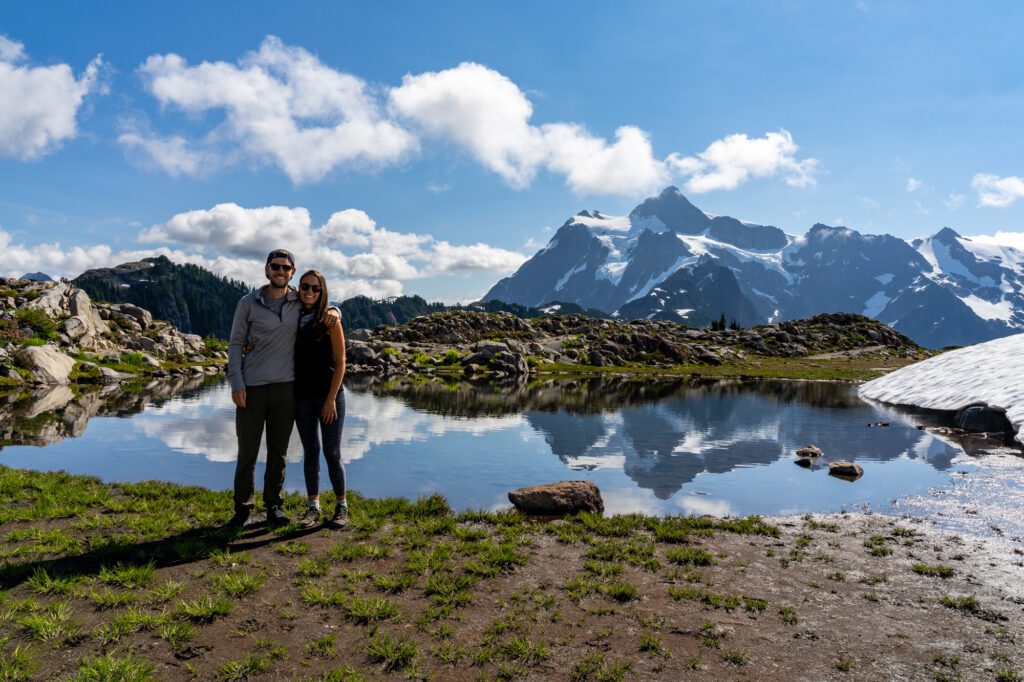
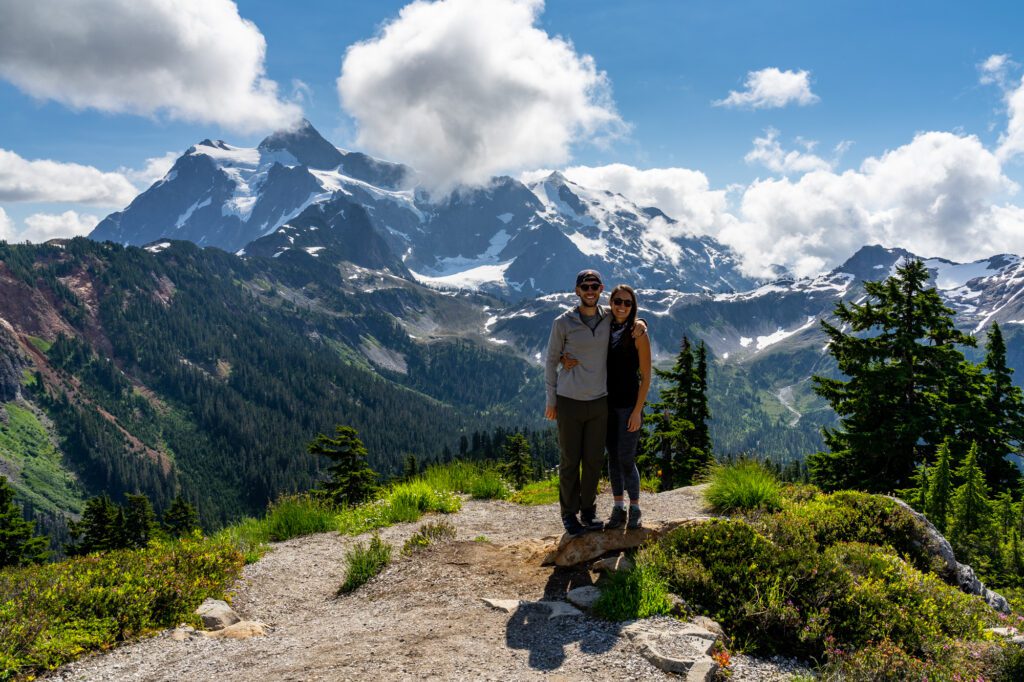
This is a short and easy hike with amazing views near the top. Start from the big Artist Point parking lot and head south along the trail. You’ll come to a set of stairs that winds its way up the hill, with better and better views the higher you go.
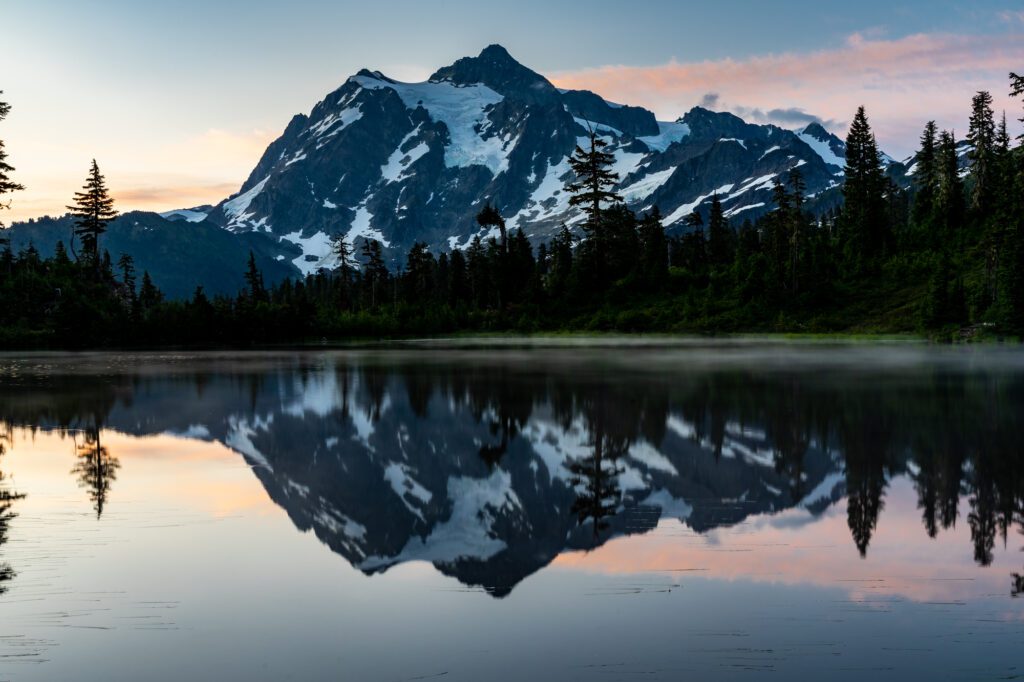
Eventually, you’ll come to a picture-perfect little tarn (a tarn is basically a pond in an alpine setting) with a reflection of Mount Shuksan.
Last time we were up there, we set up our tripod to take some pictures, and Matt accidentally knocked over the camera face first into the water. Oopsie!
Continue up to Huntoon Point, which has an unobstructed view of Shuksan and some nice views of snowy Mount Baker on the other side of the point.
For a slightly longer and more interesting hike, look at the Heather Meadows / Artist Point Trail. Make sure to add on the short hike up to Huntoon Point from the parking lot!
Picture Lake is also a great place to stop for pictures, particularly at sunrise and sunset.
While Mount Baker Highway is generally open in the winter (except for in big snowstorms), the last stretch of road up to the Artist Point parking lot is generally closed in the winter and spring, and the trail is snow-covered.
The road was still closed in early August when we were there last – you can check road status here.
If that part of the road is closed, you can do the hike from the Heather Meadows Visitor Center, which involves a little more climbing.
This part of the state is home to several of our favorite longer hikes in Washington State, like the Chain Lakes Loop, and Lake Ann. If you’re up for a longer hike, we’d highly recommend those (but both are well outside the “easy hike” category).
The Twin Falls Trail (Snoqualmie Pass)
- Length: 2.6 miles
- Elevation Gain: 500 ft.
- Season: Year Round
- Trail Type: Out and Back
- Difficulty: Easy
- Trailhead Location
- Dog Friendly: Yes, on a leash
- Pass Required: Discover Pass or a $10 day pass available at the machine in the parking lot
This hike to Twin Falls is one of the most accessible hikes from the Seattle area, and is the hike my family usually chooses when we’re looking for a quick and easy trail to get out into nature.
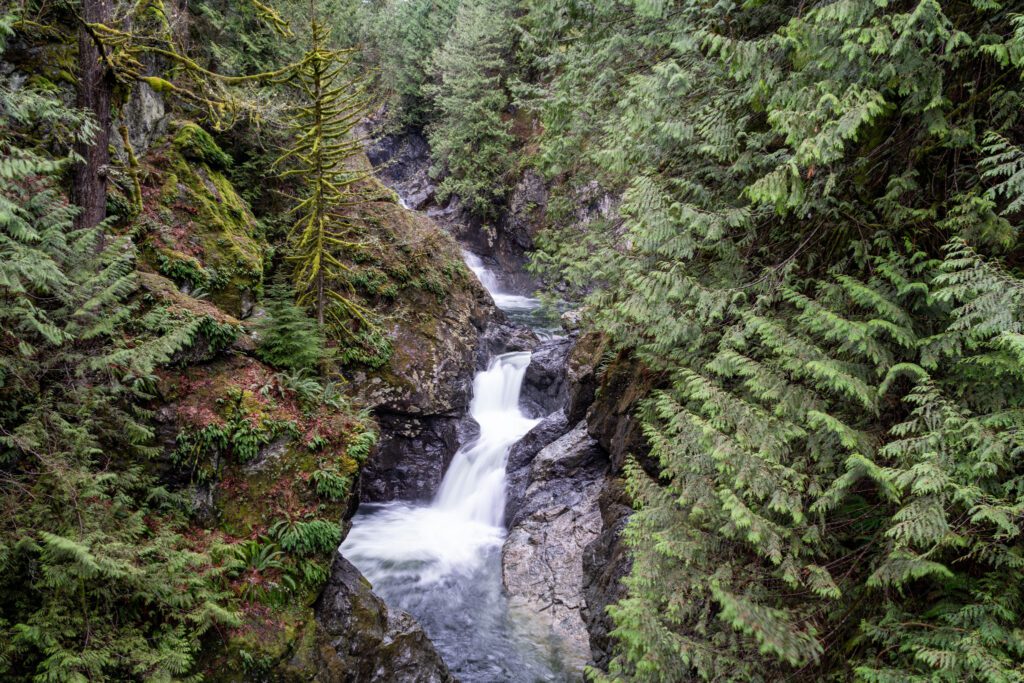
You’ll start from a relatively small parking lot at the south end of the trail, and make your way along the Middle Fork of the Snoqualmie River to a nice two-tiered waterfall.
This is a popular hike, particularly on summer weekends, so get there early to make sure you get a parking spot in the lot.
You start the hike with a nice riverside walk before the trail turns away from the river and begins a surprisingly aggressive climb. There are essentially two hills you climb.
The first takes you up to a bench with a view of the falls off in the distance before you drop back down into a valley. The second hill starts shortly thereafter, and takes you close enough to the road to hear the traffic noise on I-90 before you make it to the falls.
There are two viewpoints that are worth seeing.
The first is the lower falls viewpoint, which is off to the right of the main trail down a set of wooden stairs.
The second is the upper falls, which you can see from the wooden bridge that crosses the river (and marks the end point of the hike).
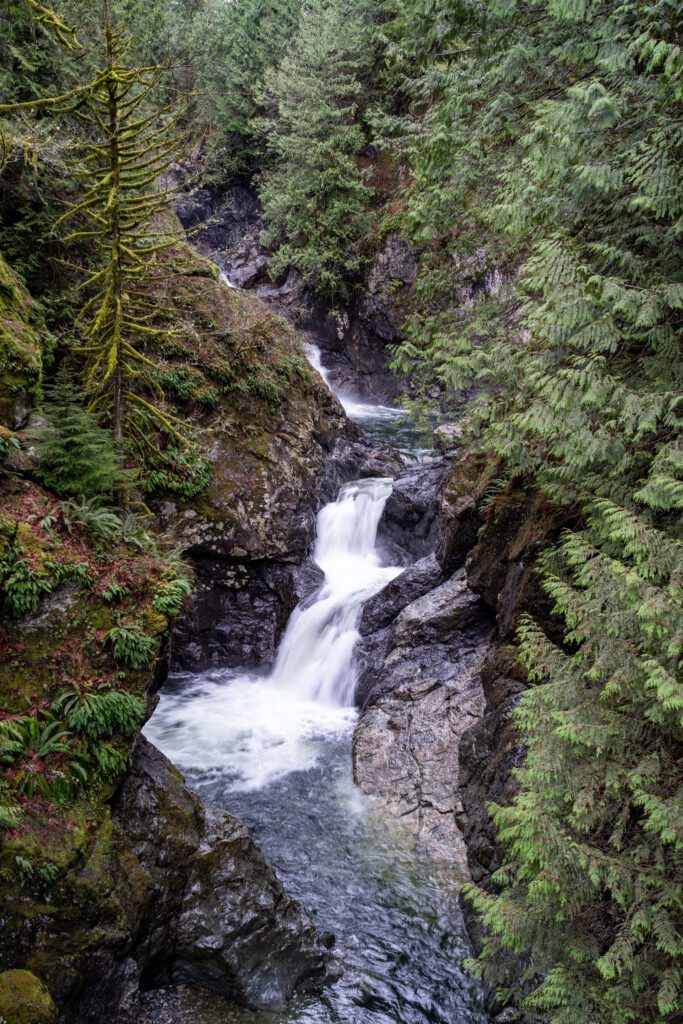
Technically, there’s another viewpoint a short ways up the trail from that bridge, but we don’t really think it’s worth it.
Read More: Hiking the Twin Falls Trail in Washington State (Complete Trail Guide)
The Marymere Falls Trail (Olympic National Park)
- Length: 1.8 miles
- Elevation Gain: 500 ft.
- Season: Year Round
- Trail Type: Out and Back
- Difficulty: Easy
- Trailhead Location
- Dog Friendly: No
- Pass Required: None
This is a short, easy hike through the woods near Lake Crescent to a nice waterfall. One important note: don’t expect a thundering waterfall at the end of this trail – it’s much closer to a trickle. Though the fact that it’s 90 feet tall makes it worth the short hike to get to it.
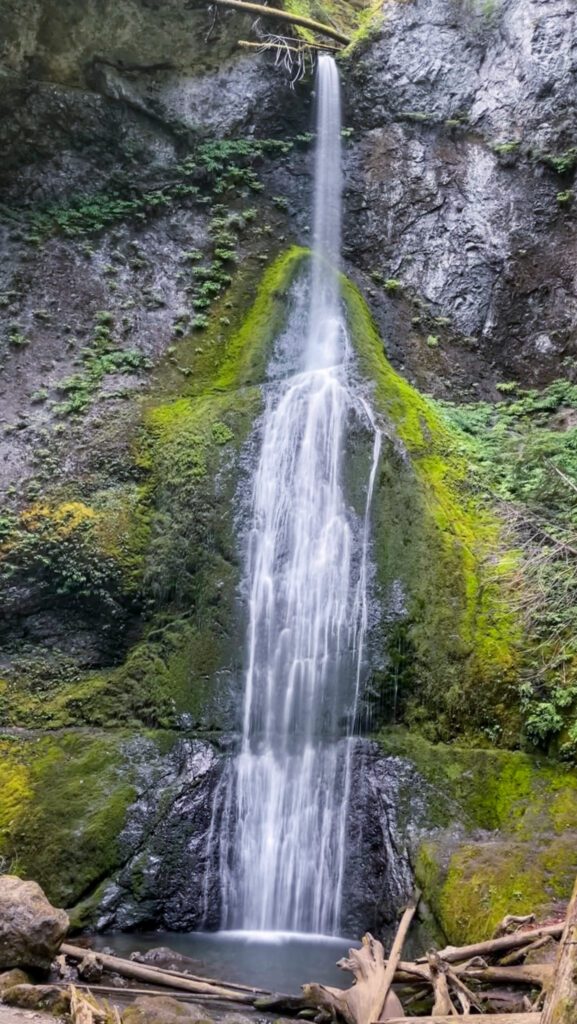
The hike starts from the parking lot near the Storm King Ranger Station, which is generally very, very busy on summer weekends. Prepare to get there early, or wait a few minutes for a parking spot.
The trail starts by crossing under the road and starting along a forested path full of mosses and ferns that scream “OLYMPIC PENINSULA,” at least to us.
Eventually, you’ll cross a bridge over a river (really, it’s more of a creek) and reach a boardwalk that makes a nice little loop to two viewpoints of the falls. Both are worth seeing.
The hike up to Mount Storm King, which is a tough hike with a section that you climb with the assistance of ropes at the top, leaves from along this trail. The view of Lake Crescent from the top of that hike is great, but the hike is not an easy one.
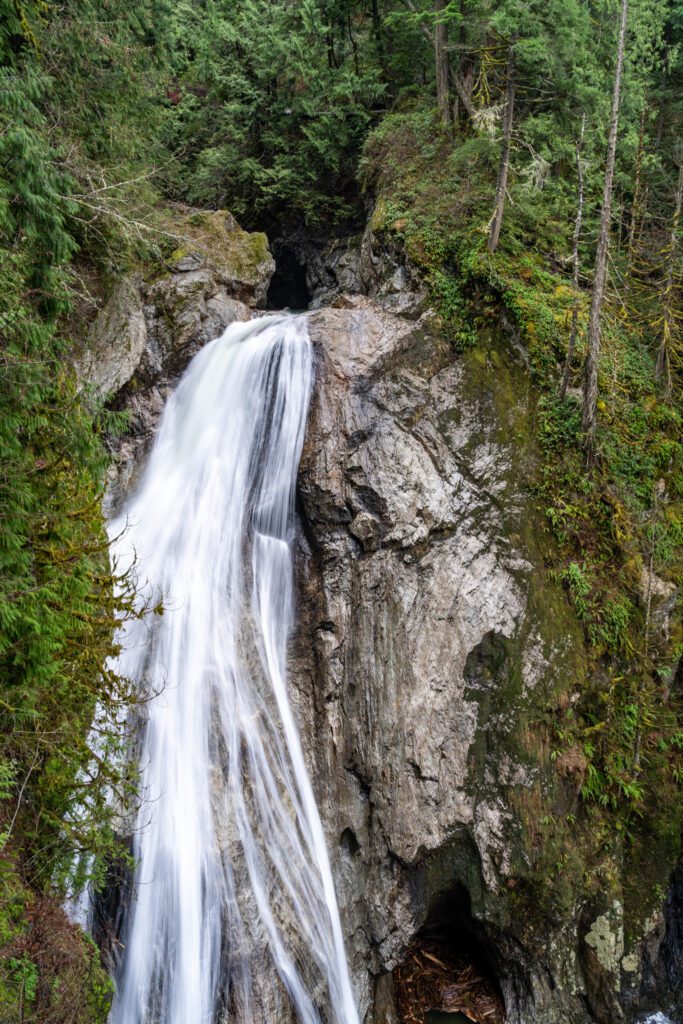
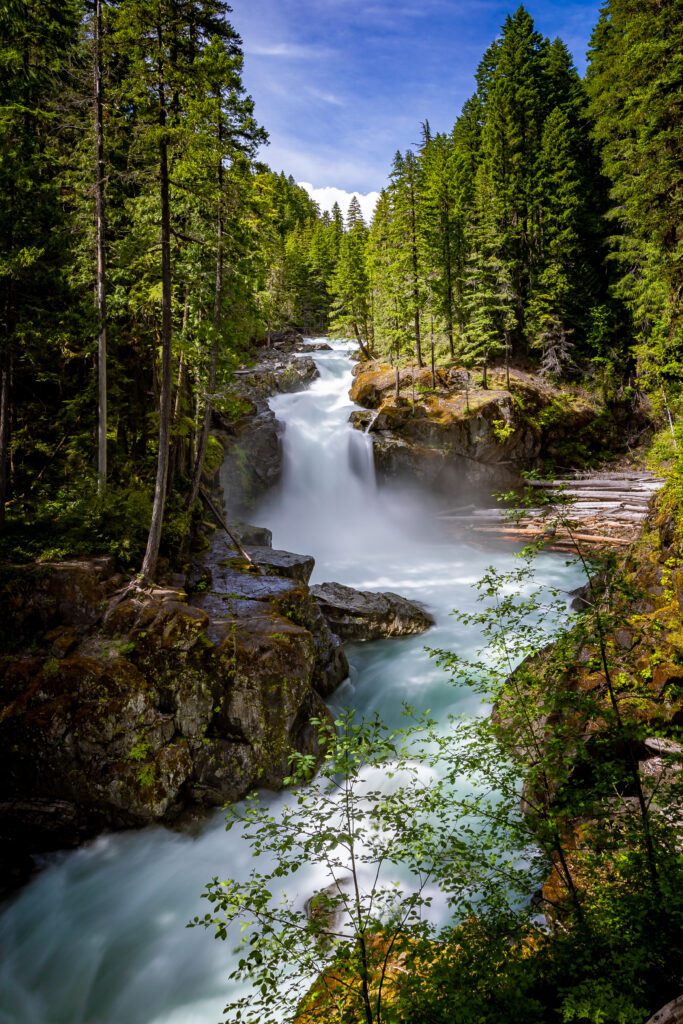
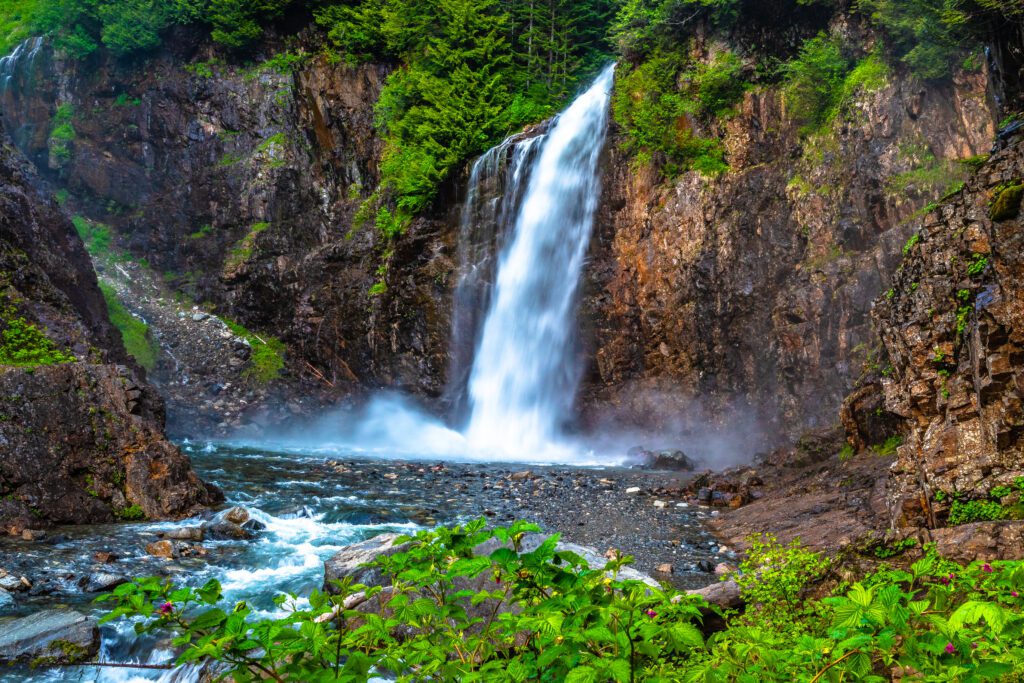
The Silver Falls Trail (Mount Rainier National Park)
- Length: 3 miles
- Elevation Gain: 600 ft.
- Season: Summer – Fall
- Trail Type: Loop
- Difficulty: Easy
- Trailhead Location
- Dog Friendly: No
- Pass Required: America the Beautiful Pass or National Park Entry Fee
This is a nice, easy hike along the Ohanapecosh River to one of the best waterfalls in Mount Rainier National Park – Silver Falls.
The trail starts and ends at the Ohanapecosh Visitor Center, and is walkable from the Ohanapecosh Campground if that’s where you’re spending the night.
Tackle the loop clockwise, which has you climbing gently on the western bank of the river until you reach a junction in the trail. Take a right and make a steep descent down to river level, where you’ll find a wooden bridge over the river with a nice view of the falls.
From there, you follow the trail on the other side of the river back to the Visitor Center, which is slightly downhill.
If you’re looking to extend your hike a bit, you can continue left at the junction to follow the Eastside Trail, cross the road, and do the Grove of the Patriarchs Trail before coming back and finishing the loop.
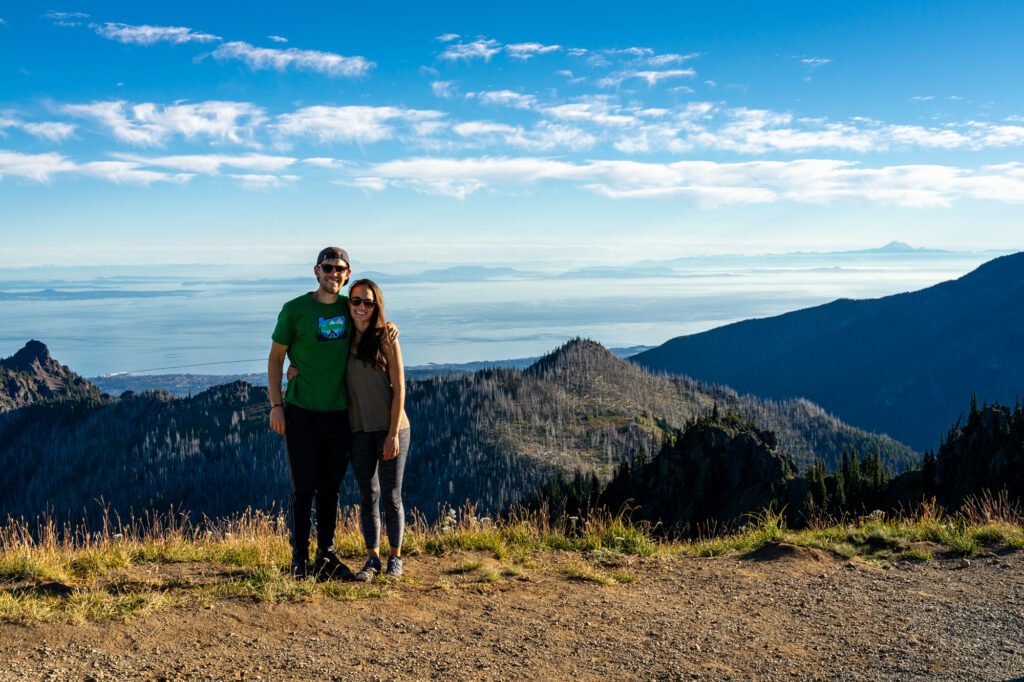
Hurricane Hill (Olympic National Park)
- Length: 3.2 miles
- Elevation Gain: 650 ft.
- Season: Spring – Fall (sometimes in winter)
- Trail Type: Out and Back
- Difficulty: Easy / Moderate
- Trailhead Location
- Dog Friendly: No
- Pass Required: America the Beautiful Pass or National Park Entry Fee
One of the things we like about the Olympic Peninsula is the fact that there are a wide variety of different ecosystems that exist within a relatively small slice of the state.
This is another great hike in the park that offers something completely different than the beaches or waterfalls we’ve covered so far.
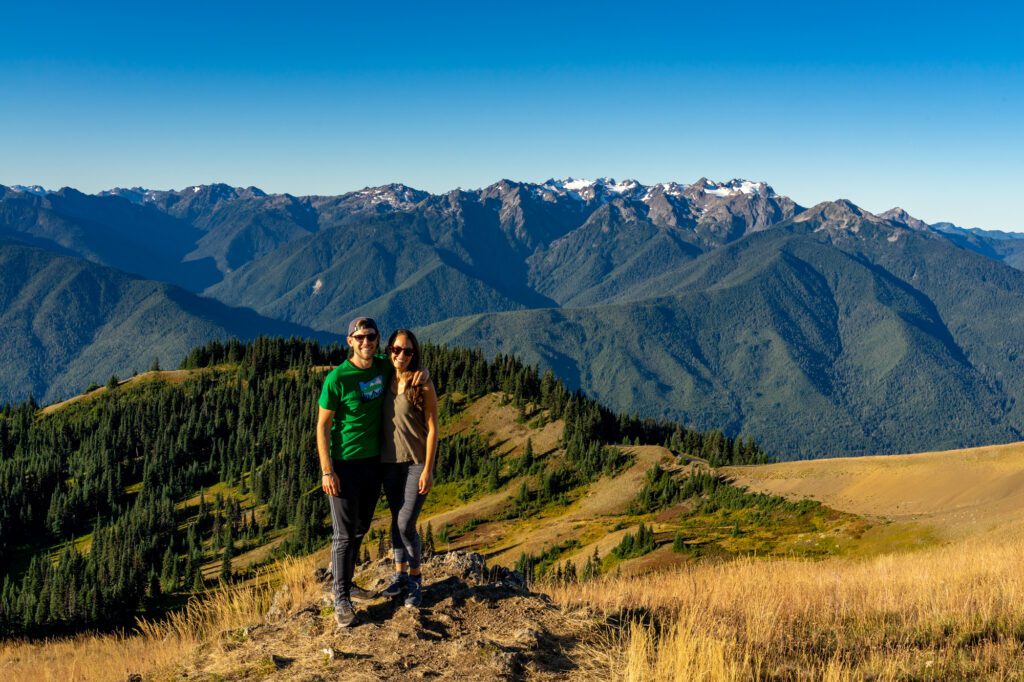
This is the alpine section of Olympic National Park, sitting more than 5,700 feet above sea level.
The Hurricane Hill Trail is a nice, paved path that climbs up to a spectacular view, where you’ll be able to see Mount Baker to the east, San Juan Island, Vancouver Island and British Columbia to the north, and the Olympic Range – including Mount Olympus – to the south. At least on a clear day.
The parking lot for this trail is surprisingly small for its popularity. You may have to park at one of the other lots just up Hurricane Ridge Road and add on some hiking distance.
The Franklin Falls Trail (Snoqualmie Pass)
- Length: 2 miles
- Elevation Gain: 400 ft.
- Season: Spring – Fall (sometimes in winter)
- Trail Type: Out and Back
- Difficulty: Easy
- Trailhead Location
- Dog Friendly: Yes, on a leash
- Pass Required: Northwest Forest Pass
This is a short and easy hike that leaves from a trailhead across the road from Snoqualmie Pass at Denny Creek Campground.
This trail is best in the spring and summer, when the snow has melted but water levels feeding the thundering falls are relatively high, but it can also be done in the winter with proper equipment.
In the winter, the road to the trailhead closes and you’ll have to hike in (it makes it about 8 miles), but the waterfall occasionally completely freezes, which is a super unique spectacle.
There’s not much to say about the hike itself. It’s short, forested, and slightly uphill the entire way. The falls is 70 feet high, and comes rushing off of a ledge above you.
You can get a nice view of the falls from the viewpoint, but an even better view if you follow the narrow, rocky trail down to the base of the falls.
Rattlesnake Ledge (Snoqualmie Pass)

- Length: 4 miles
- Elevation Gain: 1,100 ft.
- Season: Year Round
- Trail Type: Out and Back
- Difficulty: Easy / Moderate
- Trailhead Location
- Dog Friendly: Yes, on a leash
- Pass Required: Discover Pass or a $10 day pass available at the machine in the parking lot
This hike is 100 feet of roundtrip elevation gain outside of the “easy hike” standard we set at the beginning of this guide, but we think it’s still worth including.
The thing about the hike to Rattlesnake Ledge, which is a hike that nearly everyone who grew up in the suburbs east of Seattle has done at one point or another, is that the hike is relatively uneventful until you get to the top.
It’s essentially just a long climb up switchbacks in the woods. There’s nothing particularly special or interesting about the trail until you reach the top, where you emerge from the forest onto a rocky overlook with great views of the Cascades and Rattlesnake Lake.
The parking lot is big, with plenty of parking even on sunny weekend mornings, when families flock to this trail. It’s one of the most accessible hikes near Seattle, and it’s a popular trail. Don’t expect solitude if you choose to do this one on a summer weekend.
One other thing to know is that there’s a decent chance that, in the winter and spring, you’ll reach the top and be enveloped in a shroud of fog, rendering you completely unable to enjoy any of the views you worked hard to earn.
Discovery Park – West Point Lighthouse Loop (Seattle)
- Length: 4.5 miles
- Elevation Gain: 500 ft.
- Season: Year Round
- Trail Type: Loop
- Difficulty: Easy
- Trailhead Location
- Dog Friendly: Yes, on a leash
- Pass Required: None
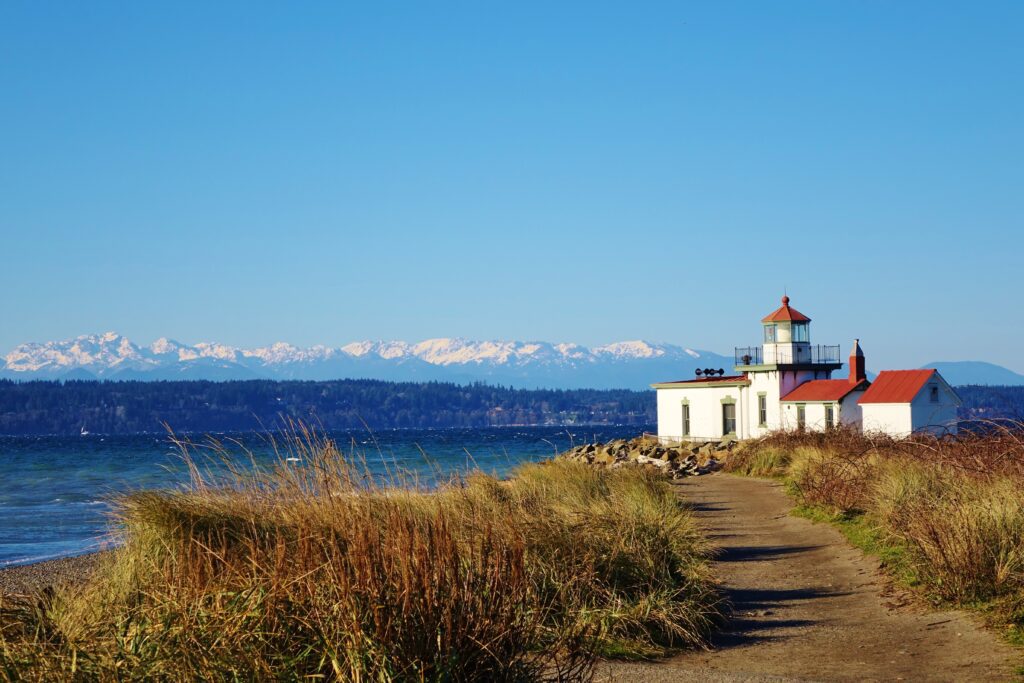
If you’re looking for a nice, easy hike in Seattle, this is by far our number one choice.
It’s a relaxing loop hike that takes you out to a rocky beach and the West Point Lighthouse. There’s a good chance that there will be a bald eagle perched on the tower next to the lighthouse.
There are 11 miles of hiking trails to choose from in Discovery Park, which is only about 10-15 minutes away from Downtown Seattle, but we think the loop out to the Lighthouse following the “Loop Trail” is the best of the bunch.
It can be muddy, especially in the winter and spring when it’s often drizzling, but if you wear the right shoes, you’ll be fine.
There are a couple of different parking lots to choose from in terms of where to start this hike.
We’d opt for parking at the Visitor Center (here on Google Maps), where there are restrooms available but parking is limited, or at the south lot (here on Google Maps), where there’s more parking but no restrooms.
Find more trail information and recent trail reports here.
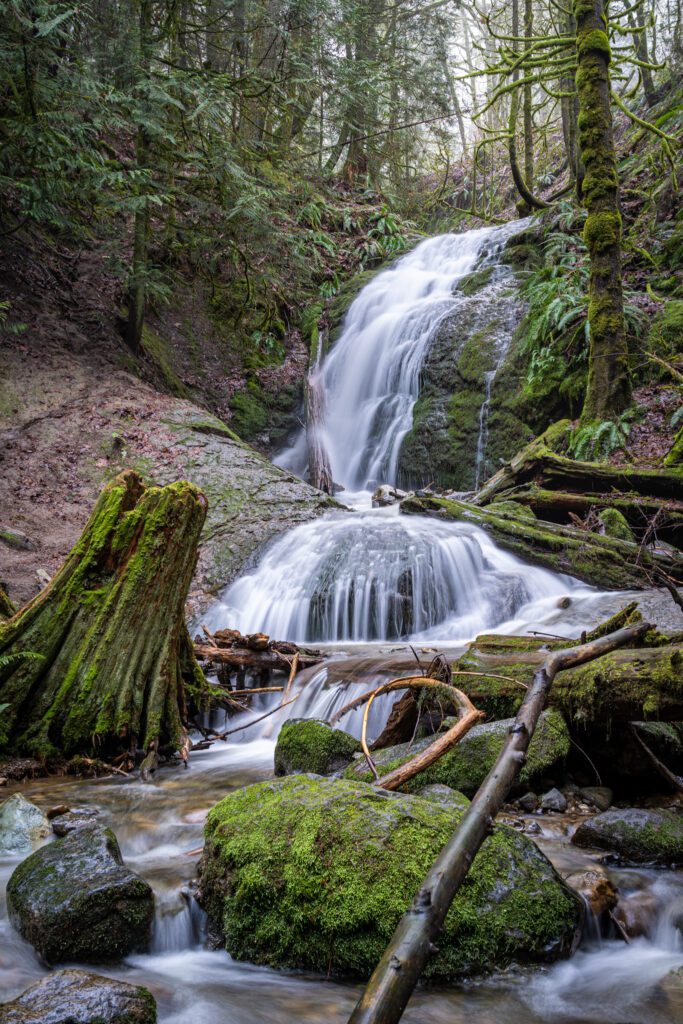
The Coal Creek Falls Trail (Bellevue)
- Length: 2.7 miles
- Elevation Gain: 550 feet
- Season: Year Round
- Trail Type: Loop
- Difficulty: Easy
- Trailhead Location
- Dog Friendly: Yes, on a leash
- Pass Required: None
This is one of those hikes that I’ve always taken for granted because it’s literally five minutes away from my mom’s front door. But after we did it on a chilly winter morning recently, I realized that it probably belongs on this list.
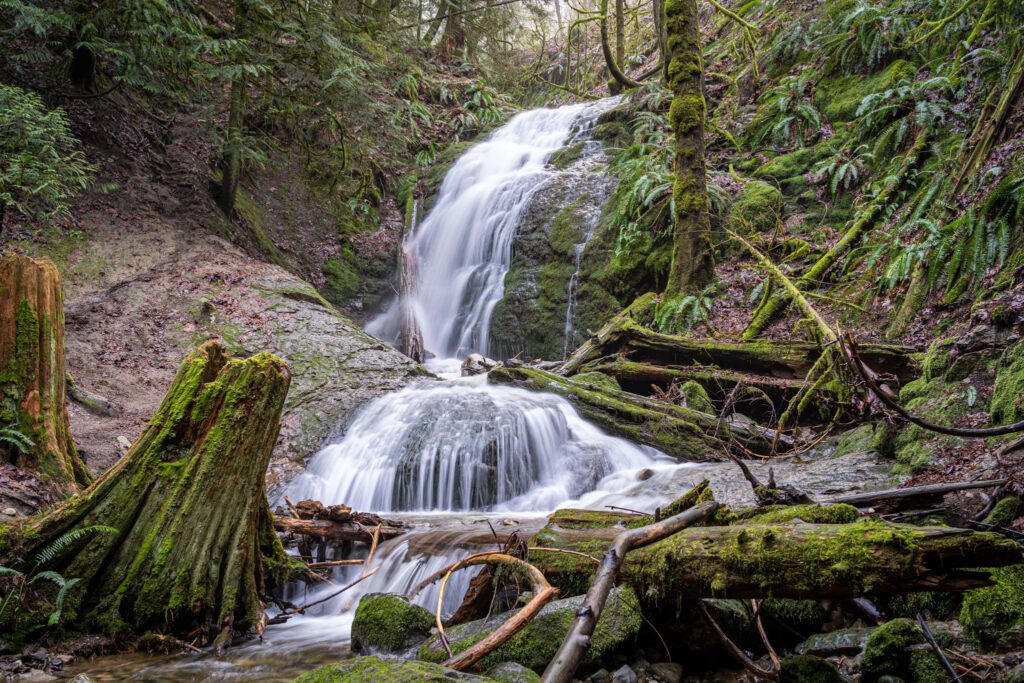
It’s particularly nice in the winter and spring, when the waterfall is roaring.
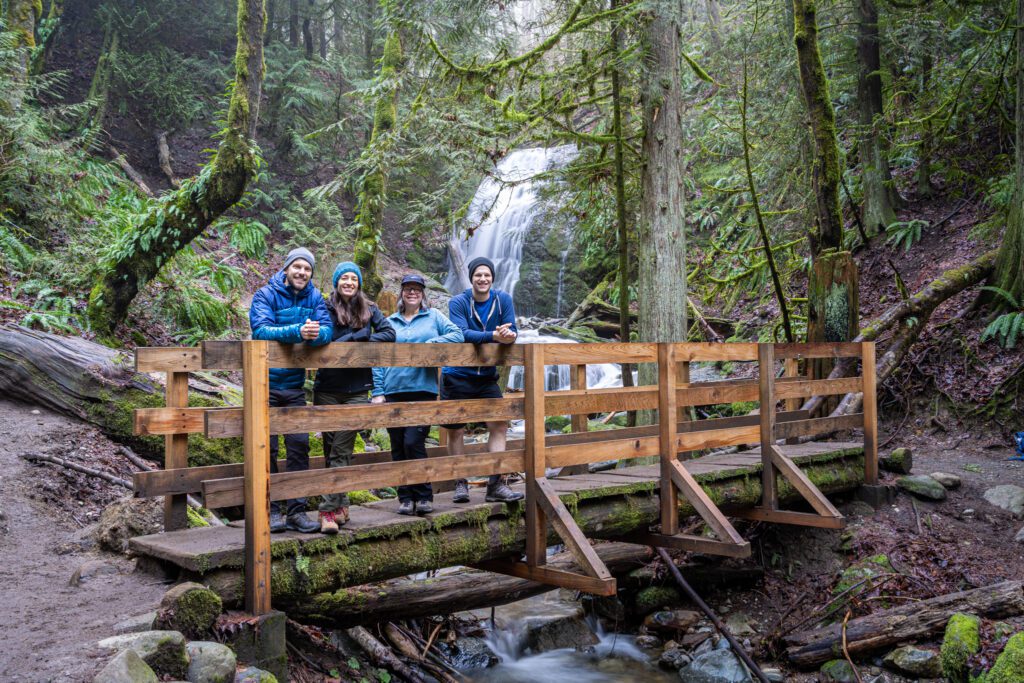
The loop takes you through a mossy, ferny forest in Cougar Mountain Regional Park, and is a peaceful refuge from the hustle and bustle of the Seattle area.
There are some fun informational signs about the mining that took place here a century ago, which is an interesting twist.
The waterfall itself is cool in the winter, when the water levels are high. In the summer, it’s far less impressive. There’s a picturesque wooden bridge in front of the falls.
This is a popular trail with local families, particularly those with young kids. Expect it to be busy on weekend mornings. We did it at 9:00 am on a Sunday, and it was surprisingly calm (though the parking lot was nearly full when we finished).
More to Explore in Washington State
Heading to the great state of Washington? Here are some other posts you might like.
- The Best Things to Do in Seattle: A Local’s Complete Guide (coming SOON!)
- Where to Stay in Seattle: 7 Amazing Areas to Stay
- How to Plan an Amazing Weekend in Seattle (3 Day Itinerary)
- Two Days in Seattle: The Best of Seattle in 48 Hours
- One Day in Seattle: How to See The Best of Seattle in a Day
- The 8 Best Day Trips from Seattle: A Complete Guide
- 10 Amazing Weekend Getaways from Seattle: A Complete Planning Guide
- Where to Find the Best Coffee in Seattle: 15+ Amazing Seattle Coffee Shops
- Gluten Free Seattle: A Complete Travel Guide for Celiacs
- How to Plan an Amazing Washington State Road Trip
- The 19 Best Airbnbs in Washington State
- 33 Incredible Cabins in Washington State
- 12 Amazing Easy Hikes in Washington State for Beginners
- How to Plan an Amazing Olympic National Park Itinerary
- What to Do in Leavenworth, Washington: A Complete Guide
- What to Do on San Juan Island: A Complete Visitors Guide
- The Best Things to Do on Orcas Island: Complete Planning Guide
- The Best Things to Do on Vashon Island: A Complete Day Trip Guide