Hiking near Seattle: A Complete Guide (23 Great Hikes + Map)
If you’re here, chances are you’re interested in doing some hiking near Seattle. If that’s the case, you’re in the right place!
While we live in Portland now, Matt grew up in the Seattle area (in Issaquah, which is where a few of the closer-in hikes below are located) and we regularly come up to Seattle to visit friends and family, oftentimes including a hike or two during our visit.
There are very few big cities with the breadth of hiking options within an hour or two that Seattle has to offer (Portland is one, if you can consider it a big city).
From big, epic adventures in Mount Rainier National Park, to smaller, more localized adventures in Snoqualmie Pass and along the Mountain Loop Highway, there are a nearly unlimited number of hikes near Seattle to choose from.
The best part is that they also offer a diverse range of scenery, from views of the Puget Sound to alpine lakes and snow capped peaks, to fire lookouts and towering waterfalls. There’s truly something for everyone.
And we’re on a mission to tackle them all!
In this guide to our picks for best hikes near Seattle, here’s what we’re going to cover:
- A few important logistics to keep in mind as you’re planning, like the different passes you might need and seasonal considerations to know before you go.
- Our favorite hikes within the Seattle city limits – unlike most cities, Seattle actually has a fair amount of hiking without ever leaving the city.
- Our top picks for the hikes within two hours or so of Downtown Seattle, including hikes in Mount Rainier National Park and Snoqualmie Pass.
Throughout the guide, we’ll share our favorite hikes, viewpoints, waterfalls, and more based on our trips to help you plan your Seattle hiking adventure.
Sound good to you? Let’s get into it.
Disclaimer: Some of the links in this post, like hotel links, are affiliate links, meaning at no additional cost to you, we make a little bit of money if you click through and book. That being said, we would never recommend something to you that we don’t stand behind 100%.
Things to Know About Hiking in Seattle Before You Hit the Trail
Here are a couple of things to keep in mind before you hit the trail.
Dogs are generally allowed (with a few exceptions), but they need to be leashed. You cannot take dogs on the trails at Mount Rainier, but they’re allowed on most hikes in Mount Baker – Snoqualmie National Forest and in Washington State Parks.
You’re going to need a car to get to the hikes near Seattle. There’s no getting around it. Except if you’re planning on doing Mount Si, Little Si, or one of the other hikes along the Trailhead Direct bus route, which connects Seattle, Bellevue, North Bend with popular trailheads east of Seattle. Summer and early fall only, weekends and holidays only.
Trailheads can be VERY busy, especially on weekend mornings in the summer. Be prepared to get an early start and arrive at the trailhead before 9am in most cases to secure a parking spot (it can be even earlier than that at some of the more popular hikes on this list).
Roads close during the winter months (and many trails outside of Seattle see snow). Many of the roads through national parks and to access trails in national forests are closed during the winter. In the mountains, this means after the first snowfall, which is typically late October or early November. Roads tend to re-open in the late spring, but trails are not going to be fully snow-free until June (July or August at Mount Rainier).
Parking Passes & Permits for Hiking Trails Near Seattle
Parking passes are required for most hikes around Seattle, with the notable exception of the hikes within the city limits, which do not require permits or passes.
There are a few passes and permits you might need for the hikes outside the city, and it comes down to what agency’s land the trailhead is on.
- The main pass you’ll need is a Northwest Forest Pass, which allows you to park at trailheads in Mount Baker – Snoqualmie National Forest (or any other national forest trailhead in Washington OR Oregon). It’s $30 for an annual pass or $5 for a day pass (sometimes they have envelopes at the trailhead, but they’re often out), and you can buy them in advance at REI.
- For hikes in Washington State Parks (like Wallace Falls), you’ll need a Discover Pass. It’s $30 for an annual pass or $10 for a day pass, and you’re much more likely to be able to buy these onsite (although we’d still recommend buying an annual pass in advance if you think you’ll use it three or more times in the next 12 months. Find it at REI, or at any of the Washington State Parks.
- To tackle the hikes in Mount Rainier National Park, you’ll either need to pay the $30 entrance fee at the entrance station or have an America the Beautiful Pass. The America the Beautiful Pass is $80, which means it pays out if you visit THREE OR MORE national parks in the 12 months after you buy the pass. As an added bonus, it also covers all national recreation land, including national forests and national monuments, so if you decide to buy this, you don’t need a Northwest Forest Pass. Find it here at REI.
23 Great Hikes within 2 (ish) Hours of Seattle
Now that we’ve covered some of the important logistics, let’s get into the specific Seattle hikes that we recommend.
Since there are so many options, we’re splitting this guide into two sections. One section will focus on hikes within the city limits (a couple of them are closer to walks, but that’s fine). The other section will cover hikes that are further out, up to around two hours from Seattle (one-way).
Our Favorite Hikes IN Seattle
If you’re looking for a quick taste of nature within Seattle’s city limits, you have quite a few good options (especially compared to most other big cities).
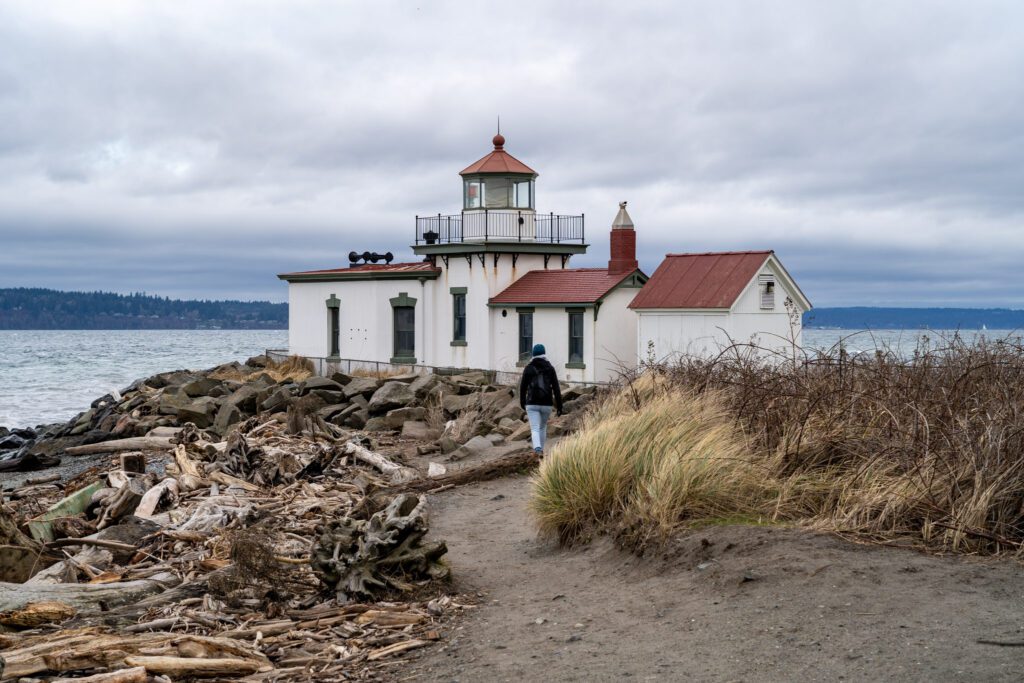
The Discovery Park Lighthouse Loop
- Length: 4.5 miles
- Elevation Gain: 450 feet
- Trail Type: Loop
- Difficulty: Easy
- Pass Required? None
- Dog-Friendly? Yes, on a leash
- Trailhead Location: Discovery Park Visitor Center
This is, without a doubt, our absolute number one pick for hiking within Seattle, and it’s a hike that we recommend in our 3 day Seattle itinerary for visitors because we think it offers a unique perspective of Seattle, which is a relatively green city compared to most.
I’ll never forget landing in Seattle with Alysha, who grew up in Northern California, on our first trip to visit my family and her remarking that everything is so GREEN.
Discovery Park is just northwest of Downtown Seattle, and the proximity to the skyscrapers and Space Needle is part of the appeal here. There are even multiple buses that will get you there from places like Pike Place Market or the Seattle Center within about 30 minutes.
If you’re driving, we like to park at the visitor center, which has some interesting information about the park, plenty of parking, and restrooms.
From there, you have many options in terms of your route, but the ultimate destination is West Point Lighthouse, which is the northwestern corner of the peninsula that Downtown Seattle is on, along with North and South Beach (which are on either end of that peninsula).
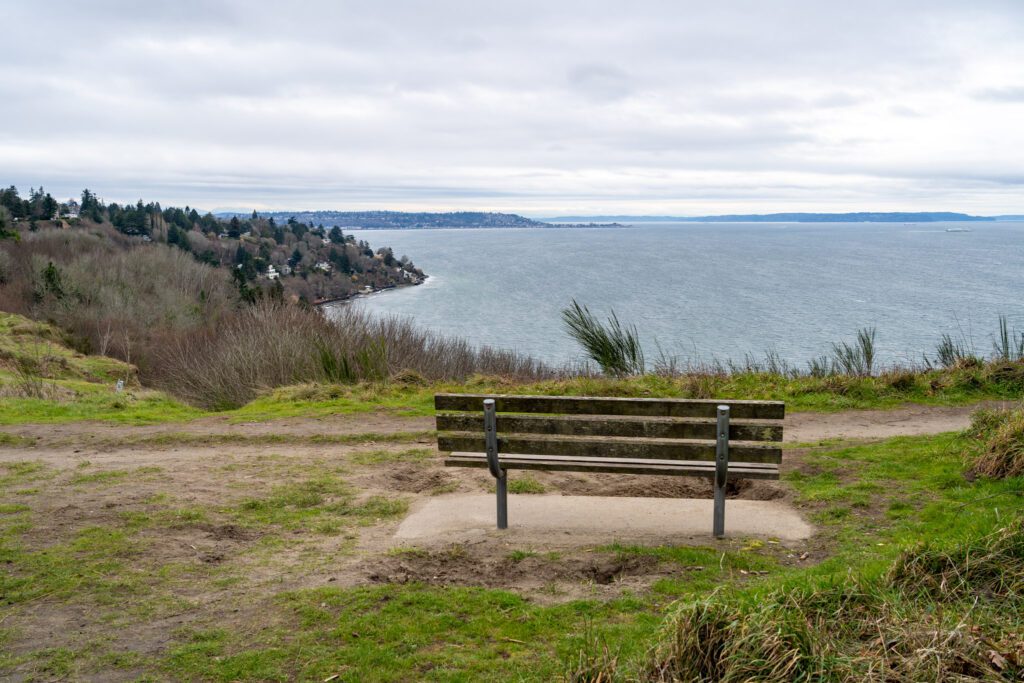
The best way to do it, we think, is to do this 4.5 mile loop.
It’s not particularly hard – there are a couple of staircases along the way that can be wet after rain. But it covers the best parts of the hike – the beaches and lighthouse, the mossy forest, and last but not least, the bluffs above the beach.
You can shorten it by making it an out-and-back hike from the South Parking Lot (here on Google Maps), which brings it closer to three miles (with a similar elevation profile).
The Seward Park Perimeter Loop
- Length: 2.4 miles
- Elevation Gain: None
- Trail Type: Loop
- Difficulty: Easy
- Pass Required? None
- Dog-Friendly? Yes, on a leash
- Trailhead Location: Seward Park Parking Lot
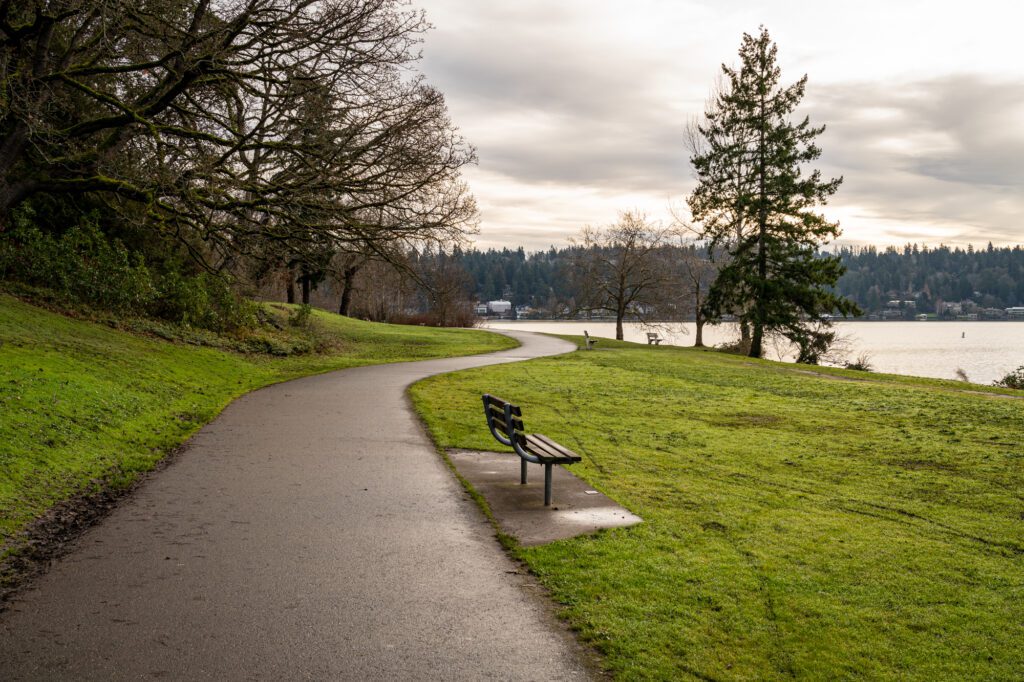
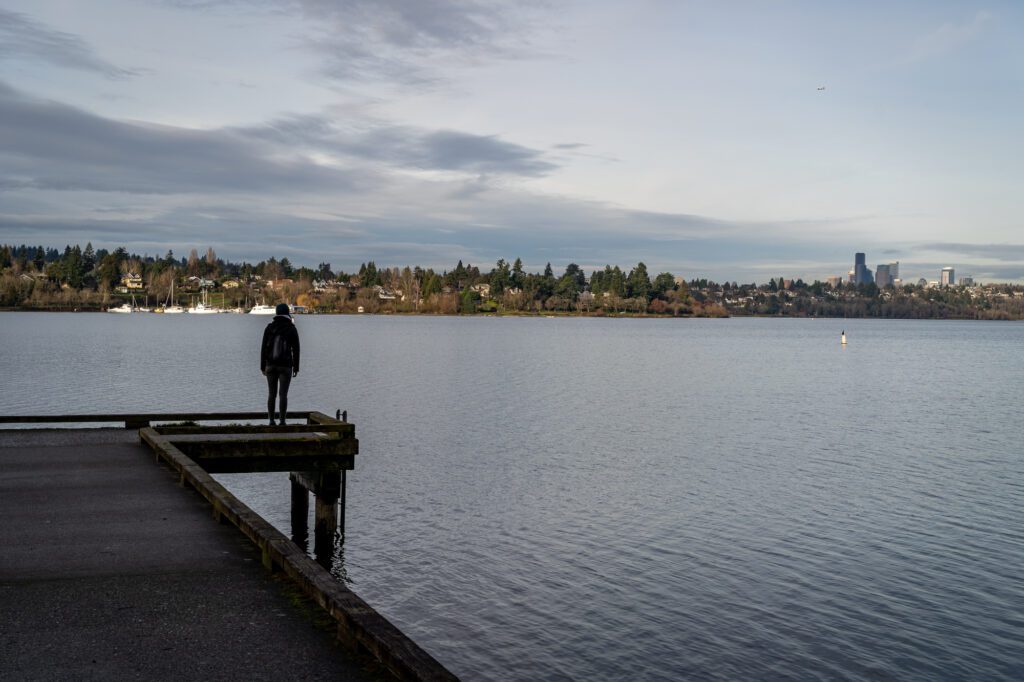
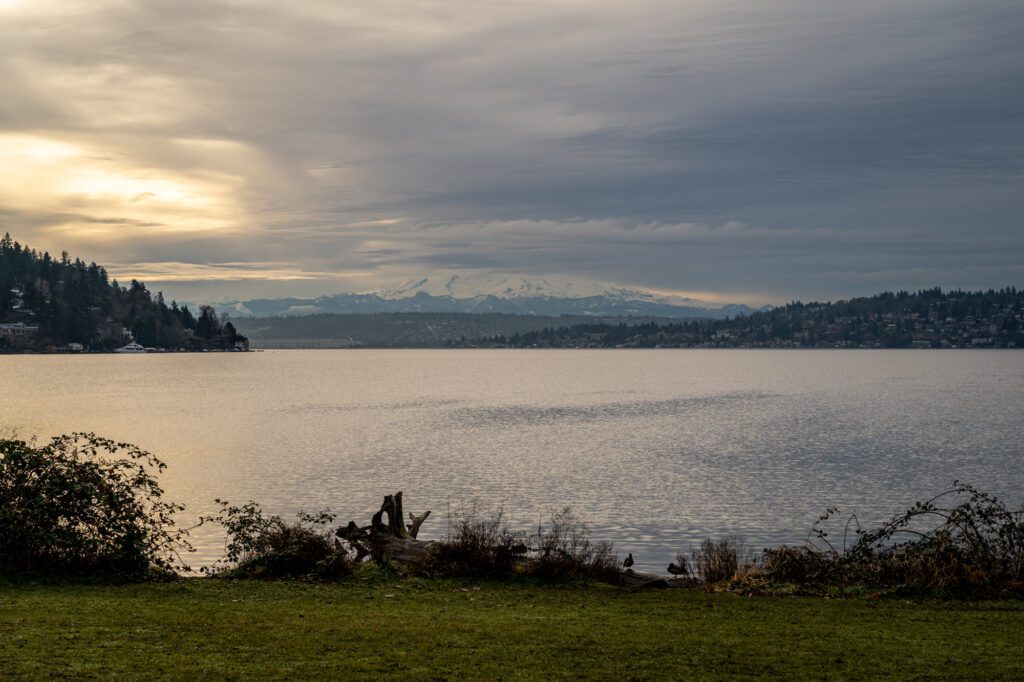
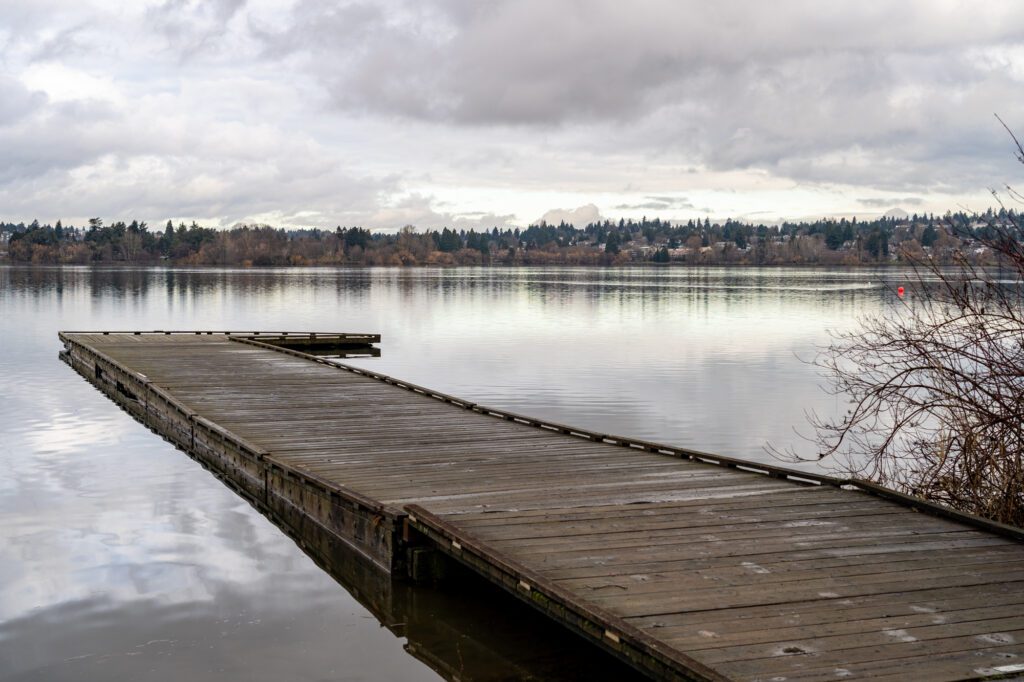
I wouldn’t necessarily call this the most thrilling hike in the world, but Seward Park is a lovely green oasis on the southern edge of Seattle. It is flat, making it perfect for all abilities, and offers fantastic views of Lake Washington as you meander around the point along the lakefront.
There are a couple of hiking options here – a trail that makes a loop around the perimeter of the park, and a network of trails that goes up into the forest in the center of the park.
It comes down to personal preference, but we like the perimeter route because you get great views of Rainier at the south end of the park, and Seattle at the north end.You could ALMOST see the base of Rainier on this cloudy day.
However, the perimeter route is a flat, paved path, so if you’re looking to get into nature, choose the trails in the middle of the park, which feel much more remote than their location would suggest (10 minutes from Downtown Seattle).
We would recommend taking a picnic lunch and sitting by the lake to relax either before or after your walk.
Weekends and holidays are very crowded, but the park is popular all days of the week.
The Green Lake Loop
- Length: 3.0 miles
- Elevation Gain: None
- Trail Type: Loop
- Difficulty: Easy
- Pass Required? None
- Dog-Friendly? Yes, on a leash
- Trailhead Location: Green Lake South Parking Lot
On the spectrum of “walk” to “epic hiking adventure,” this is decidedly closer to the walk side. But it’s an enjoyable 90 minute stroll along the edge of Green Lake, and there are some short detours from the trail that will bring you to a couple of our favorite spots in Seattle.
Matt used to live two blocks from Green Lake, and in the summertime, this area becomes one of the hot spots in the city.
Even on the rare sunny day during deep winter, you’ll find Seattleites out and about soaking up the fleeting sunshine before returning to their deep, dark caves awaiting the return of summer.
It’s a paved pathway all the way around the lake, and you’ll share it with bikes, roller bladers, dogs, ducks, and your fellow humans. It’s also almost entirely flat.
Here are some worthy detours from the paved pathway.
- On the eastern side of the lake, you have a great one-two-three punch of coffee, lunch, and a drink, though it involves a bit of walking (through a very pleasant neighborhood). Start with coffee at Zoka Coffee (a highly underrated Seattle coffee shop that I only recently rediscovered and have enjoyed), excellent tamales at Frelard Tamales on Latona, and a drink across the street at the Latona Pub, a neighborhood institution (Matt lived in the vicinity here before moving down to San Francisco back in 2014).
- Directly west of Green Lake at 65th (ish), you have Greenwood Avenue, which is full of places to eat and drink. Herkimer Coffee, a Seattle original, is always a good bet, and the Chicken Supply a few doors up is one of our favorite spots in Seattle (we regularly drive a long way from Matt’s mom’s house in the burbs to pick up this heavenly fried chicken).
- On the southwest corner of the lake is Woodland Park, where you’ll find the Woodland Park Zoo. If you’re a zoo person in Seattle, this is it! It’s an easy 15-20 minute walk through Woodland Park to the zoo from the southern end of Green Lake.
20 Great Hikes Near Seattle (~1-2 hours away)
If you’re looking to escape the city and get further out into nature, we have some absolutely fantastic news for you.
There is perhaps no better place to do that than Seattle. There are great hikes to be had within 30-40 minutes of the city center, and we came up with a list of twenty hikes worth doing within about two hours of the city, offering a wide variety of terrains, difficulty levels, and rewards from towering waterfalls to unobstructed views of Mount Rainier.
We’ve put together a list of 20 hikes near Seattle that are accessible as a day trip (which we’re calling about 2 hours one way).
We’re going to order them by distance from Seattle, starting with a few hikes that are closer in, and then spiraling out from there to hikes to the east, north, and south of the city.
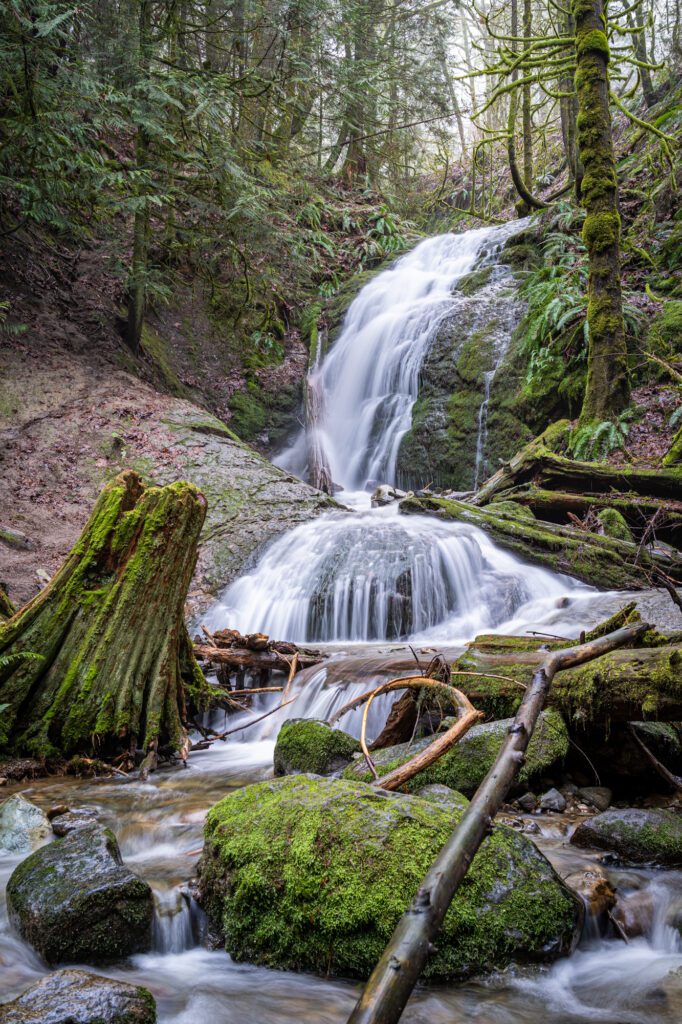
Coal Creek Falls (Cougar Mountain / Issaquah)
- Length: 2.7 miles
- Elevation Gain: 544 feet
- Trail Type: Loop
- Difficulty: Easy
- Pass Required? None
- Dog-Friendly? Yes, on a leash
- Distance from Seattle: 13 miles; 20 minutes
- Trailhead Location: Red Town Trailhead
This is a hike that I have definitely taken for granted since it is literally five minutes from the house I grew up in.
However, after doing this hike on a cold, wet winter morning, I think it deserves a spot on this list for two reasons (update for 2024: we do this hike all the time now with the dog, and it’s a great little hike!).
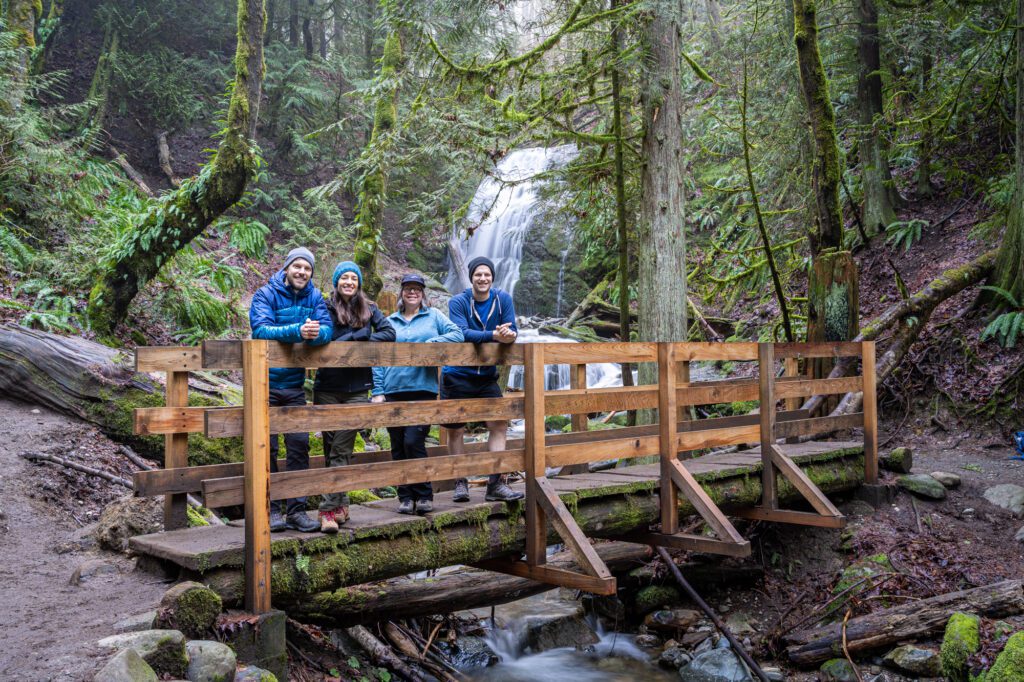
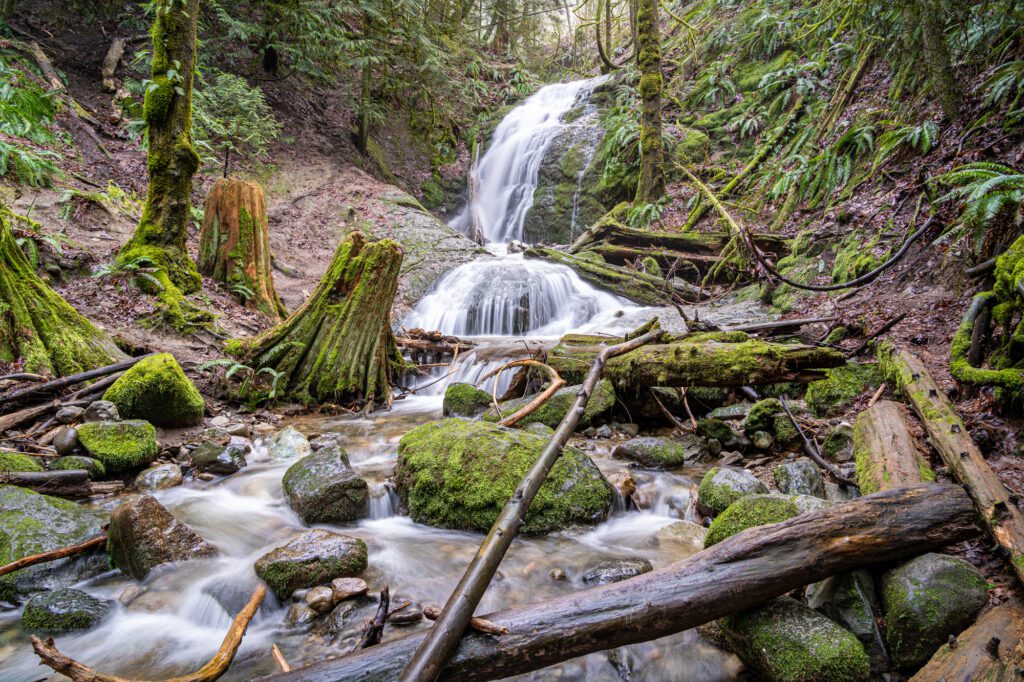
First, it’s a great winter option because it’s at a lower elevation than many of the hikes on this list, which means it’s accessible year round. Plus, the waterfall is impressive in the winter, when the flow is high.
Second, this hike is insanely accessible from Seattle, which means you don’t have to commit to a full day affair. It’s roughly 20 minutes from your door to the trailhead (closer if you’re coming from somewhere on the Eastside), which makes it the most accessible hike near Seattle on this list.
The most direct route to the falls is an out-and-back from the main parking lot along Newcastle Golf Club Road (here on Google Maps), but we always prefer loops, so we’d recommend this route instead (it’s BARELY longer).
The nice part about the whole Cougar Mountain area is that there’s a seemingly endless network of trails that you can combine to extend your hike, depending on what you’re up for.
Here’s a longer trail that covers more ground, if you’re looking for something longer.
Poo Poo Point via the Chirico Trail (Tiger Mountain / Issaquah)
- Length: 4 miles
- Elevation Gain: 1,750 feet
- Trail Type: Out and Back
- Difficulty: Moderate / Hard
- Pass Required? None
- Dog-Friendly? Yes, on a leash
- Distance from Seattle: 25 miles; 45 minutes
- Trailhead Location: Poo Poo Point Trailhead (Chirico Trail)
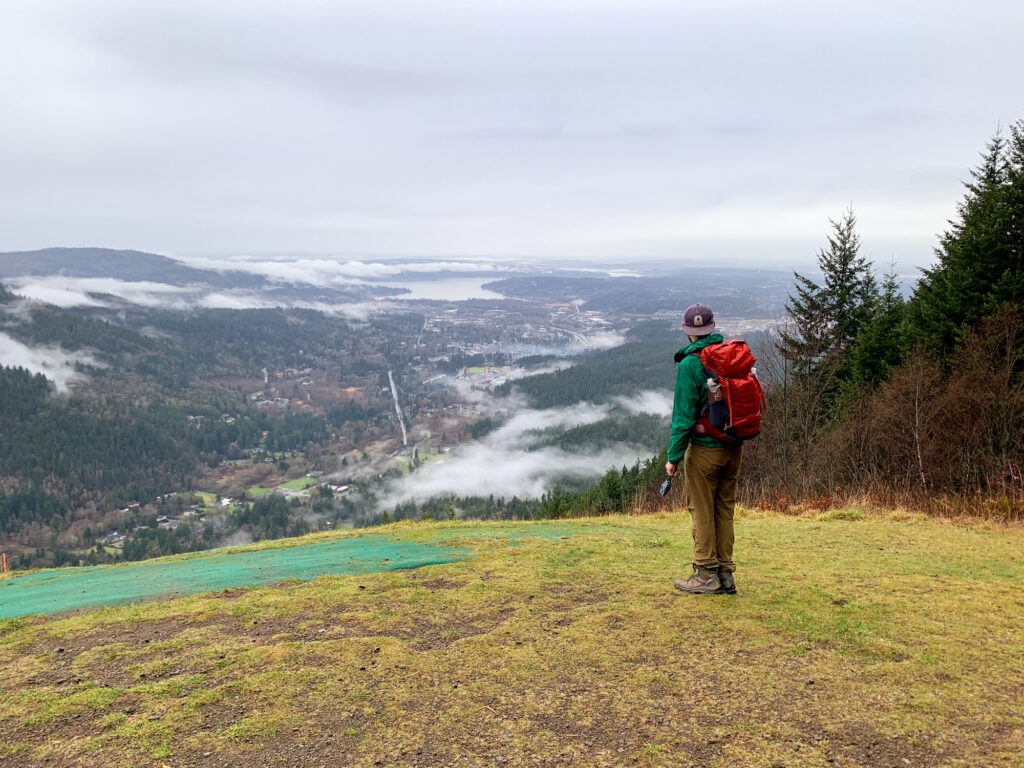
Situated on West Tiger Mountain in Issaquah, the hike to Poo Poo Point is a perfect way to breathe in that fresh forest air without having to venture too far from Seattle.
This is a hike that we’ve done multiple times, and it always delivers a quick up and down that will get your heart pumping on the short but steep climb.
The hike up to Poo Poo Point is a moderate climb (some might call it hard) with amazing views over Issaquah and Lake Sammamish to the northwest.
You’ll climb through the forest of Tiger Mountain, which is notoriously muddy after rain (or, just muddy in general in the winter and spring). Another reason to wear waterproof hiking boots.
The climb can be a little steep, and you will certainly feel it in your thighs the next day. On the way up to the highest point in the hike, you will probably see paragliders launching – it’s one of the best spots for paragliding in the state.
There are, essentially, two routes to take to get up to Poo Poo Point: the High School Trail and the Chirico Trail.
The Chirico Trail, which is the one we prefer because it’s more direct and is a better workout, starts from a parking lot off of Issaquah-Hobart Road.
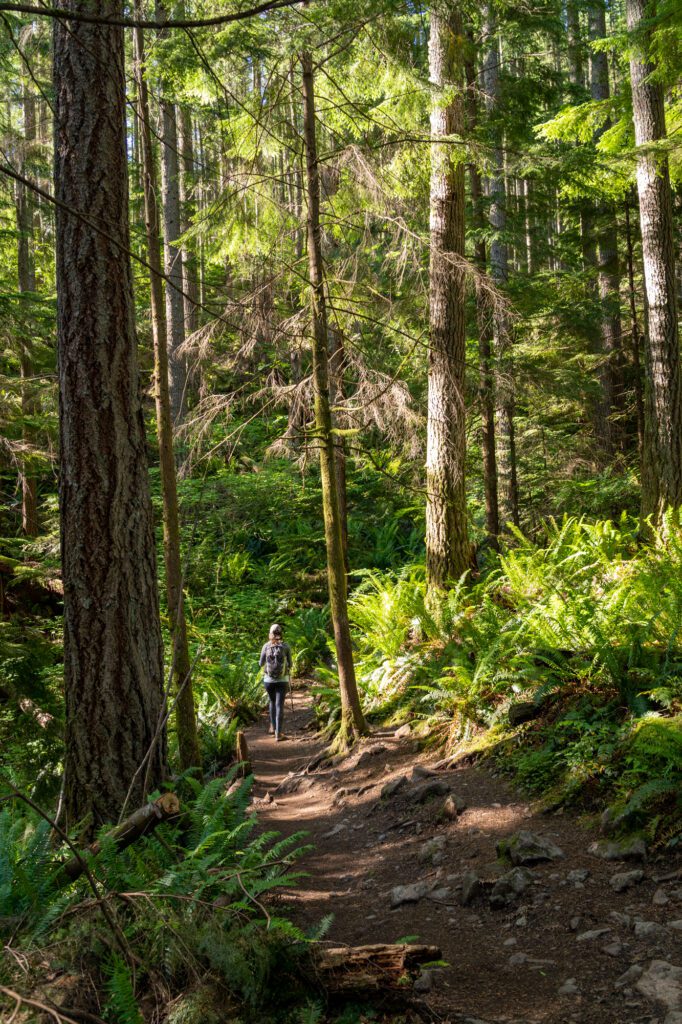
It’s essentially a climb from start to finish, and there’s not a whole lot to say about the trail itself. It’s mossy. It’s ferny. It’s green. And it’s a great example of why we love hiking in the Pacific Northwest.
The other version of this hike climbs the same amount, but does it over an extra two miles, which makes it a more moderate option. It’s called the “High School Trail” because it leaves from a trailhead near Issaquah High School (here on Google Maps).
The Twin Falls Trail (Snoqualmie Pass)
- Length: 2.6 miles
- Elevation Gain: 500 feet
- Trail Type: Out and Back
- Difficulty: Easy
- Pass Required? Discover Pass
- Dog-Friendly? Yes, on a leash
- Distance from Seattle: 35 miles; 35 minutes
- Trailhead Location: Twin Falls Trailhead
If you’re in the market for an easy hike near Seattle with a nice payoff at the end, this hike to Twin Falls is for you! I’ve done this hike a few different times now, and it’s always a pleasant journey.
Just over half an hour drive east of Seattle in North Bend, Twin Falls Trail is a world away from urban life. The hike to the best viewpoint of the falls is just over 2.5 miles roundtrip and starts from the Twin Falls parking lot.
Heads up – you will need a Discover Pass to park at the trailhead. Last time I was there, the machine to buy day passes wasn’t working, which presented a bit of a conundrum for people who didn’t have an annual pass.
The hike starts out by following the South Fork of the Snoqualmie River before deviating from the path of the river and climbing gently up some switchbacks through the forest.
The trail drops down back to the river (briefly) before you start the final ascent to Twin Falls, which involves a little bit of up and down along the way.
The payoff is, you guessed it, Twin Falls. There are two viewpoints – one for the Lower Falls, and one for the Upper Falls.
For the Lower Falls, veer right off the trail at the 1 mile mark, and take the path down the hill.
Then, climb back up to the main trail and continue along for another 0.1 mile, which is when you’ll reach the viewing platform for the Upper Falls.
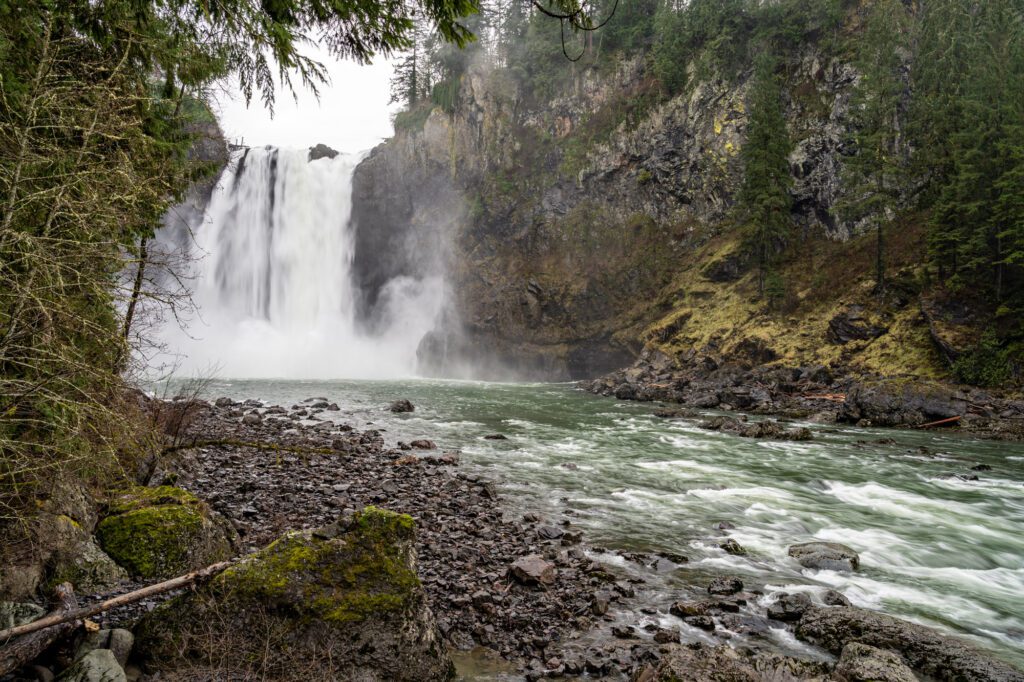
Snoqualmie Falls (Snoqualmie Pass)
- Length: 1.4 miles
- Elevation Gain: 250 feet
- Trail Type: Out and Back
- Difficulty: Easy
- Pass Required? None
- Dog-Friendly? Yes, on a leash
- Distance from Seattle: 30 miles; 35 minutes
- Trailhead Location: Snoqualmie Falls Lower Parking Lot
Snoqualmie Falls is a great little half day adventure from Seattle if you need a quick city break. The trail is short, packed with information and views, and accessible for most levels.
Located off of I-90 as it heads east up to Snoqualmie Pass, there are two parking lots for Snoqualmie Falls, and this hike essentially connects the two.
For the best experience in terms of both parking and the “wow” factor, we recommend starting at the lower falls and climbing up to the upper viewpoint, which is the more impressive of the two. This way, it’ll feel like you earned the view, rather than parking at the upper parking lot and just walking over to it.
Along the walk, read signs explaining the significance of the Snoqualmie River and Falls in Native American culture and explaining about local flora and fauna. Wander through ferns, fir, cedar, and maple trees that are particularly striking during fall.
The reward at the end of the short climb is an extraordinary view over the powerful waterfall.
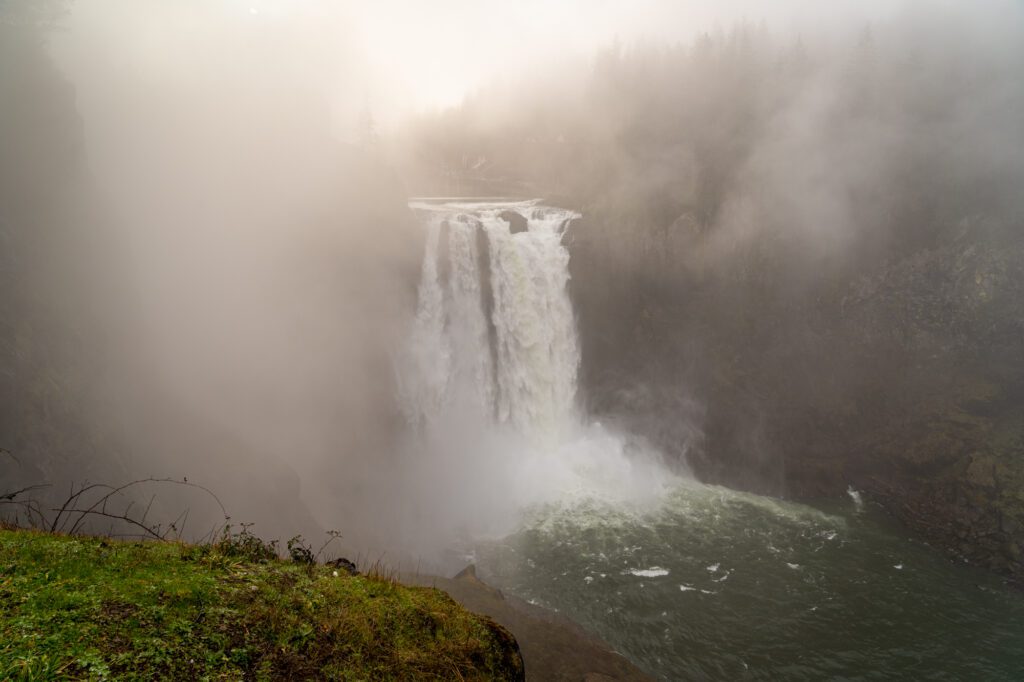
Walk along the walkway and revel in the roar of the falls and the refreshing spray encircling you. Snoqualmie Falls takes on a new facade each season and is at its most powerful in the spring due to fresh snowmelt, but there is water year round (unlike some other falls, which run dry in the summer).
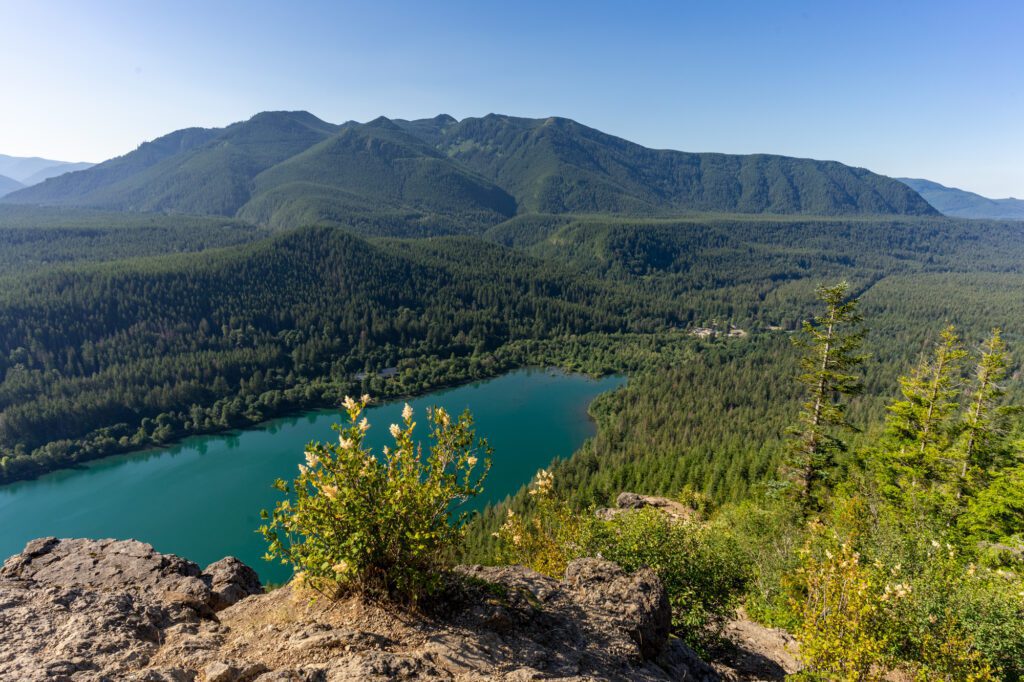
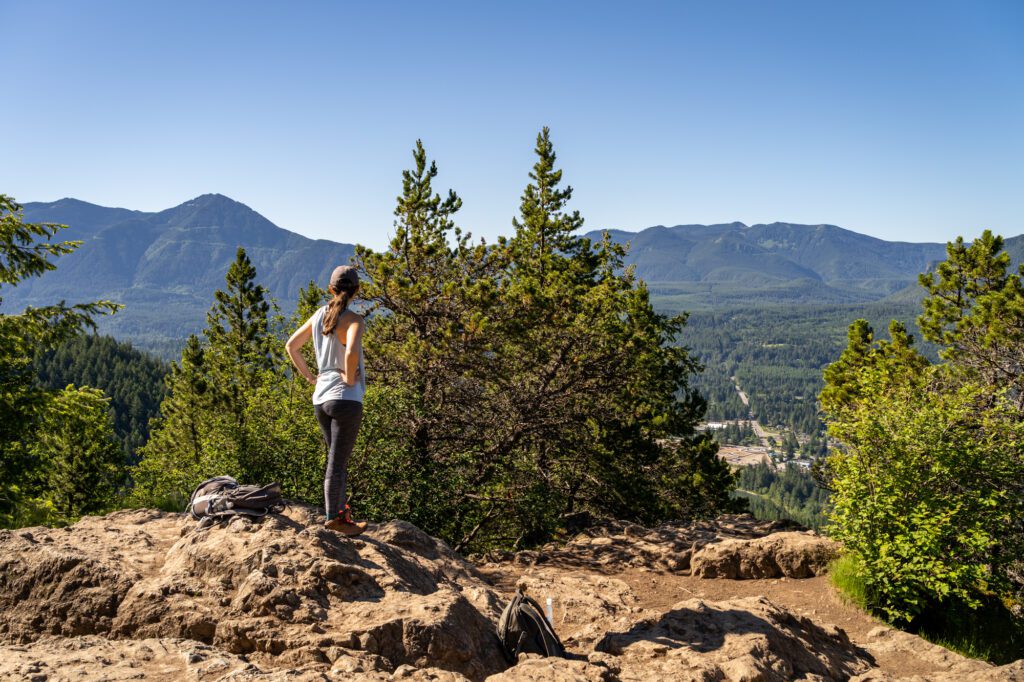
Rattlesnake Ledge (Snoqualmie Pass)
- Length: 4.0 miles
- Elevation Gain: 1,160 feet
- Trail Type: Out and Back
- Difficulty: Moderate
- Pass Required? None
- Dog-Friendly? Yes, on a leash
- Distance from Seattle: 35 miles; 40 minutes
- Trailhead Location: Rattlesnake Ledge Trailhead
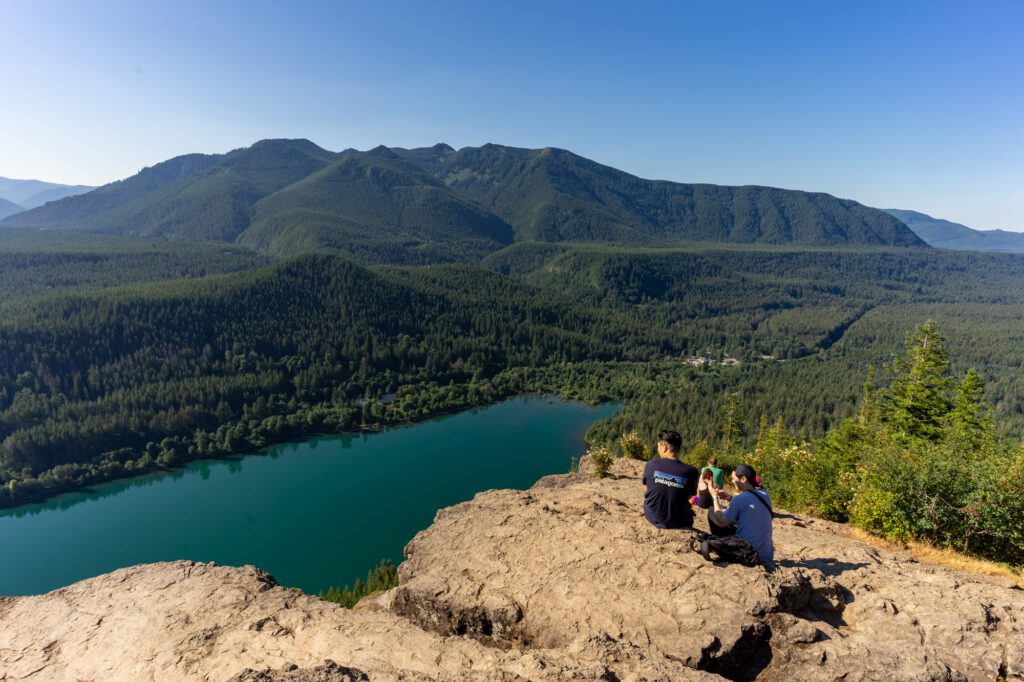
Every time I had done this hike it had magically been sunny at the bottom, and foggy at the top until the most recent time, so I had really only seen pictures of the spectacular view.
Now that we got up to the viewpoint over blue-green Rattlesnake Lake on a clear summer day, I can officially confirm that it’s a great view.
This is a popular hike, partially because it is only a short distance outside of Seattle, basically in the town of Issaquah, but it feels like you’re in the middle of the wilderness.
On summer weekend mornings, the trail is packed with families, kids, and pups all getting a nice workout in and enjoying the views at the top.
You’ll be hiking straight up and straight down on a well maintained trail, but it can be wet and slippery if it has rained recently. You’ll be hiking through the forest on the way up, and the only time you get a break in the trees for a nice view is when you reach the top.
Bring a sturdy pair of hiking boots for traction and hiking poles to save your knees on the way down.
If you can swing it, try visiting at sunrise or sunset to catch the amazing view from Rattlesnake Ledge. Looking across the small lake right below the mountain, with views of the dense forests on the mountains in the distance, is a great way to start or end your day!
The Little Si Trail (Snoqualmie Pass)
- Length: 4.1 miles
- Elevation Gain: 1,200 feet
- Trail Type: Out and Back
- Difficulty: Moderate
- Pass Required? Discover Pass
- Dog-Friendly? Yes, on a leash
- Distance from Seattle: 33 miles; 40 minutes
- Trailhead Location: Little Si Trailhead
Little Si is the smaller neighbor to Mount Si—and a fantastic trek for newer hikers looking for a nature fix with a more modest physical challenge than the full climb to Mount Si’s peak (more on that in a second).
This popular route is accessed from I-90 East on Mount Si Road, where you’ll find a relatively small primary parking lot and an overflow lot a short way down the road.
Be warned that this popular trail attracts many visitors and is typically crowded on weekends, rain or shine. Both Little and Mount Si can be accessed year-round, making them some of the few hikes that can be experienced even during the off season (outside of intense storms), which adds to their popularity.
The start and end of this hike feature steep inclines, but the middle is more gradual in elevation. There are some great fern-laden forest sections, and then a spectacular view from the top of the hike across the valley towards the Cascades.

Don’t be discouraged by the immediate steep ascent—the trail soon flattens out.
After a steep climb near the end of the trail, you’ll emerge onto a rocky outcropping, which is the summit of Little Si.
Take in views over the valley, as well as the peaks of Mount Si and Mount Washington before turning around and heading back down the mountain, following the trail the way you came.
Find more trail information in our guide to hiking the Little Si Trail.
The Mount Si Trail (Snoqualmie Pass)
- Length: 8.0 miles
- Elevation Gain: 3,150 feet
- Trail Type: Out and Back
- Difficulty: Difficult
- Pass Required? Discover Pass
- Dog-Friendly? Yes, on a leash
- Distance from Seattle: 35 miles; 40 minutes
- Trailhead Location: Mount Si Trailhead
The proximity of Mount Si to Seattle certainly contributes to the popularity of this well-trodden trail. It’s almost a measure of fitness for locals – it’s not uncommon to hear people who live east of Seattle using Mount Si as a measuring stick for what kind of hiking shape they’re in.
When you take a look at the hike, it immediately makes sense why that is the case.
This hike is no joke. It’s straight up, gaining over 3,000 feet of elevation over the four miles it takes to get to the summit (to be clear, then there’s another four miles back down).
Even though this trail is difficult, it is hiked by approximately 100,000 people every single year because it is so accessible from Seattle and the surrounding area. North Bend, which is where you’ll find the trailhead, is just a 40 minute drive from Seattle.
The trailhead is in North Bend off of I-90 and is guaranteed to fill up, even on the not so ideal weather days. If you’re hiking on a weekend or holiday, consider shuttling with Trailhead Direct to save space and fuel.
Mount Si is a perfect challenge for novice and experienced hikers alike, immersing you into some classic Pacific Northwest rugged beauty in the Central Cascades. The trail is also used by trekkers with weighted backpacks preparing for a Rainier ascent.
As you set off on the trail, you’ll almost immediately start climbing, albeit at a gradual pace. The path flattens out at about a mile-and-a-half in. Take your time here as you walk among giant, old-growth trees that have withstood fires and logging.
Mount Si was previously a mining and logging center before it was protected as a state conservation area. From here, the trail becomes much steeper and continues to climb through a new growth forest. Along the way, stop and catch some views when there’s a clearing in the forest.
Near the top, you’ll find a great spot for lunch that overlooks the rolling green hills of the Snoqualmie Valley and the snowy peak of Mount Rainier on clear days.
Don’t stop here, though! Follow stone steps up and over rocks to Mount Si’s true summit, overlooking the Olympics, Seattle, and Snoqualmie Valley.
Mailbox Peak (Snoqualmie Pass)
- Length: 9.4 miles
- Elevation Gain: 4,000 feet
- Trail Type: Out and Back
- Difficulty: Very Difficult
- Pass Required? Discover Pass
- Dog-Friendly? Yes, on a leash
- Distance from Seattle: 37 miles; 40 minutes
- Trailhead Location: Mailbox Peak Trailhead
Don’t let the popularity of Mailbox Peak fool you—this hike is no easy feat and isn’t for the faint of heart.
That being said, the recently updated trail is more manageable than the old trail. The number of rescues and injuries on the old trail were enough reason for a new trail to the top to be constructed.
Your reward at the end? A mailbox full of letters, of course.
Your adventure begins on Middle Fork Road off of I-90, where there are two parking lots next to the trailhead. Arrive early to have a chance at finding a spot on summer weekends.
At the end of the paved road, walk around a gate, and enter into a clearing that indicates the new trail. The lower half of the hike involves a number of bridge and creek crossings. And then it’s time to conquer the many switchbacks.
The best way to do this hike is as a loop, taking the Old Trail up, which is steeper and more direct, and then the New Trail – which is essentially one big long set of switchbacks – on the way down.
With about four miles of steep climbing to reach the top, it’s inevitable that your legs will be burning. The final push to the summit is even more of a challenge. The views will hopefully melt away the memory of your grueling ascent, however, and the iconic mailbox marks the top.
Take a break for a while along the ridgeline as you stare into the peak of Rainier and down over the fertile valley unfolding in a panoramic view in front of you before you tackle the descent, which is arguably equally challenging and is almost sure to result in jello legs.
Dirty Harry’s Balcony (Snoqualmie Pass)
- Length: 4.4 miles
- Elevation Gain: 1,600 feet
- Trail Type: Out and Back
- Difficulty: Moderate
- Pass Required? Discover Pass
- Dog-Friendly? Yes, on a leash
- Distance from Seattle: 40 miles; 40 minutes
- Trailhead Location: Dirty Harry’s Balcony Trailhead
Combine a tough workout with some rocky viewpoints on this North Bend hike. Located off the exit for the Fire Training Academy, the trailhead for Dirty Harry’s Balcony is marked with a sign, where you’ll find a parking lot.
The first section of the hike requires you to walk on the road to the Fire Training Academy. Immediately after you cross the bridge over the Snoqualmie River, follow the trail that veers to the right.
The trail starts climbing pretty quickly, and you’ll follow switchbacks uphill for most of the trek. Notice climbing route bolts along the way and the massive boulders on the route that have been put in place to secure the trail.
Take a breather on a cliff as you admire the views. Keep in mind this isn’t the ultimate balcony—you still have about a mile to go before you reach Dirty Harry’s Balcony, where valley and mountain views await.
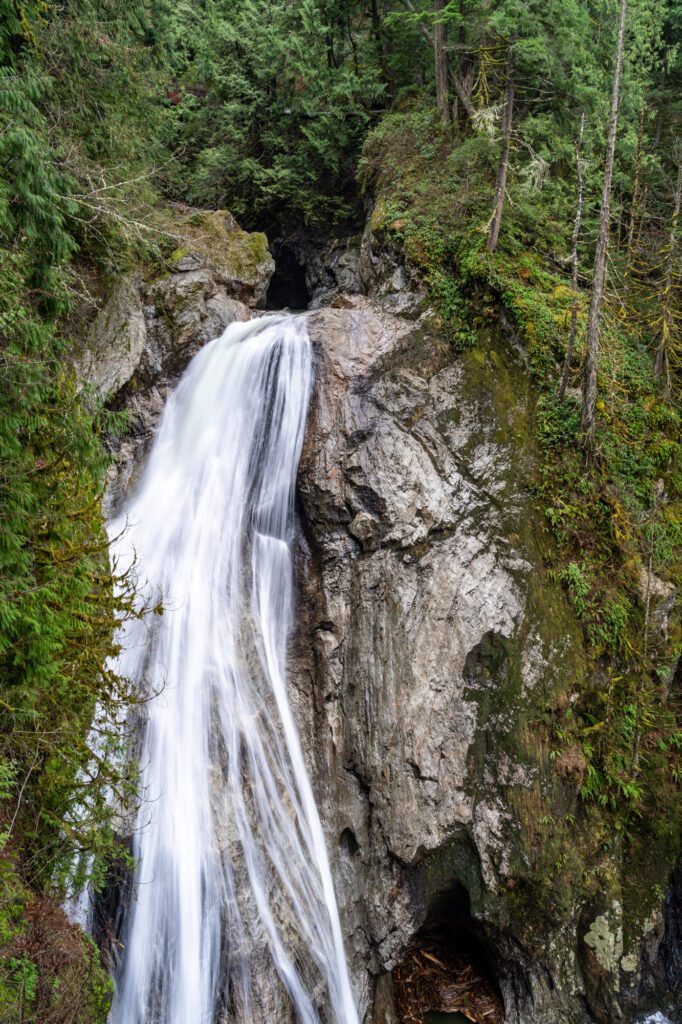
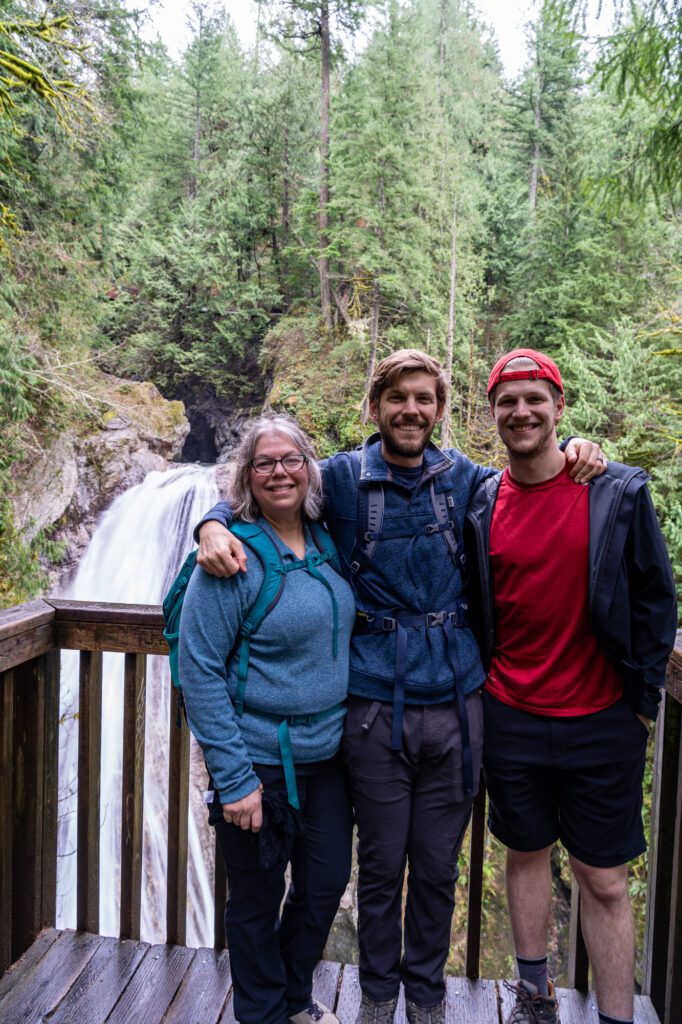
The Wallace Falls Trail (Wallace Falls State Park)
- Length: 5.6 miles
- Elevation Gain: 1,300 feet
- Trail Type: Out and Back
- Difficulty: Moderate
- Pass Required? Discover Pass
- Dog-Friendly? Yes, on a leash
- Distance from Seattle: 50 miles; 1 hour
- Trailhead Location: Wallace Falls State Park
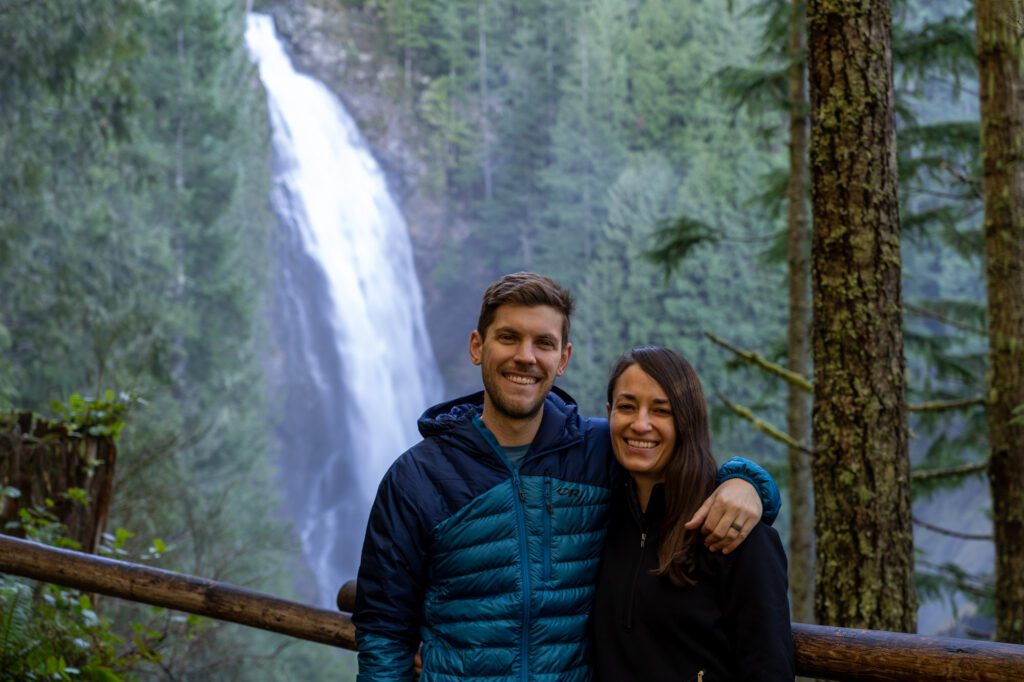
We loved this hike. As we drove east on Highway 2 towards Stevens Pass, we drove into a dense bank of fog sitting in the Skykomish River Valley that had us scared that we weren’t going to be able to see the waterfall.
As we entered Wallace Falls State Park and started up the trail, we were right on the edge of the fog bank. It was still unclear if there was going to be a blanket of fog shrouding the waterfall from view.
About halfway to the waterfall, the fog broke and all of a sudden it went from dreary and gray to bright and blue!
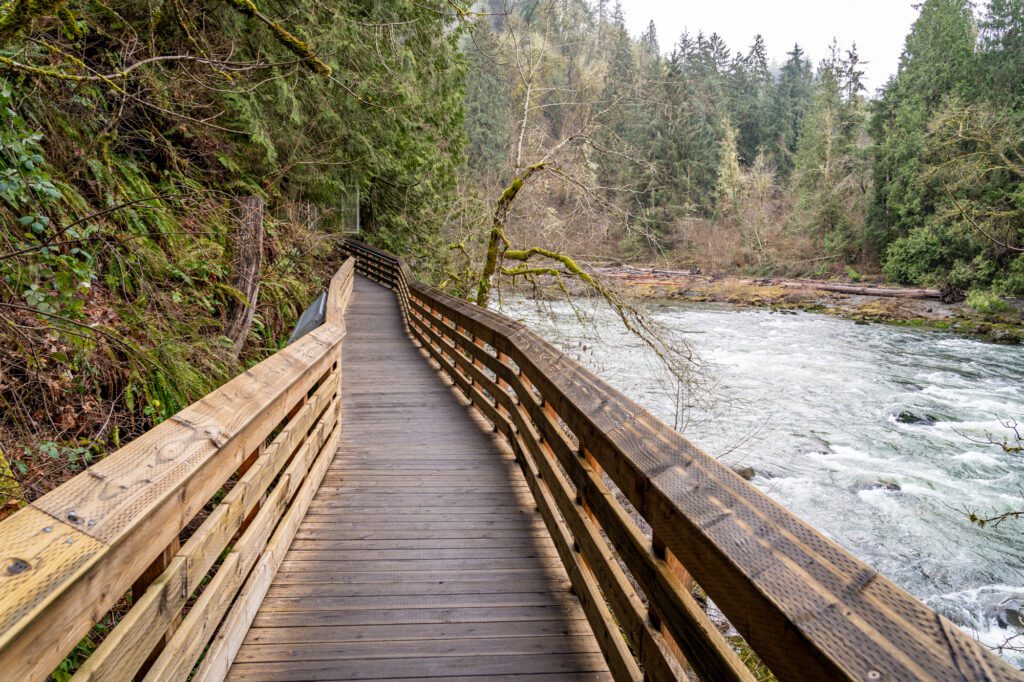
There are a couple of routes that you can take to reach the falls – the Woody Trail follows a more direct route along the Skykomish River, and the Railroad Grade trail follows the forest road that is more even and more accessible for people with mobility issues.
We took the Woody Trail, and would highly recommend it. You can make it a loop, but the railroad grade adds an extra mile or so to the distance AND it’s less scenic.
This hike is surprisingly tough. We saw five miles and thought “how hard can it be?”
However, the post-holiday weight and winter inactivity led to a much tougher hike than we were expecting. Climbing 1,500 feet over two miles or so is no joke, and there are a bunch of switchbacks to tackle before reaching the falls.
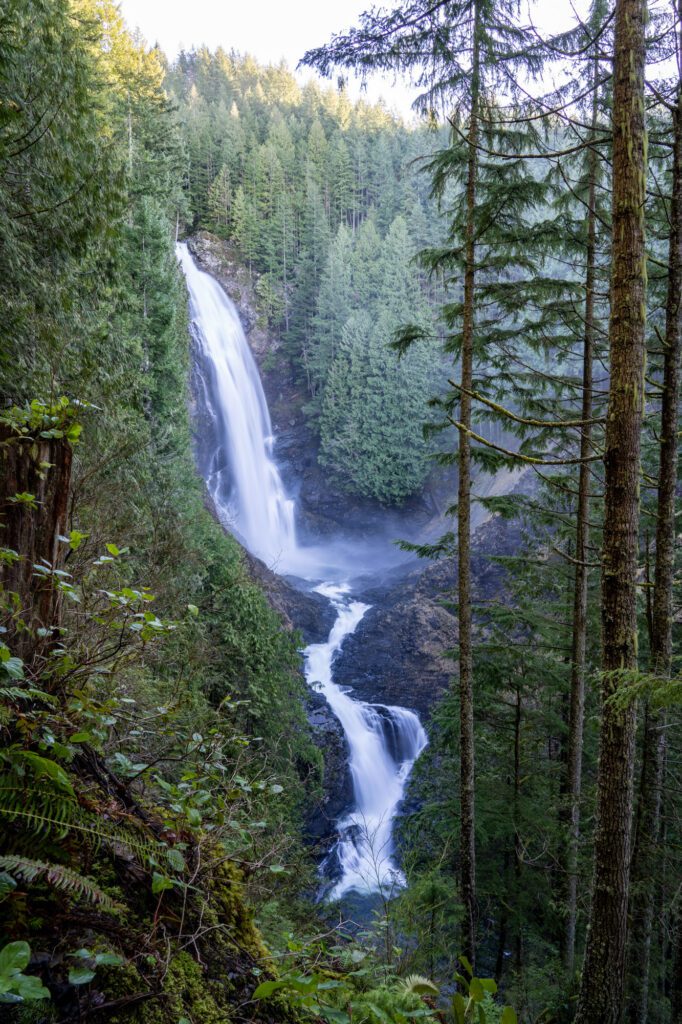
There are a couple of different viewpoints along this trail, and the one that you absolutely should not miss is the Middle Falls Overlook, which is the epic view of the two-tiered waterfall. It’s 2.1 miles into the trail.
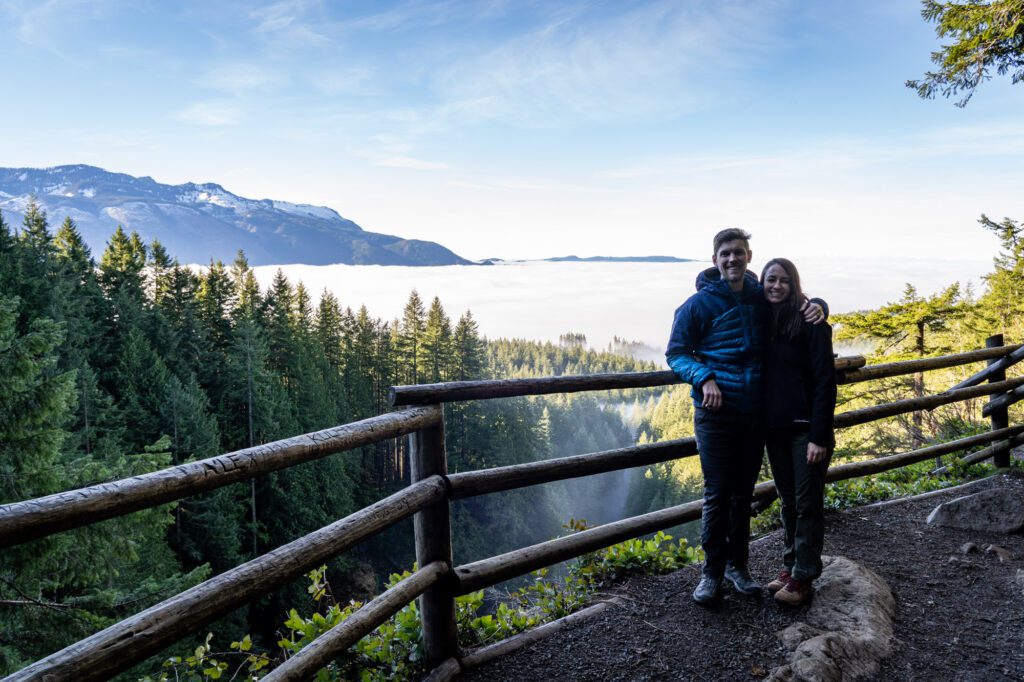
If it’s clear out, we think it’s worth the effort to continue up past that overlook to the Valley Overlook, where you have a nice view of the Skykomish Valley AND the Olympics.
We were able to climb up above the fog when we did this hike in January, and were treated with a spectacular view of the fog-covered valley with the Olympics in the distance.
You can extend your hike beyond the falls by heading out to Wallace Lake (8.8 miles), or by making it a big loop by continuing up the trail past the Upper Falls and heading out to Wallace Lake, making it a lollipop hike (11 miles).
We love this hike, and you can find more trail information in our guide to hiking the Wallace Falls Trail.
Snow Lake and Gem Lake (Snoqualmie Pass)
- Length: 7.2 miles / 10.0 miles
- Elevation Gain: 1,800 feet/ 2,200 feet
- Trail Type: Out and Back
- Difficulty: Moderate
- Pass Required? Northwest Forest Pass
- Dog-Friendly? Yes, on a leash
- Distance from Seattle: 52 miles; 1 hour
- Trailhead Location: Snow Lake Trailhead
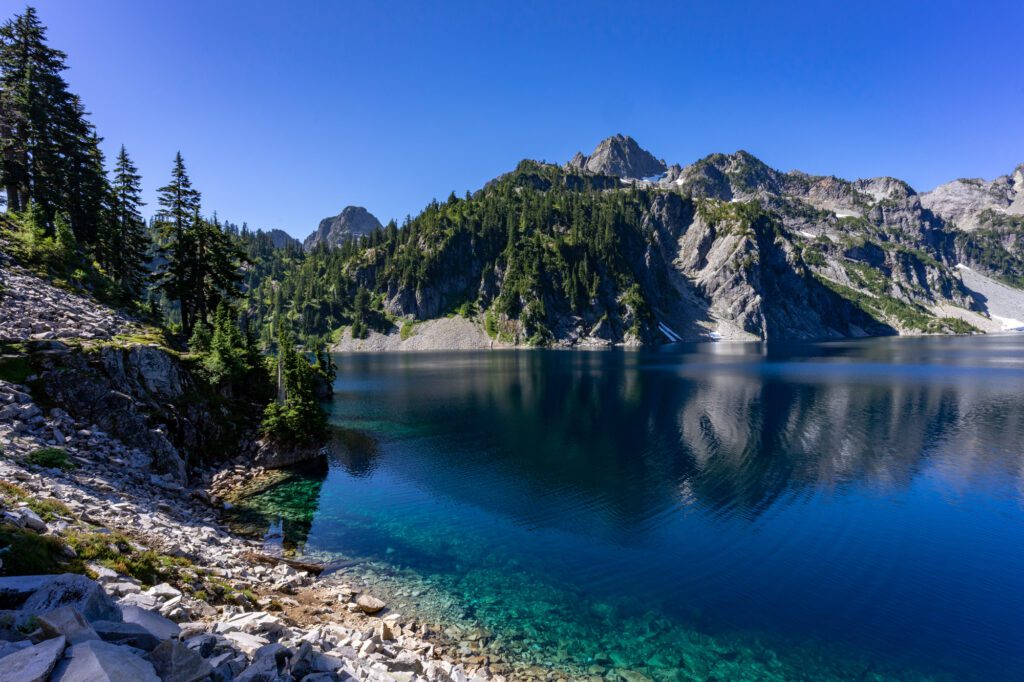
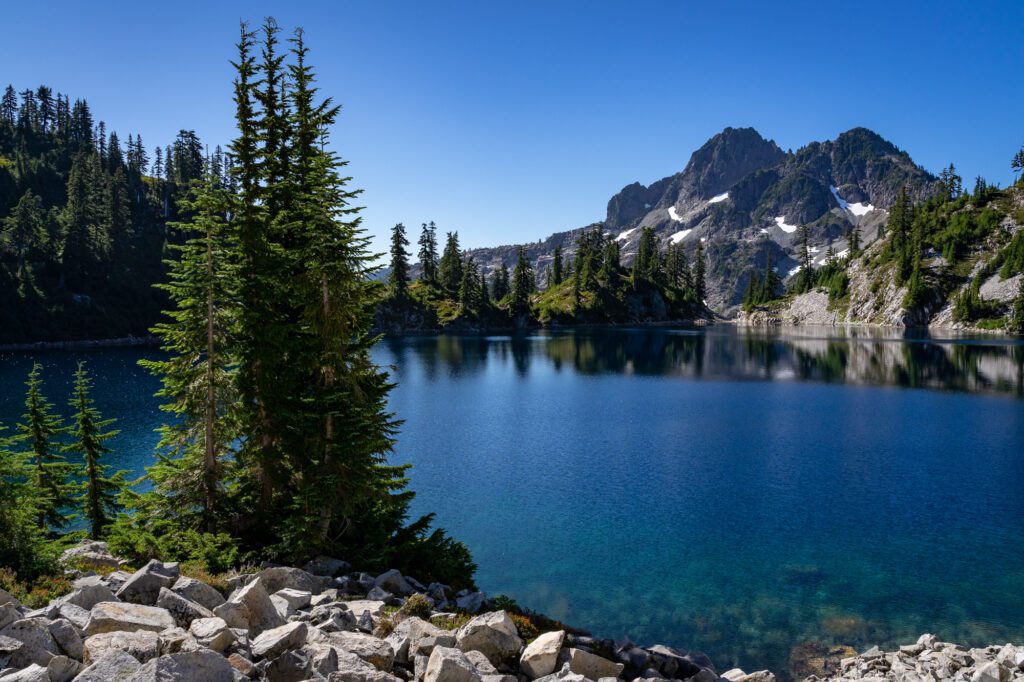
If you’re at all familiar with hiking around Seattle, you probably know Snow Lake.
When you think about all the great hiking in the state, this trail is one of the most popular in the Seattle area because it gives you a taste of the Alpine Lakes Wilderness (one of the most spectacular hiking destinations in the country) without the effort of backpacking in and spending the night or driving three hours to get to Colchuck Lake.
We love this hike, and think it’s a good blend of effort to reward ratio, proximity to Seattle (it’ll take about an hour to get there and back) and the sheer beauty of one of western Washington’s best alpine lakes (though, we will say, there are A LOT of them).
The stunning alpine lake this hike is named after is one of the most visited lakes in the area, attracting plenty of visitors who don’t mind the short hike up. However, it is worth braving the crowds to see this lake up close and personal.
You’ll start from Alpental Ski Area near Snoqualmie Pass Ski Resort, and climb immediately from the trailhead. You’ll wind through the forest before emerging into a clearing, where the switchbacks begin. Ascend up the rocky switchbacks, and when you crest the hill you’ll get your first views of Snow Lake.
From here, you’ll start to descend into the basin, and eventually you’ll arrive at the lakefront.
Don’t stop here! Continue along the right side of the lake, following the trail to the end of the lake. You’ll be rewarded with fantastic views across the crystal-clear lake, with the rocky peaks rising above the lake to the southwest.
If you’re up for it, you should continue on to Gem Lake, which is far less crowded than Snow Lake, and equally gorgeous. It’s closer to 11 miles round trip, but most of the elevation gain happens in those switchbacks at the beginning.
The rest of the hike is relatively tame, and you’ll cross a few log bridges that are kind of fun along the way. We were two of four people (and a very cute pup) at Gem Lake, while there were probably 100 people at Snow Lake at the same time.
If you’re really feeling good, continue onto Wildcat Lakes, which adds another 3 miles making it a 14 mile day.
If you do this, bring PLENTY of water and snacks. It would make a fantastic overnight backpacking trip that you could probably do in one night.
Franklin Falls (Snoqualmie Pass)
- Length: 2.0 miles
- Elevation Gain: 400 feet
- Trail Type: Out and Back
- Difficulty: Easy
- Pass Required? Northwest Forest Pass
- Dog-Friendly? Yes, on a leash
- Distance from Seattle: 50 miles; 1 hour
- Trailhead Location: Franklin Falls Trailhead
Franklin Falls, which is up towards Snoqualmie Pass just off of I-90, is an opportunity to get outside and stay active while with the bonus of getting to marvel at one of Washington’s best waterfalls.
Franklin Falls is a quintessential Washington state waterfall experience that leads you to tumbling falls and a large plunge pool among shady forest.
The trailhead is located near Snoqualmie Pass, about a half-mile past the Denny Creek Campground. You’ll find a parking lot that will fit about 30 cars. If this lot is full, head about a half mile further where there is a larger parking area that has room for about 60 cars. Arrive early for the best chance at finding parking for this popular hike.
The trail is accessible for most skill levels, with a gentle incline over the one-mile trek to reach the falls. Bridges, steps, and walls have been added to help make the more tedious parts of the trail safe for all hikers.
Walk along a shady trail through leafy coniferous trees until you reach tree-shrouded boulders.
Even though there are three tiers to the waterfall, only the last set of falls can be seen from the trail, which are most vibrant between April and July as the winter’s snow melts and feeds into the flow. Franklin Falls are active year-round.
During winter, you can access the falls from a different exit that requires a longer hike—but be careful of avalanche warnings during the winter months.
Heybrook Lookout (Mountain Loop Highway)
- Length: 2.6 miles
- Elevation Gain: 850 feet
- Trail Type: Out and Back
- Difficulty: Easy
- Pass Required? None
- Dog-Friendly? Yes, on a leash
- Distance from Seattle: 55 miles; 1 hour 15 minutes
- Trailhead Location: Heybrook Lookout Trailhead
This short hike in Gold Bar is a perfect mini excursion outside of Seattle, and is one of the most easily accessible fire lookouts in Washington State.
Just after entering Mount Baker-Snoqualmie National Forest, you’ll find a small, gravel parking lot where you’ll also find an information kiosk and the trailhead.
While you initially start off walking parallel to the highway, you’ll quickly turn left and head into the woods. Take your time along this short, well-maintained trail, enjoying the sounds of birds chirping and sights of the ferns and moss.
Just before you reach the lookout tower, you’ll be met with mountain views.
Continue on as the views from top of Heybrook Lookout are much more impressive. Climb the 89 steps to the viewing area and savor the sight of the surrounding valleys.
On a clear day you should also be able to spot Mount Persis and Mount Baring—and maybe even Bridal Veil Falls cascading down Mount Index across the valley to the south.
Lake 22 (Mountain Loop Highway)
- Length: 5.4 miles
- Elevation Gain: 1,350 feet
- Trail Type: Out and Back
- Difficulty: Moderate
- Pass Required? Northwest Forest Pass
- Dog-Friendly? Yes, on a leash
- Distance from Seattle: 56 miles; 1 hour 10 minutes
- Trailhead Location: Lake 22 Trailhead
Lake 22 is a perfect hike for those looking for a moderate adventure through a trademark fern-laden forest, a Pacific Northwest classic.
The trailhead is located just past Granite Falls in Mt. Baker-Snoqualmie National Forest, where there is a parking lot with space for about 50 cars.
This beautiful rainforest trail is well-maintained and has been reinforced so the surface is sustainable and sturdy to walk across. Enjoy your amble across the damp forest floor, rich in ferns and mosses that almost feel like you’re in some fantastical land from the Neverending Story or Lord of the Rings.
The first two miles of this hike are a steady climb, with a few switchbacks, several waterfalls, and a couple of nice viewpoints along the way. At almost exactly two miles in, the trail flattens out and brings you to Lake 22’s northern shore.
The lake is tucked up under the ridgeline where you’ll find Mount Pilchuck, and there’s a level path around the lake that is worth doing to see it from different angles and, more importantly, escape the crowds that tend to congregate where the trail first hits the lake.
Heather Lake (Mountain Loop Highway)
- Length: 4.6 miles
- Elevation Gain: 1,034 feet
- Trail Type: Out and Back
- Difficulty: Moderate
- Pass Required? Northwest Forest Pass
- Dog-Friendly? Yes, on a leash
- Distance from Seattle: 57 miles; 1 hour 10 minutes
- Trailhead Location: Heather Lake Trailhead
Heather Lake is another great lake hike on this short stretch of road in the central Cascades. It’s a relatively easy hike, so it’s a good hike for kids and experienced hikers alike.
You’ll find the trailhead is located just past Granite Falls and has a large parking area as well as some overflow space. Heather Lake gets quite busy on weekends, so a mid-week hike is recommended if it works in your schedule. Otherwise, be prepared to get here early on summer weekends to get a spot.
A couple of miles before the trailhead is Verlot Ranger Station, where you can pick up a Northwest Forest Pass if you need it.
Once you head out on the trail, you’ll immediately climb a few switchbacks up through old growth forest. Along the way, you’ll follow an old logging road and woods with small waterfalls. Admire the varied vegetation from giant, old-growth trees to red berries and ferns.
After a short, steady climb, you’ll reach the shores of Heather Lake. There’s a flat path that circumnavigates the lake, which we’d recommend. The far side of the lake has some of the best rocks to enjoy lunch (or a snack and some water) from. You can even continue past the marshy area and come across a small pond with views of Mount Pilchuck.
This hike is as lovely during the summer as it is during the fall—come during both seasons to experience the differing vegetation. It’s also a good winter hike, though you’ll need the right equipment to do it safely.
Mount Pilchuck (Mountain Loop Highway)
- Length: 5.4 miles
- Elevation Gain: 2,300 feet
- Trail Type: Out and Back
- Difficulty: Difficult
- Pass Required? Northwest Forest Pass
- Dog-Friendly? Yes, on a leash
- Distance from Seattle: 60 miles; 1 hour 15 minutes
- Trailhead Location: Mount Pilchuck Trailhead
After the Heybrook Lookout (above), Mount Pilchuck is probably the second most accessible fire lookout in Western Washington in terms of both distance from Seattle and effort to reach (though we want to note that IT IS NOT AN EASY HIKE – climbing 2,300 feet over a couple of miles is no joke).
Situated along the Mountain Loop Highway in the Central Cascades, the trailhead is located outside of Granite Falls. Note that part of the road to reach the trailhead is along relatively rough gravel, but it’s doable in a passenger vehicle if you’re willing to take it slow.
After you head out on the trail, you’ll reach a fork—veer right as the left trail is a false path. Much of the time you’ll be climbing through forest, sometimes up precarious rocks that require a bit of attention. There are a few false summits.
To identify that you’re at the correct one, you should be able to see a fire lookout as well as a brown “Parking Area” sign on a tree at the summit.
Upon reaching the top, which involves a steep scramble up big rocks to the fire lookout, you’ll soon forget the climb. From the top, take in the 360 views of Mount Rainier, Mount Baker, and the Olympics from the shelter while you refuel with lunch.
While Mount Pilchuck draws crowds during peak season, the challenge of this popular trek shouldn’t be discounted. It’s not an easy hike.
The Naches Peak Loop (Mount Rainier National Park – Sunrise)
- Length: 3.4 miles
- Elevation Gain: 600 feet
- Trail Type: Loop
- Difficulty: Easy/ Moderate
- Pass Required? America the Beautiful Pass
- Dog-Friendly? No
- Distance from Seattle: 88 miles; 1 hour 45 minutes
- Trailhead Location: Tipsoo Lake Comfort Station
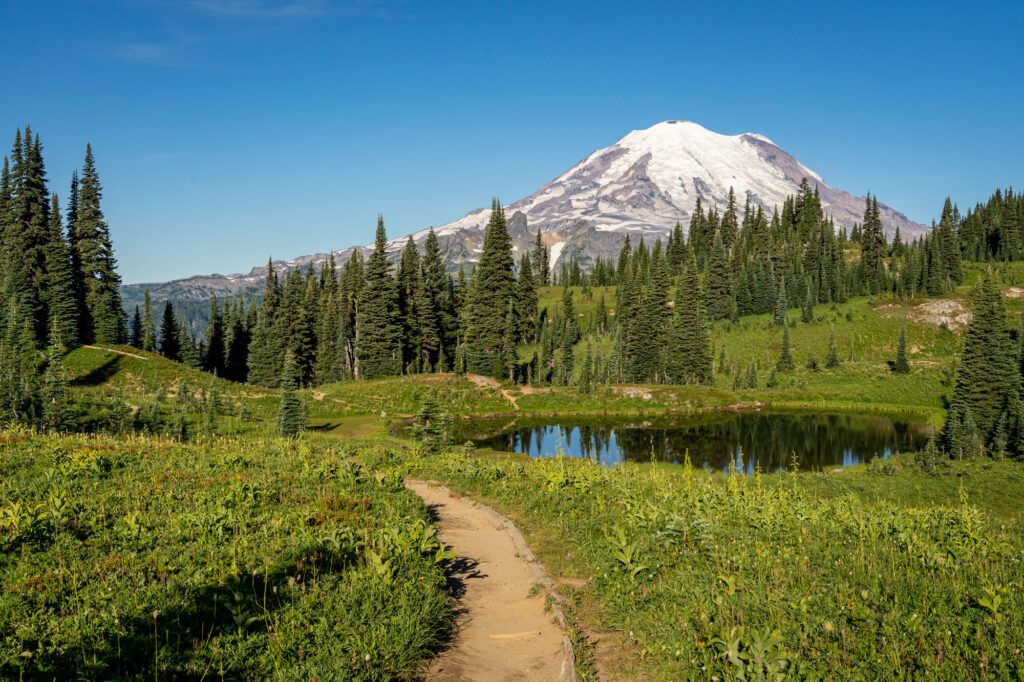
The Naches Peak Loop might just be the best bang-for-your-buck hike in the entire state.
It has to be on any list of the best easy hikes in Washington, given it’s only 3.4 miles long with a gentle climb up to the top, where you’ll be greeted with some of the most spectacular views of Mount Rainier in the park.
The best place to park is at the Tipsoo Lake comfort station, which is on the southwestern side of Tipsoo Lake, and has bathrooms (which is important after a two hour drive). You can find it here on Google Maps.
From the trailhead, tackle the trail clockwise. You’ll start with a gentle climb, which passes alongside the lake and through a field of wildflowers in the early summer before crossing a bridge and intersecting with the Pacific Crest Trail.
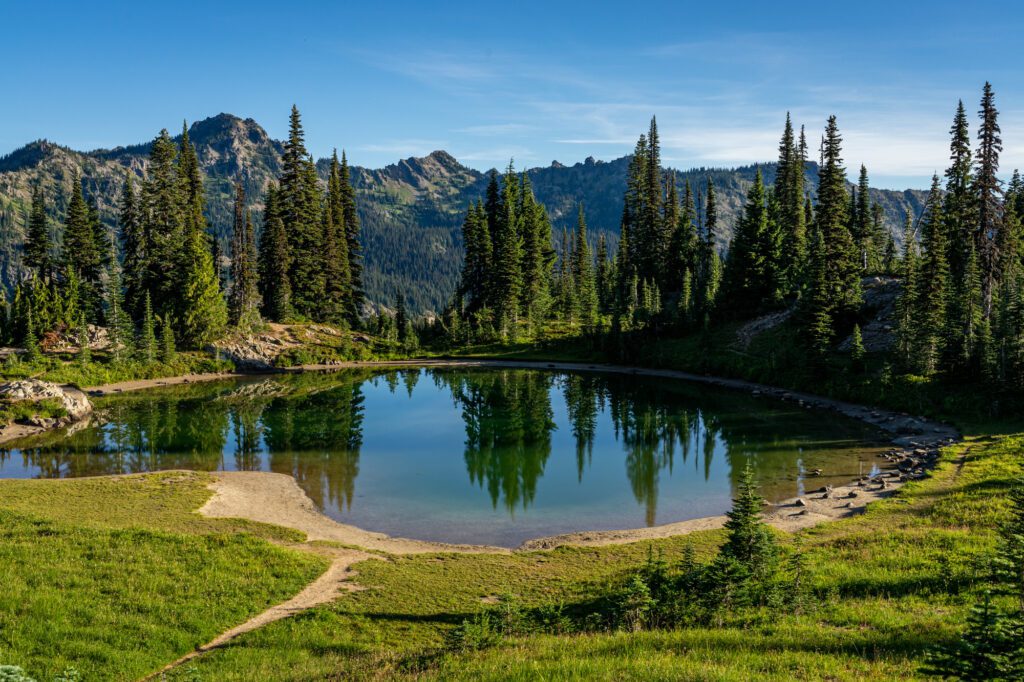
Continue the journey, which winds its way through the forest and past a couple of pretty tarns (the fancy word for ponds) before reaching the summit at about half way through the hike.
At that point, you’ll be hiking straight towards Rainier – which is why we recommend doing it in this direction – and there’s a half mile stretch of trail where it’s just nonstop jaw-dropping views of the Mountain.
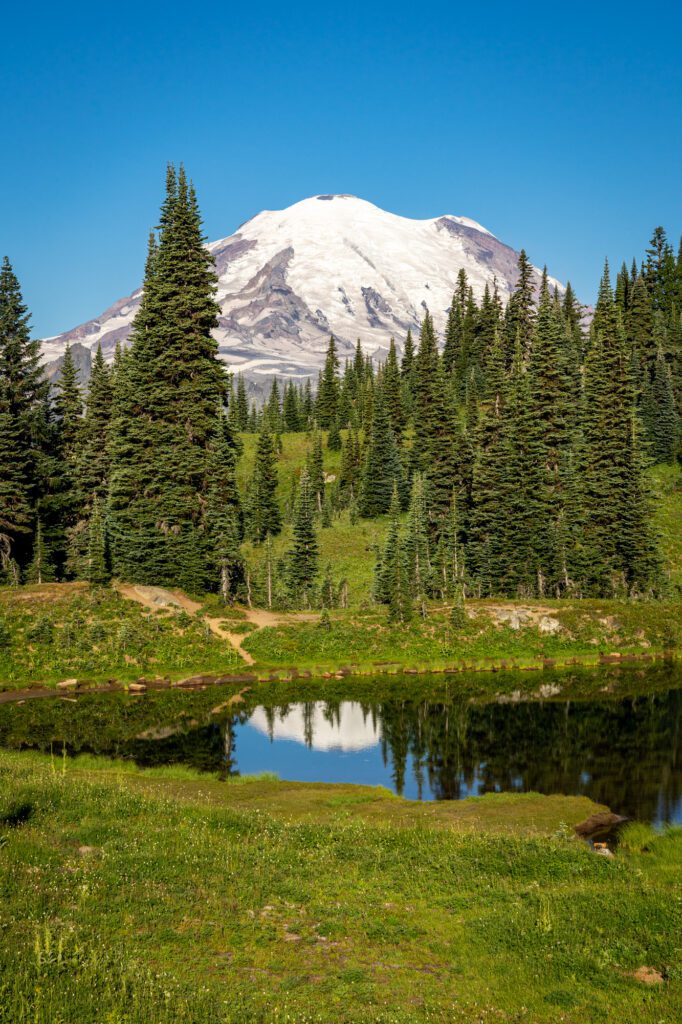
It’s also well-worth coming here for sunrise, when the rising sun lights up Rainier’s glaciated peak in a beautiful pink color.
The best place to catch the sunrise is here, up on the road on the eastern side of Tipsoo.
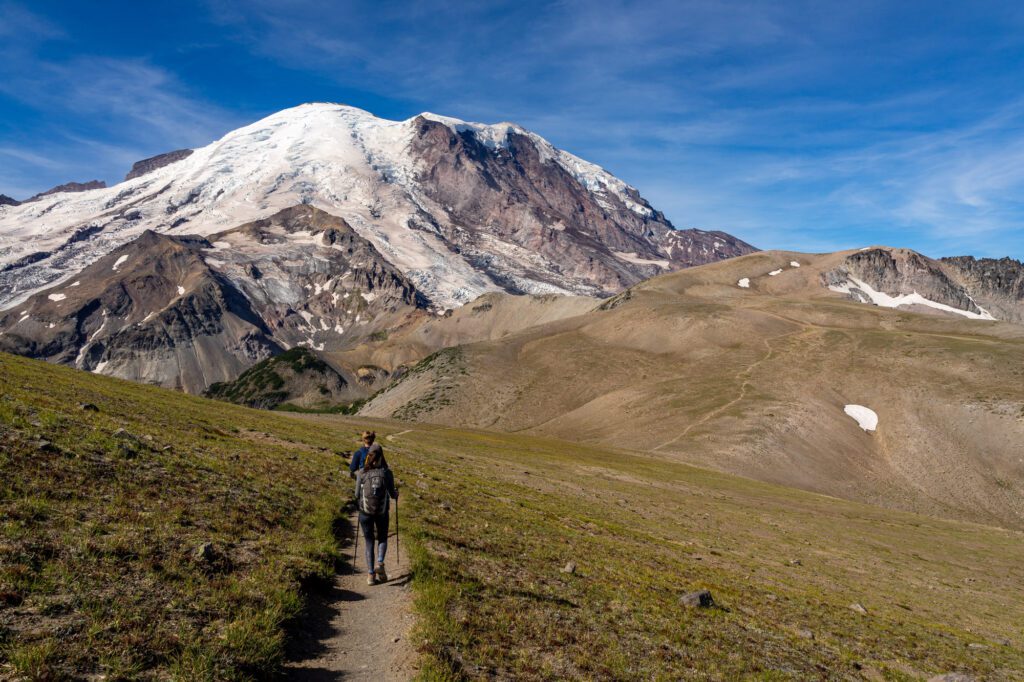
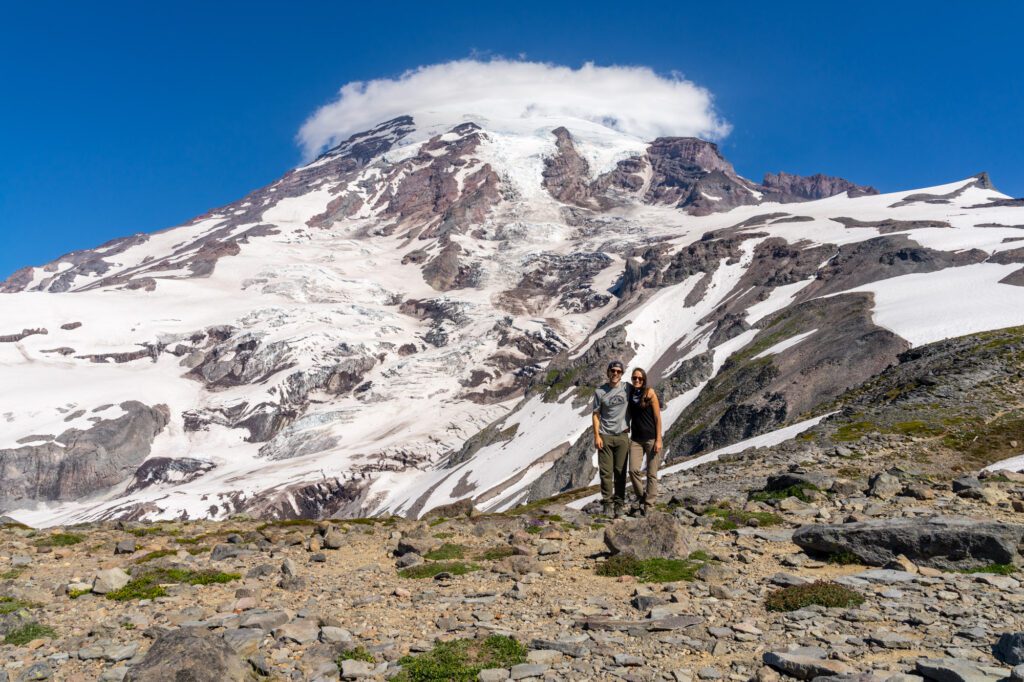
The Burroughs Mountain Trail (Mount Rainier National Park – Sunrise)
- Length: 9 miles
- Elevation Gain: 2,500 feet
- Trail Type: Out and Back
- Difficulty: Hard
- Pass Required? America the Beautiful Pass
- Dog-Friendly? No
- Distance from Seattle: 95 miles; 2 hours 20 minutes
- Trailhead Location: Sunrise Visitor Center
This is some of the best hiking in the state, at least if you enjoy a challenge. The Burroughs Mountain Trail offers some insane views of Mount Rainier, but makes you work hard for them.
The Burroughs are, for lack of a better word, three lumps that are at the base of Mount Rainier’s northeastern face, and by the third one you’re basically face to face with the most spectacular natural beauty that Washington State has to offer.
Throughout the entire hike, there are views across the whole park, including of Rainier itself, to keep you going. When you get to the peak, Mount Rainier looks almost close enough to touch.
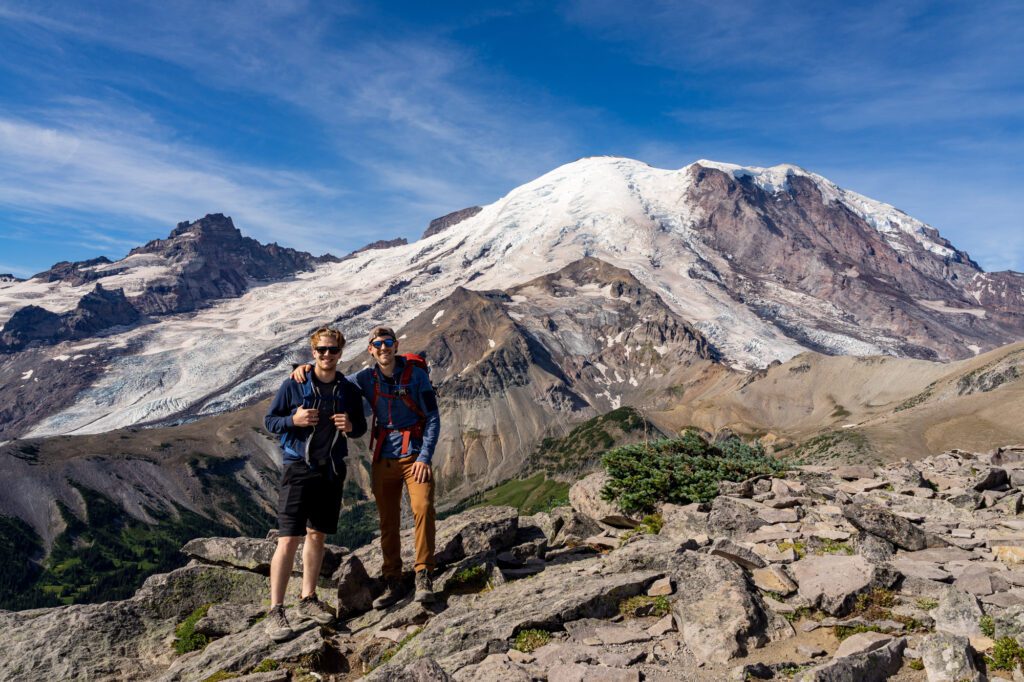
We were fascinated by the swirling cloud that forms above Mount Rainier and seems to grow as the day goes on.
Even in summer some of the trail may be covered in snow, so it is important to head out mid-summer once the snow has had a chance to melt. Aside from that, the trail is popular enough that it is in pretty great condition.
One thing we noticed is that the park map has the trail ending at the second of the three boroughs.
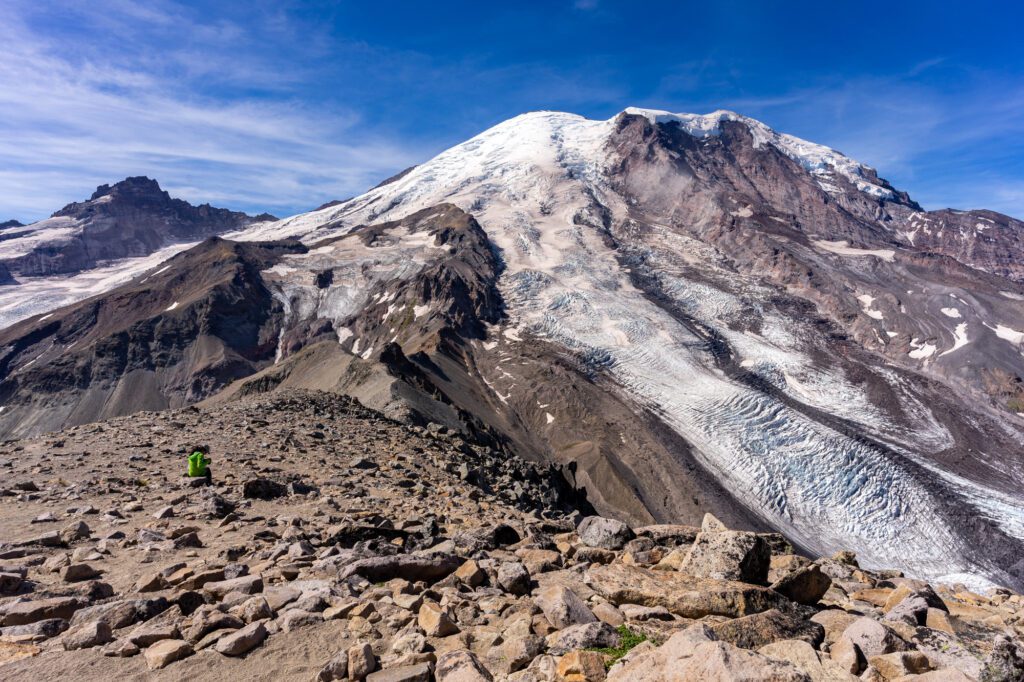
If you’re up for it, you should definitely head out to the third one, which is closest to the face of Mount Rainier, but know that it’s technically “unmaintained.”
You’ll probably encounter a few mountain goats along the way, and maybe more than a few marmots.
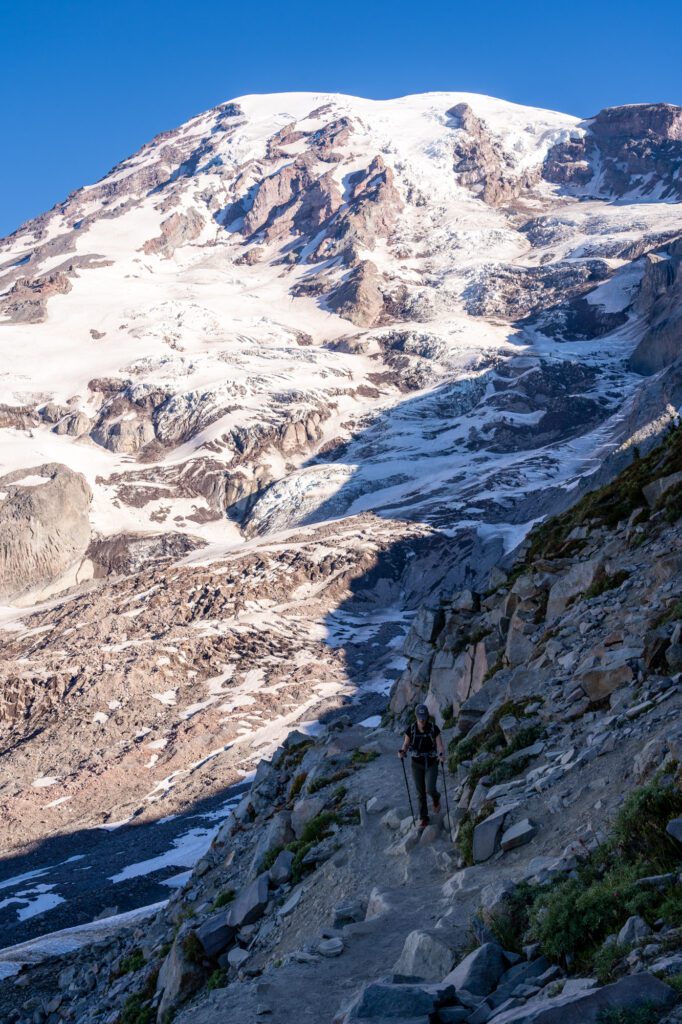
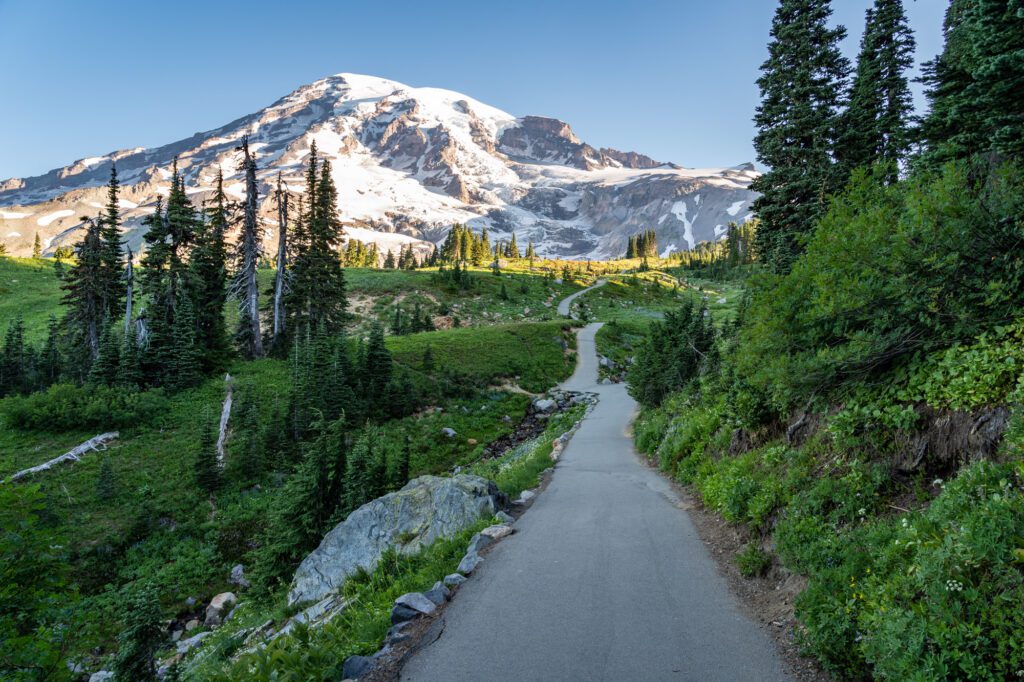
The Skyline Loop Trail (Mount Rainier National Park – Paradise)
- Length: 5.5 miles
- Elevation Gain: 1,800 feet
- Trail Type: Loop
- Difficulty: Moderate / Hard
- Pass Required? America the Beautiful Pass
- Dog-Friendly? No
- Distance from Seattle: 107 miles; 2 hours 40 minutes
- Trailhead Location: Henry M Jackson Visitor Center
In my opinion, the Skyline Trail is clearly near the top of the list of the best hikes in Washington because it gives one of the most spectacular views of Mount Rainier that you’ll find anywhere. We’ve done it multiple times now across the years, and it never gets old.
Plus, it takes you through the fields of wildflowers that Paradise is famous for if you do it in the early summer. It’s a bucket list worthy hike.
At the high point of the trail, you’re going to feel like you can literally reach out and touch the mountain, and the views are not something you’ll soon forget.
The hike begins on the trailhead behind the Henry M. Jackson Visitor Center in the Paradise parking lot. We’ve done this hike multiple times, and by about 7:30 am on a weekend in the summer, the massive parking lot is almost full.
It is important to note that you’ll have two options when hiking the Skyline Loop. You can either tackle it clockwise or counterclockwise. Which direction is best depends on a number of factors, including time of day you arrive and personal preference.
Hiking it clockwise means a steeper but shorter ascent with incredible views of Rainier during your climb. However, you’ll also be contending with crowds on the ascent.
Going counterclockwise, you’ll have a gentler and more gradual ascent on a quieter trail. On the downside, you’ll have a steep descent, which can be hard on the knees. You will also be sharing the trail with crowds going uphill.
We’ve done the loop in both directions, and slightly prefer the hike heading clockwise (especially if you can get an early start). If you head out on the hike going clockwise, the trail starts off with a pretty steep climb that eventually becomes more gentle, but for the vast majority of the hike, you’ll be nearly face-to-face with Mount Rainier.
When you get up to Panorama Point, you’ll be met with views of Paradise Valley, Mount St. Helens, and Mount Adams out to the south.
Panorama Point isn’t the high point, though, you’ll continue on a short, rocky climb to hit the high point of the hike, where you’ll be up-close-and-personal with Rainier’s southern face.
We love this hike, and have an entire guide to hiking the Skyline Trail with far, far more detail than you’ll find here.
Seattle’s Best Hikes: A Handy Map
As promised, here is a helpful map of all of the trailheads for the hikes we’ve mentioned in this guide so that you can visualize where they all are.
To view a full size version of the map, click on the “expand” icon in the top right.