How to Hike the Amazing Wallace Falls Trail (3 Waterfalls!)
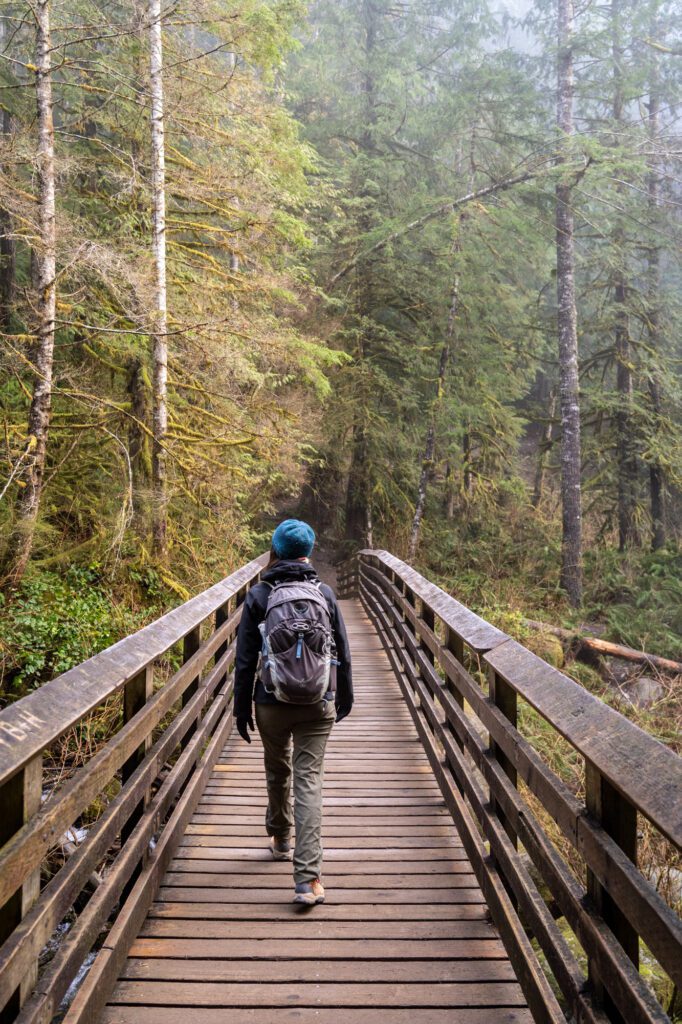
As we made our way north from the Seattle area towards the Skykomish River Valley to hike to Wallace Falls, we were enveloped in a dense layer of fog that had us wondering whether or not we’d even be able to see the falls. We arrived in the parking lot, which seemed to be on the edge of the fog bank, and started up the short trail that would eventually lead us to Wallace Falls.
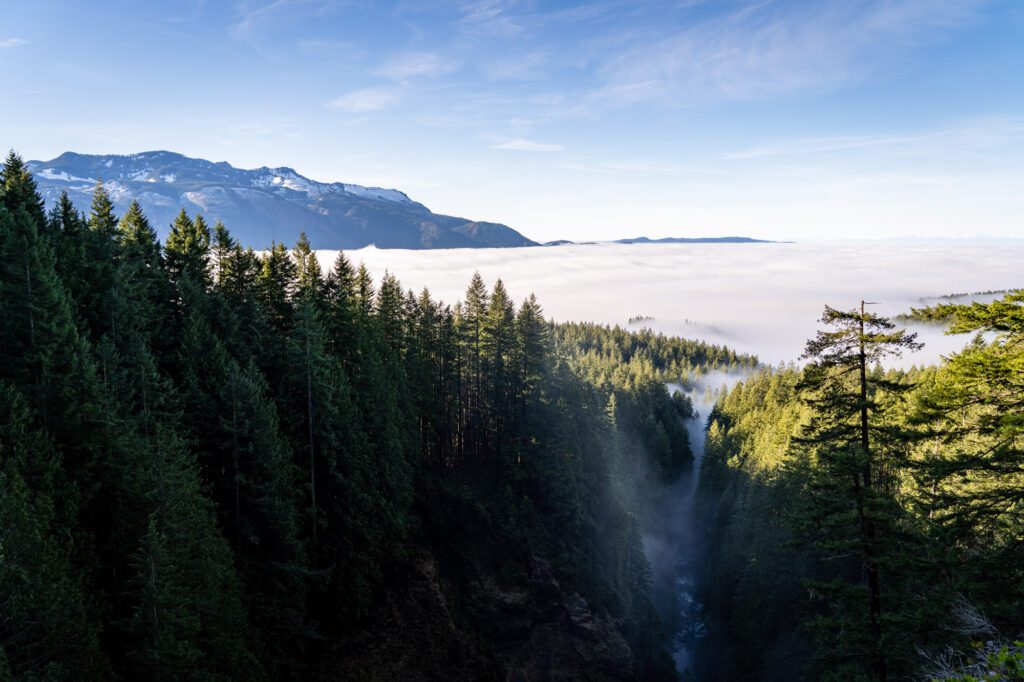
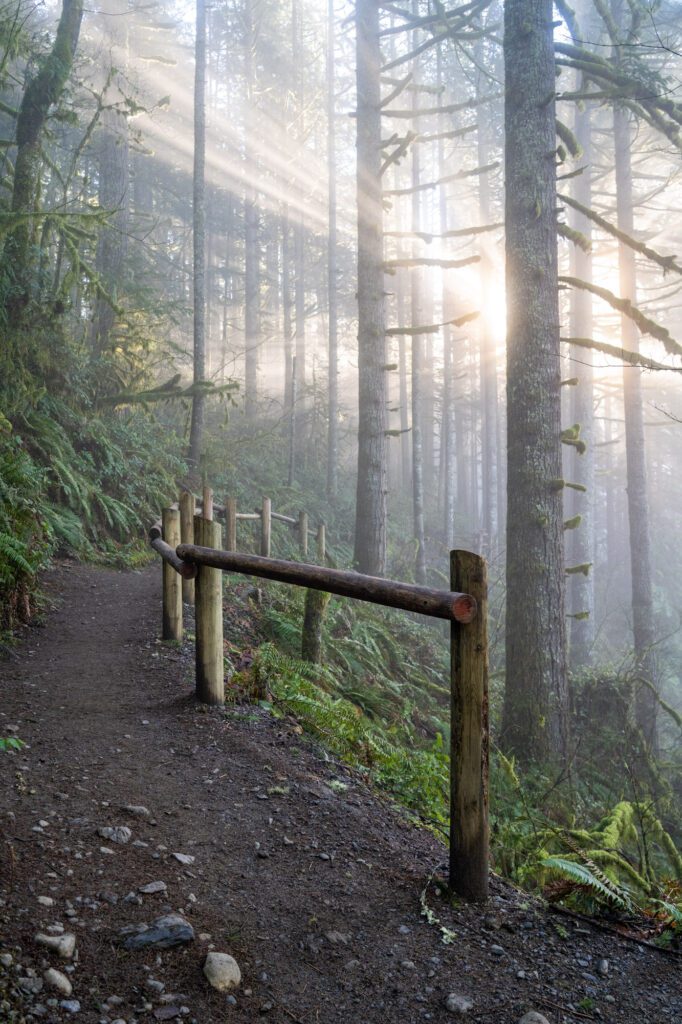
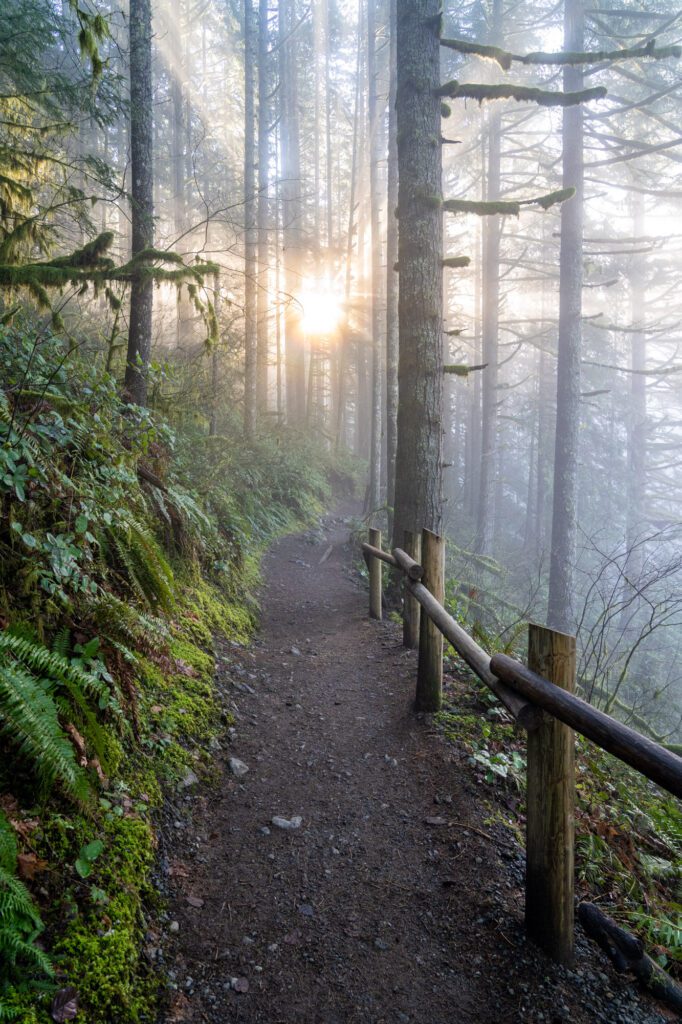
About a mile into the Wallace Falls Trail, we found ourselves above the dense layer of low fog with the bright sunlight peeking through the trees. The sight of blue skies above us after a period of particularly gray winter weather in Seattle energized us, and added to the magic of this hike.
In this guide, we’ll give you all the information you need to plan an incredible hike to one of our favorite waterfalls in Washington State.
We’ll start with the basics – how long is the hike, and what route should you take – and then give you a detailed trail report based on our experience. Oh, and we’ll cover the best viewpoints along the trail to get a picture-perfect view of the falls.
Disclaimer: Some of the links in this post, like hotel links, are affiliate links, meaning at no additional cost to you, we make a little bit of money if you click through and book. That being said, we would never recommend something to you that we don’t stand behind 100%.
Wallace Falls: Hike Details
- Length: 5 miles
- Elevation Gain: 1,200 ft.
- Season: Spring – Fall (sometimes in winter)
- Trail Type: Out and Back
- Difficulty: Easy / Moderate
- Dog Friendly: Yes, on a leash
- Pass Required: Discover Pass or a $10 day pass available at the machine in the parking lot
- Trailhead Location
This hike – which is among our favorite hikes in Washington State – is surprisingly tough. We saw five miles and thought “how hard can it be?” However, the post-holiday weight and winter inactivity led to a much tougher hike than we were expecting.
Climbing 1,500 feet over two miles or so is no joke, and there are a bunch of switchbacks to tackle before reaching the falls.
Route Options for Hiking to Wallace Falls
The most direct route starts from the Wallace Falls State Park parking lot and heads up the Woody Trail, which takes you directly to all of the different tiers of the falls. This is the route that we’ll be describing below, and is our recommendation for most people.
However, there are a couple of alternate routes available that will give you a slightly different path on the way back to the trailhead. Here are the two main alternatives, as we see them.
The Railroad Grade
This is a more gradual ascent that is basically an old forest road, so it’s wide and relatively well-graded compared to the tree-root-laden Woody Trail.
About a quarter mile after leaving the parking lot, you’ll come to a junction where you can head right, which takes you down to the banks of the Wallace River and onto the Woody Trail, or up to the left, which is the Railroad Grade.
It’s about a mile longer each way to reach the falls, and you can either do the hike out and back on the Railroad Grade, or do a loop that returns to the parking lot via this trail.
More trail information here.
The Wallace Lake Add-On
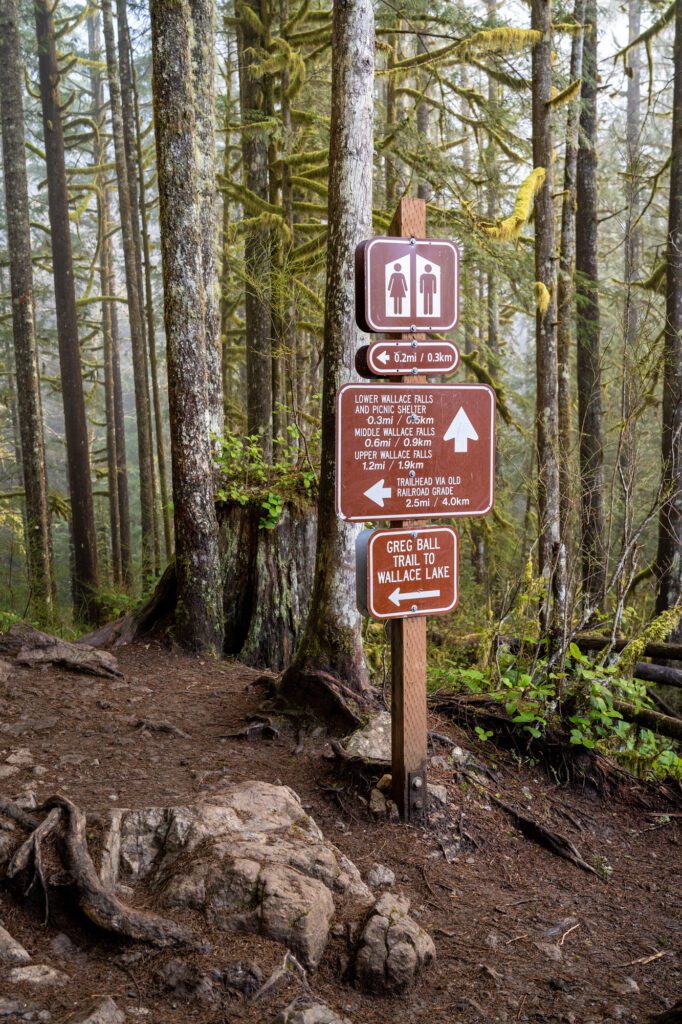
At the River Overlook, you’ll reach a junction that heads along the Greg Ball Trail out to Wallace Lake.
It’s a three mile hike, one way, from the junction to the lake, and the route linked here doesn’t include the hike to the Middle Falls viewpoint, which is the one you should DEFINITELY make it to.
If you head up to that viewpoint and then hit Wallace Lake on the way back, you’re looking at roughly an 11 mile hike.
More trail information here.
The Best Time to Hike to Wallace Falls
This hike is great from the spring through the fall, when you’ll find snow-free trails.
We also love the mossy, ferny aspect that you’ll find in the wetter months, which makes you feel like you’re walking through an enchanted forest.
For context, we did the hike up to Wallace Falls in late January after a sustained period of somewhat warm weather (warm in this case means in the 40’s). On either side of the time we hiked it, the trail was covered in snow and ice.
The falls will be at their peak in the winter and spring, when the extra water is a sight to behold, and the vista from Valley View is full of snow-covered peaks.
In the summer, the falls are less impressive as the rain stops and the warm weather rolls in.
In the winter, you’ll often find snow and ice on the trail, particularly in the week or so after big storms.
Whatever time of year you’re heading to Wallace Falls, make sure to check recent trail reports to see what the conditions are like before you head out.
Getting to the Wallace Falls Trailhead
The trailhead for this hike is within Wallace Falls State Park, which is just off of Highway 2 as you get to Gold Bar on the way up to Stevens Pass. Here it is on Google Maps.
From Seattle, it’s going to take about an hour depending on traffic and where, exactly, you’re coming from.
The best way to get there is to take 522 East, which connects with Highway 2 in Monroe. You can either take 520 East across Lake Washington, or take I-5 north up to the junction with 405, and head south on 405 to the junction with 522 East.
Keep in mind that 520 involves a toll, so if you want to save a few bucks, the I-5 route will only cost you about five extra minutes of travel time.
Once you’re on Highway 2, follow it through a couple of small towns until you reach Gold Bar, where you’ll turn left and make a couple of turns, following signs to Wallace Falls State Park.
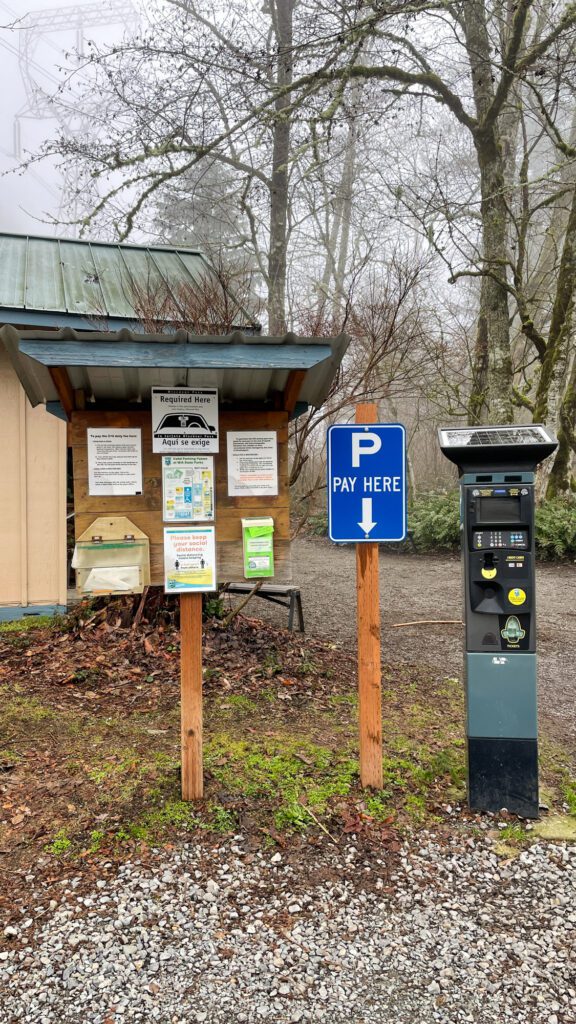
Parking at the Trailhead
There’s a big parking lot at the trailhead, complete with flush toilets and a machine where you can pay for parking! However, on weekends, this parking lot is often full by 10:00 am, if not earlier. Especially in the summer.
To secure a parking spot on a weekend, get here by 10:00 am at the latest.
We were there on a winter weekday morning and the parking lot was about half full at noon when we were done with the hike. When we arrived at 9:00 am, there were a grand total of three cars in the lot, including our own.
Fees and Passes Required
This hike is inside of Wallace Falls State Park, which means you’ll need to either display a Discover Pass in your car, or pay a $10 day use fee at the machine in the parking lot.
The Discover Pass is worth buying if you’re planning on visiting three or more Washington State Parks in the next 12 months.
It’s also worth noting that the pass is good for two vehicles, which means you can just buy one for your household if you have two cars.
You can either buy it online at REI in advance, or you can buy it onsite at Wallace Falls State Park.
More information on the Discover Pass, where to buy it, and more here.
Hiking the Wallace Falls Trail: A Complete Trail Guide
Normally, when we write trail reports for longer hikes, we break up the trail into distinct sections to make it more digestible.
However, despite this trail being five miles, there’s really not a good way to do that – the entire climb is fairly similar once you get onto the trail.
So we’ll give it to you all in one go. And, as a reminder, this report covers the out and back Wallace Falls hike along the Woody Trail.
The trail starts heading east from the parking lot along a wide gravel path, and at a quarter mile or so you reach the junction.
You’ll be hiking under some electrical lines that are alarmingly loud, and the buzzing will follow you until you arrive at the junction and plunge into the woods.
Head right here to hop onto the Woody Trail, which you will follow all the way to the end point.
If you take a left at this junction, you will end up on the Railroad Grade, which takes you to the lower falls viewpoint with a more gradual ascent, but adds a mile or so to the distance (one way).
The trail drops down, and you’ll find yourself walking along the Wallace River. There are a few nice places where you can detour from the trail to the riverbank to admire the beauty of the rushing river.
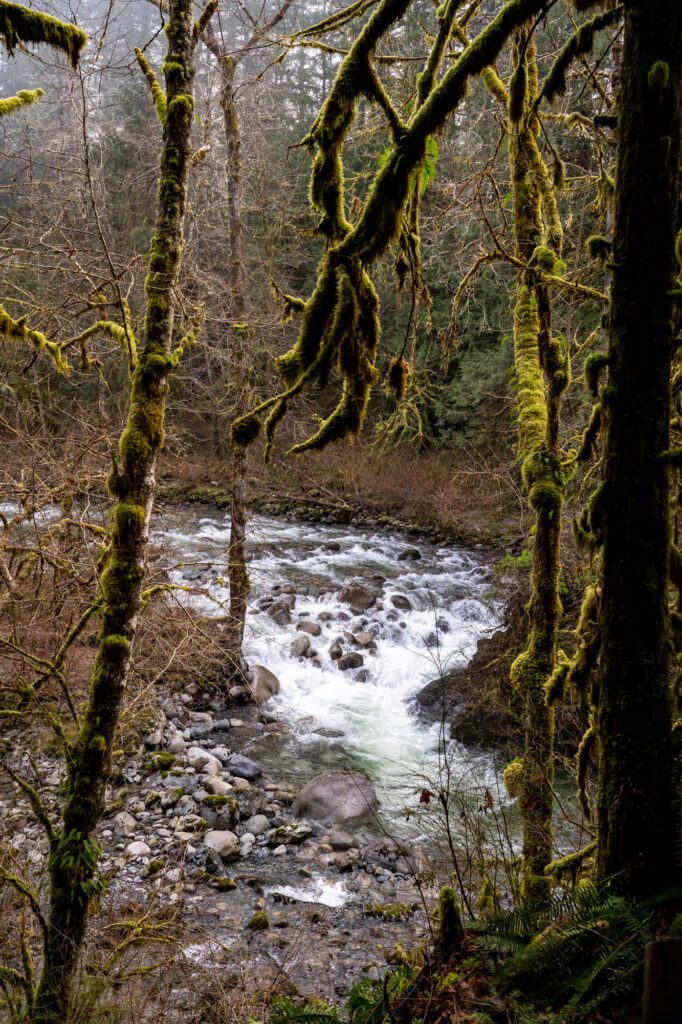
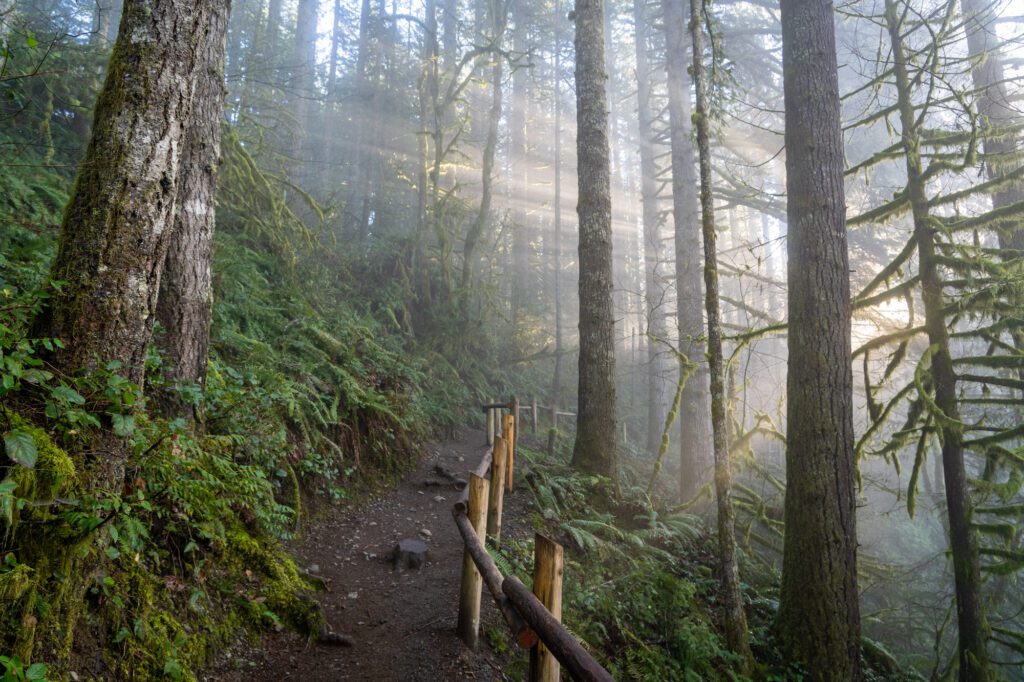
If you do this hike in the winter or spring, the trees along the trail will be covered in a thick moss that thrives with all the moisture in the air.
At points, it feels like you’re meandering through an enchanted forest straight out of a Lord of the Rings novel, and we half expected an elf to step out and welcome us to their lands as we climbed towards the falls.
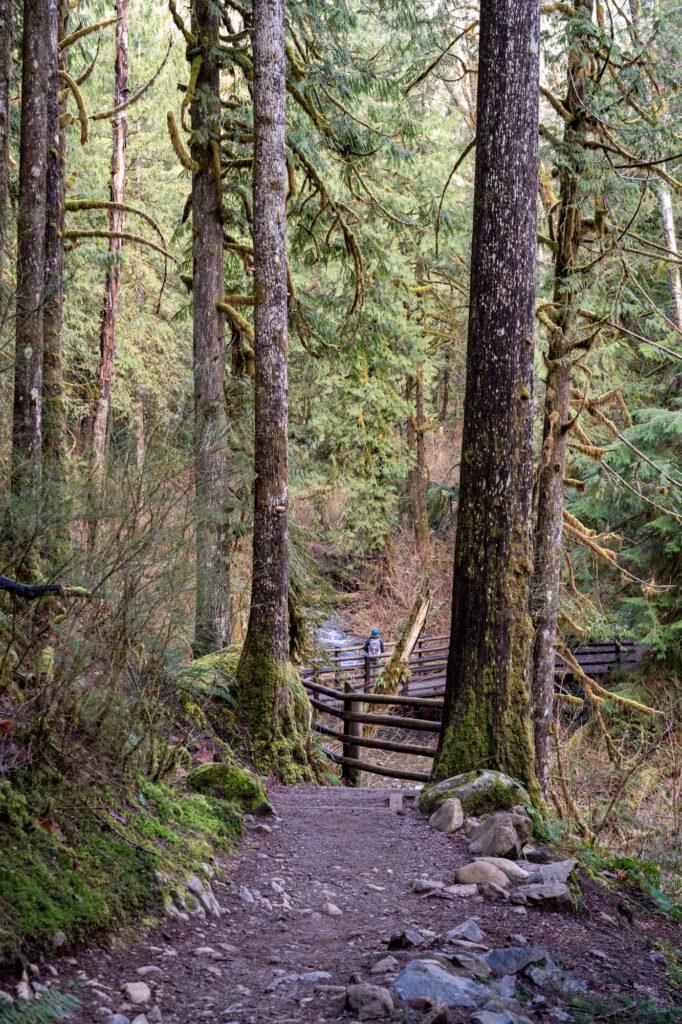
At 0.8 miles in, you’ll descend down to a picturesque wooden bridge that crosses a small creek that, in the winter, is not particularly small, swelling with all of the rainfall.
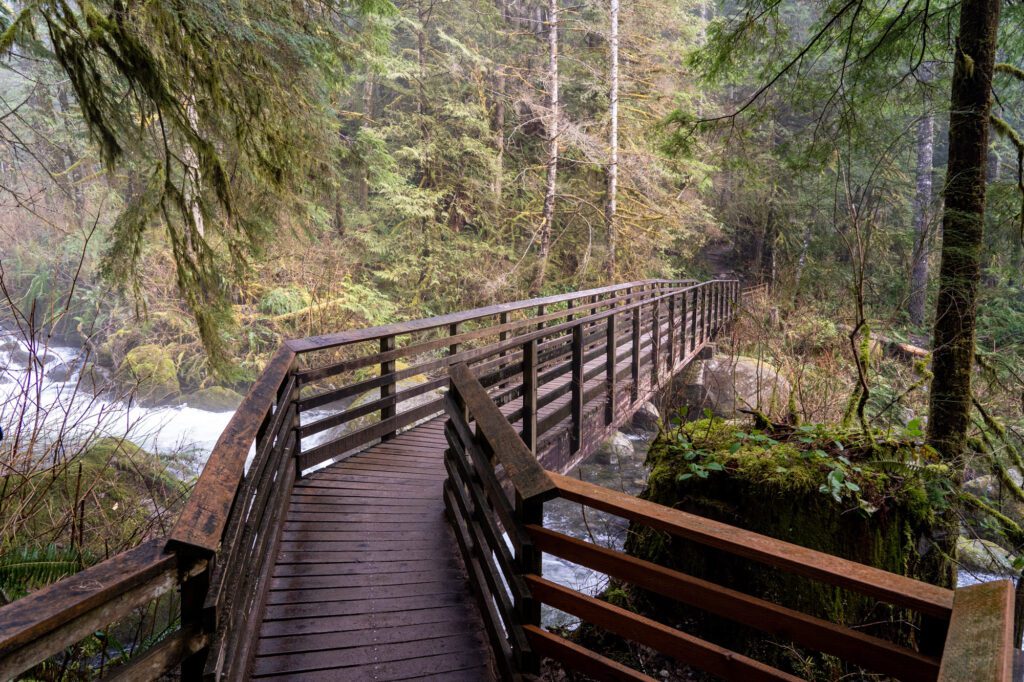

From the bridge, the climb begins in earnest. Remember when we mentioned that this hike was harder than we expected? This is the part where that comes true.
The trail alternates between switchbacks and a gradual ascent, passing the point where the Wallace River meets the North Fork of the Wallace River – there’s a good informational sign at 1.5 miles into the hike that is worth stopping at.
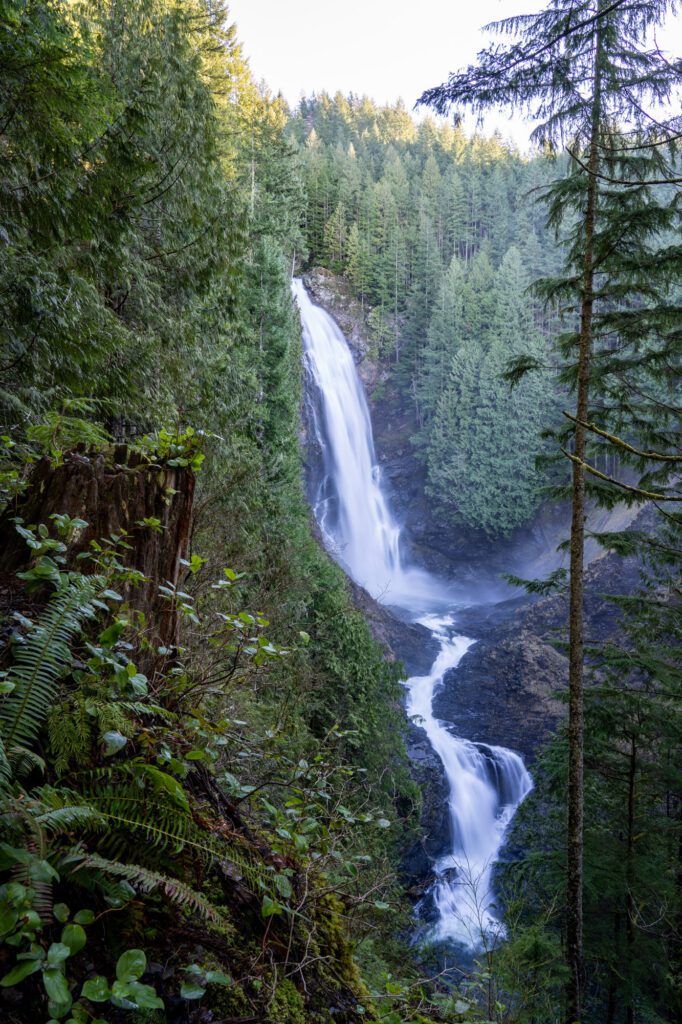
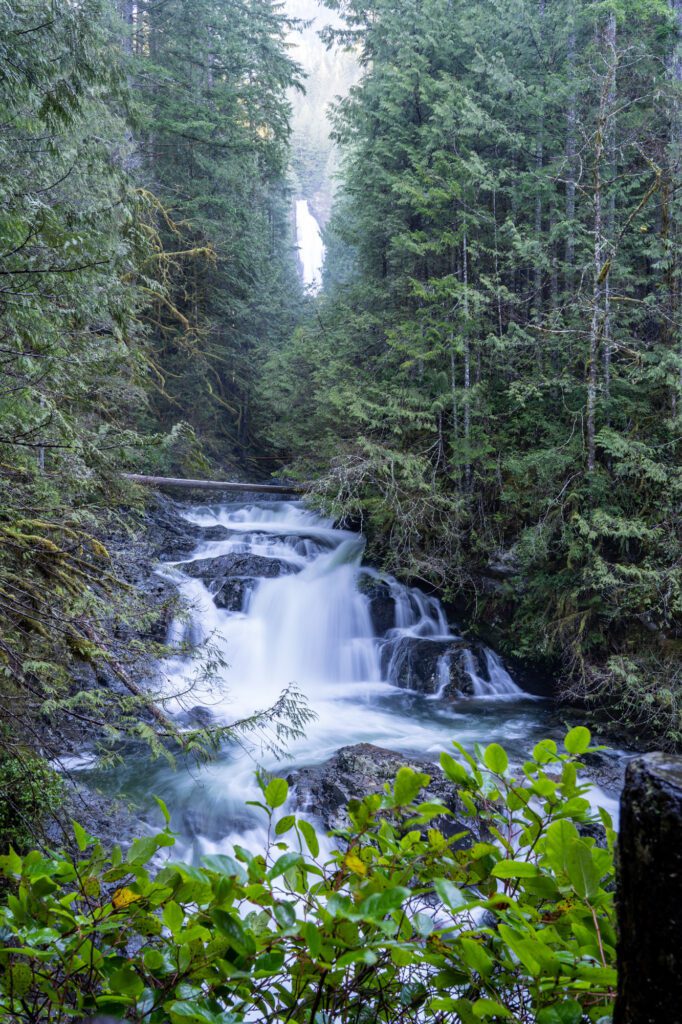
Another quarter of a mile and you’ll reach Lower Wallace Falls, which is the first of four great viewpoints on this trail.
Here, you have a view of a less impressive waterfall in the foreground with the towering Middle Falls off in the distance (don’t worry, you’ll be there soon!).
It looks something like this.
There’s a picnic shelter here that makes a nice stopping point for some water, snacks, and to strip layers before you embark on more climbing.
I have good news and bad news here.
The bad news is that this is where the switchbacks really start. Over the next half mile of trail, you’ll climb roughly 400 feet with a series of switchbacks.
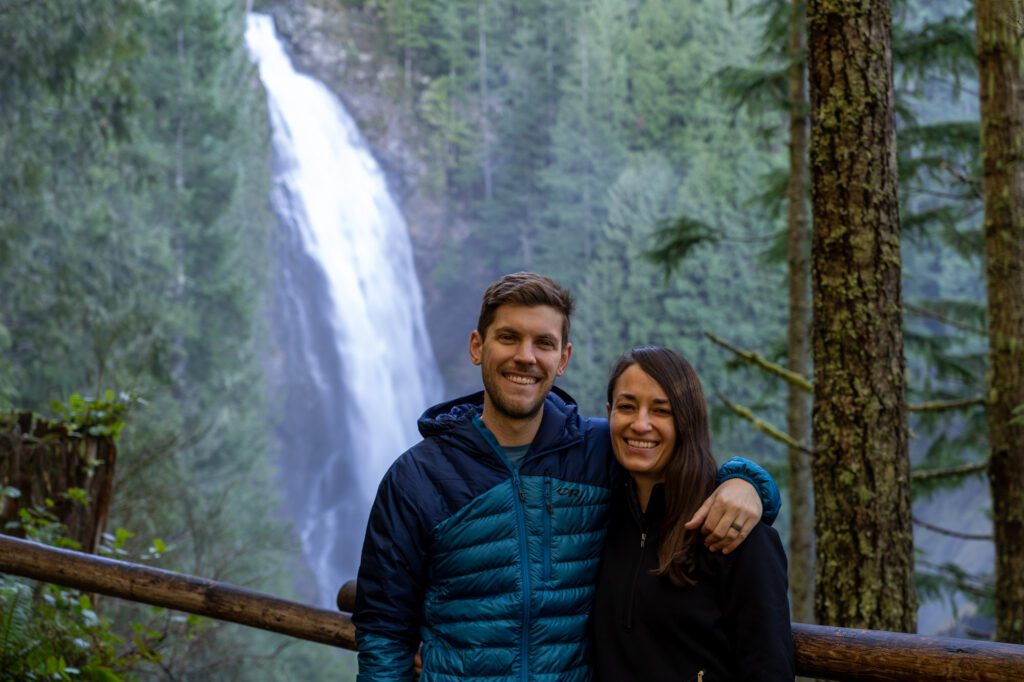
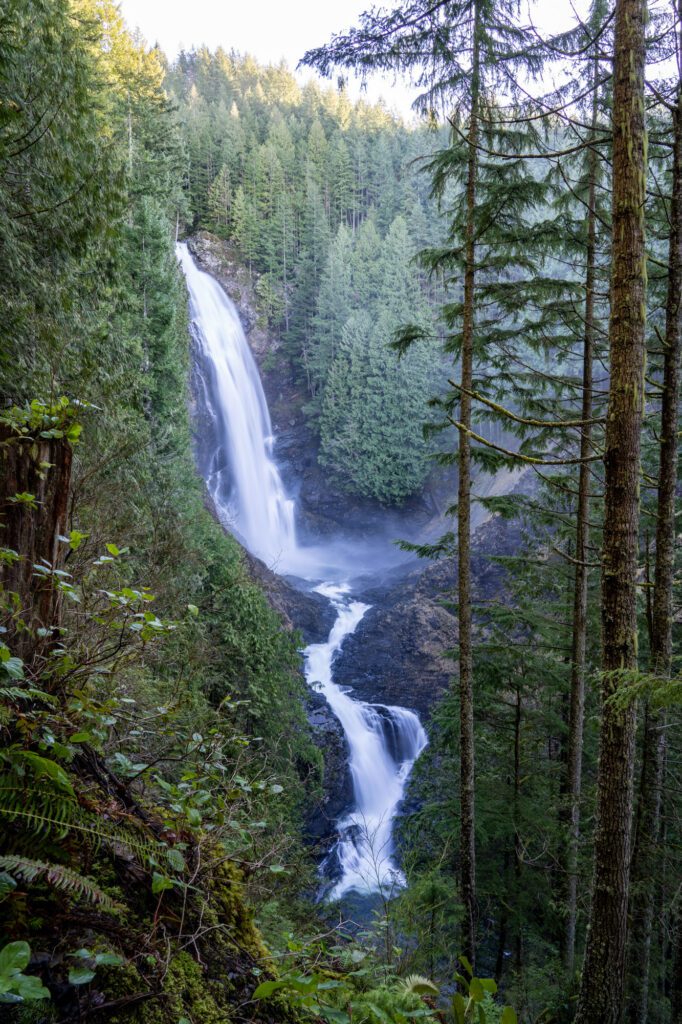
The good news is that after those switchbacks, you’re at the Middle Falls Viewpoint, which is the best view of Wallace Falls (which is really a set of three waterfalls along the Wallace River, but most people mean the Middle Falls because it’s the most impressive of the bunch) you’ll get on this hike.
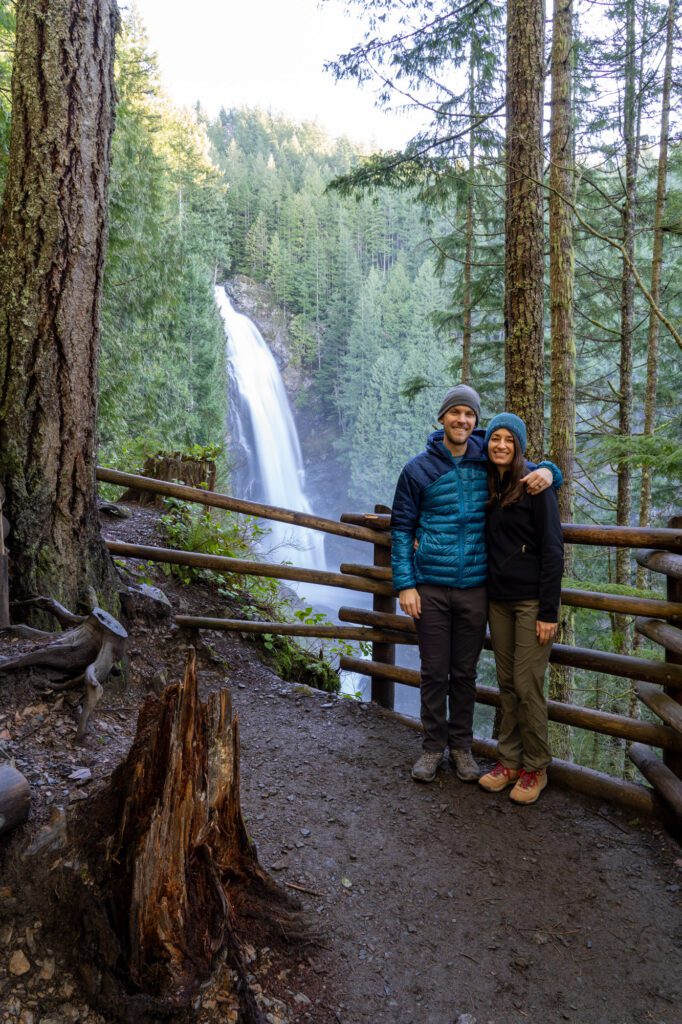
Most people turn around here, but we’d actually recommend that you continue hiking a bit up the trail to the Valley Viewpoint and Upper Falls.
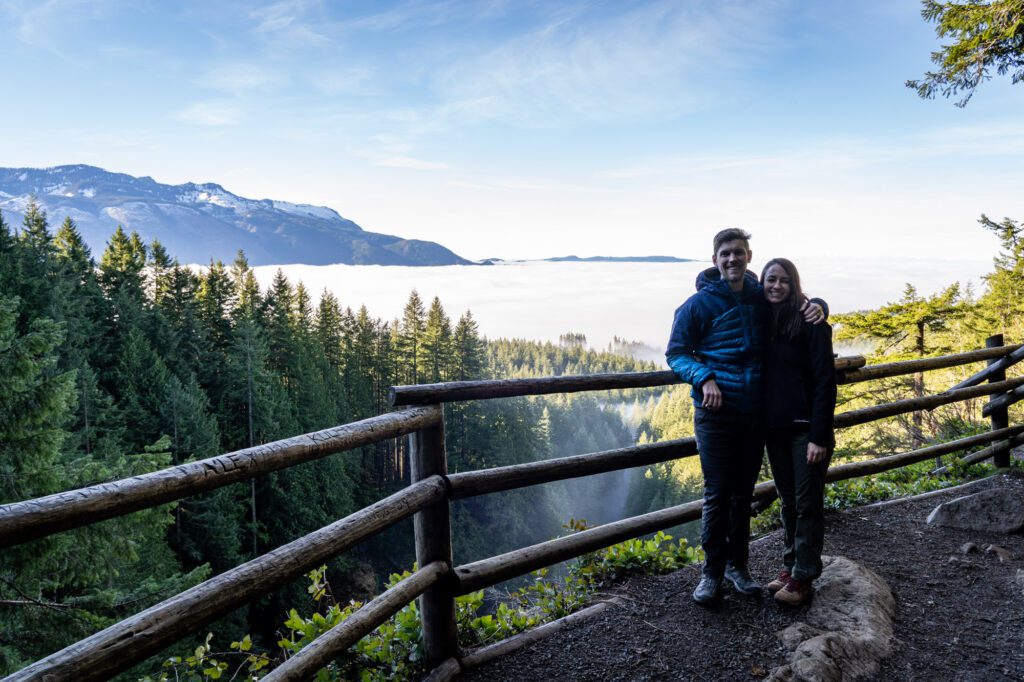
The Valley Viewpoint was spectacular for us because we were above the layer of low fog, which you could see hanging over the valley. You’re looking out to the southwest over the Skykomish River Valley, with the Olympic Mountains in the background.