What to Do at Mount Rainier: Complete Guide for First Timers
Wondering what to do in Mount Rainier National Park? We have some great news for you – you’re in the right place!
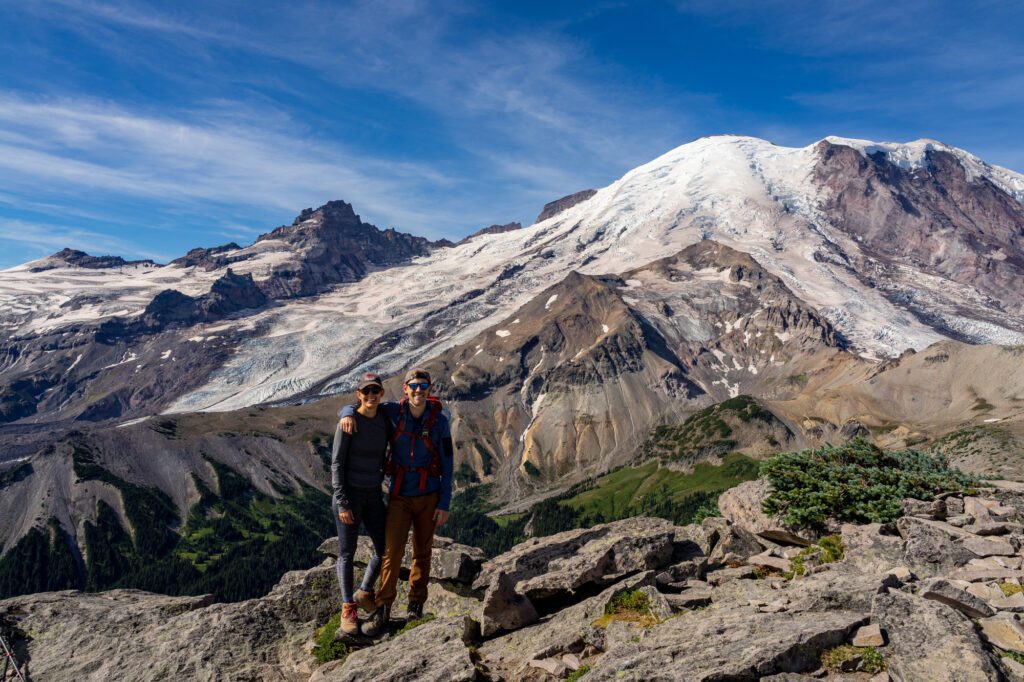
We’re Matt and Alysha, and we LOVE Mount Rainier National Park.
We’re here to break down all of our favorite things to do at Mount Rainier, from epic hikes to thundering waterfalls to our favorite wildflower spots (and everything in between).
We live in Portland, Oregon, and make multiple trips up to Mount Rainier every single summer to bask in the wildflower meadows that the early summer brings, hike our hearts out to viewpoints of the snow capped peak, and spend sunrises and sunsets with an incredible view (usually of Rainier, again).
It’s also worth noting that our dog, Lupine, was named as we meandered through a subalpine meadow at Rainier that was filled to the brim with fields of, you guessed it, lupine.
In this guide, we’re going to cover our favorite things to do in Mount Rainier National Park based on our numerous summer days spent exploring, complete with all the details you’ll need to make your trip up to Mount Rainier an amazing one.
Sound good to you? Let’s get into it.
Disclaimer: Some of the links in this post, like hotel links, are affiliate links, meaning at no additional cost to you, we make a little bit of money if you click through and book. That being said, we would never recommend something to you that we don’t stand behind 100%.
A Brief Overview of the Geography of Mount Rainier National Park
Before we get into our favorite things to do at Mount Rainier, we need to talk about the park’s geography. Because it matters how you go about planning your trip.
Mount Rainier National Park is a big park, covering 369 square miles and surrounding the glaciated peak on all sides.
However, there are only four, relatively small main parts of the park that are accessible without a long multi-night backpacking trip.
Those regions are Paradise, Sunrise, Ohanapecosh, and Mowich Lake, and they form a nice little circuit that circumnavigates Rainier.
Here’s an overview of each of those four regions.
- Paradise – Best for first-time visitors: Paradise is the most popular area to visit, located on the southern side of the Mountain, and home to some great day hikes at Mount Rainier. It’s where you’ll find the best waterfall hikes at Mount Rainier, along with countless meadows bursting with wildflowers in the summer.
- Sunrise – Best for hikes with epic Rainier views: Sunrise, which is on the east side of the park, has a large network of hiking trails winding through the rugged yet stunning wilderness. It is also home to the highest point in Mount Rainier National Park that you can drive to. This is probably the part of the park with the best selection of epic, long hikes to tackle.
- Ohanapecosh – Best for family-friendly hikes: This part of the park is at the southeastern corner, near the Stevens Canyon Entrance of the park. There are a couple of family-friendly hikes in the area, a large campground (that’s generally the least competitive in the park), and it’s a good central location between Paradise and Sunrise. However, it’s basically an old-growth forest, so you’re not getting those unobstructed Rainier views.
- Mowich Lake – Best for peace and quiet: Mowich Lake, on the northwestern side of the Mountain, is the quietest area of Mount Rainier National Park. It is free from the tourist hype of Paradise and Sunrise, and the long and arduous bumpy gravel road to get there cuts the number of visitors significantly. There are two great hikes here though that are worth braving the bumpy drive for (ideally in a high-clearance vehicle).
The other thing to note here is that the access roads for some regions of the park – namely Sunrise and Mowich Lake – close for the winter, and remain closed through the spring into June (and sometimes July – it depends on the weather).
Here’s a map of the park to help you visualize how all of these pieces fit together.

Timed Entry Reservations for Paradise and Sunrise
In 2024, you need to make an entry reservation for Paradise and Sunrise.
This is the most important piece of this entire logistics section, because it’s a new system for 2024 and we can foresee many people missing it and getting turned away at the entrance stations.
Between May 24 and Sept 2, 2024, you need to make a timed entry reservation to enter the Paradise Corridor.
This includes the road between the Nisqually Entrance, up to the Henry M. Jackson Visitor Center, and down to the Stevens Canyon Entrance near Ohanapecosh.
From July 4 through September 2, you need to make a timed entry reservation to enter the Sunrise Corridor.
This is the road between the White River Entrance, up to the Sunrise Visitor Center.
These permits only apply if you enter the park between 7am and 3pm, meaning that if you enter before 7am or after 3pm, a permit is not required (another reason for an early start!).
It’s also worth noting that a reservation at Cougar Rock Campground (Paradise), the Paradise Inn, or National Park Inn can be used in place of a timed entry permit for the Paradise Corridor.
If you get a first-come, first-served site at White River Campground near Sunrise, that also can be used in lieu of a Sunrise timed entry permit.
However, it is also worth noting that a camping/lodge reservation in Paradise DOES NOT get you access to the Sunrise Corridor, and vice versa.
Permits are released 90 days in advance in blocks.
Here are the release dates for 2024 for the Paradise Corridor Timed Entry Permits:
- February 21, 2024: Reservations available for May 24 – June 30, 2024
- April 1, 2024: Reservations available for July 1 – July 31, 2024
- May 1, 2024: Reservations available for August 1 – September 2, 2024
Here are the release dates for 2024 for the Sunrise Corridor Timed Entry Permits:
- April 1, 2024: Reservations available for July 4 – July 31, 2024
- May 1, 2024: Reservations available for August 1 – September 2, 2024
It’s well worth reading the timed entry reservation page AND the timed entry FAQ for all the information you might need.
Implications of Timed Entry Permits for Your Trip
For what it’s worth, we saw this timed entry reservation process unfold at multiple other national parks across the western United States during our two year road trip a few years back.
During that period, we visited every national park west of the Rockies, and saw multiple parks trying their best to deal with increased visitation numbers.
It’s a complicated situation, because on one hand, the record visitation numbers are putting a huge strain on park resources and ecosystems.
On the other hand, we want to make our national parks accessible (and we want that access to be equitable) because seeing the national parks in person makes everyone want to come together to protect them!
However, putting that all aside, the number one implication that we saw in places like Rocky Mountain National Park and Glacier National Park is that the timed entry permits will force people to enter the park before that 7am window kicks in.
Parking lots in Rocky Mountain National Park and Glacier National Park were full by 6am or so as people rushed to get into the park before the permits were required. We’d anticipate that something similar will play out here.
Keep that in mind as you plan your own visit, since parking at Sunrise and Paradise is limited to begin with.
Things to Know Before You Visit Mount Rainier National Park
Here are a few other things to know before you make the trip to Mount Rainier National Park.
It’s worth stopping at one of the park’s visitor centers to check on trail conditions and closures.
There are three main visitor centers in the park, one at Paradise (the Henry M. Jackson Visitor Center), one at Sunrise (the Sunrise Visitor Center), and one at Ohanapecosh (the Ohanapecosh Visitor Center).
We always stop by the visitor center – especially on our first trip to a park – to check out the trail conditions and talk to the knowledgeable rangers (who generally know where to find the best wildflowers or fall color).
You’ll need to pay an entrance fee to get into the park. And, yes, you need to pay even if you get there when the entrance station is closed. For Mount Rainier, it’s $30 per vehicle, which is good for seven days. You can prepay for that pass here, or wait in line at the entrance station and buy it on arrival.
Another option – and this is a good one if you’re planning on visiting three or more national parks in the next 12 months – is the America the Beautiful Pass, which covers all National Recreation Areas (National Parks, Forests, Recreation Areas, and Monuments) for only $80.
The pass is good for 12 months. In Washington and Oregon, where most hiking is on national forest land, we think it’s a no-brainer! You can get it in advance at REI, or buy one on arrival.
There are very limited options for eating and drinking inside the park. It’s best to pack your meals – breakfast, lunch, and snacks – so that you don’t have to leave the park and re-enter to get lunch (lines at the entrance stations can be LONG).
Leave the dogs at home. No dogs allowed on any hikes in Mount Rainier National Park. This rule helps preserve the trails and the flora and fauna in national parks.
Dogs are allowed in campgrounds and at trailheads – essentially anywhere a car can go, dogs can go. Which isn’t particularly helpful, and you’ll have a more enjoyable trip if you leave them at home.
Our Favorite Things to Do in Mount Rainier National Park
And now, let’s talk about our favorite things to do in Mount Rainier National Park.
We’re going to loosely organize them by region of the park, but there are a few that don’t fit into a single region, and you’ll find them sprinkled in throughout.
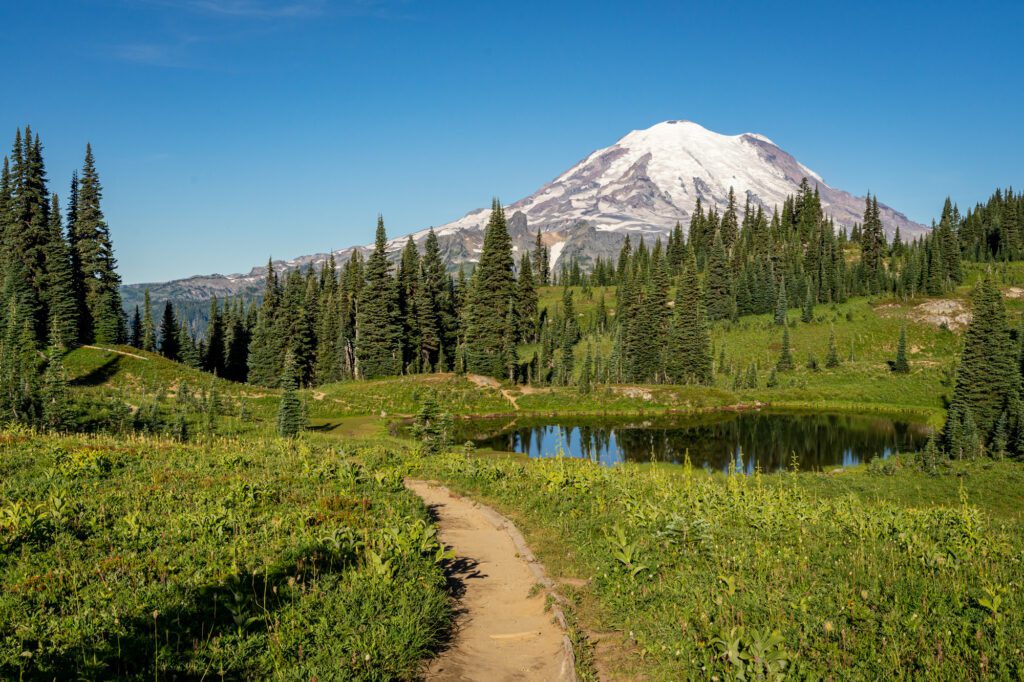
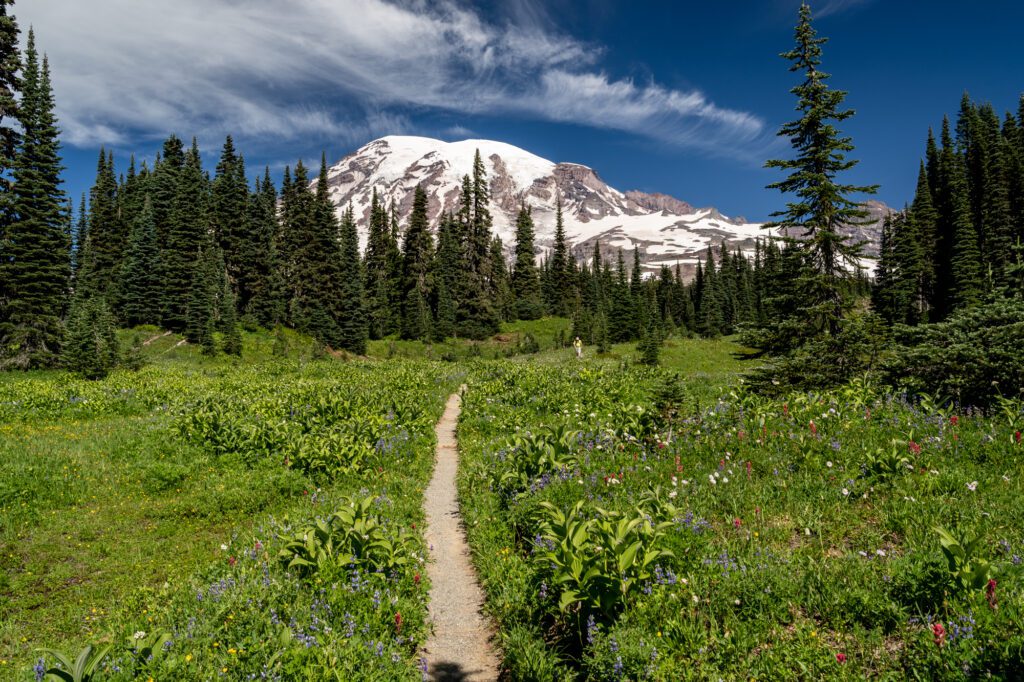
Hike the Skyline Trail (Paradise)
- Length: 5.5 miles
- Elevation Gain: 1,700 feet
- Season: Mid-July – September/October
- Trail Type: Loop
- Difficulty: Moderate / Hard
- Trailhead Location: Henry M Jackson Visitor Center
The Skyline Trail is, without a doubt, our favorite hike in Mount Rainier National Park.
It’s also in the top three in terms of hikes in Washington State (our list changes constantly as we discover new hikes and revisit old favorites).
However, the biggest problem with the Skyline Trail is that it’s not exactly a secret, so the traffic on this trail is WILD.
That being said, if you’re willing to get an early start (we have gotten on the trail by 7am the last two times), you’ll be more likely to find at least a little slice of solitude for the first half of your hike (it will disappear on your way down, as the hordes of other hikers are on their way up).
At this point, you might be asking why the Skyline Trail is our favorite.
It has (almost) everything we love in a hike in the Cascades:
- Lush subalpine meadows full of wildflowers or fall color, depending on the time of year.
- Excellent views of a snow capped mountain peak.
- A good amount of climbing to really get the blood pumping.
- Abundant wildlife along the trail (mostly marmots and mountain goats in this context).
- Great panoramic views of the surrounding landscape (in this case, views of the Tatoosh Range, Mount St. Helens, and Mount Adams).
- A gorgeous waterfall.
The only thing we can think of that this hike DOESN’T have is a lake.
The best part is that all of that is packed into just six miles of hiking. If you told us that we could get all of that with a ten or twelve mile hike, we’d be ECSTATIC.
Putting it another way, the reward-to-effort ratio here is astronomical, which is why we love it so much (and why so many other people do, too).
We have an entire guide dedicated to helping you plan a hike on the Skyline Trail, which you should read for far more detail and answers to questions like “which direction should I hike it in” and “how hard is this hike, really?”
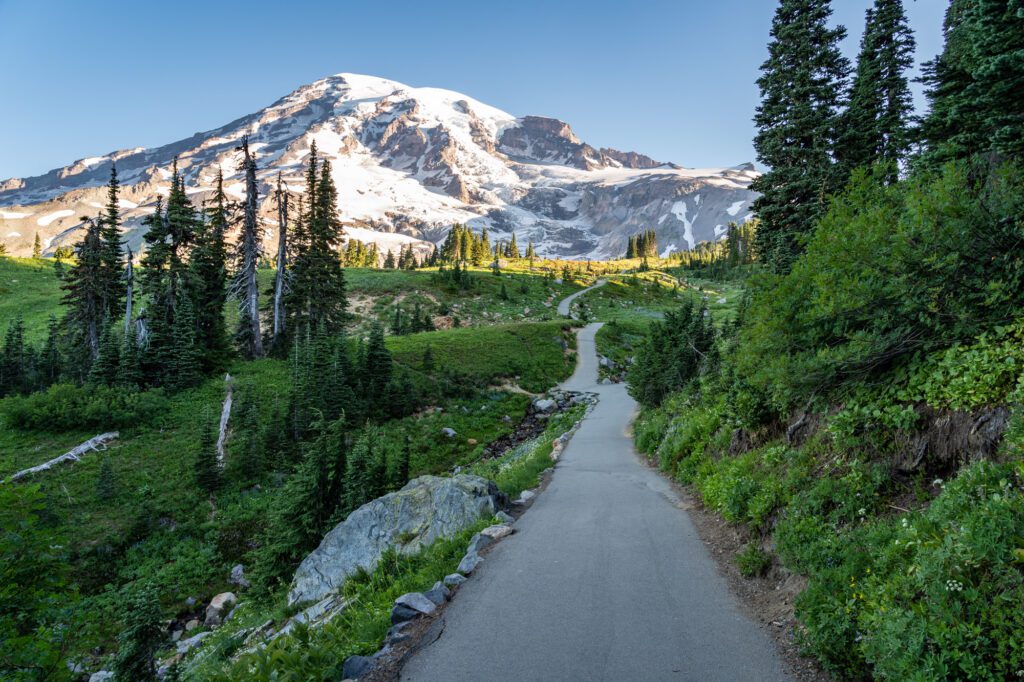
Experience the Waterfalls in Paradise (Paradise)
Part of the reason that we usually recommend Paradise as the best place to visit for first timers with a short trip (like a day trip to Mount Rainier) is that it features the most diverse group of landscapes and attractions.
It has wildflower meadows, rocky alpine areas, and beautiful lakes.
And waterfalls.
The waterfalls at Paradise are among some of our favorite waterfalls in Washington State, and there are four of them that we think you should absolutely visit.
Three of the four are within a few hundred feet of the parking lot, too, so they make for nice stops if you’re not up for hiking several miles, or if you’ve already done a big hike that day.
A note: we’re ordering these from highest to lowest elevation (or closest to the Henry M. Jackson Visitor Center to furthest).
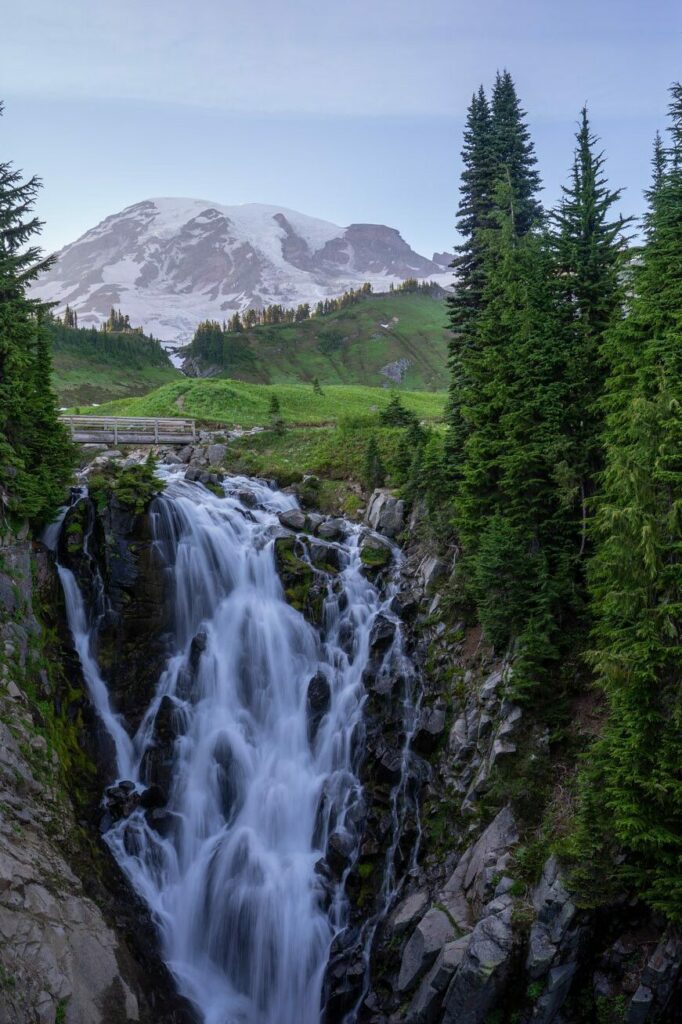
Myrtle Falls: If you hike the Skyline Trail, you’ll pass right by Myrtle Falls, which is the most scenic of the four here thanks to the looming face of Mount Rainier in the background. It’s about a quarter mile along a gradual paved path from the parking lot at the Henry M. Jackson Visitor Center. The falls is 60 feet high and cascades over a rocky ledge. The highlight is the background imagery, with the green meadows of Paradise and Rainier’s snow capped peak.
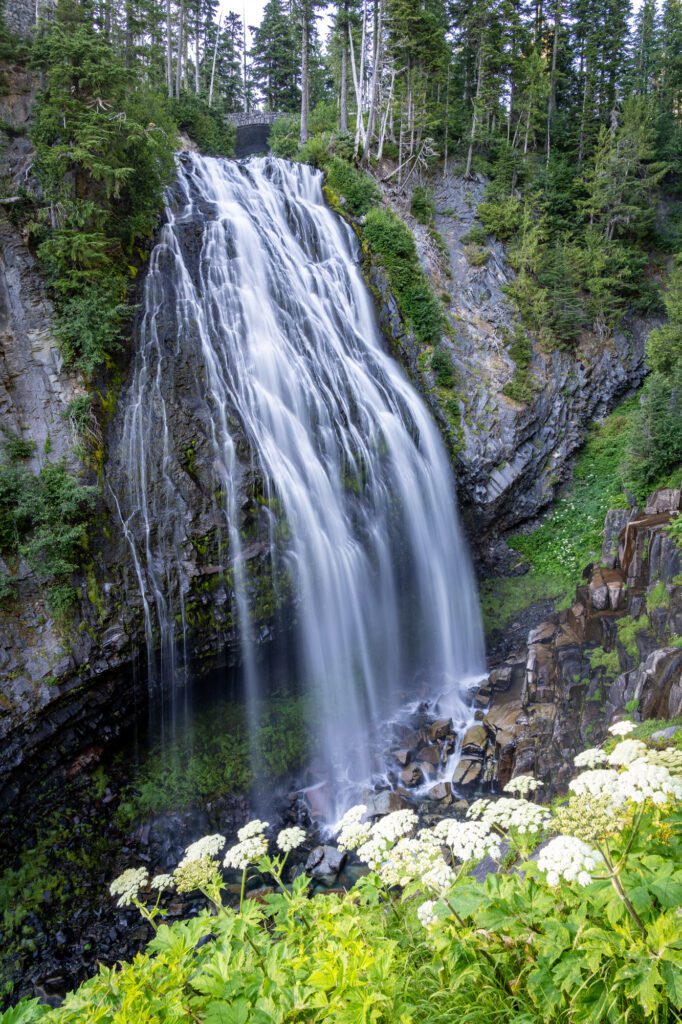
Narada Falls: Another very short walk from the parking lot along Paradise Valley Road brings you to the viewpoint for Narada Falls, which doesn’t look particularly impressive from the above. But once you walk the 0.2 miles down to the viewpoint, you get the full view of the 168 foot plunge, where the snowmelt that fills the Paradise river tumbles over a rocky outcropping.
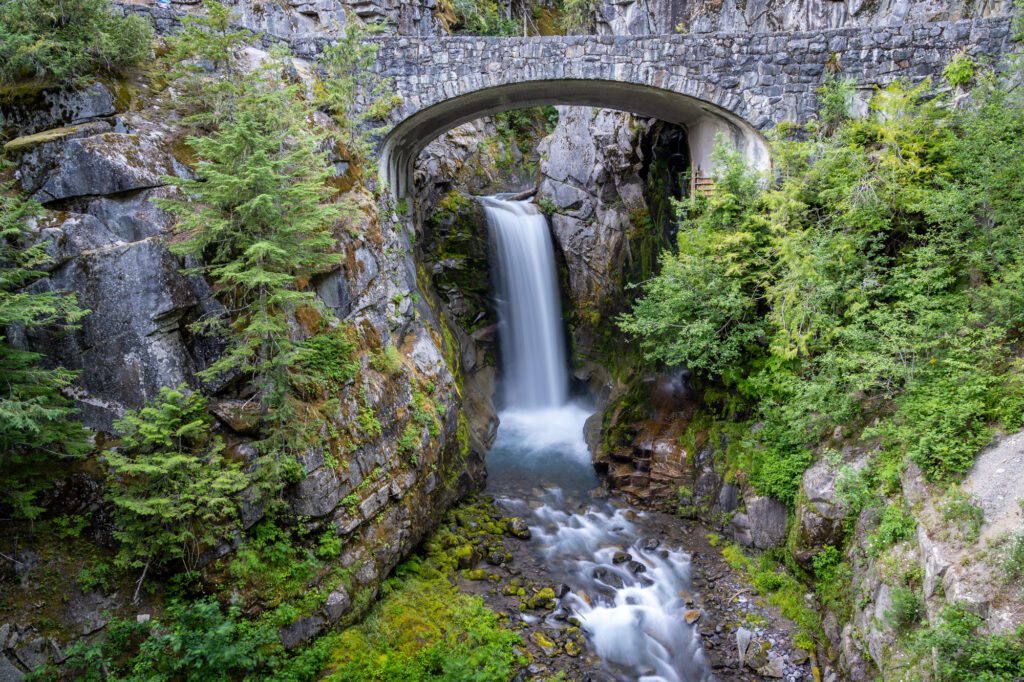
Christine Falls: Christine Falls is a few miles lower on Paradise Valley Road after you cross the Nisqually River, and the tiny parking lot is on your left if you’re heading down from Paradise. This one is cool because the waterfall, while not particularly tall or impressive, is perfectly framed by the stone bridge that you’ll later drive over. It’s a few hundred steps from the parking area down to the viewpoint, making it the most accessible of the four.
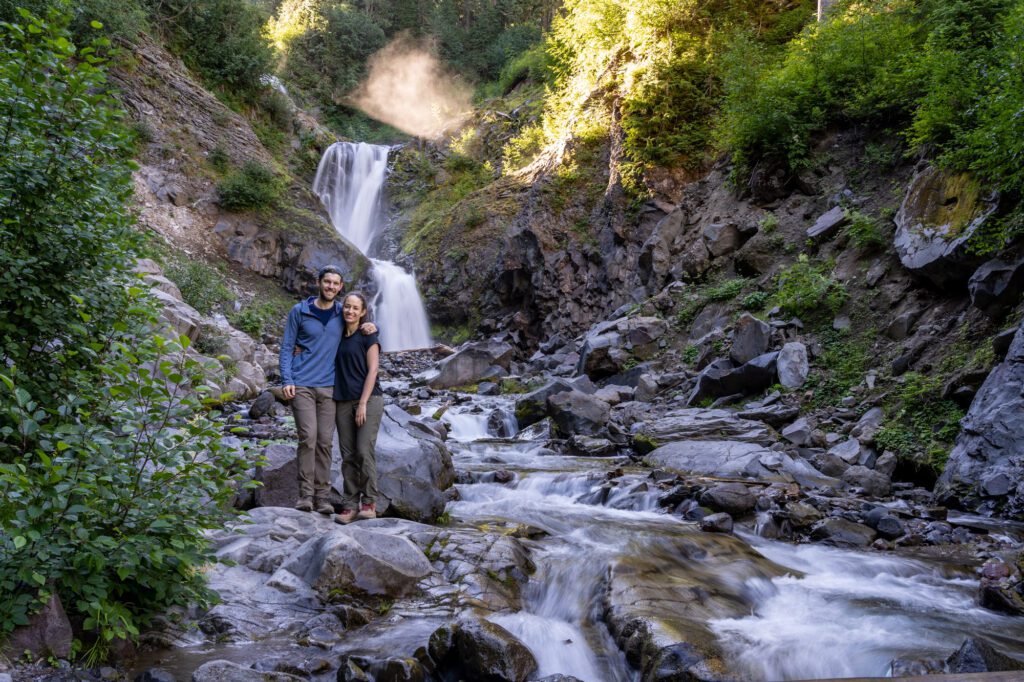
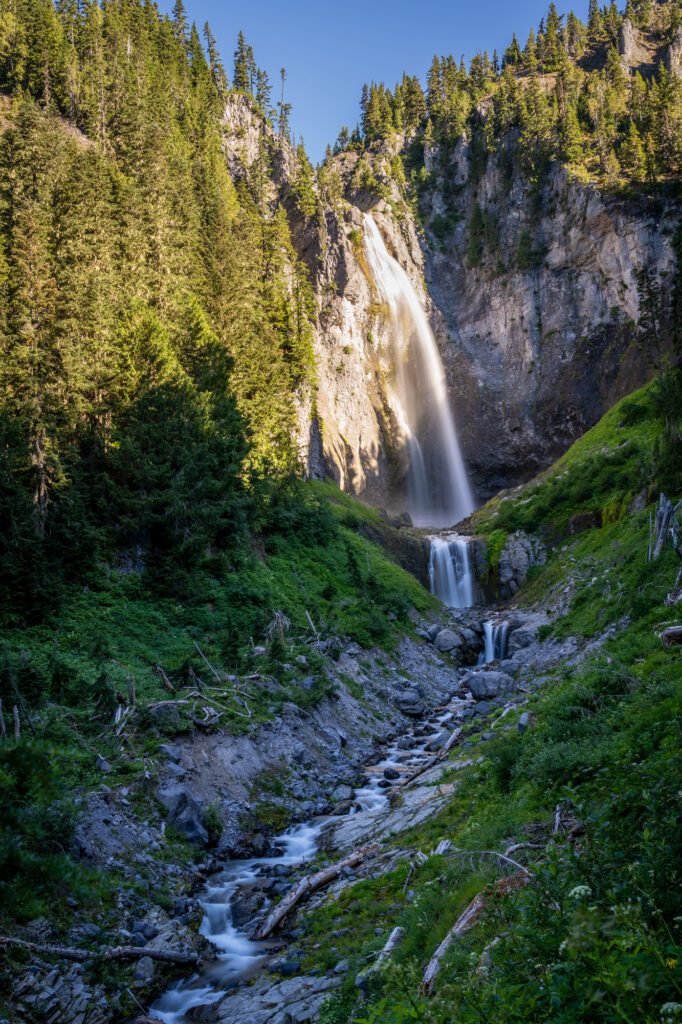
Comet Falls: Comet Falls is both our favorite waterfall in Mount Rainier National Park and the hardest to access, which is why we have a whole section on it just below!
Hike to Comet Falls + Bloucher Falls (Paradise)
- Length: 3.8 miles
- Elevation Gain: 1,250 feet
- Season: Mid-July – September/October
- Trail Type: Out and Back
- Difficulty: Easy / Moderate
- Trailhead Location: Comet Falls Trailhead
As we just mentioned, Comet Falls is our favorite of the four waterfalls here because it is, by far, the most impressive in terms of the waterfall itself.
However, in order to view it, you do have to hike a few (moderately difficult) miles.
On the bright side, there is another great waterfall along the trail – Bloucher Falls – and the two of them make the relatively moderate effort worth it, we think.
Comet Falls is a two tiered waterfall that first tumbles off of a ledge high above the trail, falling 300 feet into a pool. From there, it flows off another ledge down into the creek, which continues all the way down to Christine Falls.
There are two good viewpoints for Comet Falls along the trail.
The first is your first view of the falls, where you have a great view of Van Trump Creek leading your eye along the gully up to Comet Falls.
The second is further along the trail, where you have an up-close-and-personal view of the falls.
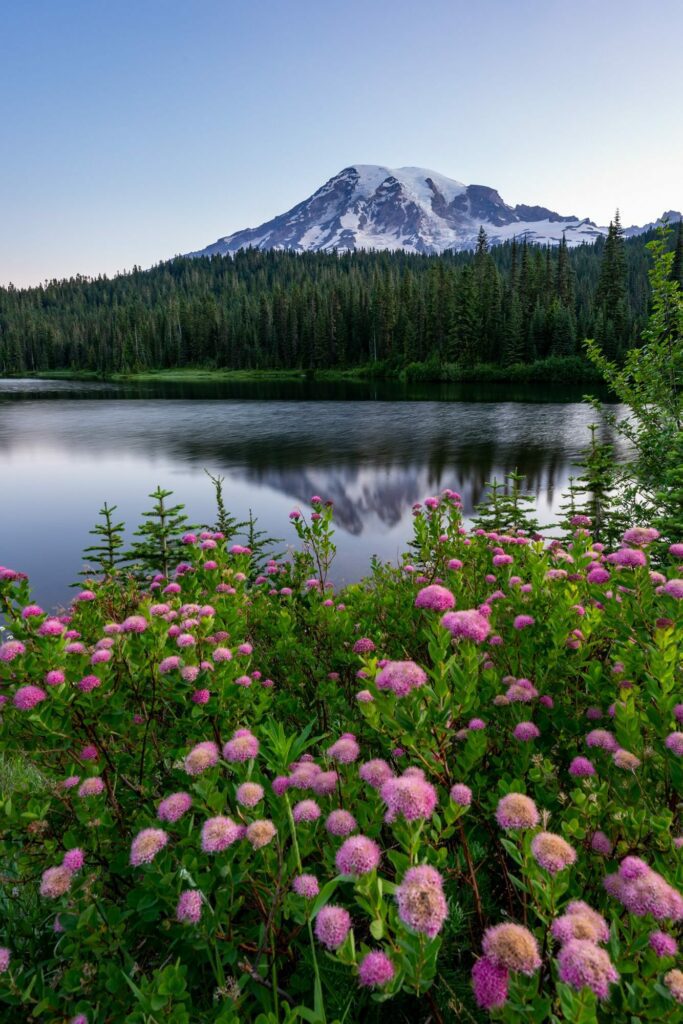
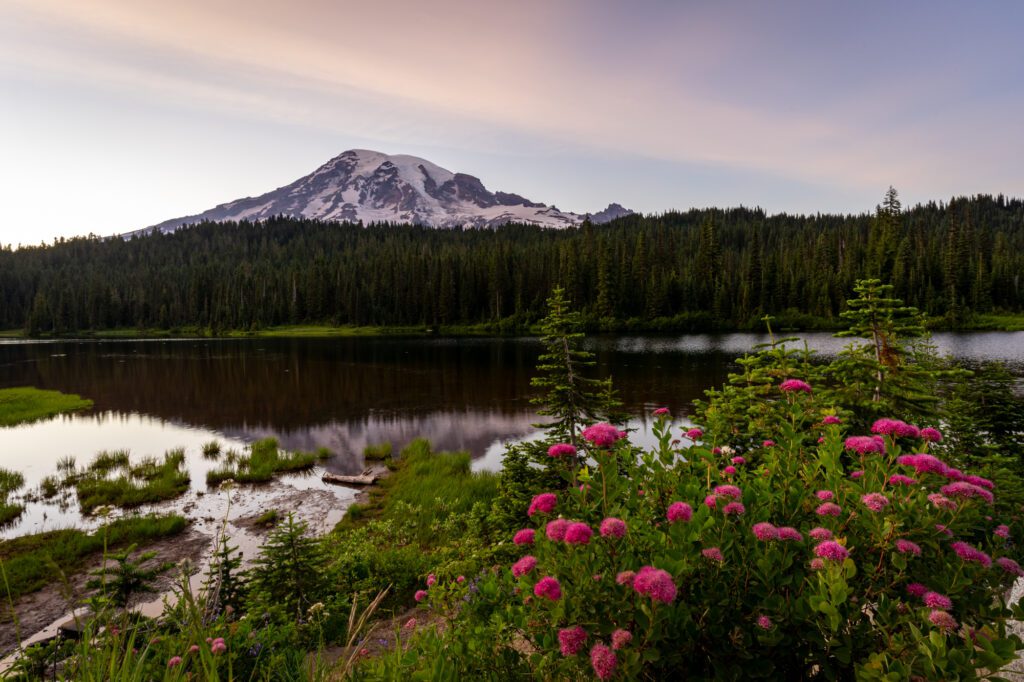
Pay Reflection Lakes a Visit (Paradise)
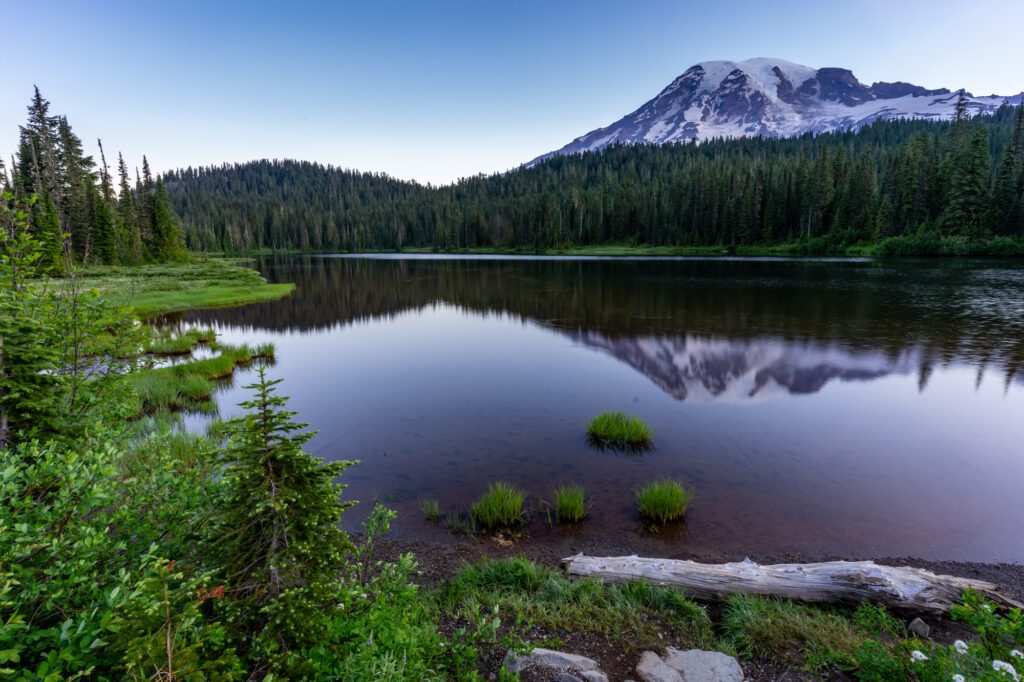
Reflection Lakes is a well-known destination for photographers thanks to the reflection of Rainier’s peak in the surface of the lakes, and the wildflowers that grow on the slopes on the side of the lake.
This is one of our favorite sunrise and sunset spots at Mount Rainier National Park (more on that below), and if you come here during those times, you certainly won’t be alone.
But it’s not just about the photography because there are a couple of good hikes that leave from here too.
For great wildflowers in late July and early August, head north on the High Lakes Trail towards the Henry M. Jackson Visitor Center, which we did on our latest trip and weren’t disappointed.
For a thigh-burner that ends at a saddle with nice views of Rainier, head up the Pinnacle Peak Trail.
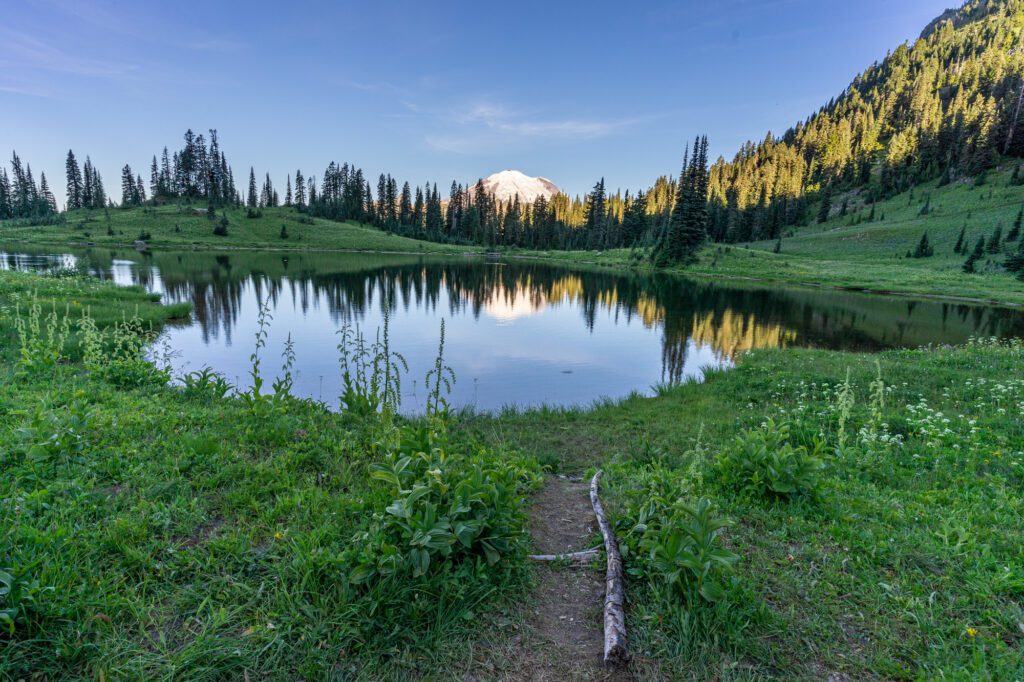
Hike to Bench and Snow Lakes (Paradise)

- Length: 2.5 miles
- Elevation Gain: 600 feet
- Season: Mid-July – September/October
- Trail Type: Out and Back
- Difficulty: Easy
- Trailhead Location: Bench and Snow Lakes Trailhead
In a place like Mount Rainier National Park where you’re surrounded by spectacular hikes in all directions, we think the hike to Bench and Snow Lakes might be one of the most underrated hikes in the park (it’s high on our list of worthwhile easy hikes in Washington for a reason).
The trailhead for Bench and Snow Lakes is a few miles east of Reflection Lakes on Stevens Canyon Road (here on Google Maps). It’s a small parking lot on your right.
The trail takes you to two lakes, and the trail between the two features some jaw-dropping views of Rainier.
First is Bench Lake, which has a perfect reflection of Mount Rainier if you manage to catch it on a wind-free day (pictured above)
Second is Snow Lake, which is tucked away in a beautiful rocky cirque, with towering rocky peaks rising high above the lakeshore on the far side.
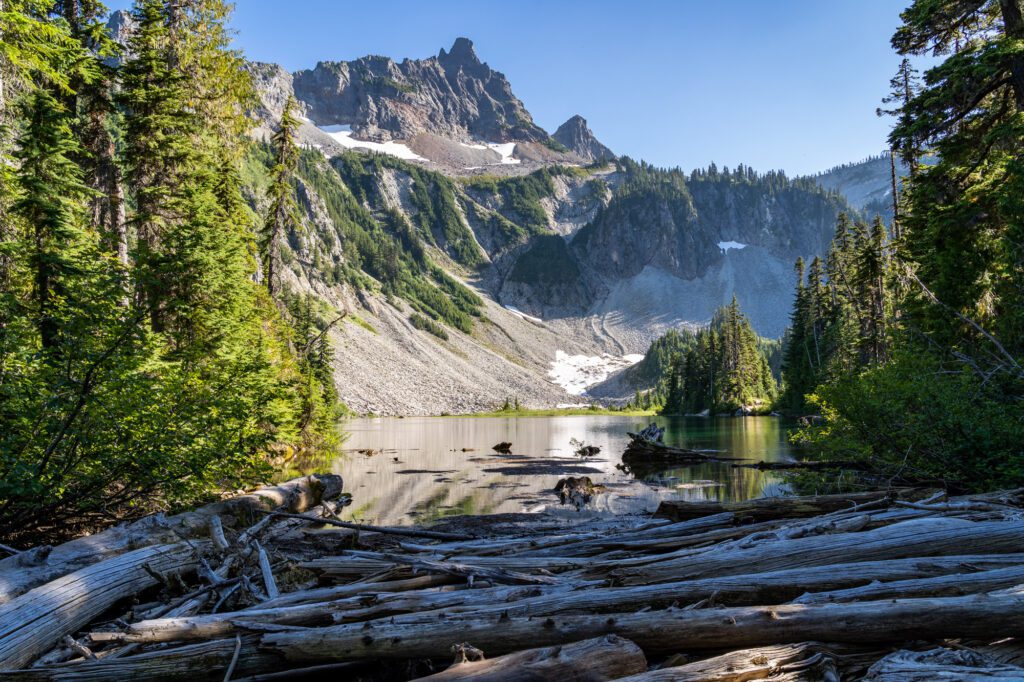
There are trails on both sides of the lake (and a campground on the left side), which is also where you’ll find the best view of the lake (we think).
Hike the Family-Friendly Grove of the Patriarchs and Silver Falls (Ohanapecosh)
Ohanapecosh, which is the region on the southeast side of the park, is worth a stop for a few reasons.
First, it offers a different aspect to the park than the other areas. Instead of being surrounded by subalpine meadows bursting at the seams with wildflowers and jaw-dropping views of Mount Rainier, you’re tucked away in a dense old growth forest.
Second, it’s a perfect stopping point along the drive between Paradise and Sunrise. It’s also a great home base if you want to camp in one place for your entire trip, because it’s roughly equidistant between the two.
Third, there are two great and short hikes to do here that, once again, offer something a little different than the other hikes in the park.
The first is the Silver Falls Trail, which takes you on a loop through the forest that follows the path of the Ohanapecosh River to a nice waterfall.
The second is the Grove of the Patriarchs (NOTE: CLOSED FOR THE FORESEEABLE FUTURE due to the suspension bridge being destroyed in a flood), which crosses the river to an island full of massive trees that is a great illustration of the ecosystem in this part of the park.
There’s also a visitor center and big campground here, and the town of Packwood sits just south (by “just” we mean 15 minutes or so), which is a good place for lunch or dinner (Packwood Brewing Company and the Mountain Goat!), and is probably the best-equipped town near the park.
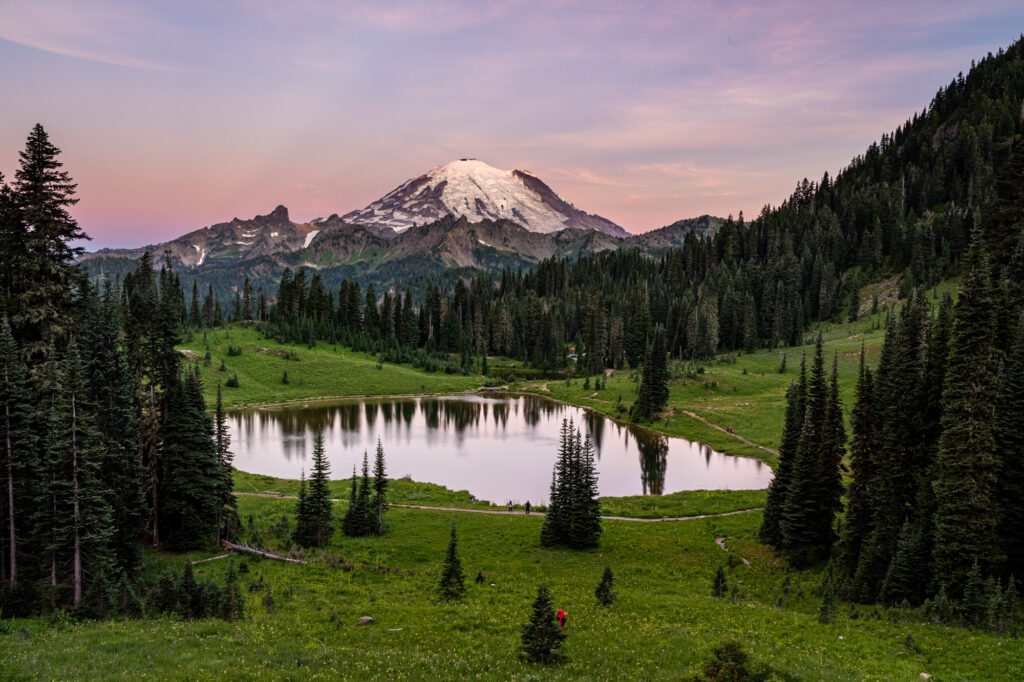
Take Photos at Tipsoo Lake and Hike the Naches Peak Loop (Sunrise)
Tipsoo Lake and the Naches Peak Loop form a one-two punch that we think is basically a must-do on any Mount Rainier itinerary that includes Sunrise.
Tipsoo Lake is – SPOILER ALERT (because we’re going to cover our favorite sunrise/sunset spots in a second) – our favorite sunrise destination in the park because it’s right on the road and you can watch as the sun rises behind you, illuminating Rainier’s peak in changing hues of pink, orange, and yellow.
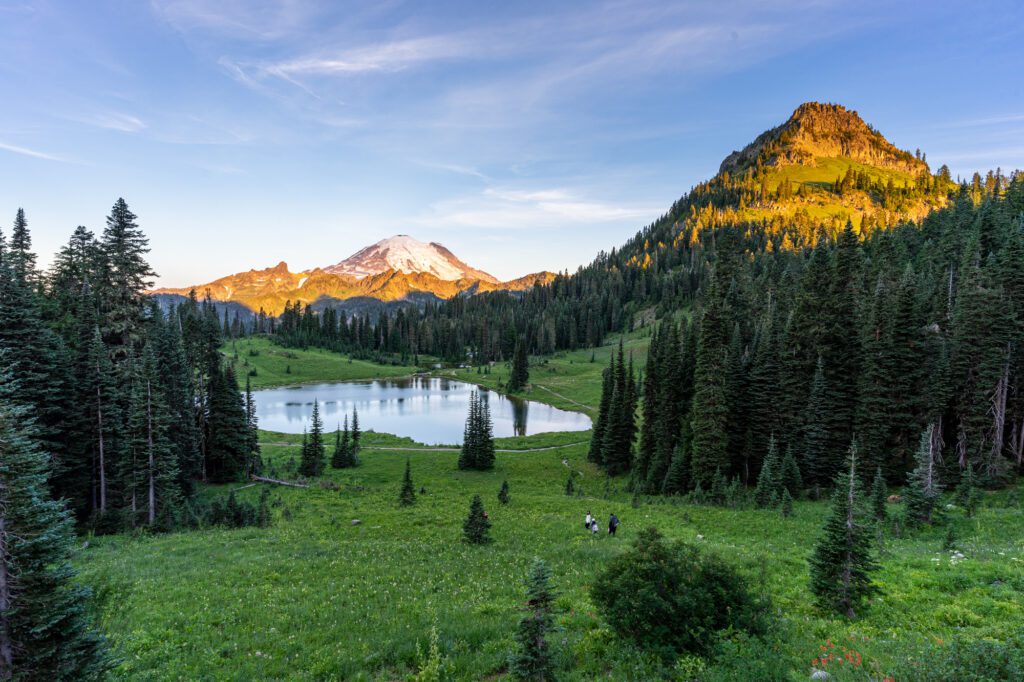
The Naches Peak Loop leaves right from Tipsoo Lake, following the Pacific Crest Trail on the way up to Naches Peak.
From the midpoint of the trail, you’re hiking straight towards Rainier, and there are some great views to be had along the way.
We think it’s one of the top three hikes in the park in terms of reward:effort ratio, and makes for a lovely little excursion on a day where you’ve already done a longer hike or are planning to do one later in the day.
Hike Along Sourdough Ridge for Unbeatable Rainier Views (Sunrise)

Sourdough Ridge is the ridge that runs from Sunrise Point (here on Google Maps) all the way up past the Sunrise Visitor Center to Frozen Lake. Along the way, there are nonstop views of Mount Rainier and the valleys on either side of the rocky spine.
The entire trail is doable, but unless you have two cars, it’s a little longer than we’d like and you’d be seeing the same thing twice (and hiking away from Rainier on the way back, which isn’t ideal).
So, unless that sounds good to you, you really have two choices when it comes to how best to get these views.
The first is to do one of the longer hikes near Sunrise, which we’re going to cover in the next section.
All of those hikes leave from the Sunrise Visitor Center and head up to Sourdough Ridge and out to Frozen Lake, which offers some of our favorite views in the park.
The second option would be to hike from Sunrise Point to the top of Dege Peak, which is a short 2.8 mile hike that climbs aggressively to the top of Dege Peak, where you’ll have 360 degree views of the surrounding landscape, including Mount Rainier and Mount Adams (in the distance).
Note that you can do the hike to Dege Peak from the Sunrise Visitor Center too – it’s slightly longer (~4 miles).
Tackle One of the Amazing Hikes at Sunrise (Sunrise)
While our single favorite hike in the park is Skyline, we also think that the Sunrise Visitor Center and the area surrounding it has the best collection of hikes in the park.
There are three great hikes – all of which we’ve done, sometimes multiple times – that leave right from the parking lot at the visitor center, and they all offer something a little bit different.
All three of the hikes below start on the Sourdough Ridge Trail, which as we’ve already covered has some pretty magical views of Rainier. Then you arrive at Frozen Lake and these three hikes branch off in different directions.
Burroughs Mountain (9 miles / 2,600 feet elevation gain): We’re big fans of this hike, especially if you go past the “official” end of the trail at the Second Burroughs and continue on to the Third Burroughs, where you’ll be about as close to the face of Mount Rainier as you can get without actually climbing it.
The downside? You have to descend down into the valley between the second and third burroughs in order to make the final ascent to the third, so it basically doubles the elevation gain.
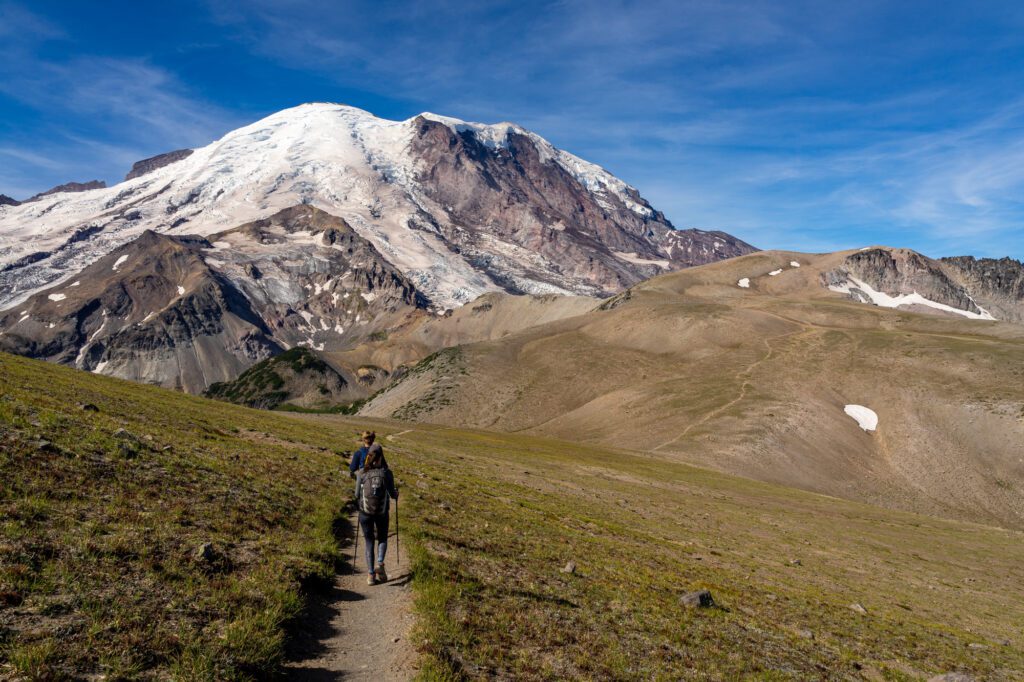
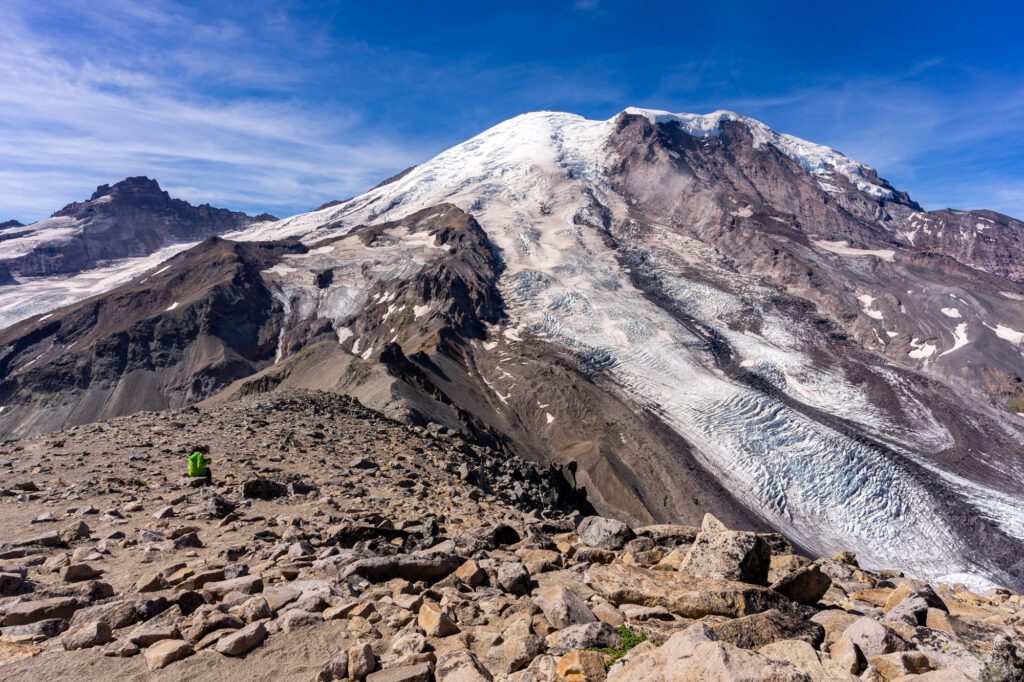
We have an entire guide dedicated to hiking the Burroughs Mountain Trail for you to read for far, far more detail on that hike.
The Mount Fremont Lookout (5.5 miles / 1,200 feet elevation gain): Of the three hikes here, this is the most popular trail.
We’re not exaggerating when we say that hundreds of hikers can be found at the fire lookout at the end of this trail on a nice Saturday evening in August, enjoying the orange glow that washes over the valley and Rainier’s peak as the sun sets to the west.

The hike climbs along a rocky, marmot-laden ridge on the way out to a historic fire lookout with sweeping views from Rainier, over the valley to the north, and beyond.
Berkeley Park (7.5 miles / 1,600 feet elevation gain): We discovered this hike by talking to a ranger at Paradise, who we asked where to find wildflowers (it was the last few days of July). They immediately said “Oh, Berkeley Park is the place to be right now.”
We had never heard of it, but we were heading towards Sunrise the next day, so we added it to the list.
It was a GREAT hike. The trail drops down from Frozen Lake into a lush valley with a brilliant display of wildflowers in just about every color imaginable.
There’s a babbling creek to keep you company as you hike, and numerous pull offs to sit and relax and take in the ambiance.
Whichever hike you end up choosing, we’d highly recommend making it a loop that comes out on the Sourdough Ridge Trail to Frozen Lake (which means you’re facing Mount Rainier) and then goes back past Shadow Lake on part of the Wonderland Trail (the 90+ mile backpacking trail that circumnavigates Mount Rainier) and then cuts over onto the Sunrise Rim Trail, which has great Rainier views and abundant wildflowers in the summer.
Brave the Road to Mowich Lake for Two Great Hikes (Mowich Lake)
The hardest part of the park to access (of the regions that are accessible by road, anyway) is at the end of a long, washboard gravel road that requires a slow, steady journey – and a lot of patience – to reach.
The result, though, is the fact that this is – BY FAR – the least visited part of the park, so you’ll get more solitude than you’ll find just about anywhere else in the park outside of the areas only accessed by long, overnight backpacking trips.
All things considered, this road isn’t actually that bad. It’s more well maintained than a lot of the forest roads we’ve driven on in Washington, but the nature of the unpaved road means it’s going to be slow going.
At the end of that journey, you’ll come to the shores of the biggest AND deepest lake in Mount Rainier National Park, which sits in a glacier-carved basin surrounded by some of the best subalpine meadows in the park.
There are three main attractions here, aside from the lake.
First is the hike up into the wildflower-laden subalpine meadows of Spray Park.
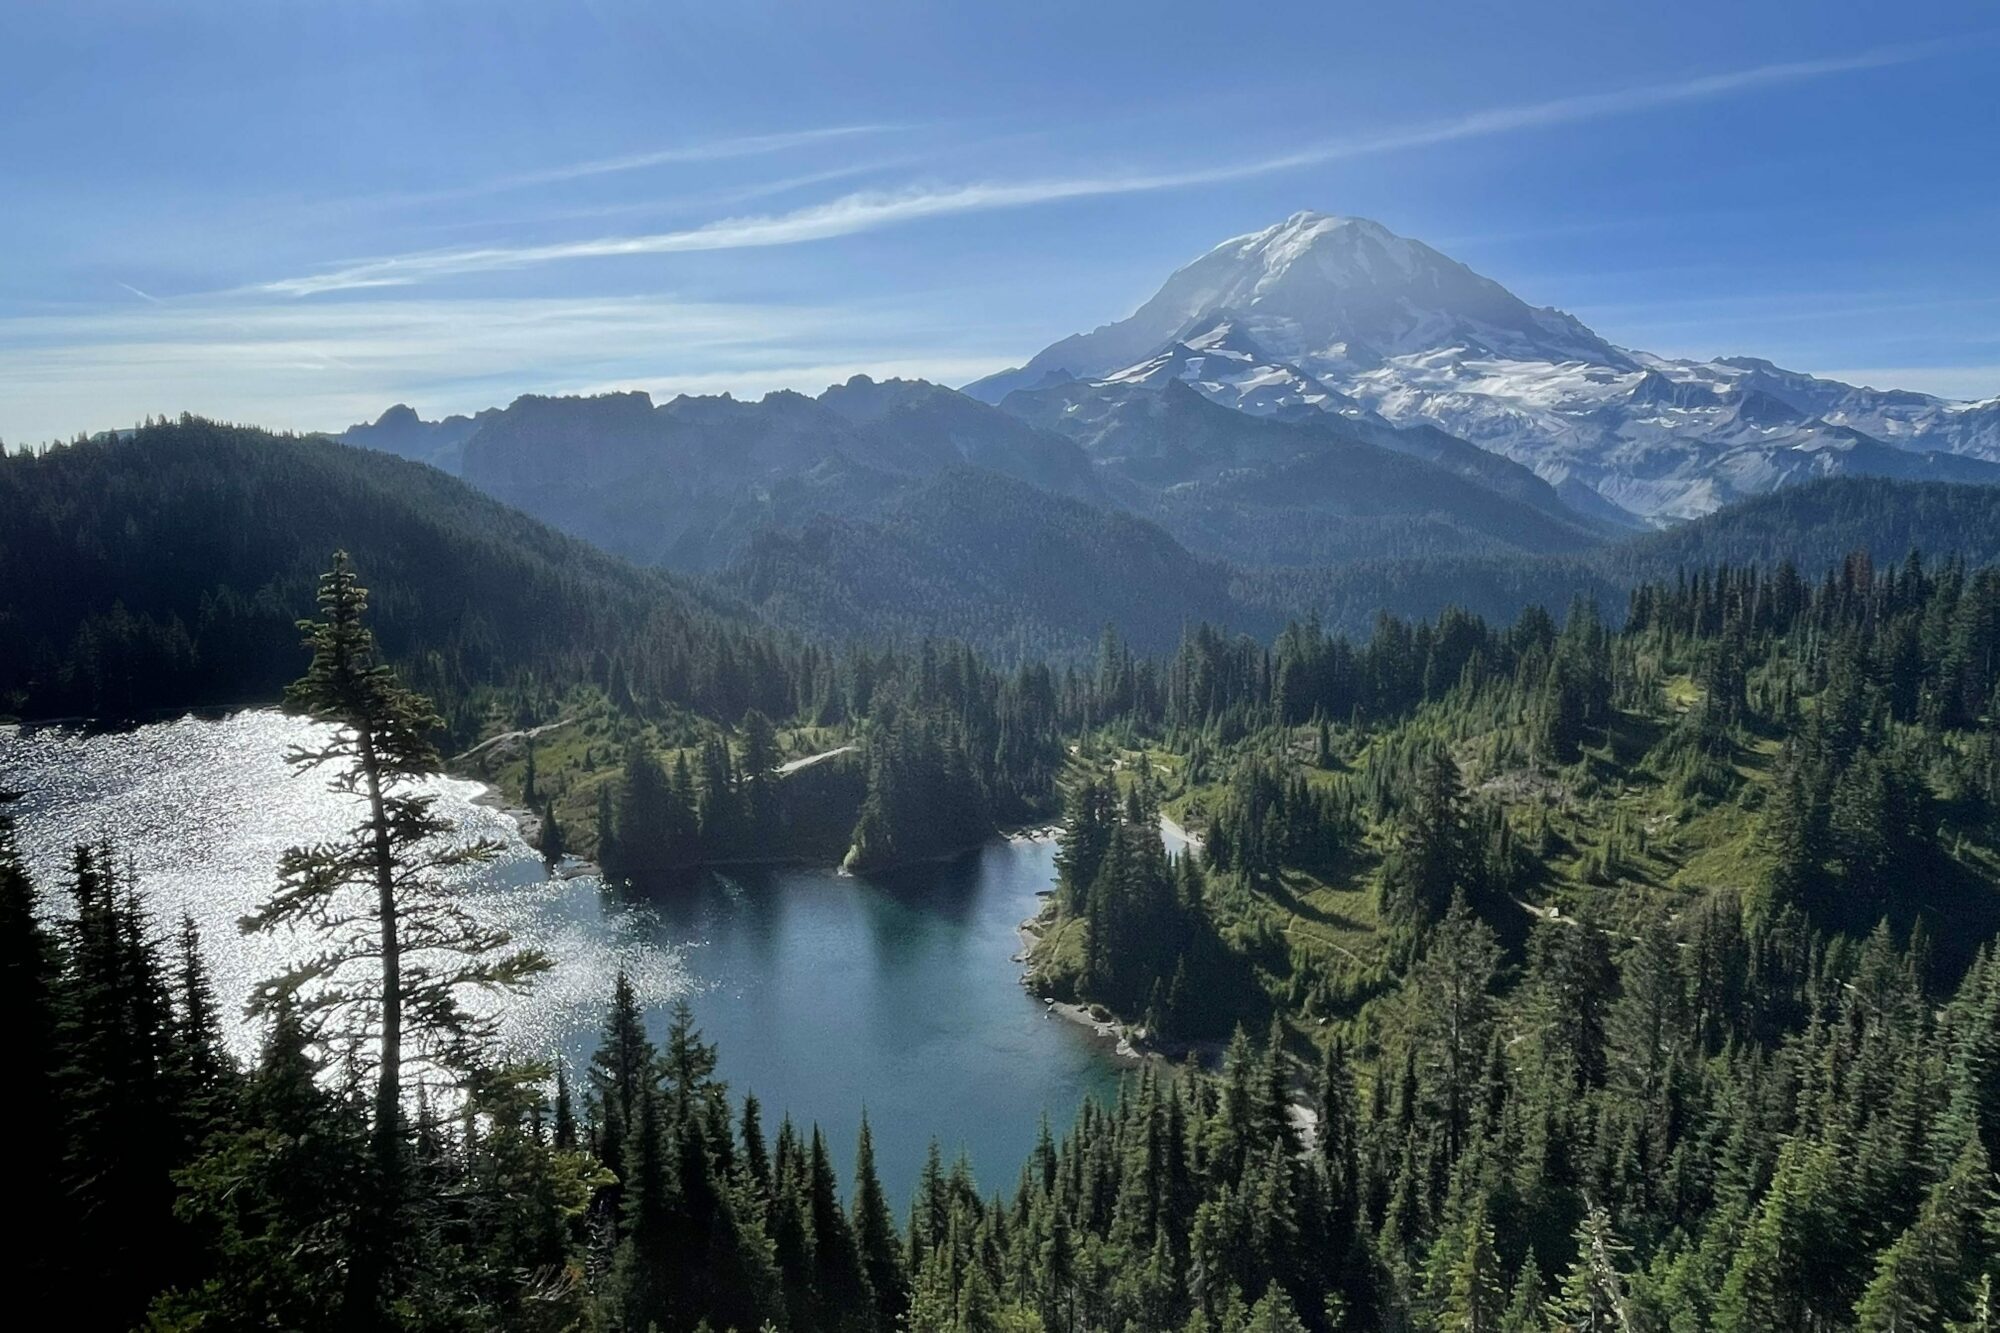
Second is the hike up to the Tolmie Peak Lookout, a moderate hike up to fire lookout with a truly magnificent view out over Eunice Lake towards Mount Rainier’s northwest face.
Last is the small, primitive campground with a handful of walk-in sites. There are vault toilets here, but no potable water SO YOU NEED TO BRING YOUR OWN WATER (or a filter).
This would be a great place to pitch a tent to use as a home base for the two hikes we mentioned above.
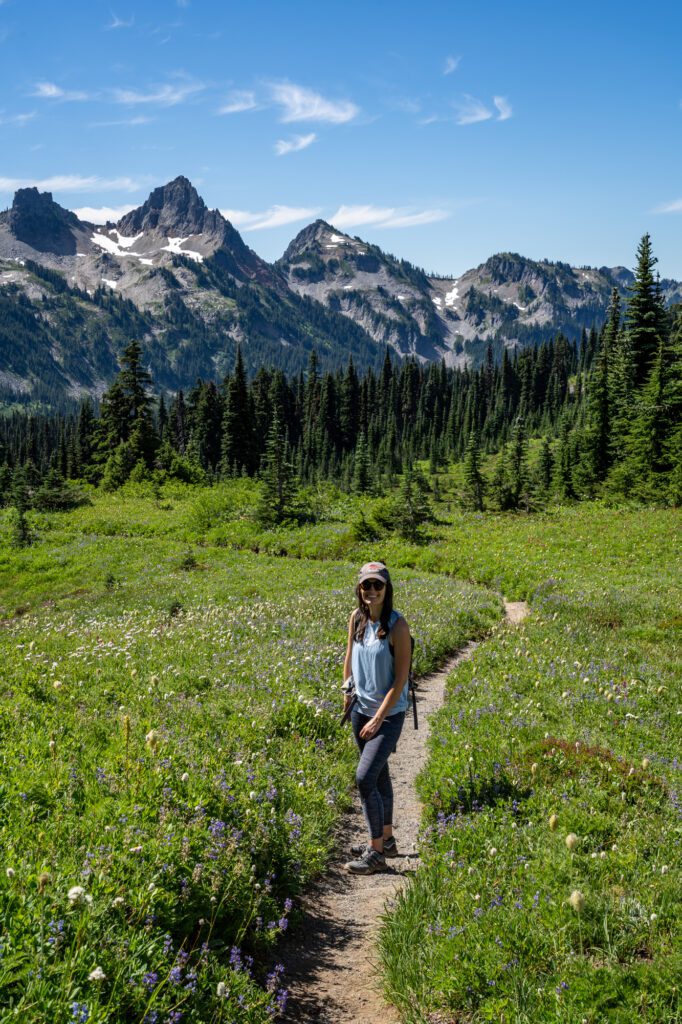
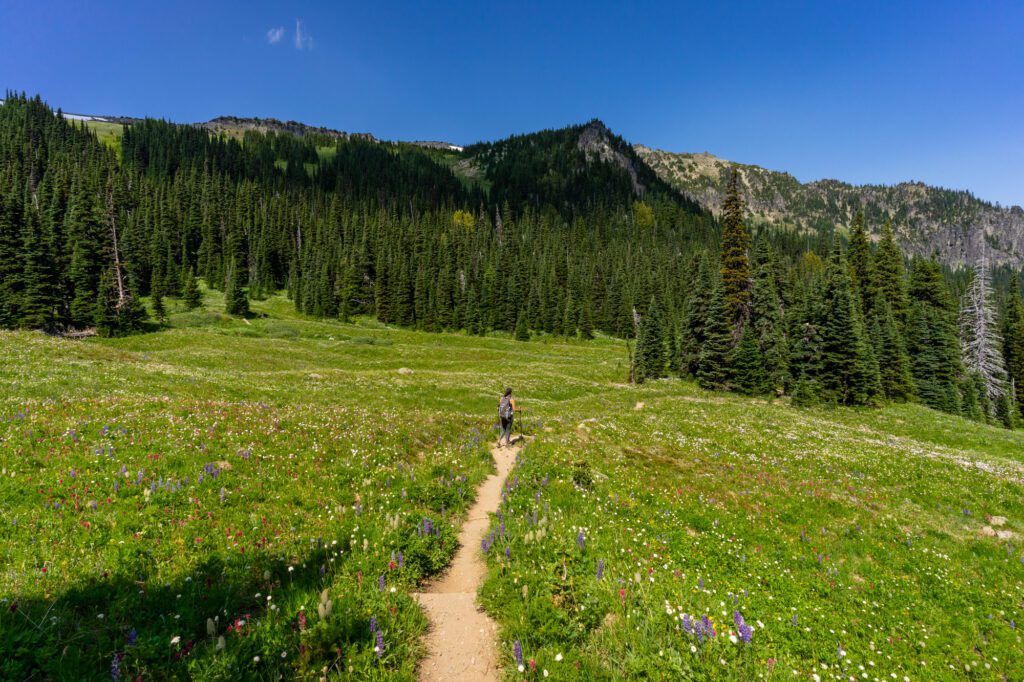
See the Blankets of Wildflowers in the Early Summer (All Regions)
The early summer – which means July and August in the Cascades – brings a diverse, multi-colored display of wildflowers to the subalpine meadows in Mount Rainier National Park.
I mean, we named our dog “Lupine” while on a hike at Rainier surrounded by, YOU GUESSED IT, a massive field of purple lupine.
Wildflower season is notoriously hard to predict, especially as the climate changes and snowfall and spring temperatures become more erratic. But, generally, we’ve had the best luck in the last week of July and the first week of August.
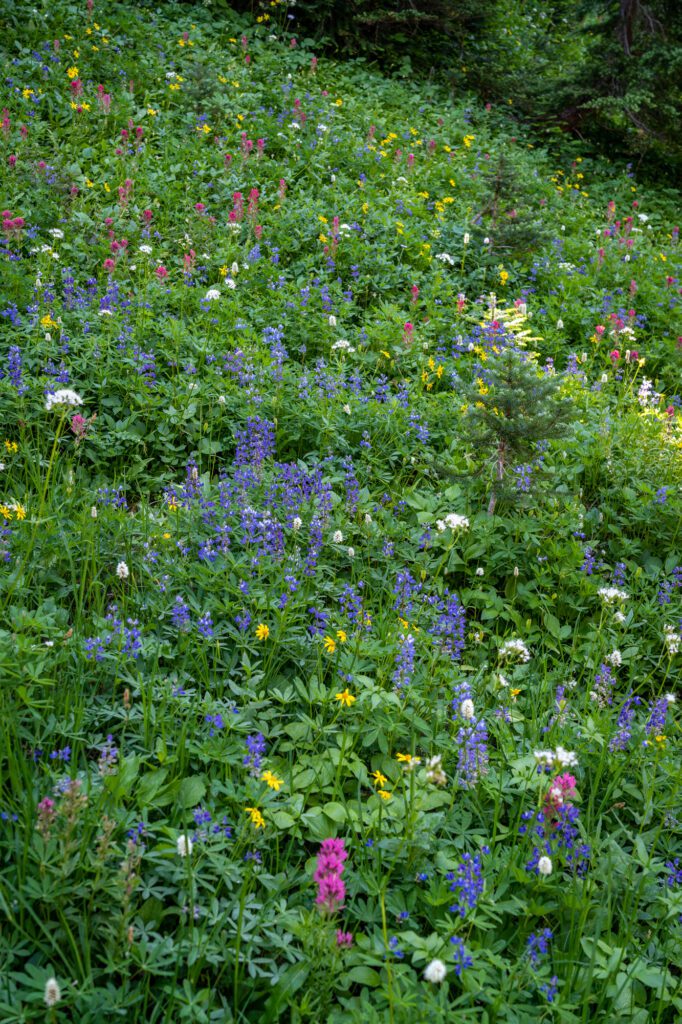
It also varies by region thanks to elevation differences. Paradise and Sunrise reach peak bloom at slightly different times. Generally, Sunrise is a few days / weeks later because it’s higher elevation, but it depends on the year.
It’s VERY IMPORTANT to remember that you need to stay on the trail and avoid trampling the wildflower meadows, EVEN IF THEY HAVEN’T BLOOMED YET.
By walking on the flowers, you can destroy them both in the current year, and in future years.
Be respectful of the environment, people!
Our best piece of advice when it comes to wildflowers is twofold.
Before your trip, keep an eye on trail reports for hikes on the Washington Trails Association, where trail reports from your fellow hikers will keep you abreast of the current bloom situation.
The NPS also has a good wildflower page about what’s currently blooming.
Then, when you arrive at the park, head to the visitor center to ask the park rangers where they’ve seen good wildflowers recently.
This has been the best way for us to figure out where to go, and we discovered the Berkeley Park trail through asking rangers where we should go at that particular time.
Berkeley Park (Sunrise), the Sunrise Rim Trail (Sunrise), the High Lakes Trail (Paradise), and Spray Park (Mowich Lake) are all excellent choices for seeing wildflowers in the park.
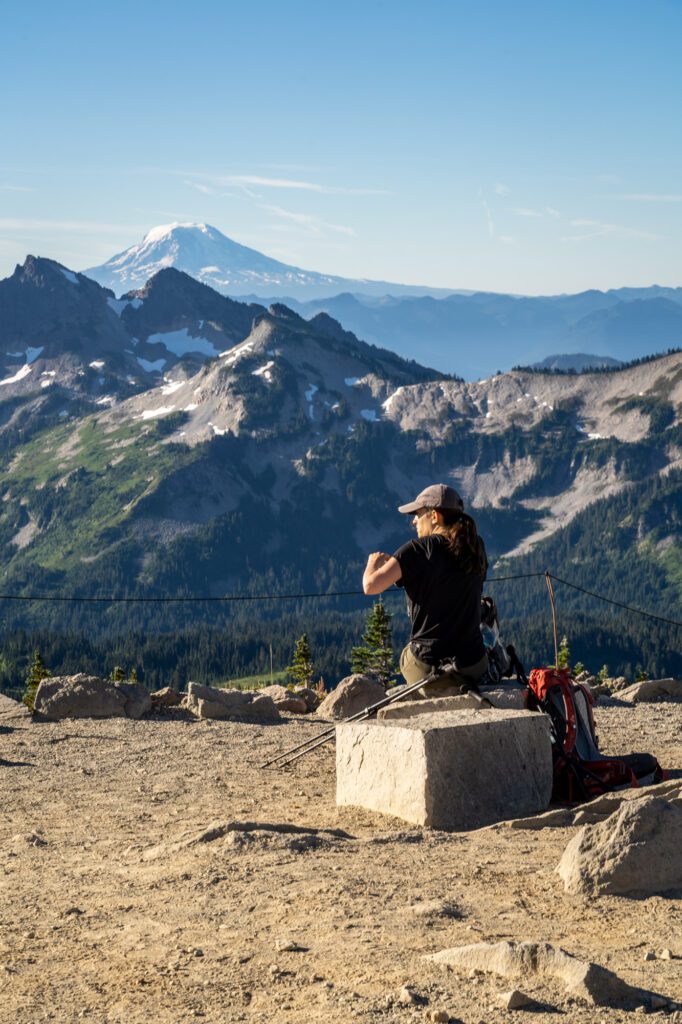
Catch an Epic Sunrise or Sunset (Paradise, Sunrise, or Mowich Lake)
There are a nearly unlimited number of places to catch a nice sunrise or sunset in the park, but there are several that we find ourselves drawn to again and again that we think are worth mentioning.
Conveniently, we’re going to give you one in each part of the park aside from Ohanapecosh (and two in Sunrise), so you have plenty of options.
Tipsoo Lake (Sunrise): Located at the base of the road up to Sunrise (ish), Tipsoo Lake is a great spot to catch a sunrise because if you’re up on the road above the lake (here on Google Maps), the sun is coming up behind you, lighting up the face of Rainier first with shades of pink, then orange as the sun comes up. It’s also nice from the eastern shore of the lake, which has a nice partial reflection and wildflowers (in the early summer).
Mount Fremont Lookout (Sunrise): This isn’t exactly an unknown spot, and the reason that it’s so great is the sweeping view of Rainier and the ridges and valleys on the north side of the mountain. Also, it’s fairly accessible, and the hike out there isn’t particularly difficult. It’s a VERY popular spot, so don’t come here expecting solitude. But it’s hard to beat the view. You’re looking south at Mount Rainier, which makes it equally good for sunrise or sunset because you’re never looking directly into the sun (which we don’t like).
Reflection Lakes (Paradise): Probably the most well-known spot, this is another very popular one and I’ve enjoyed chatting with photographers here at both sunrise and sunset (we slightly prefer sunrise here). A good reflection of Rainier, plenty of parking, and a roadside viewpoint make this one hard to beat in the Paradise area (though we’d argue that it’s better from the Pinnacle Saddle, which is a short steep hike up from the lake). One important note: the mosquitoes here are no joke, and they’re ravenous in the early summer.
Tolmie Peak Fire Lookout (Mowich Lake): Another of the park’s historic fire lookouts, this is a tough spot to reach for sunrise because of the long, bumpy gravel road that you have to drive to get to the trailhead. And the angle of the sun here is better for sunset anyway, we think, when the sun is setting at your back as you watch the alpenglow wash over Mount Rainier’s peak.
Our Favorite Things to Do in Mount Rainier, Mapped
Planning a Trip to Mount Rainier National Park? You won’t want to miss our detailed guides to visiting Mount Rainier that are all based on our own personal experience exploring the park.
- All the Best Things to Do in Mount Rainier National Park
- How to Plan an Unforgettable Day Trip to Mount Rainier From Seattle
- Where to Stay near Mount Rainier National Park: A Complete Guide
- The Best Hikes in Mount Rainier National Park: A Helpful Hiking Guide
- Hiking the Skyline Trail: Is This the Best Hike in the Entire State?
- Hiking the Jaw-Dropping Burroughs Mountain Trail at Mount Rainier
- Hiking to Towering Comet Falls in Mount Rainier National Park
- The Naches Peak Loop: The Best Bang-for-your-Buck in Washington