Hiking the Little Si Trail: A Complete Trail Guide
When most hikers in the Seattle area think about hiking near North Bend, the first trail that inevitably comes to mind is the epic hike up to Mount Si. However, that trail is really only accessible to a small percentage of would-be hikers thanks to the steep climb and relatively long mileage that puts it squarely in the “difficult” category.
If you’re not up for the challenge of tackling Mount Si, which involves 3,500 feet of climbing and the better part of the day, then there’s a shorter, easier option just down the road. The Little Si trail is a nice, moderate option that can be done in a half day from Seattle, including travel time.
The hike up to the summit of Little Si is on our list of the best hikes near Seattle because it’s easy to get to, it’s a nice hike through a ferny forest that encapsulates a lot of what we like about hiking in the Pacific Northwest, and it isn’t so hard that only the most experienced hikers can tackle it.
In this guide, we’ll cover everything you need to know to hike the Little Si Trail.

Disclaimer: Some of the links in this post, like hotel links, are affiliate links, meaning at no additional cost to you, we make a little bit of money if you click through and book. That being said, we would never recommend something to you that we don’t stand behind 100%.
Getting to the Little Si Trailhead
Unlike most of the trailheads for hikes in Washington State, there are actually two good options for reaching the trailhead for the hike to Little Si. And one of them is public transportation!
Driving Yourself
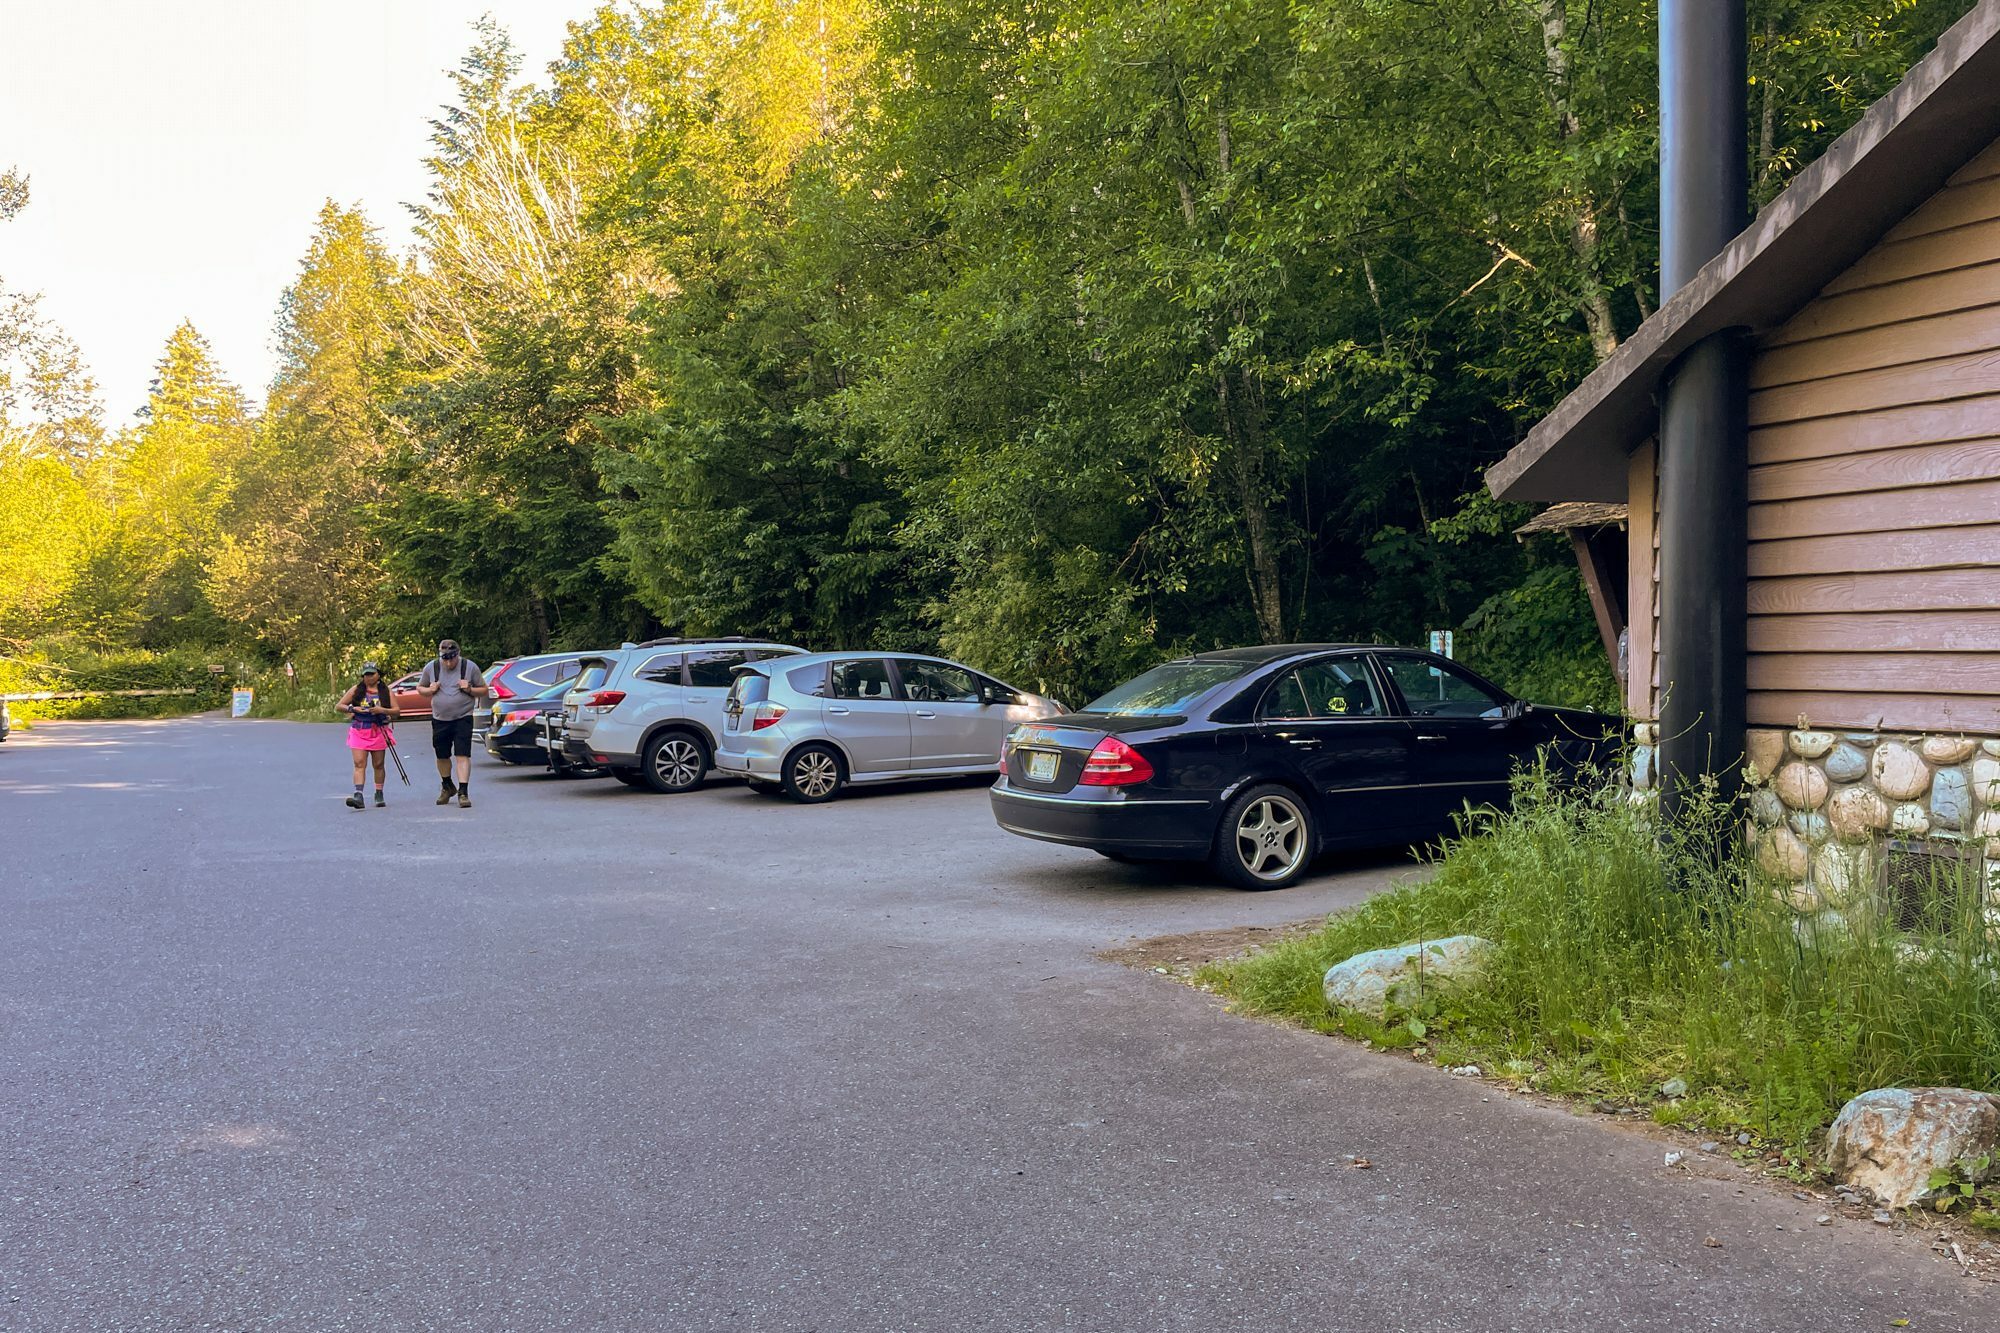
If you want to drive yourself, be prepared to deal with a nightmare parking situation on summer weekends.
We’d highly, highly recommend trying to make the journey midweek if you can swing it. If weekends are the only option for you, either plan on arriving at the trailhead NO LATER THAN 8:00 am, or take the Trailhead Direct (more on that in a second!).
There are two parking lots at the Little Si trailhead. There’s one that holds 40-50 cars right at the base of the hike, and then another slightly bigger (but not by much) overflow lot a quarter mile west along the road you drove in on.
Two things to know here.
First, it is EXTREMELY competitive to park at the trailhead.
Second, you can’t park on the streets nearby, or you will likely get towed / a ticket, depending on where you leave the car.
We cannot stress this enough – if you want a parking spot on a Saturday morning, then you need to arrive around 8:00 am at the latest.
Otherwise, you may be either waiting an hour or two for a parking spot, or leaving your car in a risky parking spot. Sundays are slightly less competitive, but still crazy busy.
You’ll need a Discover Pass to park at the trailhead since it’s a State Park, and there’s no kiosk to purchase one on arrival. That means you will need to purchase one BEFORE you head to the trailhead.
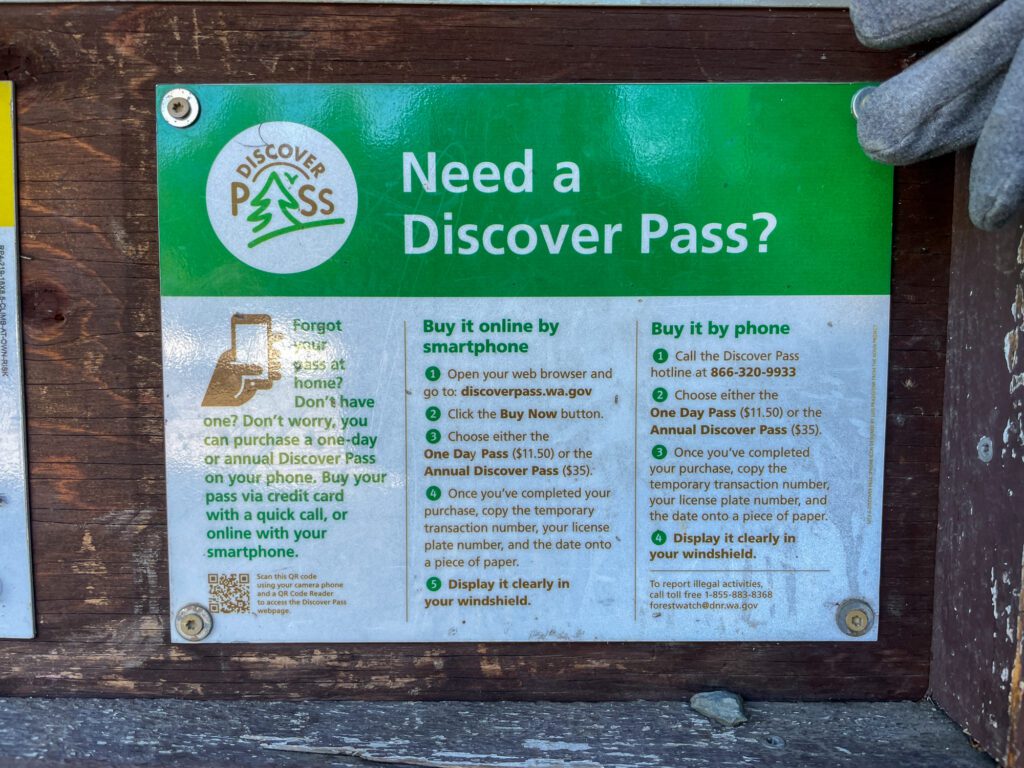
You can grab one at the REI in Issaquah or the Fred Meyer in Issaquah, or order one online at REI here.
Taking Public Transportation: Trailhead Direct
First of all, I just want to say that I love the fact that Seattle is trying to make accessing nearby trailheads easier and more environmentally friendly by testing ways to connect popular trailheads via public transit.
Because of the increasing popularity of this trail (and the other hikes nearby, like Mount Tenerife and Mount Si), King County Metro and King County Parks worked together to create a shuttle system to mimic rapid transit that people use to get to work…except to get to trailheads.
The intention is to allow for more people to access the trailheads with less congestion and parking nightmares.
It’s called the Trailhead Direct, and it works like this: there are a handful of stops in Seattle proper, including at the Capitol Hill and Downtown Seattle (at Spring & 4th) Stations that connect with Light Rail, and then two stops on the eastside (Eastgate Park & Ride and North Bend).
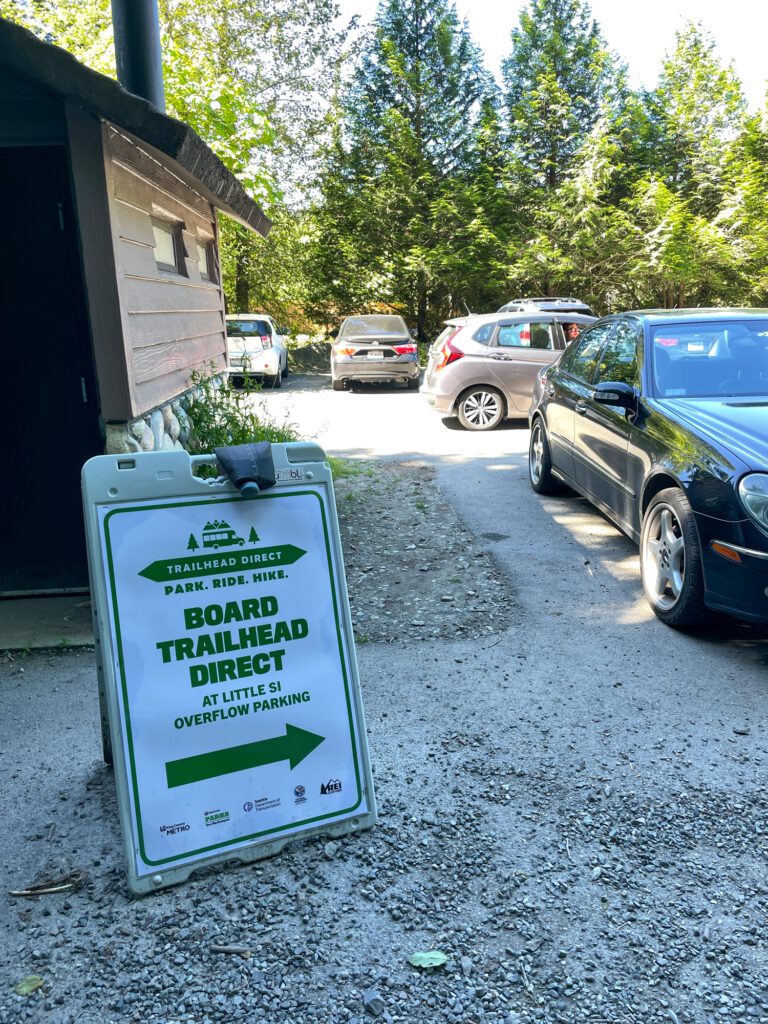
Then, it zips you off to the foot of Mount Si, stopping at three different trailheads: Mount Si, Little Si, and Mount Tenerife.
It runs on weekends and on select holidays (Memorial Day, July 4th, and Labor Day), and seating is limited (they only hold 14-32 people, depending on the vehicle).
The cost is $2.75 each way, and you’ll need either an ORCA Card or exact change in cash (bus drivers don’t carry change) to pay for your ride.
You can find more information here.
Hiking Little Si: Trail Details
- Length: 4.1
- Elevation Gain: 1,150 feet
- Season: April – November/December
- Trail Type: Out and Back
- Difficulty: Moderate
- Trailhead Location
- Dog Friendly: Yes, on a leash
- Pass Required: Discover Pass (there’s no place to buy one at the trailhead, so come prepared!)
Is This an Easy Hike?
We saw multiple families with kids between the ages of three and five heading up the trail as we were heading down, and we knew they weren’t making it to the top.
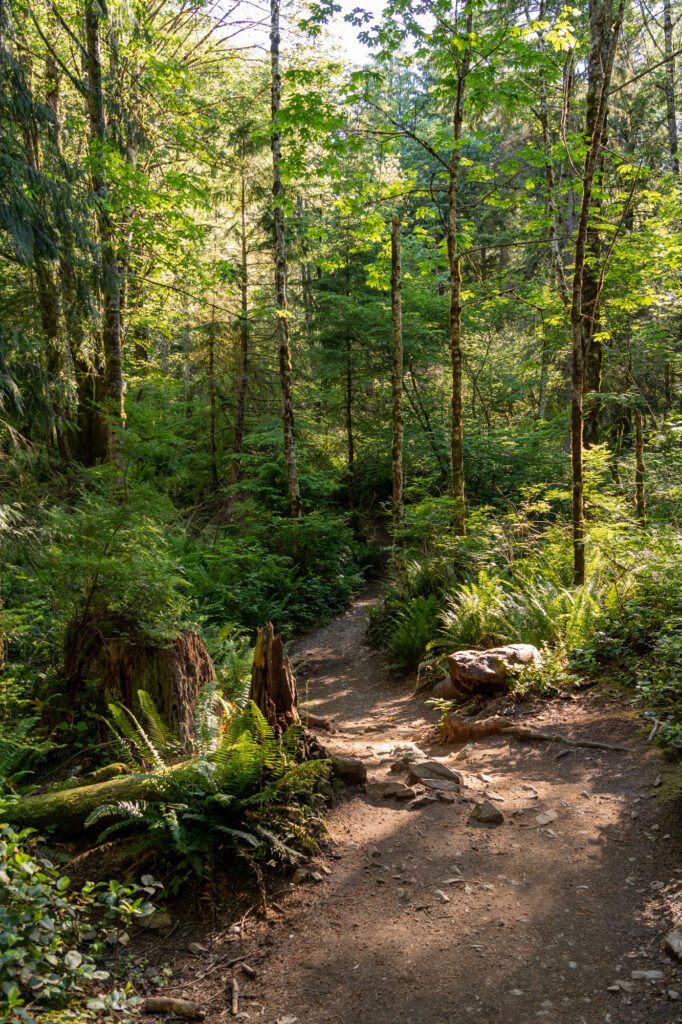
We’ve seen this hike referred to as an easy hike, and while the middle stretch is a nice, rolling grade through a dense, shaded forest, the beginning and end of this hike are steep, rocky, and not really easy at all.
Our answer is no, this is a solidly moderate hike that is probably not great for small children, which probably would have been helpful information for those families to have BEFORE they set out on their journey.
If you are looking for an easy hike, head over to our guide to the best easy hikes in Washington, where you’ll find a collection of hikes that are both under 5 miles and under 1,000 feet of elevation gain. Which is what we’d consider “easy.”
Things to Know Before You Hike the Little Si Trail
You need a Discover Pass. We already touched on this, but it bears repeating given that there’s no convenient way to get one once you’re at the trailhead. There is a convoluted process where you can order a day pass over the phone or online, but it’s better to just arrive prepared. Buy one at the Issaquah REI (or Fred Meyer), or order one online from REI before your hike so that it arrives in time.
This is a 3-season hike. One of the nice parts about this hike is that it never gets to an elevation that sees enough snow to prevent you from hiking it in the spring and late fall. The winter brings enough snow and ice where it’s best to avoid it, but by spring, it’s muddy, but doable.
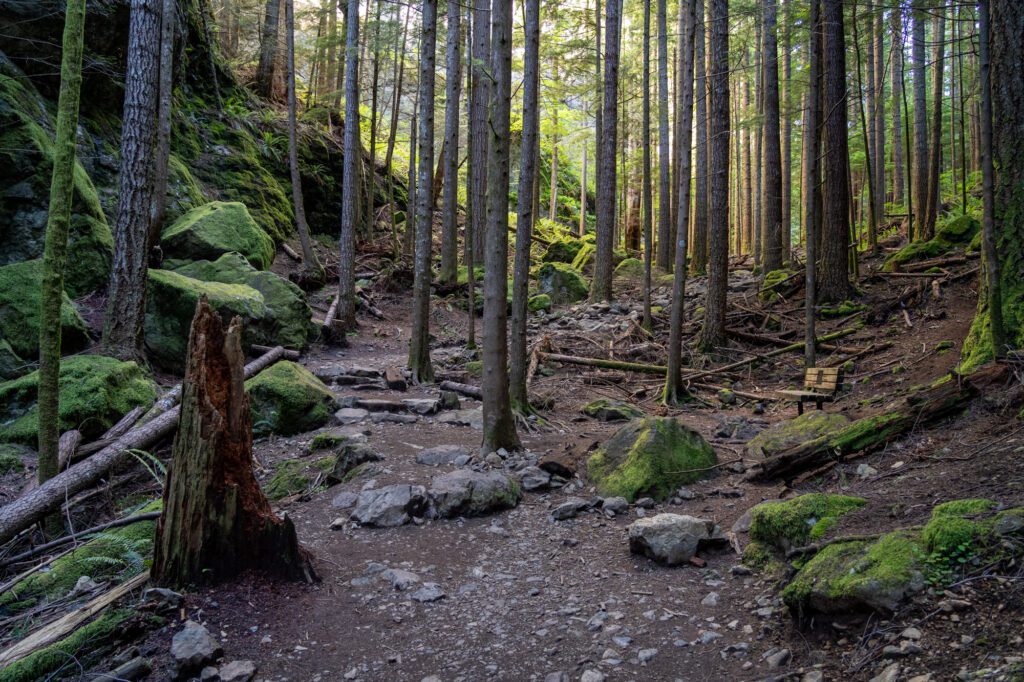
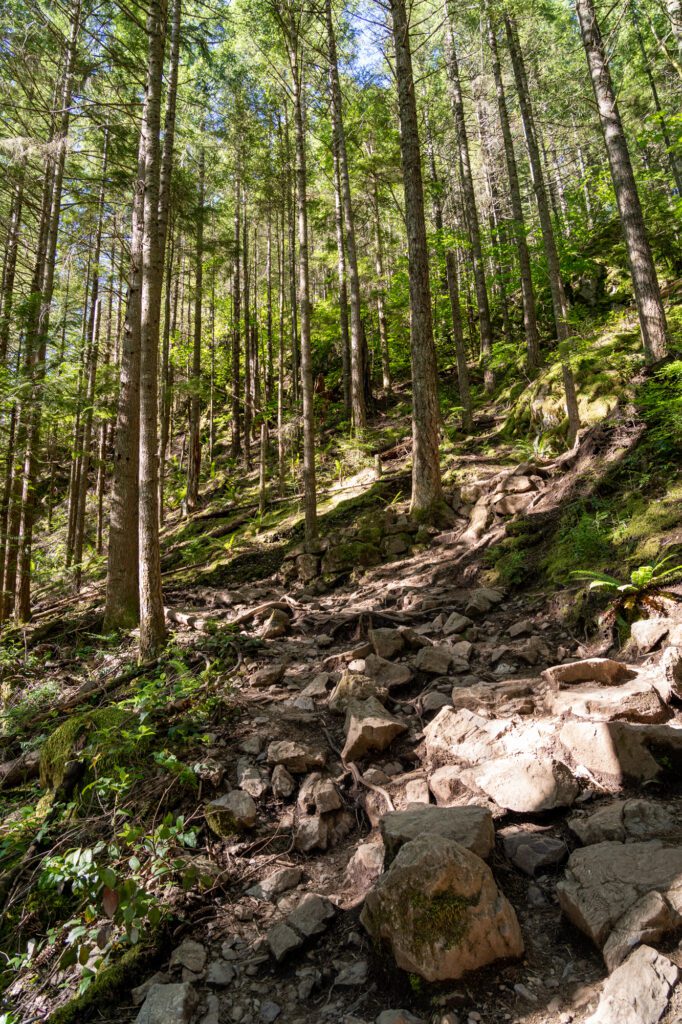
The hardest parts of this hike are the beginning and end. You might find yourself a quarter mile up the trail and wondering what you’ve gotten yourself into. Know that the first quarter mile or so, and the last third of a mile or so are the hardest, steepest parts of this hike.
There are slick rocky sections. Make sure you have proper footwear with plenty of grip and support (read: ditch the flip flops). If you’re looking for a great entry-level pair of hiking boots, Alysha almost exclusively hikes in her Columbia Newton Ridge boots, and loves them.
Hiking Little Si: A Complete Trail Report
We did this hike in late June on a sunny Friday morning, and while the trailhead was somewhat busy, we managed to snag a parking spot in the main lot at about 8:30 am. It was more or less half full at the time.
We’re going to split this hike into three sections, which we’ve creatively named “the beginning”, “the middle”, and “the end.” For each section, we’ll give you a little rundown of what to expect on the trail so you’re prepared to get out there and explore.
The Beginning: The Initial Ascent
Length: 0.5 miles // Elevation Gained: 300 feet
Like we mentioned above, the very beginning of this hike – along with the end – are the hardest parts of the hike.
You’re going to spend the first quarter mile huffing and puffing your way up. The good news is that you’ll be nice and warm by the time you reach the part of the trail that flattens out and takes you into the dense forest!
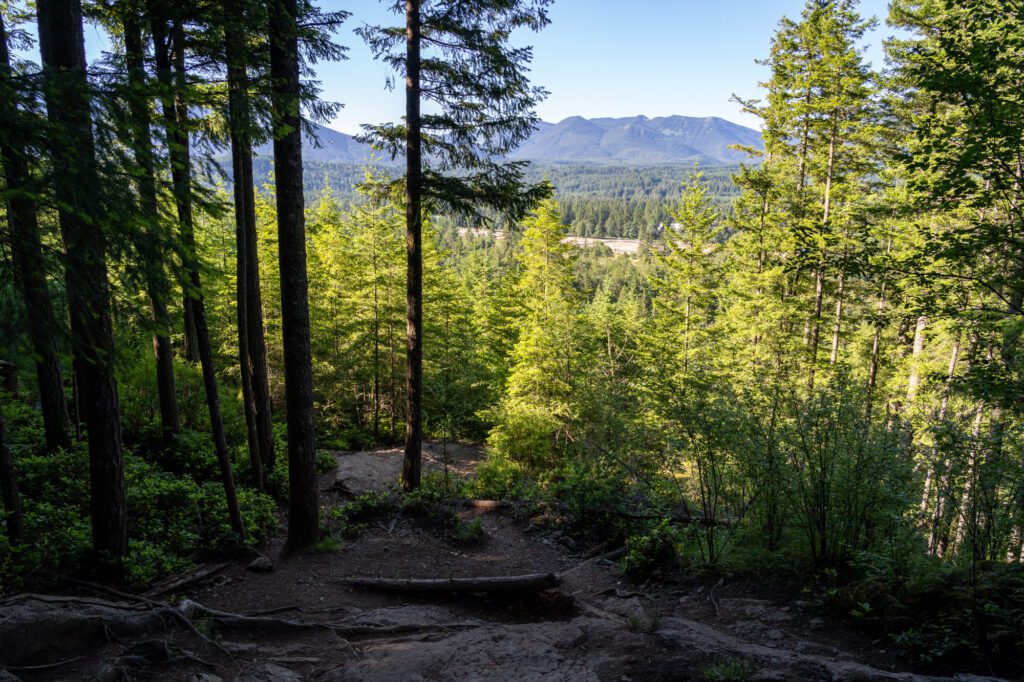
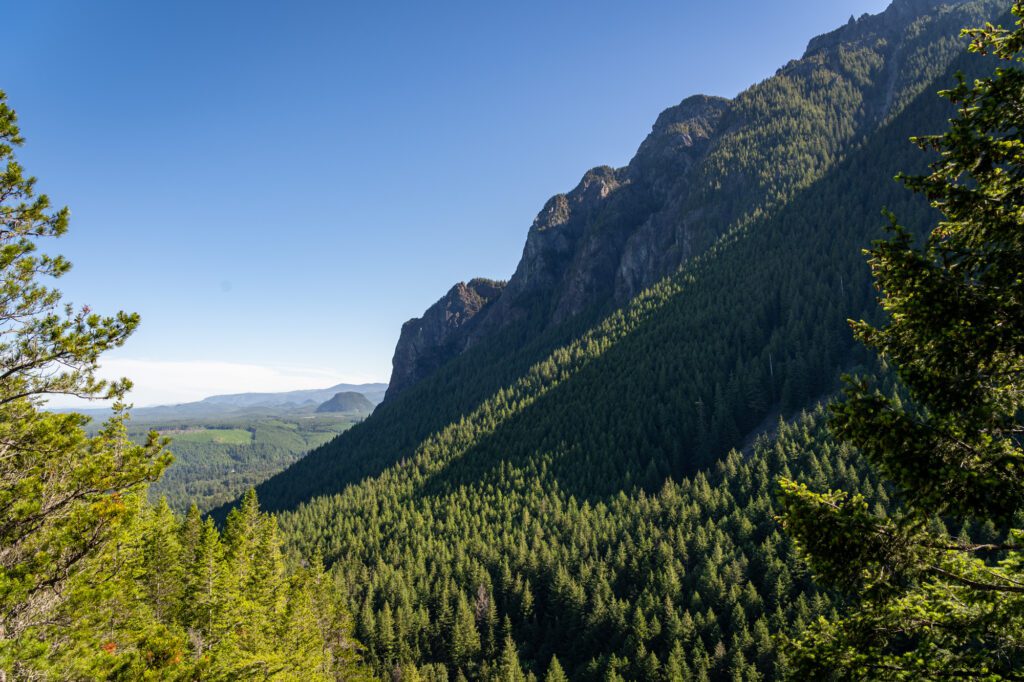
At 0.2 miles in, you’ll come to your first viewpoint that looks out over the valley to the south (you can see Rattlesnake Ledge from here across the valley).
Immediately after that, you’ll hit a part of the trail that climbs a steep rocky bit, where footing is uneven and rocks are slippery (particularly if it has rained recently). It’s a little hard to figure out where the actual trail is.
Don’t forget to turn around and look behind you once you reach the top!
Shortly after the top of that steep section, you’ll hit the first turn off for the Boulder Garden Loop trail on your right. That trail adds about a mile to the distance if you wanted to come down a different way, and also connects to the trail for the more challenging Mount Si trail (the big one!).
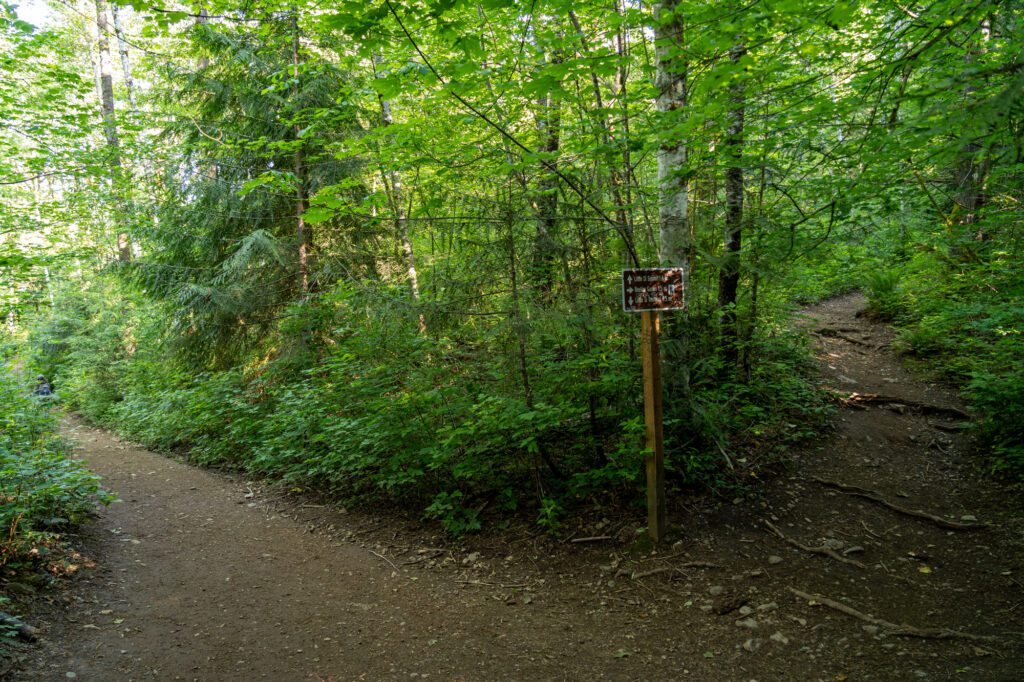

At 0.5 miles in, you’ll hit the junction where the other end of the Boulder Garden Loop leaves you, which concludes the initial section of the hike.
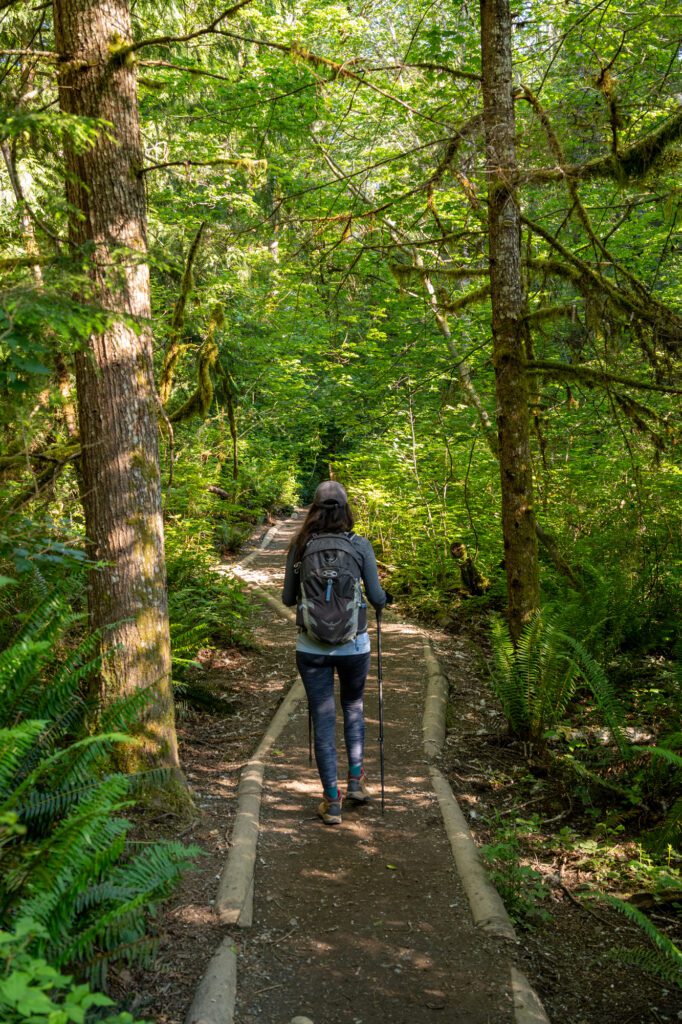
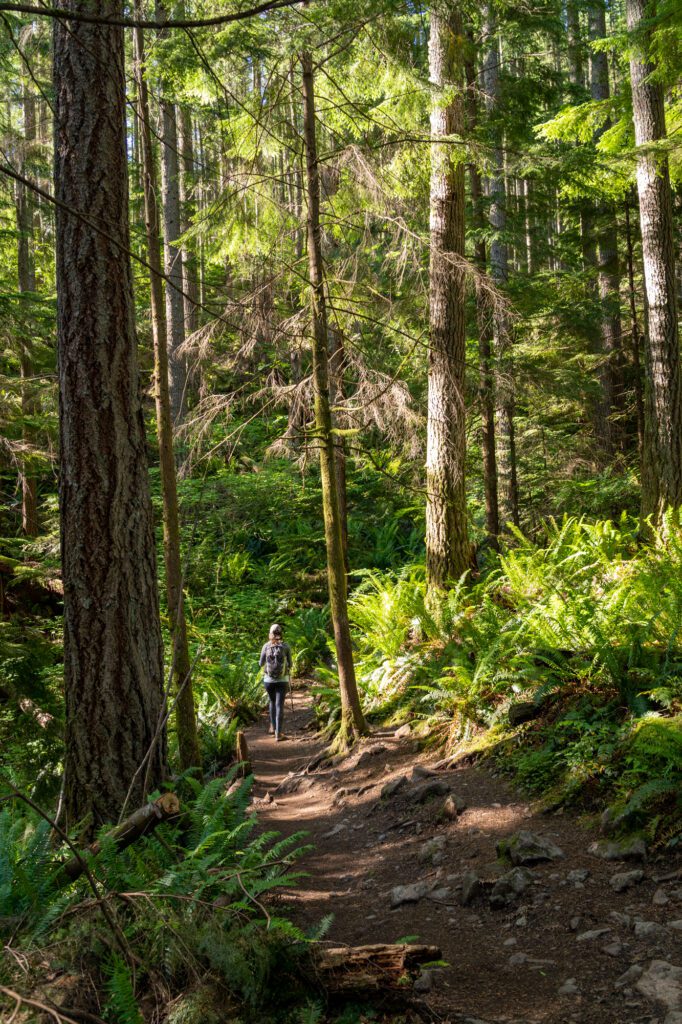
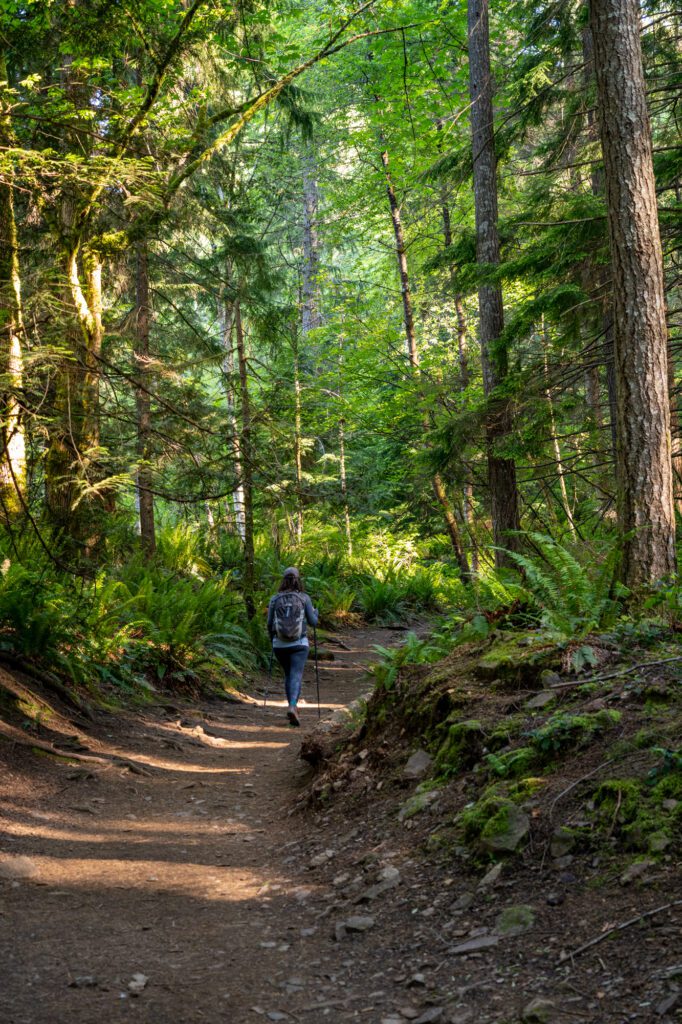
The Middle: A Meander Through the Forest

Length: 1.1 miles // Elevation Gained: 240 feet
The next section of the hike is a relaxing, slight ascent through a dense fern-laden forest that follows the gully between Little Si and Mount Si.
The end of this section leaves you at the base of Little Si’s back side, which is where you’ll begin the quick-but-challenging ascent to the summit.
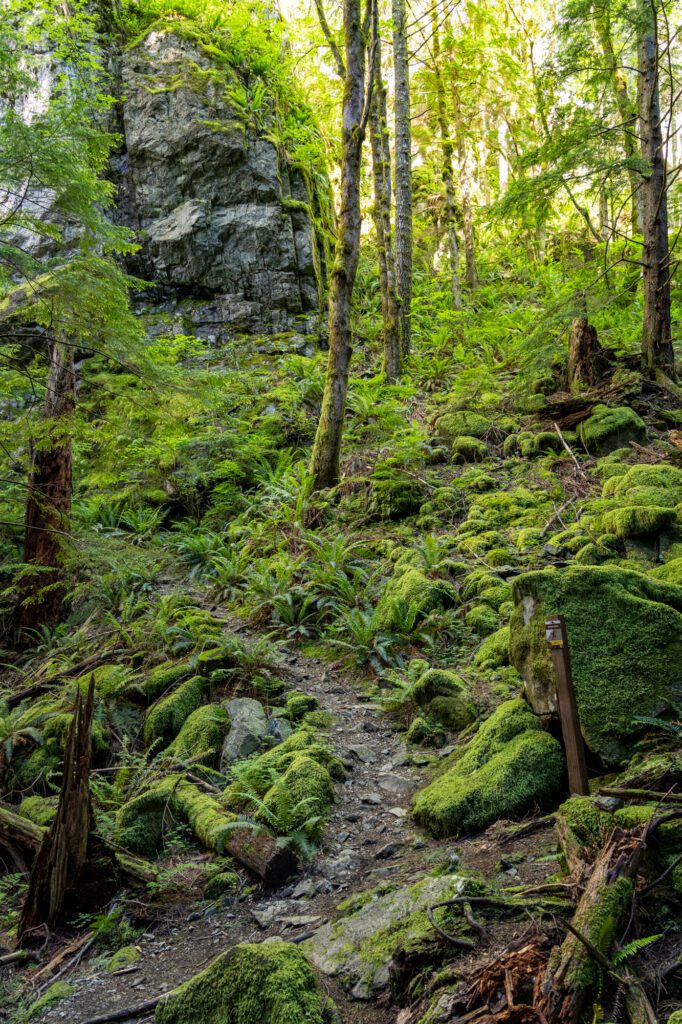
The only notable part about this section of the hike is that half way through, you’ll start to see little spur trails off to the left that are meant for rock climbers.
The End: The Final Ascent
Length: 0.5 miles // Elevation Gained: 500 feet
At 1.6 miles into the hike up, you’ll find yourself at the base of the back side of Little Si. From there, it’s a steep, challenging final push to the summit.
There are a few rocky parts that can get slippery when it’s wet (which is often in this part of the world), and some switchbacks for good measure.
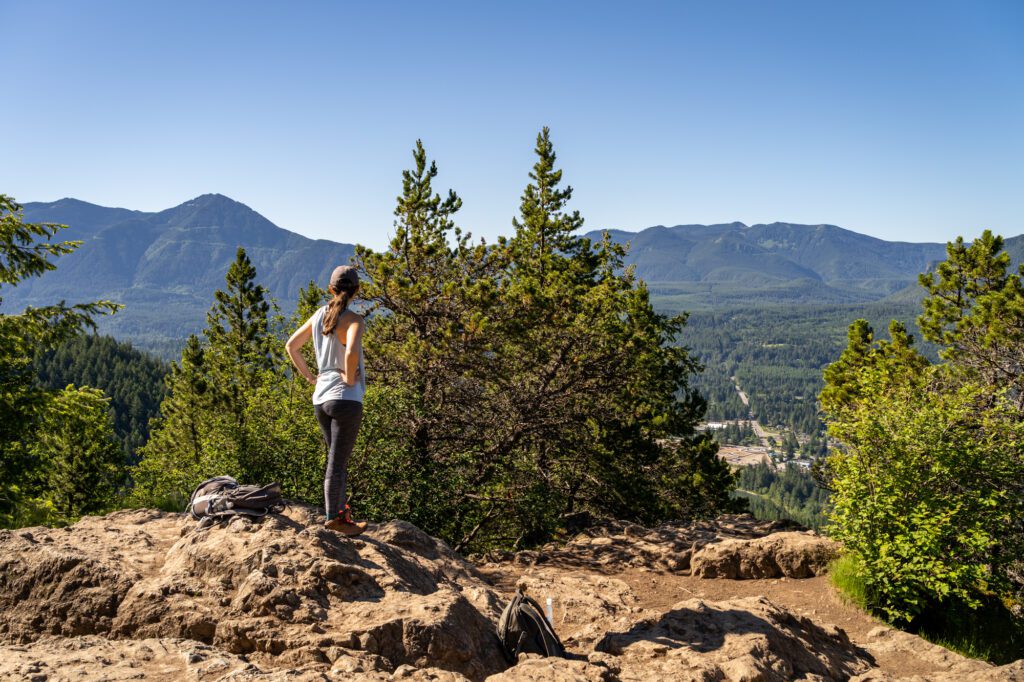
The best view of the entire hike – at least in our opinion – is actually just below the summit from a rocky outcropping on your left, looking northeast back into the valley behind Mount Si.
From that view, it’s a very short walk to the summit. The Little Si Summit sits at a hair over 1,500 feet.
From the top, you can see clear across the valley, with Mount Si off to your left. It’s a nice place to grab a snack, chat with some fellow hikers, and then make your way back the way you came.