How to Hike the Jaw-Dropping Burroughs Mountain Trail
The Burroughs Mountain Trail in Mount Rainier National Park is full of never ending views, which puts it in our top tier of hikes in the park. At first, you get a clear view of Mount Rainier while you traverse Sourdough Ridge, then it disappears behind the burroughs while you ascend the first burroughs (we’ll get to what exactly that means in the trail guide below), and then you make your way up into the alpine tundra and WHAM incredible views in every direction.
Mount Baker to the north, the Cascades to the east, the other burroughs that you’re heading towards to the west (and eventually the Olympics off in the distance), and southwest is, of course, the Mountain itself.
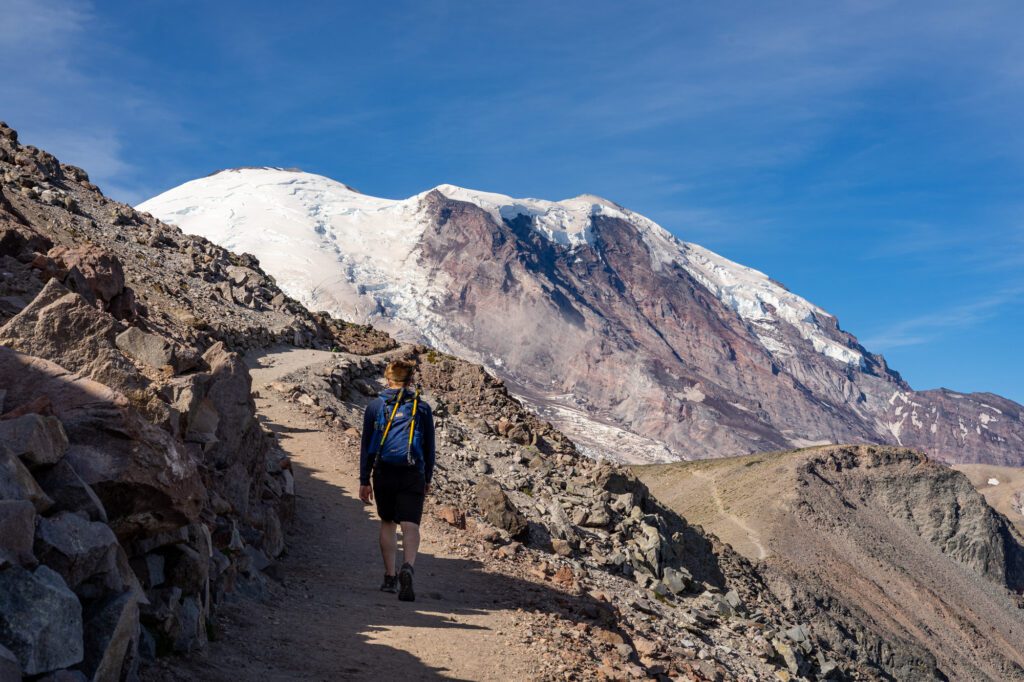
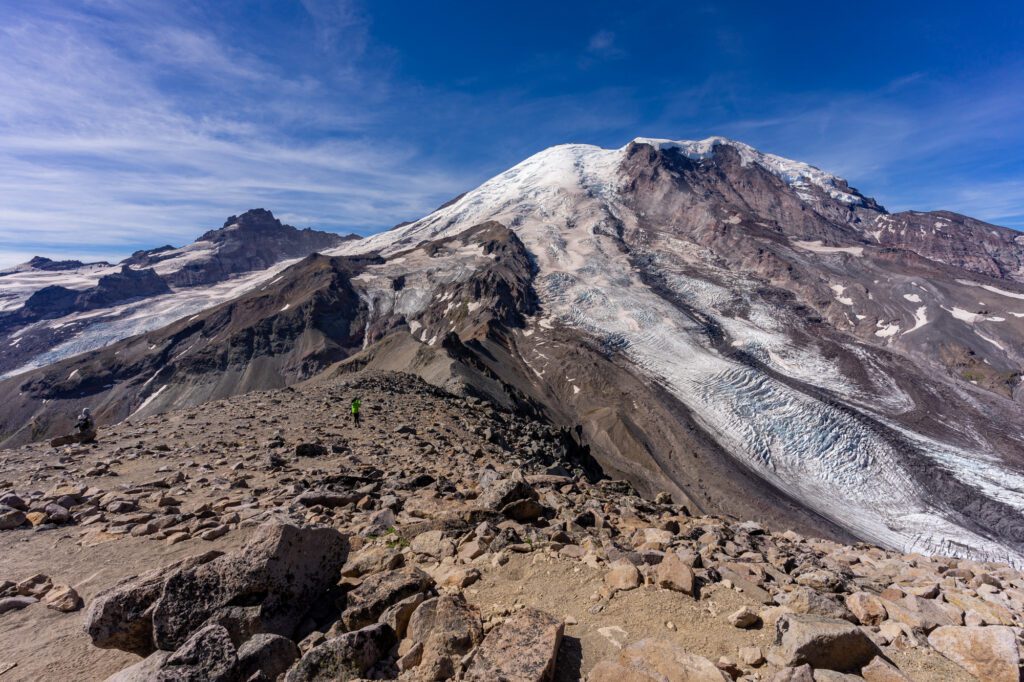
There is no other hike in the park – even the famed Skyline Trail – where you’ll feel closer to the face of Mount Rainier with the obvious exception of actually climbing Rainier.
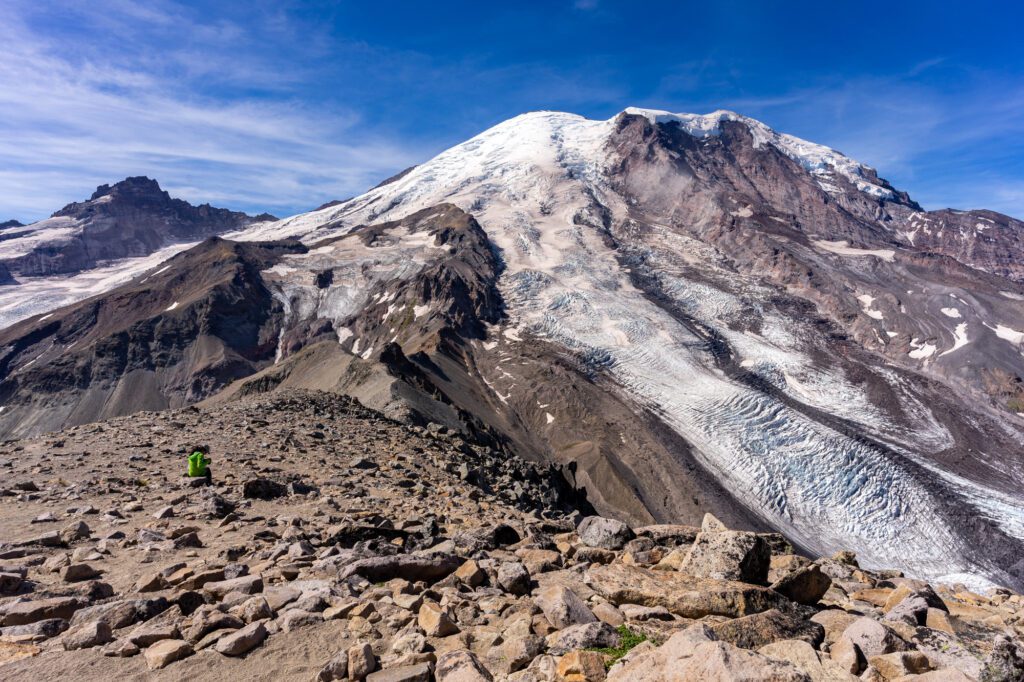
If you’re looking to get up close and personal with Rainier’s glaciated northeastern face, this is the hike for you.
It won’t be easy – you’ll do a lot of up-and-down to get there (each of the three burroughs comes with a nice little valley in between, which means up and down you go!), but we think you’ll agree that it’s worth it in the end.
In this guide, we’re going to take you through everything we think you need to know to tackle the trail yourself.
We’ll start with logistics – where to park, what route to take, and some other things to keep in mind – and finish with a brief trail report based on our own experiences on the trail.
By the end, we think you’ll have a good idea of what to expect when you hit the trail yourself so you can plan a safe, amazing trip.
Sound good to you? Let’s get into it.
Disclaimer: Some of the links in this post, like hotel links, are affiliate links, meaning at no additional cost to you, we make a little bit of money if you click through and book. That being said, we would never recommend something to you that we don’t stand behind 100%.
Burroughs Mountain: Hike Details (to the Third Burroughs)
- Distance: 9.5 miles
- Elevation Gain: 2,800 feet
- Trail Type: Loop
- Trailhead Location: Sunrise Visitor Center
- Highlights: Inch closer and closer to Rainier until you can practically reach out and touch the northeastern face when you’re atop the third burroughs.
- Starting Altitude: 6,400 feet
- Highest Altitude Reached: 7,800 feet
Choosing Your Route for the Burroughs
We have a strong perspective on the best route for this hike, but we’re going to first introduce you to the two top options, then dive deeper into our preferred route.
There’s also the question of whether or not you should continue to the third burroughs, which we’ll touch on below in the next section.
Here are those two route options (sure, there are more ways to do it, but these are the two best routes in our opinion):
- Out and Back from Sunrise via Sourdough Ridge Trail: This hike starts from the north side of the Sunrise Visitor Center and climbs up to Sourdough Ridge. You’ll head out to the Frozen Lake trail junction, up to the burroughs, and return the way you came, along Sourdough Ridge. This is the shortest, but also the busiest and most repetitive way to do the hike.
- The Burroughs Mountain Loop Trail via Sourdough Ridge and Sunrise Rim: The views never stop on this hike. You start with the same route up to the burroughs as the out and back option just covered, then return via a different trail – the Sunrise Rim trail – which starts out along a ridge with Rainier and White River Valley views before descending near Sunrise Camp. It’s about half a mile longer, but the elevation gain is the same, and the meadows along the end of the loop are filled with incredible wildflower displays during the summer that are worth the extra half mile.
If you haven’t already guessed, we strongly, strongly recommend the loop trail, which is what we’re going to focus on from here on out. The terrain is more varied, and it’s far less busy seeing as the Frozen Lake junction is part of three of Mount Rainier’s most popular hikes.
If you want to do the out and back version, you actually have all the information you need below – just follow the trail guide out to the burroughs, then return the way you came.
Should You Tackle the Third Burroughs?
On every park map and official guide, there are only two burroughs listed. But there’s actually a third burrough past the second!
And it’s even closer to Mount Rainier’s northeastern face, with spectacular views to the Mountain and out to the west, where you can see the Olympics on a clear day.
However, the hike out to the third one should not be taken lightly. Which is something we realized as soon as we left the second burroughs en route to the third burroughs.
Between the last two burroughs, the trail dips deep into a valley where you have excellent views to the north, with the Mount Fremont Lookout in the foreground and Mount Baker off in the distance.
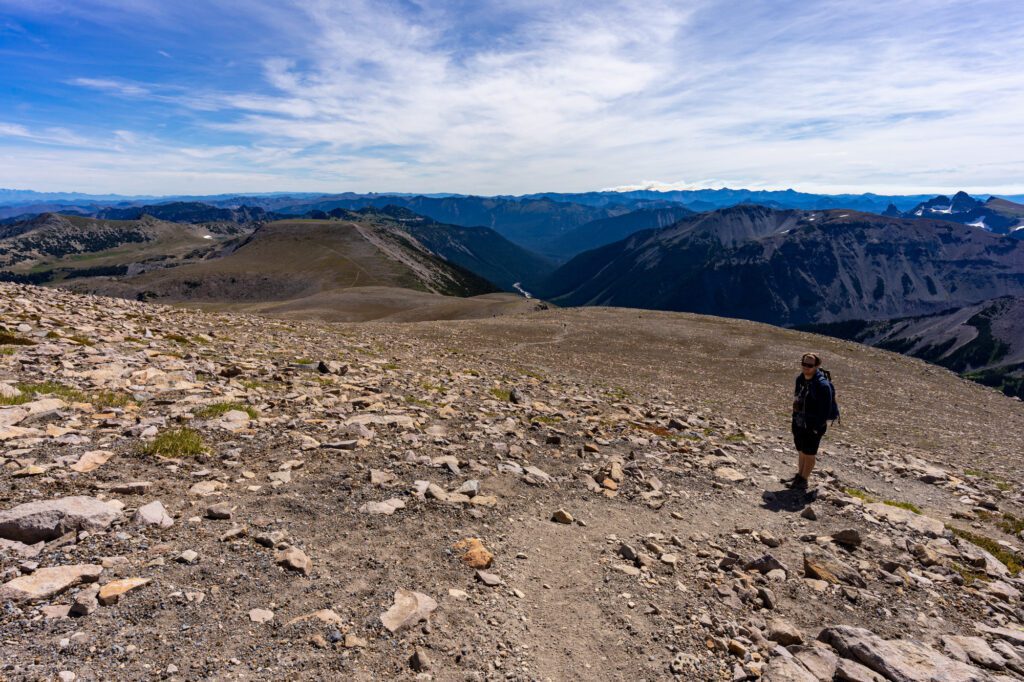
The trail descends 400 feet to the base of the valley (which means you’ll be climbing back up on your way back), and then immediately turns into a steep ascent that climbs 800 feet over the course of a mile across loose gravel and sand.

We’re not going to sugarcoat it. The hike out to third burroughs mountain is tough. It’s also very exposed – no tree cover to speak of in the alpine tundra – and gets up to just under 8,000 feet above sea level.
If your fitness level allows for an extra three miles and 1,200 feet of elevation gain with steep ascents and descents, then we absolutely think you should continue to the third burroughs.
If not, the views from the second burroughs are still pretty spectacular, and it’s a much more manageable six miles and 1,000 feet of elevation gain.
The Best Time to Hike Burroughs Mountain
This hike is in the Sunrise region of Mount Rainier National Park, and is accessible only when the roads are open.
Usually, that means late June / early July through September, but it changes annually based on rain/snowfall and spring weather. Check road status here.
The short season doesn’t really give you all that much flexibility in terms of when to hike this trail – it’s really only accessible in the summer. The trail rises 1,500 feet above the Sunrise Visitor Center, which means that you’re going to encounter snow on this hike into July.
Late July through August is the best time to hike it to avoid snow, and you’ll get some pretty spectacular wildflowers along the way during that time frame too.
Important for 2024: To deal with the ever-increasing crowds visiting Rainier each year, the park has instituted a timed entry permit for visitors to the Paradise and Sunrise corridors in 2024. For more information, head to the NPS website (linked above).
Getting to the Trailhead at the Sunrise Visitor Center
The trailhead for Burroughs Mountain is at the parking lot for the Sunrise Visitor Center, which is roughly two and a half hours away from Seattle.
To get there from Seattle, you’re going to drive through Enumclaw to reach Highway 410 South, which climbs up to the White River Entrance. Again, it’s worth noting that this road is only open between late June and September.
From the White River Entrance, you’ll climb up to the Sunrise Visitor Center along a very steep, very windy road.
Hiking the Burroughs Mountain Trail: A Complete Trail Guide
This is the part of the guide where we give you a complete rundown of what to expect along the hike.
To make it more digestible (and to give you a sense for the different phases of the hike), we’re going to break it up into four distinct parts of the trail.
- Sourdough Ridge
- The Ascent to the First Burroughs and Second Burroughs
- The Third Burroughs
- The Loop Back
Traversing Sourdough Ridge
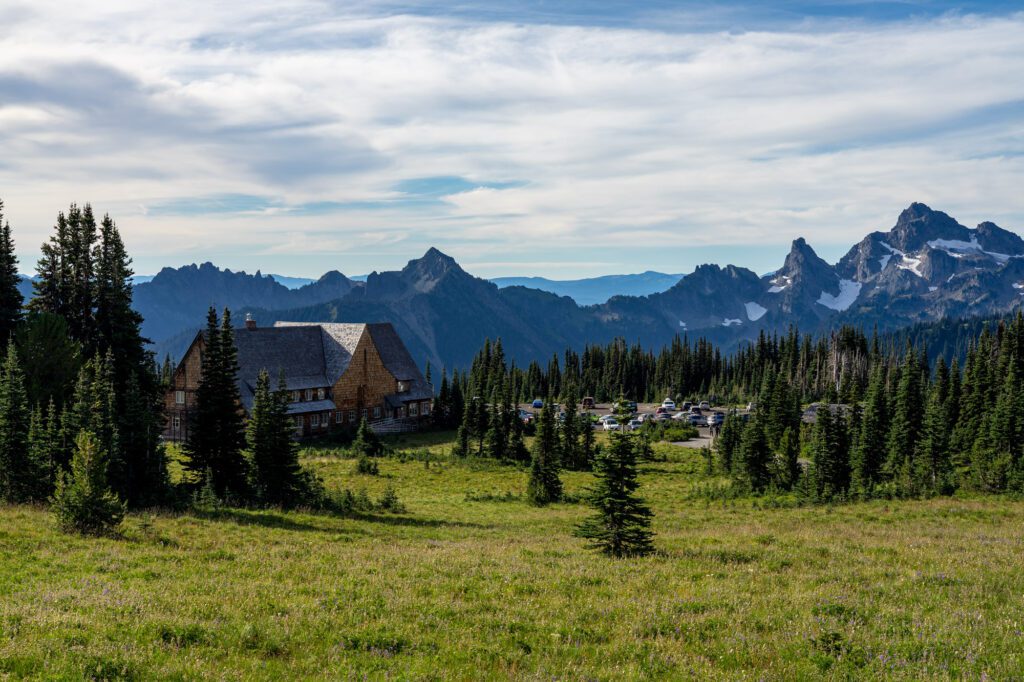
The trail starts from the northern edge of the Sunrise Visitor Center parking lot, near the picnic area. There’s a bathroom and waterfill station right next to the trailhead.
From there, the trail begins a three-quarters of a mile climb up to the top of Sourdough Ridge, climbing 400 feet along the way.
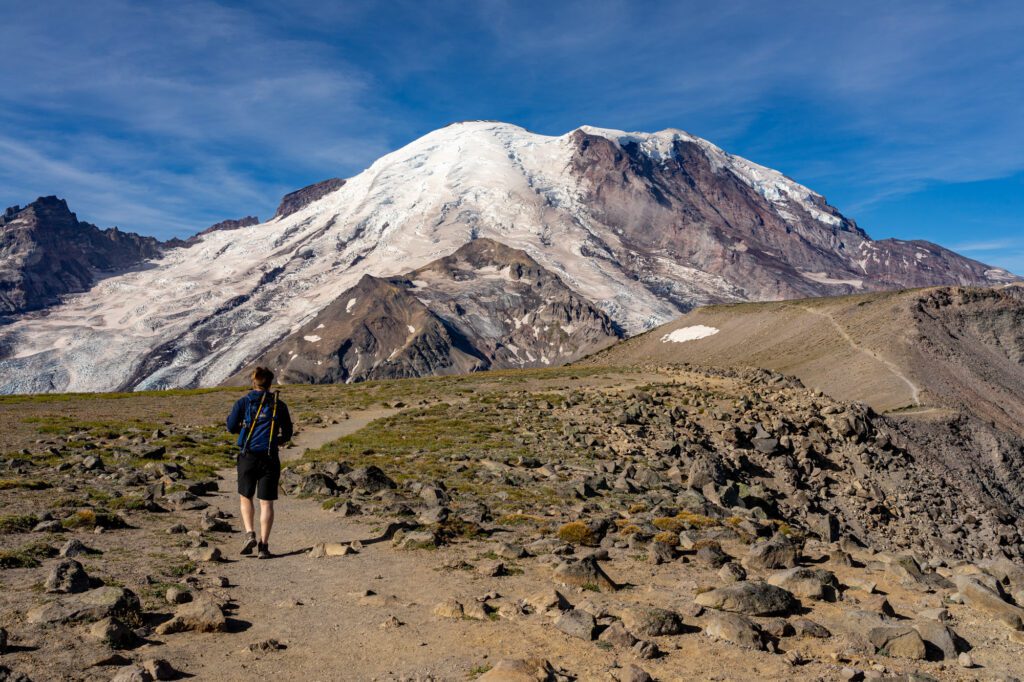
Off to your left, you’ll have jaw-dropping views of Rainier from the get-go, with wildflowers of all colors – white, purple, red – blooming in the fields alongside the trail in the early summer.
Once you’re up on the ridge, the trail turns to the west and the views continue to get better. The trail goes up and down a bit for the next half mile, when you’ll arrive at Frozen Lake. Frozen Lake is the main source of drinking water for the area, so you can’t get close (so you don’t contaminate the water).
At this point, Mount Rainier is partially obscured thanks to the burroughs, but not for long.
The trail junction here is a hub for a bunch of different hikes, including the Mount Fremont Fire Lookout and the wildflower paradise that is Berkeley Park.
There are some good rocks here to take a break, grab a snack, and relax before starting the ascent into the alpine tundra that comes next.
The Ascent to First Burroughs and Second Burroughs Mountains
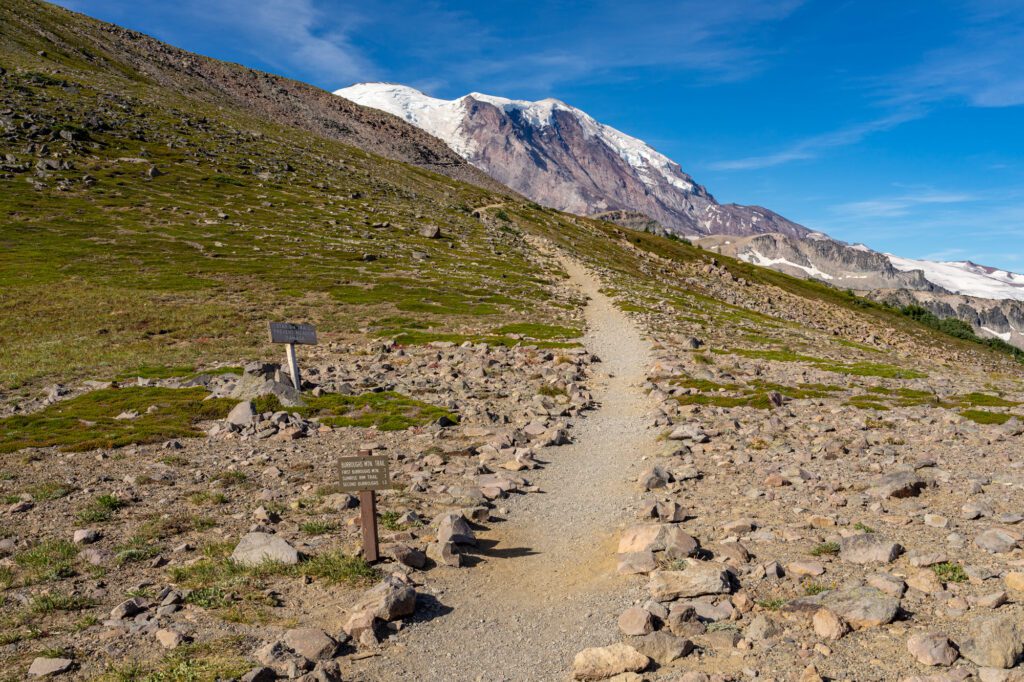
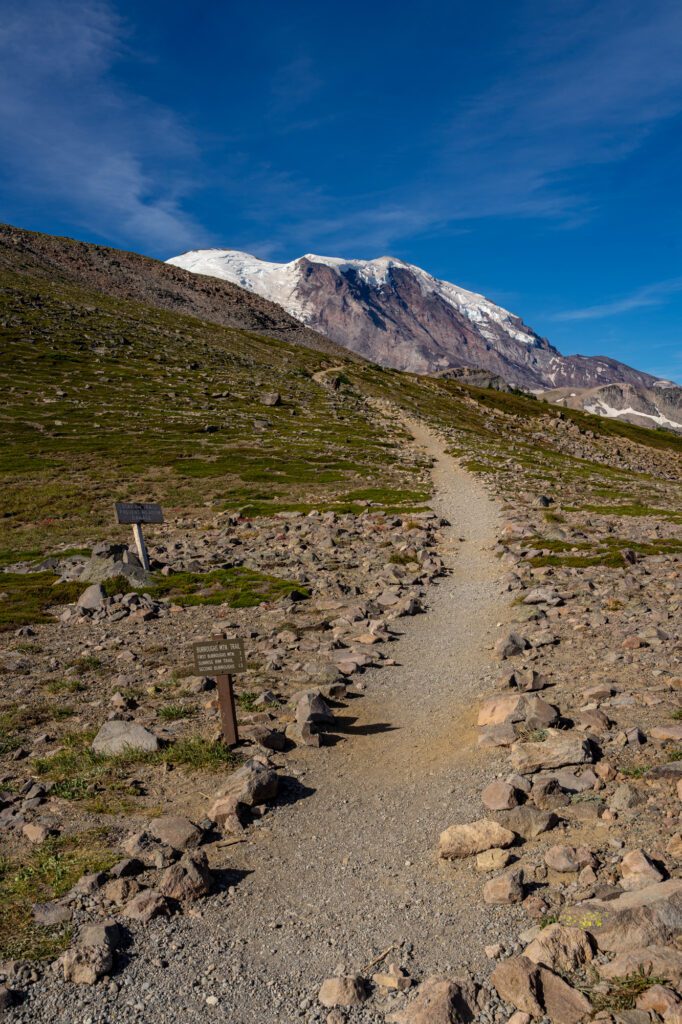
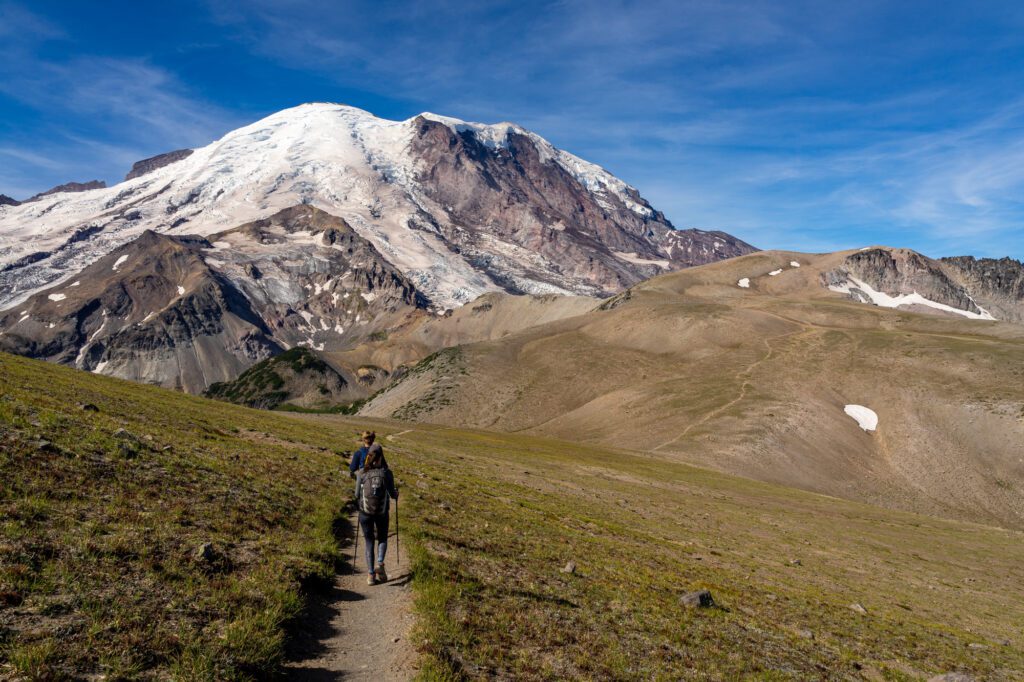
The ascent up to the alpine tundra starts with a 0.8 mile climb that is gradual and unforgiving, climbing 450 feet over gravel and tiny rocks. As you climb, Rainier’s peak begins to emerge in the distance.
At the top, you’ve made it! The views from here aren’t as good as the ones to come, but you still have a nice view of the northwestern face of the Mountain.
The trail you’ll take to form the loop – the Sunrise Rim Trail – is off to the left here.
You’ll definitely notice the landscape change as you crest the hill that brings you into the tundra.
Compared to the lush, tree-lined ridges that you just came from, the terrain at the top of this climb is barren and rocky, with just a few plants somehow springing up. How? I’m not sure. We came across what looked like a fir tree in bush form and were perplexed as to how it survived in this part of the park.
One pro-tip: watch for marmots! Marmots are adorable with their waddling little butts, and they’re fans of the rocky terrain up here. Mountain goats, too.
Continue along the trail, which descends for a short bit then starts another climb up to the second burroughs, which is an even better view than the first, if you can believe it. It’s another 0.6 miles between them, with a 300 foot gain.
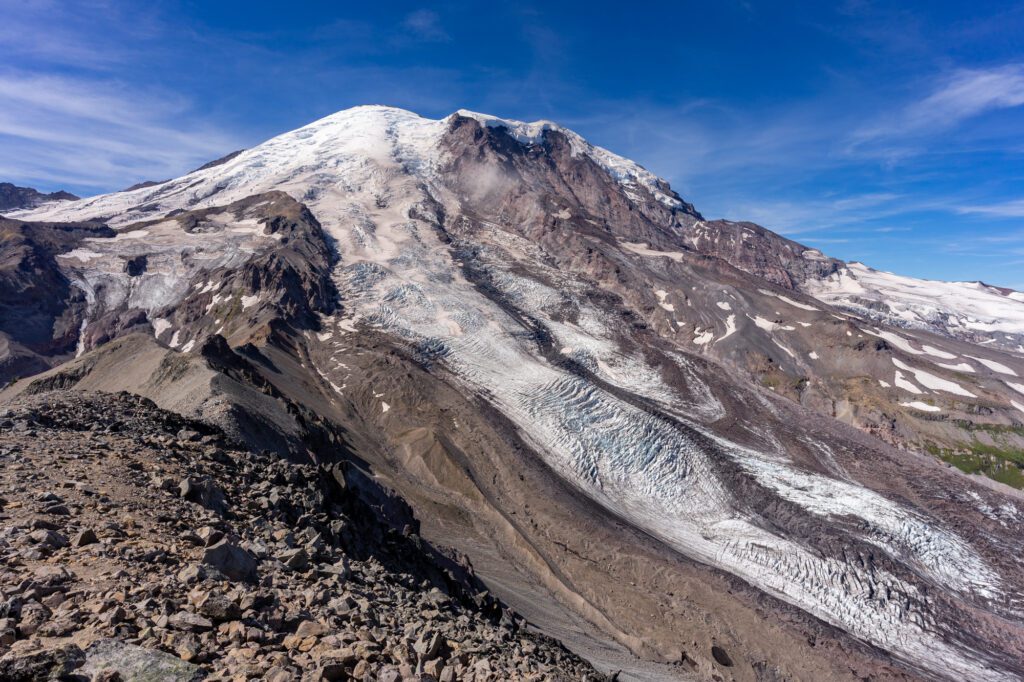
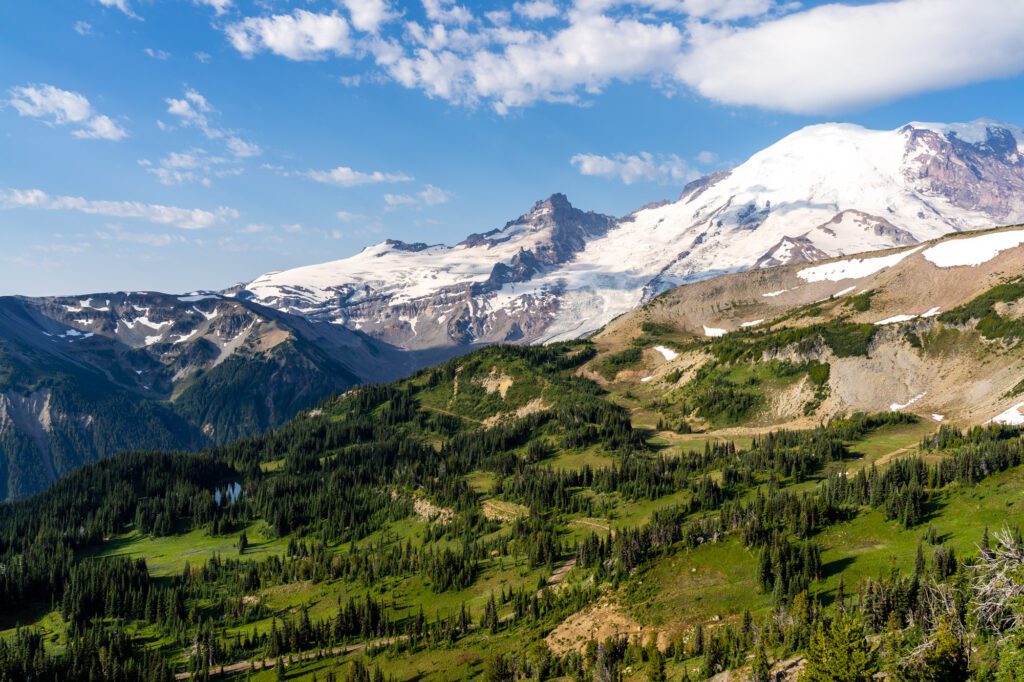
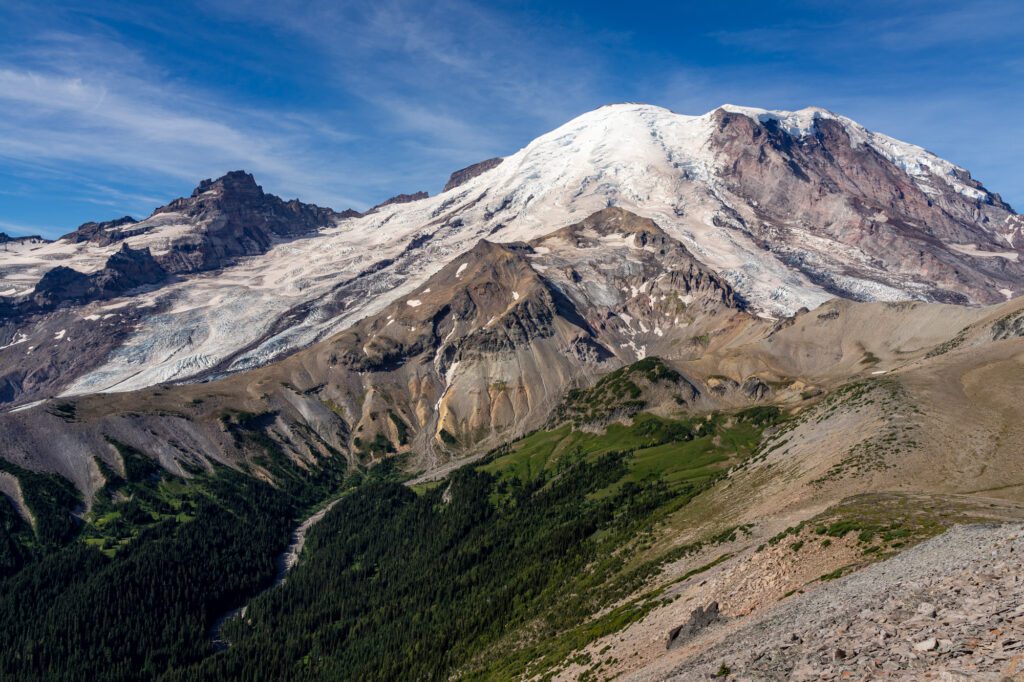
From the top, you’ll have a sweeping view out to the south of the White River Valley, including views of Emmons and Winthrop Glacier.
The Journey to the Third Burroughs
Did you read the section on “should you tackle the third burroughs?” above and decide that it sounds like a good time?
Make sure you have plenty of snacks, water, and are wearing sun protection, and head out to the west from the summit of the second burroughs mountain.
Immediately, the trail starts a steep descent. If you’re like us, you’ll spend the whole descent lamenting the fact that a) you have to climb this on the way back and b) whoa, that’s a crazy steep trail dead ahead!
This part of the trail descends 400 feet over the course of a half mile into a little valley, where you’ll find the junction with the Glacier Basin Trail (which could take you back to White River Campground, if you so desire).
Immediately, the trail begins the final ascent. It’s a grueling mile-long climb, and you’ll reach the high point of 7,800 feet after a solid 800 feet of climbing.
The views, though, are out of this world.
West is the Olympic Range. North is Mount Baker (and you can even see Bellevue from certain points on the ascent). East is the backbone of the Cascades.
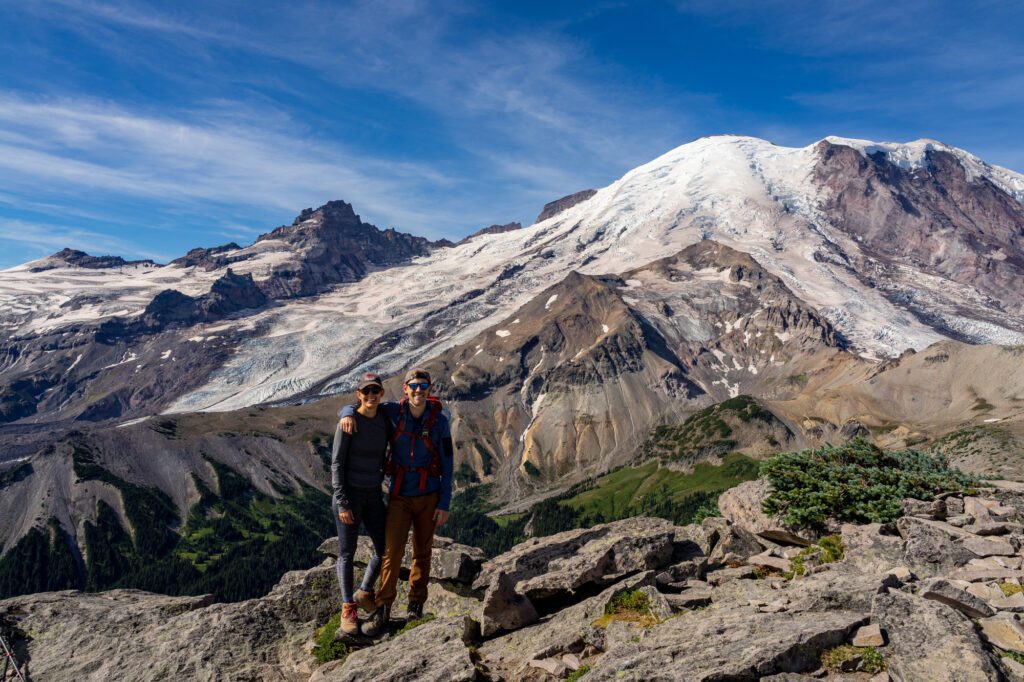
And, of course, there’s Tahoma. Rainier is so close you can practically touch it.
There are a plethora of great rocks for sitting here, and we’d recommend spending some time taking in the views of the crazy landscape that you’ve been hiking through before starting the descent.
There’s one big problem – it’s so exposed that there’s really nowhere to pee. You’ll have to hold it until you get to Sunrise Camp on the way back, which is several miles away.
The Loop Back to the Parking Lot
Follow the trail back the way you came until you reach the First Burrough.
From there, take the right to follow the Sunrise Rim Trail, which is another ridge trail with spectacular views of Rainier. This time, unlike the Sourdough Ridge portion, you have great views of the White River Valley.
The trail descends gradually, losing 900 feet of elevation over the course of 1.3 miles. It spits you out right at Sunrise Camp, which has an outhouse and a small backcountry camp.
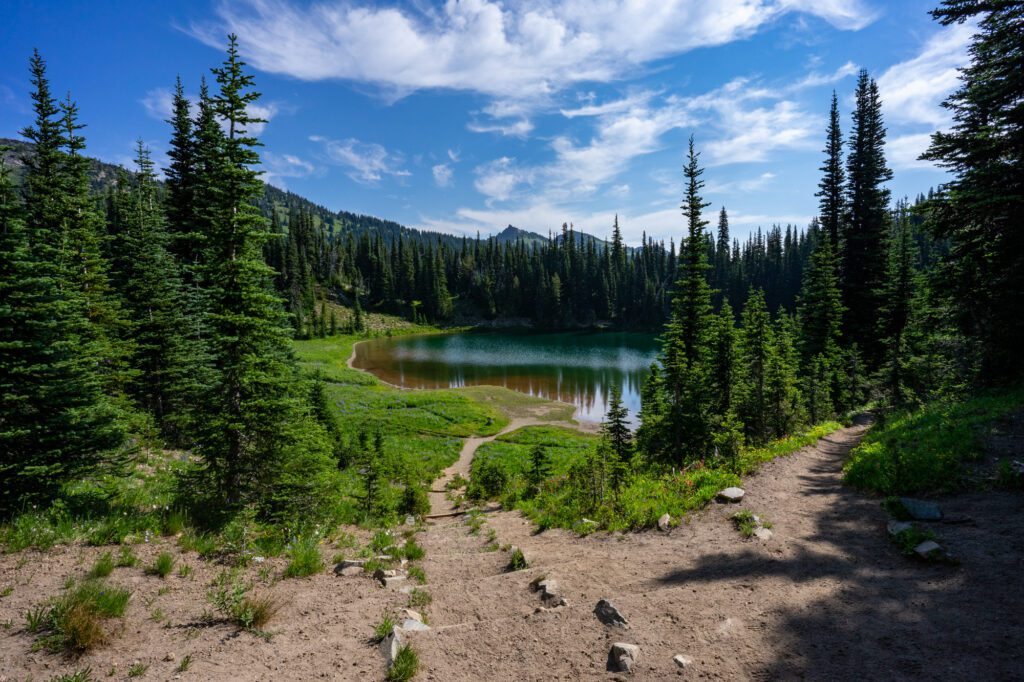
Continue past Shadow Lake, which is worth a stop to look at, before making a short ascent back to the Sunrise Visitor Center.
You’ll end up on the south end of the parking lot (remember, you left from the north side).
Tips For the Hike to Burroughs Mountain
Here are a few things to know based on our experience hiking this trail.
You’re in a national park, which means no dogs allowed on the trail. You can essentially think of dogs as cars – anywhere your car is allowed, including campgrounds and parking lots, so is your dog. But they’re not allowed on any hiking trails in national parks.
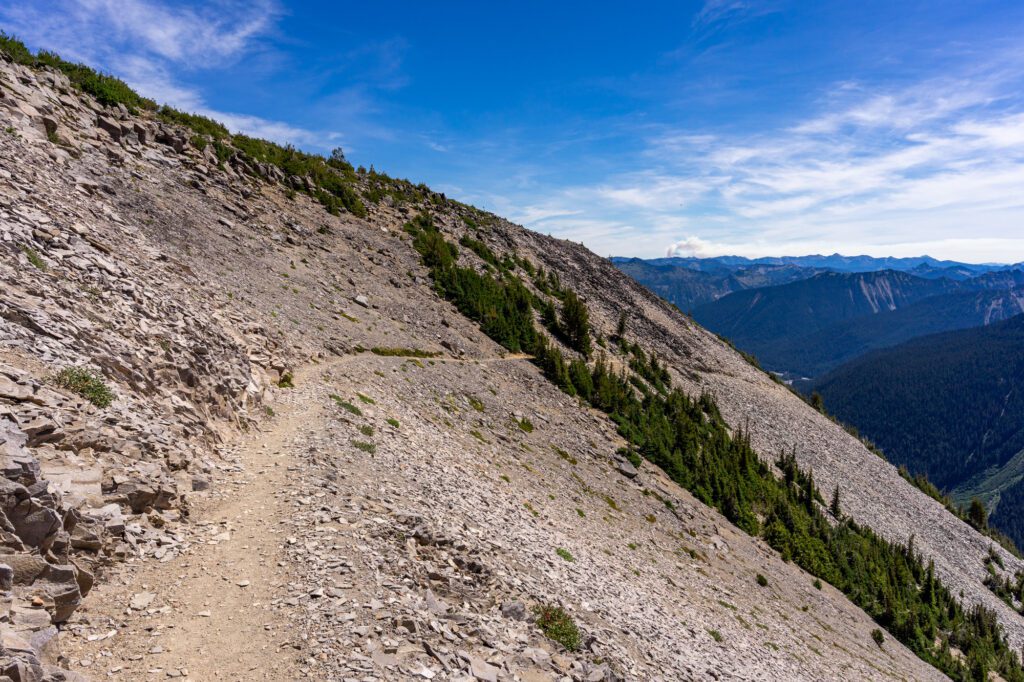
This hike is VERY exposed. Once you get into the high alpine tundra, there’s absolutely zero breaks from the sun. On a hot summer day, it can be brutal. Sunscreen, a sun hat, and a long sleeve top are going to be your best friends.
There’s also no water along the trail once you get up into the tundra. Bring at least 2L of water per person, because it’s a tough hike at high altitude. Staying hydrated is very, very important. We use two of these Platypus 1L water bottles each, and love them. They’ve been on hiking trails around the world with us.
You’re going to want sturdy hiking boots with good traction for this trail, particularly if you’re doing it early in the summer when there’s snow. We’re fans of (and own) the Columbia Newton Ridge hiking boots – an excellent first pair of hiking boots.
There’s lots of up and down on this trail. We swear by trekking poles, which we used to think were for older people and Germans (for whatever reason, we’ve encountered a staggering number of Germans of all ages who love hiking poles) and now we practically won’t take the dog for a walk without them. They’ll save your knees on the downhill, and they’ll help you push through on the uphill. These REI poles are a great first pair of poles.
It gets windy up top. Make sure to bring an extra warm layer (like a fleece) and a windproof layer, just in case.
You might see wildlife along the way, including black bears, mountain goats, marmots (SO CUTE), and chipmunks. Do not, under any circumstances, feed them. At all. Ever. Contact with humans can make them aggressive, and is bad news for both you and the animal. Make sure to give them plenty of space. They are wild animals, after all, and are very unpredictable.