Hiking in Olympic National Park: A Guide for First Timers
Want to hike to a basin full of some of the most gorgeous alpine lakes in the region? What about a beach hike out to a point where you can search for wildlife in tide pools and admire the towering sea stacks that seem to be exploding out of the ocean? There aren’t very many places in the world where you can do both of those things… in the same day.
And that’s the thing about Olympic National Park – it has three unique and distinct ecosystems (probably more, but that’s how we think about it) within its boundaries. You’ve got the higher elevation parts of the park with alpine landscapes, the rugged Pacific Coast, and some of the largest temperate rainforests in the world. All in one place!
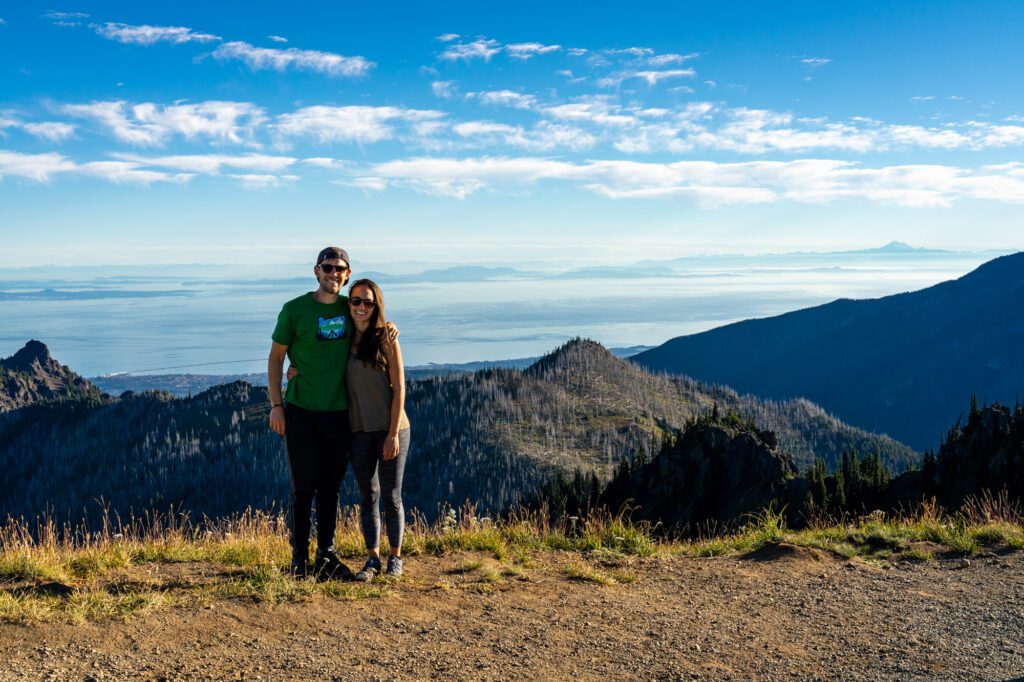
Believe it or not, Matt grew up in the Seattle area and somehow NEVER ONCE made it to Olympic National Park until he was 30.
We’ve made it a summer tradition to spend some time out on the Olympic Peninsula over the past few years, and we’ve gotten to know every corner of the park.
Over that time, we’ve fallen head over heels in love with the Olympic Peninsula. At the western edge of Washington State, temperate rainforests and mountain peaks meet sandy beaches, forming one of the most diverse areas on the West Coast, if not the entire country. The park is one-of-a-kind.
In this guide to the best hikes in Olympic National Park, we’ll take you through the best hiking trails to explore the different worlds that live within the park, whether you want an easy waterfall hike or a grueling thigh-burner that will leave you limping for a week (but with a worthy payout at the top).
Sound good to you? Let’s get into it.
Disclaimer: Some of the links in this post, like hotel links, are affiliate links, meaning at no additional cost to you, we make a little bit of money if you click through and book. That being said, we would never recommend something to you that we don’t stand behind 100%.
A Quick Olympic National Park Geography Overview
Before we jump into the best hikes in Olympic National Park, let’s take a second to zoom out and talk about the different regions of the park. Because it matters for planning purposes.
For the purposes of this guide, we’re going to divide the park into four zones: Hurricane Ridge, Lake Crescent, the Pacific Coast, and the rainforests.
Each region is incredibly distinct in topography and have unique trails that make for some of the best hikes in Olympic National Park. The diversity of landscapes within the boundaries of the park is what makes this place special, we think.
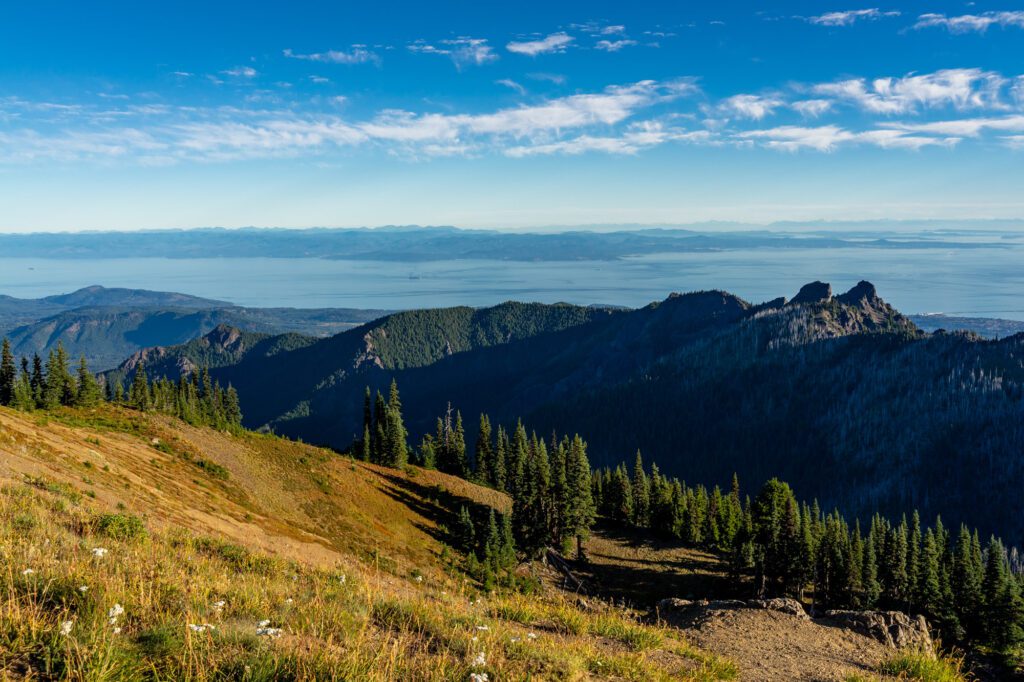
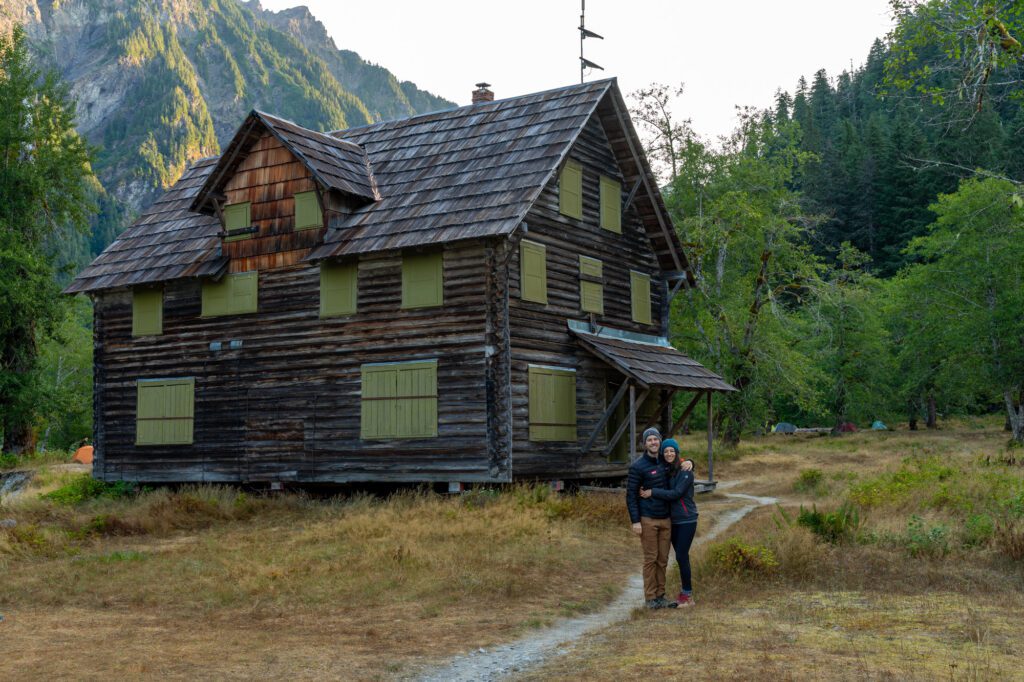
- Hurricane Ridge: Hurricane Ridge is located just 17 miles south of Port Angeles and is situated in the northernmost part of the park. This is the most accessible mountain area in the Olympic Mountain Range and the best region for higher elevation hikes and trails that challenge you with some elevation gain. Due to its elevation, Hurricane Ridge sees significant snow in the typical winter season and the trails have limited access. While the road to access it is technically open throughout the year, it typically is only open Friday-Sunday during the winter, weather permitting. The Hurricane Ridge Visitor Center is a great place to start to gather your bearings (though it sadly burnt to the ground in 2023, and is currently being worked on).
- Lake Crescent and the Sol Duc Valley: The deep waters of Lake Crescent rest in the northern foothills of the Olympic Mountains and are just an 18-mile drive west of Port Angeles. The lake is a result of a landslide that took place approximately 7,000 years ago. Today, the glimmering lake surrounded by forested mountains is a popular spot for adventures. Also tucked into the northwestern corner of Olympic National Park is the fertile Sol Duc Valley, about 40 minutes west of Port Angeles and south of Lake Crescent. Among the vegetation of the old-growth forest, one can find hot springs as well as a waterfall and the Sol Duc River, where salmon can be spotted swimming upstream in late summer and early fall.
- The Pacific Coast: The vast, rugged coastline of the Pacific Coast stretches for 73 miles from Cape Flattery down past Kalaloch Beach. The stunning beaches are distinguished by cragged cliffs, wide, sandy shores, giant rock formations, and frigid blue water all right on the edge of thick rainforest.
- The Rainforests: While each section of Olympic National Park has its own charms, the rainforests are perhaps the most unique aspect of the park. The Hoh and Quinault Rainforests are filled with ancient trees draped in mesmerizing moss and are absolutely magical to explore on mostly flat trails that can be accessed year-round.
Each hike below will be labeled so that you know what part of the park it’s in, and they’ll be roughly ordered by region, starting with Hurricane Ridge and working south.
Things to Know Before You Go to Olympic National Park
Here are a few things we think you should know before you venture out into Olympic National Park.
The park is huge, and drive times can be long. The park sprawls across the northwestern corner of the contiguous United States, and the borders are somewhat confusing and sometimes unconnected. It takes more than three hours to drive from Hurricane Ridge, at the northern edge of the park, down and around the coast to the Quinault Rainforest at the park’s southern border. It makes the most sense to break up your trip into two chunks; the northern end (Hurricane Ridge and Lake Crescent) and the southern end (the Pacific Coast and Rainforests) to minimize drive times.
Be prepared to be wet. Especially on the coast – including the rainforests. That’s the whole thing with the rainforests; they get an insane amount of rain every year. Even in the summer, it’s not uncommon to encounter rainy days in the rainforest. Over a few different summer trips, we’ve seen the beaches on sunny days, rainy days, and cloudy and foggy days. All in July and August. It’s unpredictable, and you’ll want to have a good rain jacket and waterproof hiking boots (Alysha loves her Columbia Newton Ridge boots, which are an excellent first pair of hiking boots).
A national park pass is required to access all sections within Olympic National Park. You have a few options to choose between. You can buy a seven-day pass for $30 that admits you and your vehicle. If you’re a national park enthusiast and are planning to visit three or more national parks in the next 12 months, you might want to invest in the America the Beautiful pass – The National Parks and Federal Recreational Lands Pass for $80, which will grant you access to National Park Services sites across the United States for one year. Not all of the hikes are within the boundaries of the national park and require different passes (or sometimes no pass), which we cover in the trail details section within each hike.
No dogs allowed on hiking trails in Olympic National Park. Like all national parks, dogs aren’t allowed in Olympic National Park. This means no pups on the hiking trails or beaches. They can accompany you in campgrounds and parking lots, however– basically wherever a car can go, a dog can go.
In the northwestern corner of the Pacific Coast of Washington, much of the land belongs to the Makah Tribe, including Cape Flattery. As such, a separate pass from the park pass for Olympic National Park needs to be obtained. The Makah Recreation Pass can be purchased in Neah Bay at a variety of businesses, including the Makah Tribal Center.
The 16 Best Hikes in Olympic National Park: A Complete Guide
And now, let’s get into the hikes themselves!
We’ve decided to order these hikes by region, working from the northern edge of the park (Hurricane Ridge) to the southern edge of the park (the rainforests).
Within the Pacific Coast, which is a long stretch that runs the entirety of the park from north to south, we’re going to order the hikes from north to south.
Mount Storm King (Lake Crescent / Sol Duc Valley)
- Length: 4.0 miles roundtrip
- Elevation Gain: 2,065 feet
- Trail Type: Out and Back
- Difficulty: Moderate
- Trailhead Location: Storm King Ranger Station
- Pass Required: National Park Pass
This is a relatively short but intense hike that starts from the Storm King Ranger Station on the south side of Lake Crescent. To be completely honest, we’ve done it and it was fine. It’s a tough climb, and the views at the top are nice, but there’s nothing particularly special about the rest of it.
Plus, the scramble at the top is off-putting, and we don’t really think the juice is worth the squeeze here.
There are no real interesting notes about the first part of the trail – you’ll walk under the highway on the path, follow it to a junction with the Marymere Falls trail, and then immediately begin climbing switchbacks through the forest with the occasional break in the trees giving you a nice view of the lake below.
Eventually, you’ll get to the adrenaline-inducing part of the hike, where it turns into a little bit of a scramble. It’s so steep near the end that you’ll need to use the permanent ropes that are installed to pull yourself up.
Pro tip: BRING GLOVES for the ropes to avoid tearing up your hands.
If you’re afraid of heights, this might not be the trail for you. If you’re looking for a thighmaster workout in the woods with a great view over Lake Crescent from the top, then this might be the trail you’re looking for.
On the way down, we’d definitely recommend heading out to Marymere Falls, since you’ve already done a portion of the trail to get to the trail for Mount Storm King.
Marymere Falls (Lake Crescent / Sol Duc Valley)
- Length: 1.8 miles roundtrip
- Elevation Gain: 500 feet
- Trail Type: Out and Back
- Difficulty: Easy
- Trailhead Location: Storm King Ranger Station
- Pass Required: National Park Pass
This hike also leaves from the Storm King Ranger Station, and is a nice and easy stroll out to Marymere Falls, a 90 foot high waterfall. The walk there includes dense forest, babbling brooks, and of course, the falls.
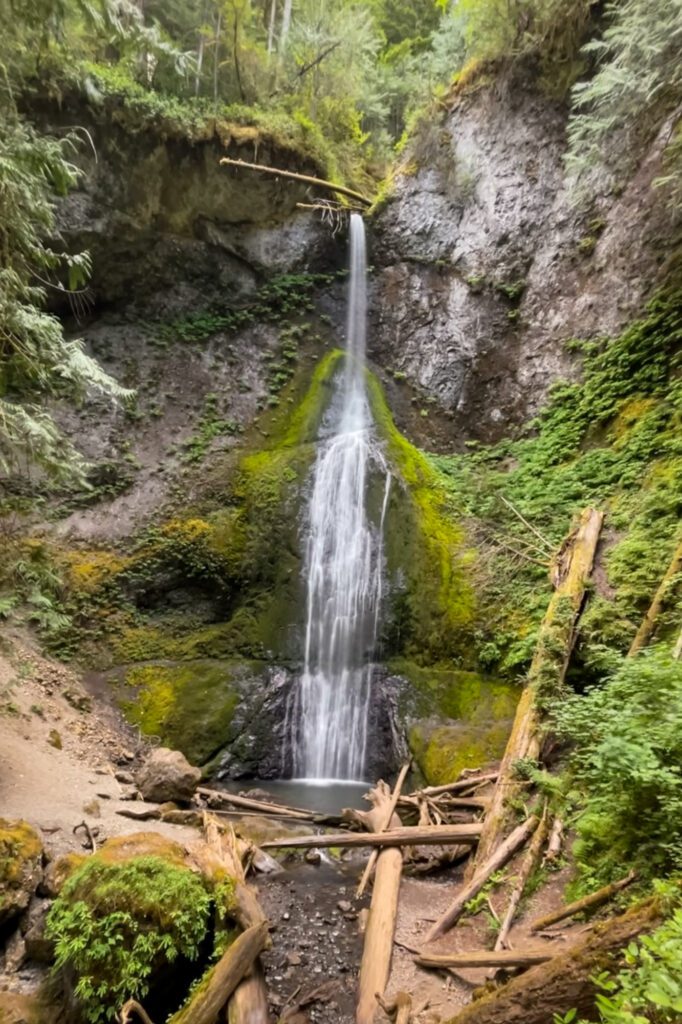
It gains minimal elevation, making it a perfect family-friendly hike in Olympic National Park. There’s only one climb, and it’s right before you reach the falls, where you gain about 150 feet of elevation to reach the base of the falls.
This is a good hike to add on if you do Mount Storm King. From the junction with the Mount Storm King trail, it’s only 0.4 miles out to the falls. Tack it onto your hike on the way down.
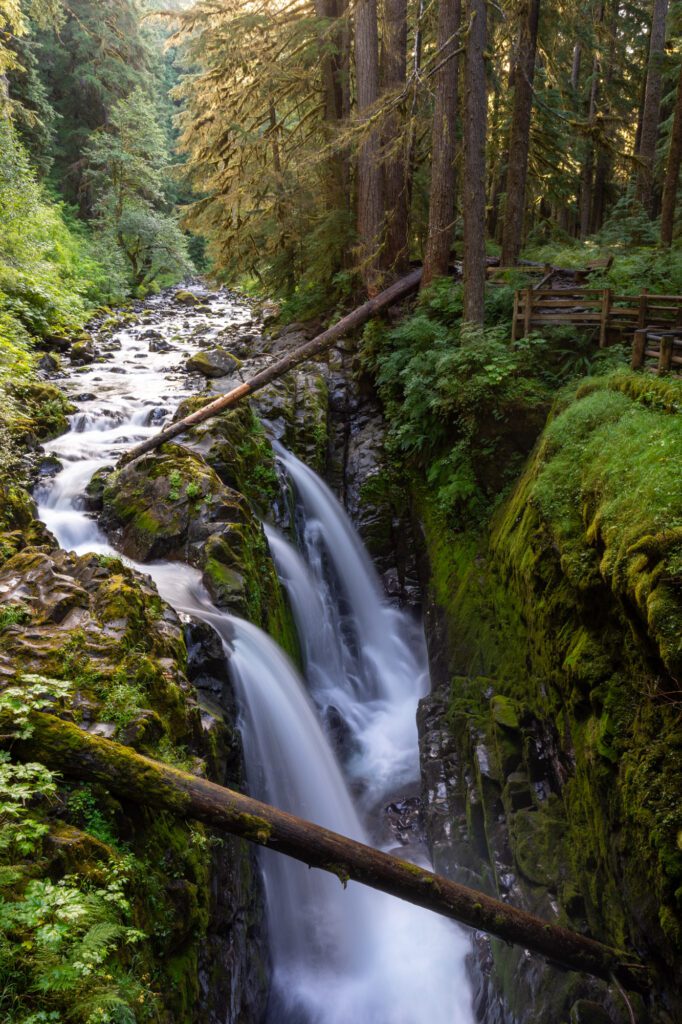
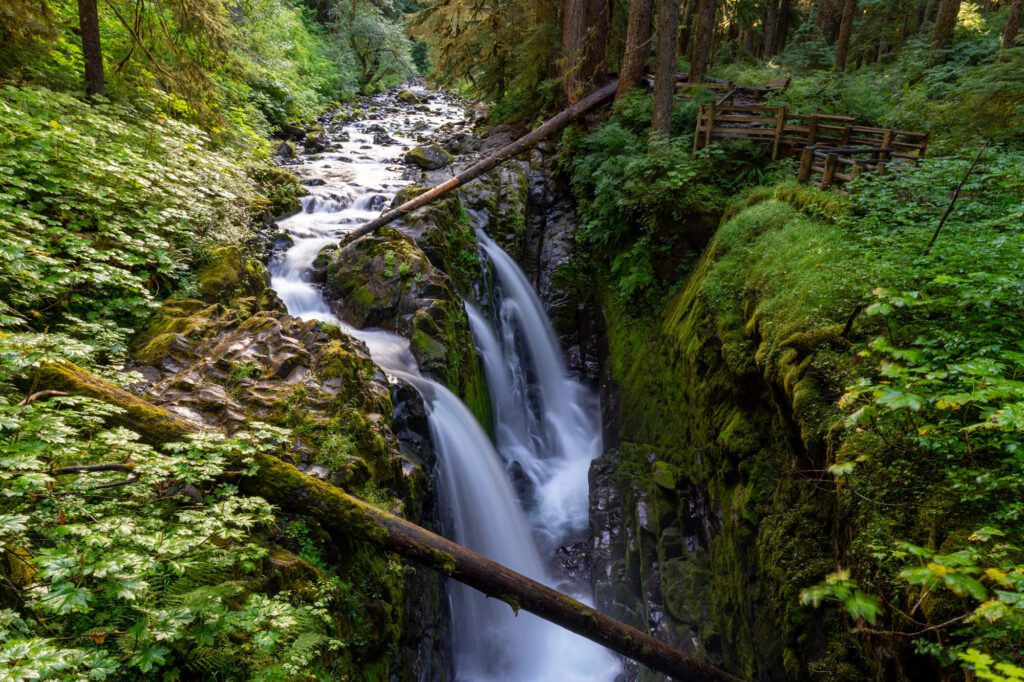
Sol Duc Falls (Lake Crescent / Sol Duc Valley)
- Length: 1.6 miles roundtrip
- Elevation Gain: 200 feet
- Trail Type: Out and Back
- Difficulty: Easy
- Trailhead Location: Sol Duc Trailhead
- Pass Required: National Park Pass
We did this trail as part of the High Divide (the falls are basically where the lollipop trail…lollipops?) and were pleasantly surprised with Sol Duc Falls.
You’ll follow a flat path through the forest before arriving at a bridge crossing the Sol Duc River, which is also the viewpoint for the falls. It’s family-friendly, well marked and maintained, and worth doing for hikers of all levels.
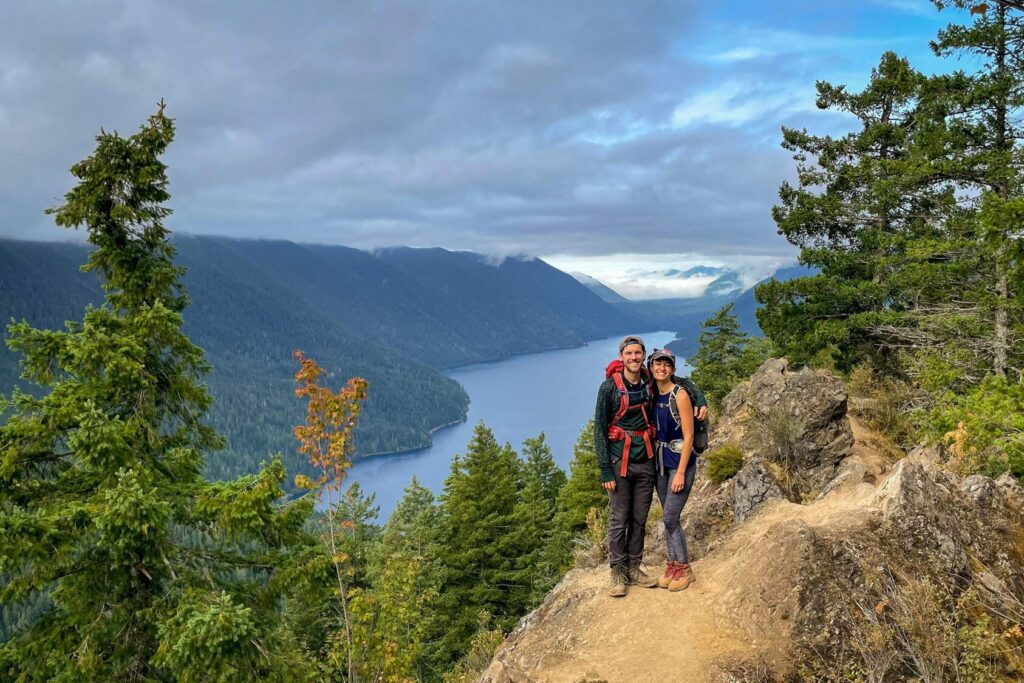
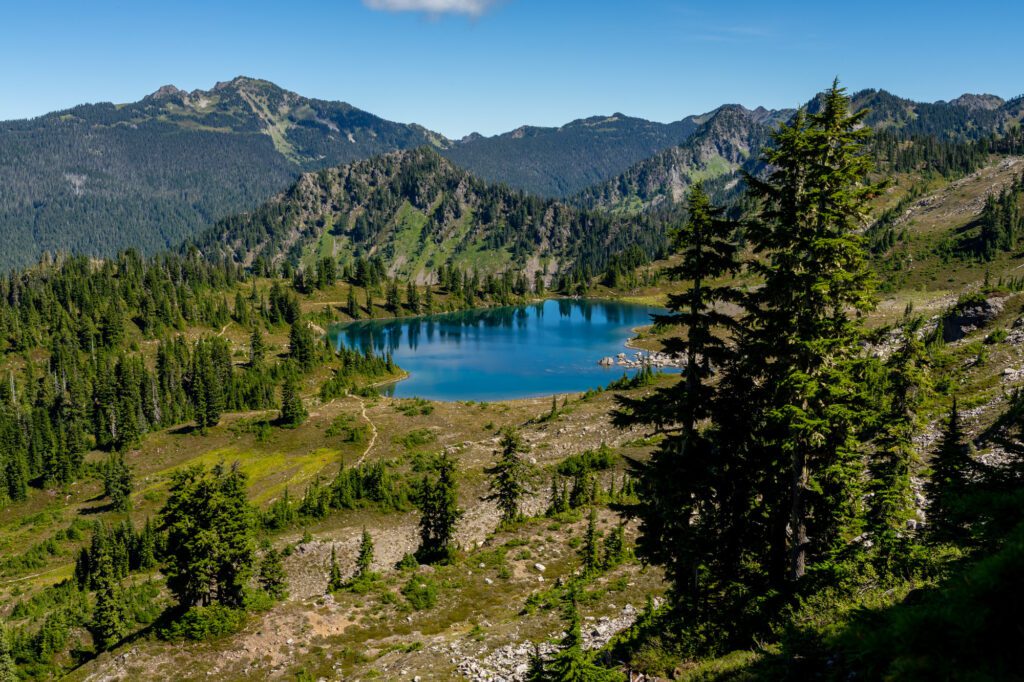
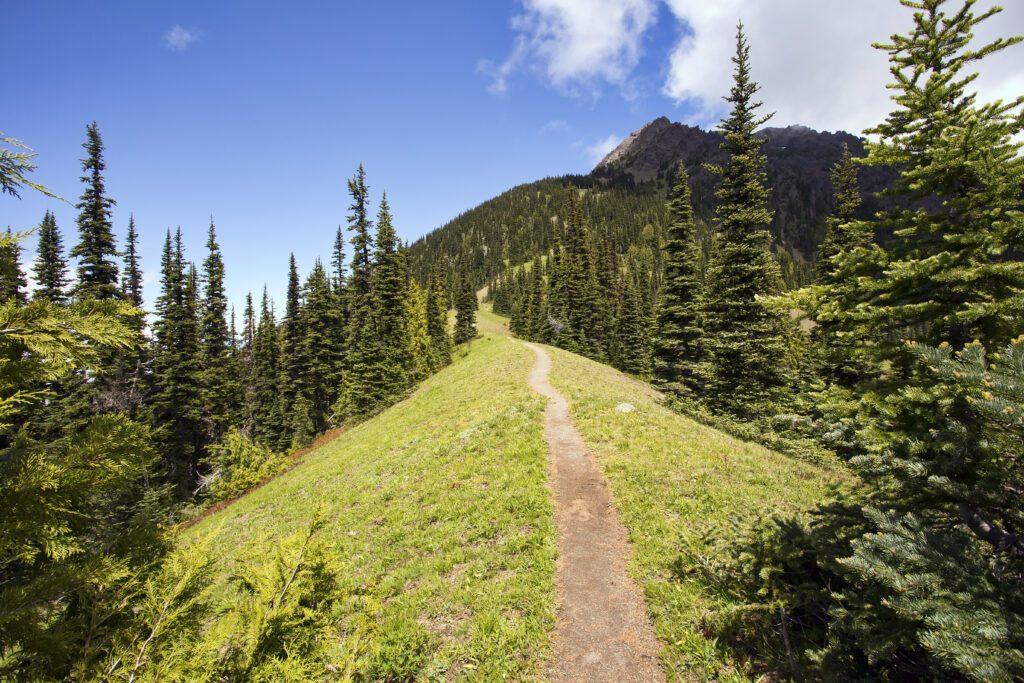
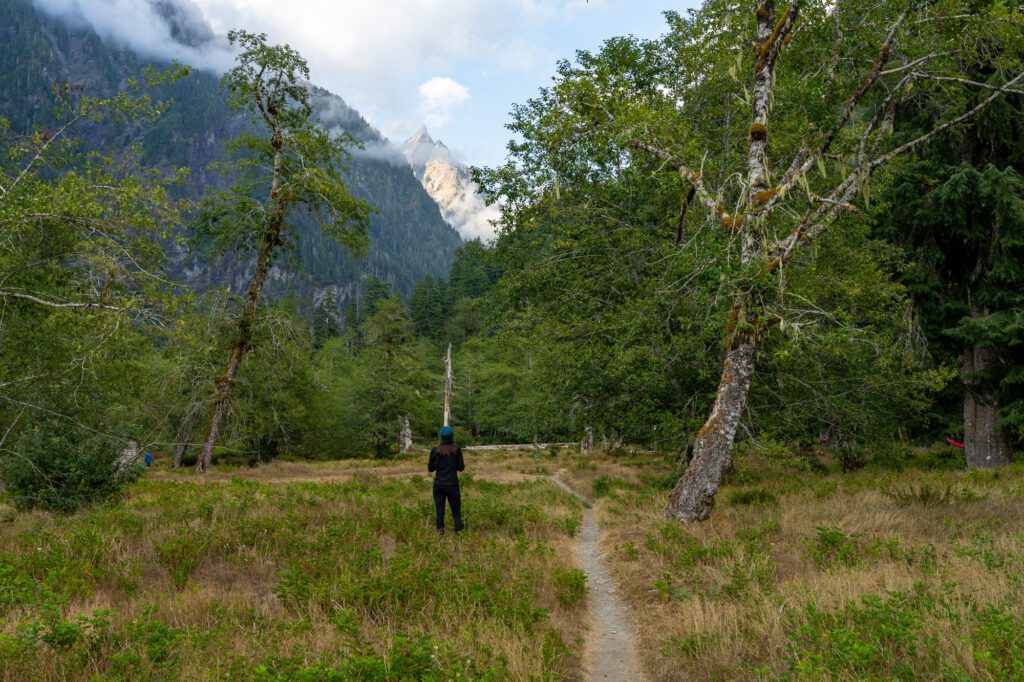
The High Divide / Seven Lakes Basin (Lake Crescent / Sol Duc Valley)
- Length: 19 miles roundtrip
- Elevation Gain: 4,000 feet
- Trail Type: Out and Back
- Difficulty: Very Difficult
- Trailhead Location: Sol Duc Trailhead
- Pass Required: National Park Pass
The High-Divide-Seven Lakes Basin Trail is among the best (if not the best) backpacking experience in Olympic National Park.
While it’s an adventure that requires some prior backpacking experience and a fair level of fitness, the effort is well rewarded with quality time spent in this spectacular subalpine basin.
Don’t be fooled by the name—there are at least eight, if not more, lakes that dot the basin. The area isn’t just famous for its lakes, its wildlife is noteworthy as well. Black bears and mountain goats are known to be found grazing among meadows in the basin.
We did the High Divide as a three day, two night backpacking trip in late August, and it was fantastic.
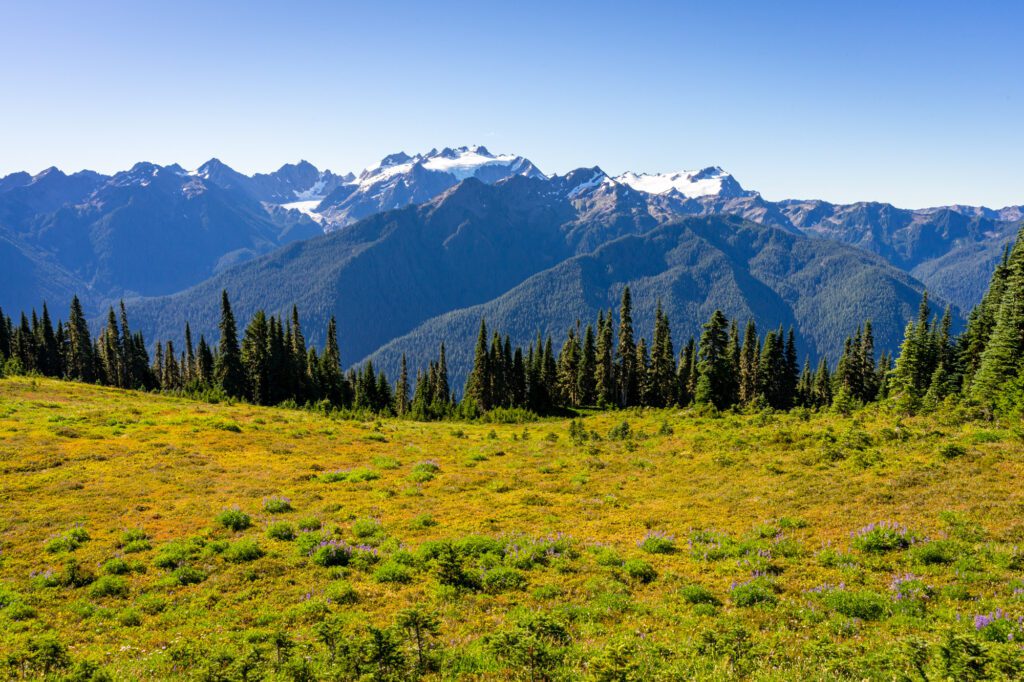
You could also do it as a day hike, but it’s a long one, with plenty of elevation gain to get up to the Seven Lakes Basin and the gorgeous High Divide, which is a ridge with spectacular views to the north and south of alpine lakes, green rolling hills, and the Olympic Range.
To do it as a day hike, you’ll need to get an early start – 19 miles in one day is no joke.
We did the hike clockwise, which is a more gradual ascent on the way up to the High Divide, and that’s what we’d recommend. Going that direction, you do the ascent over roughly ten miles, rather than nine in the other direction. It’s a minimal difference, but it’s not nothing.
You’ll start from the Sol Duc Falls Trailhead, and meander through the dense forest for a bit before the climb really starts. In the middle of the climb you’ll reach Sol Duc Park, which has a vault toilet if you or someone in your group needs to use the facilities.
Then, continue the climb, which really starts to get intense around here.
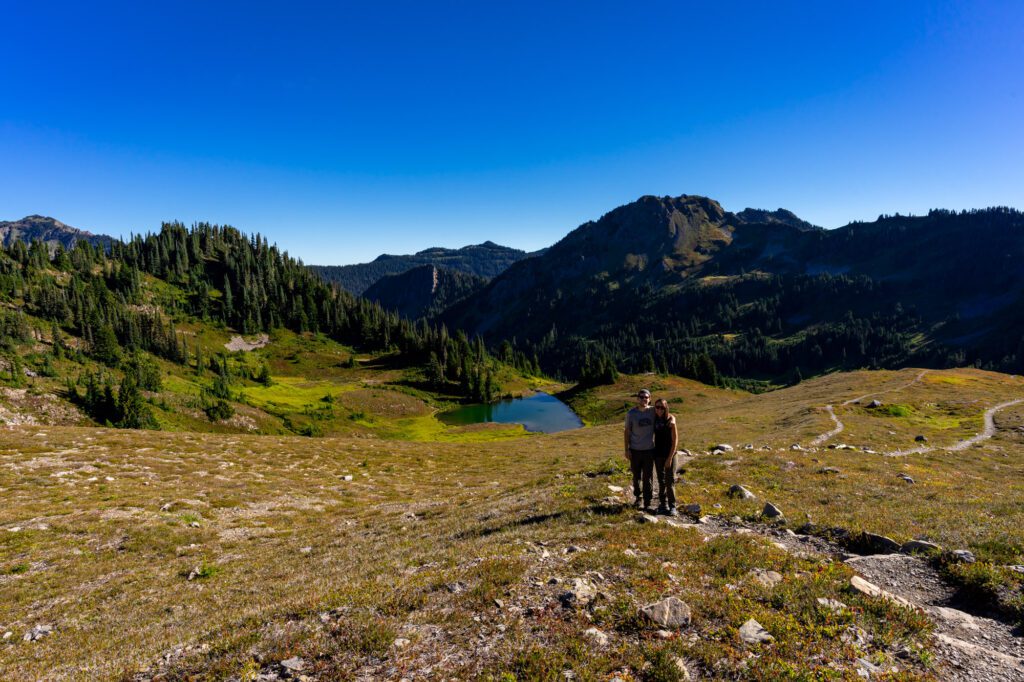
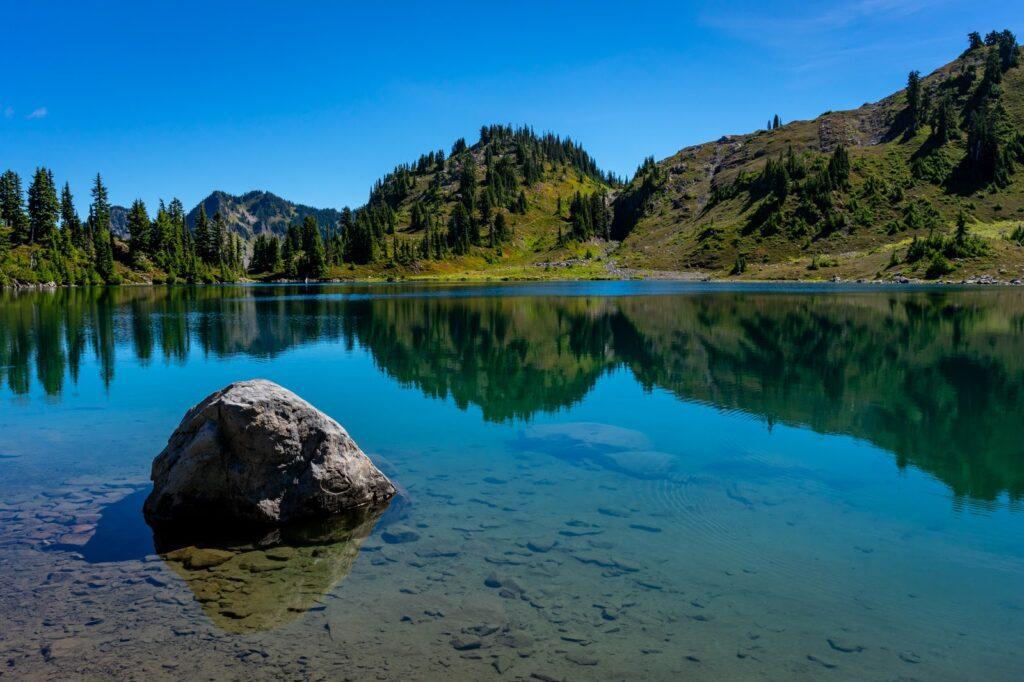
You’ll first reach Heart Lake, which is, you guessed it, shaped like a heart, and is a good spot to grab a snack and some water before you make the ascent up to the ridge, which is a thigh-burner.
Once you’re on the ridge, it’s a beautiful hike, with the Seven Lakes Basin and its sapphire blue alpine lakes to your right, and Mount Olympus off to your left
You should definitely make the detour down to Lunch Lake, which is gorgeous and should be your lunch spot. It’s a steep climb back up to the trail, but we think it’s worth it to get a taste of the Seven Lakes Basin.
From there, it’s all downhill back to the parking lot.
It is important to note that camping permits must be reserved ahead of time, here. Olympic National Park only gives out a limited number of permits, so it is best to plan ahead during peak season.
Bear canisters are required for camping on the High Divide, which can be rented from the Wilderness Information Center in Port Angeles.
One important note: there are no water sources up on the High Divide, so make sure you stop to purify plenty before you leave Heart Lake. You can also get water at Lunch Lake if you make that detour.
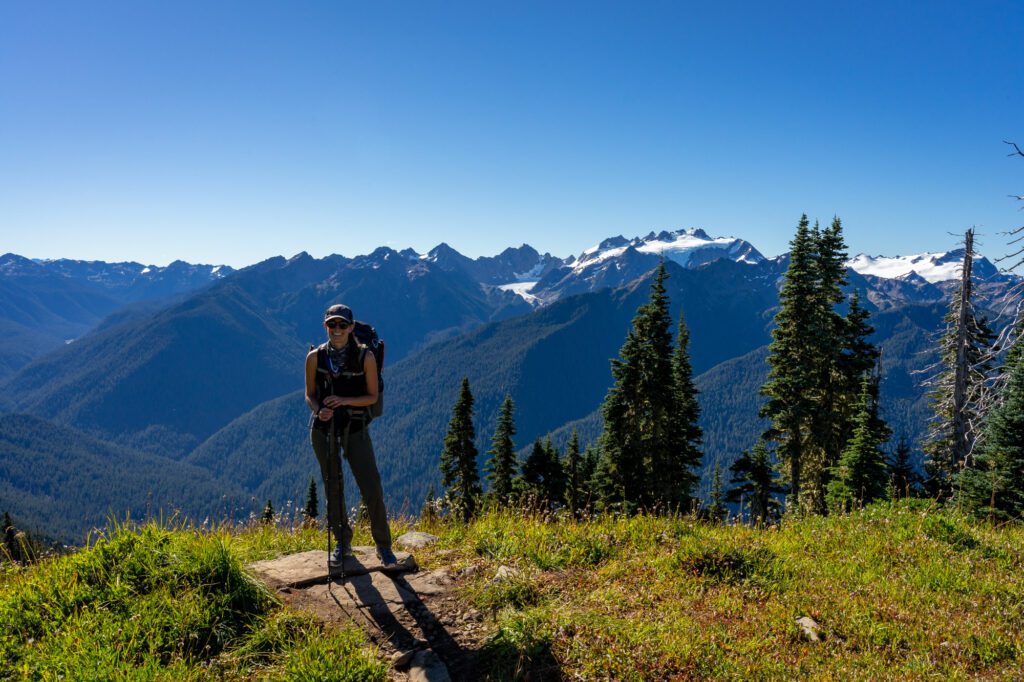
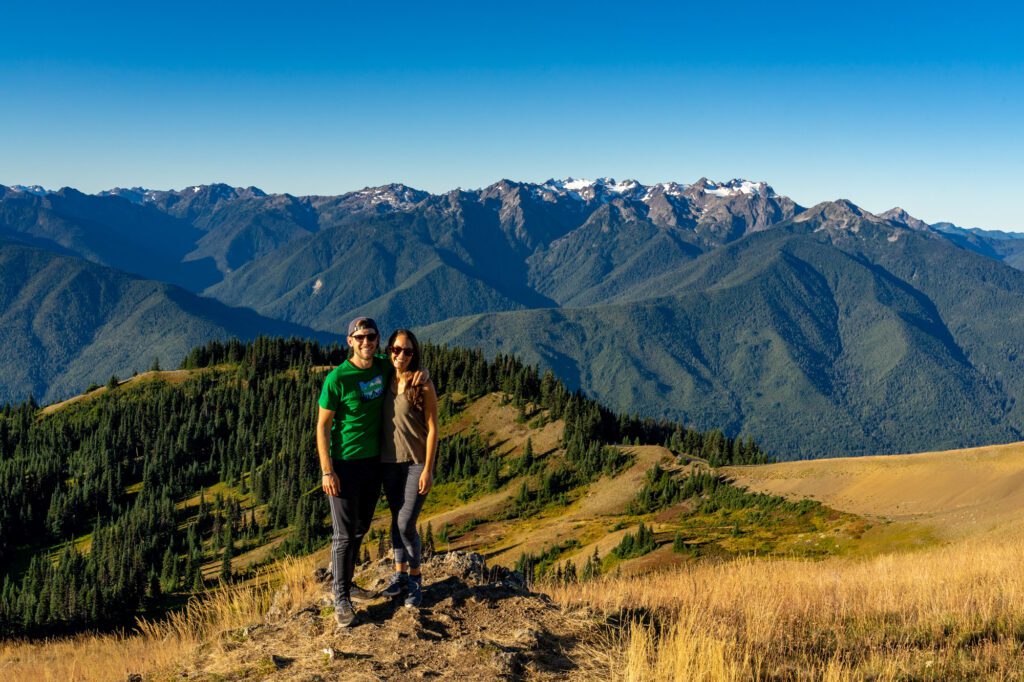
Hurricane Hill (Hurricane Ridge)
- Length: 3.2 miles, roundtrip
- Elevation Gain: 650 feet
- Trail Type: Out and Back
- Difficulty: Easy / Moderate
- Trailhead Location: Hurricane Hill Trailhead
- Pass Required: National Park Pass
Hurricane Hill is one of the most popular trails in the Hurricane Ridge region. This relatively flat, mostly paved trail is accessible for most fitness levels, making it a half-day adventure for everyone in the family.
But don’t let that accessibility fool you – the views from the top of Hurricane Hill on a clear day will blow your socks off. We could see Vancouver Island, Mount Baker, the Olympic Range, and even Vancouver’s skyline wayyyy in the distance. It was magical.
The hike departs from a large parking area, just about 1.5 miles from the Hurricane Ridge Visitors Center, where you can grab a park pass if you need and which also has bathroom and drinking water facilities.
The trek starts out gently through open pine forests along a wide path with clear views of the Bailey Range. The trail eventually gains a gradual incline and you’ll need to tackle three switchbacks before reaching the summit atop Hurricane Hill.
From up top, admire the peaks and peer into towns below, as well as the Strait of Juan de Fuca and Vancouver Island across the water. Be prepared for strong winds blowing through.
Just below the summit of Hurricane Hill, there is a second interpretive sign with information regarding the surrounding area that’s worth a read.
Klahhane Ridge (Hurricane Ridge)
- Length: 5 miles
- Elevation Gain: 1,700 ft
- Trail Type: Out & Back
- Difficulty: Moderate / Difficult
- Trailhead Location: Switchback Trailhead
- Pass Required: None if parked along Hurricane Ridge Road
This hike, which takes you along a portion of one of the most photogenic parts of Olympic National Park, is the easiest way to access that ridge.
You’ll cut off a significant distance of hiking because you’ll park along Hurricane Ridge road and connect to the ridge with the Switchback Trail.
Although that’s not to say the Switchback Trail isn’t a butt-kicker, because it climbs 1,500 feet in just under a mile and a half.
It starts from the Switchback trailhead, which is a small parking lot with limited overflow parking. From there, you climb 1,500 feet in a mile and a half to get up to Klahhane Ridge, which has spectacular views all around.
This junction is where you’ll meet up with the Heather Park – Lake Angeles loop on the Lake Angeles side, where it continues northeast along the ridge.
You can go as far as you’d like along this ridge – even down to Lake Angeles if you’re up for taking a dip in a crystal clear alpine lake, but you have to drop down to 1,700 feet to the lake…which means you have to climb back up on the way back. Not for the faint of heart, to say the least.
The best turnaround point is probably going to be where the trail starts to drop, which makes this a nice 5 mile hike.
You could also do this from the Hurricane Ridge Visitors Center all the way to Lake Angeles, which is about 12.5 miles and 4,500 feet of elevation gain when it’s all said and done. That’s a tough hike, and we included the shorter version because it’s more accessible for more hikers, and is a better use of time if you’ve only got a few days.
Moose Lake (Hurricane Ridge)
- Length: 8.2 miles
- Elevation Gain: 1,600 ft
- Trail Type: Out and Back
- Difficulty: Moderate / Difficult
- Trailhead Location: Obstruction Point Trailhead
- Pass Required: National Park Pass
The hike to Moose Lake also leaves from the trailhead at the end of Obstruction Point Road, and is well worth the effort to get to the trailhead on the narrow gravel road.
Unlike most hikes in the mountains, this out-and-back hike has you descending into the valley on the way out to Moose Lake, and climbing on the way back to the trailhead. You’ll start with a short descent into a meadow that is full of both wildflowers (in the summer anyway) and marmots.
It’s all downhill from there – you’ll climb slightly at the end of the meadow, and then drop 1,500 feet or so over the course of 1.8 miles to reach Moose Lake. Save your energy for the long journey back up the steep switchbacks to get back to your car.
Expect lots and lots of mosquitoes in the summer at the lake.
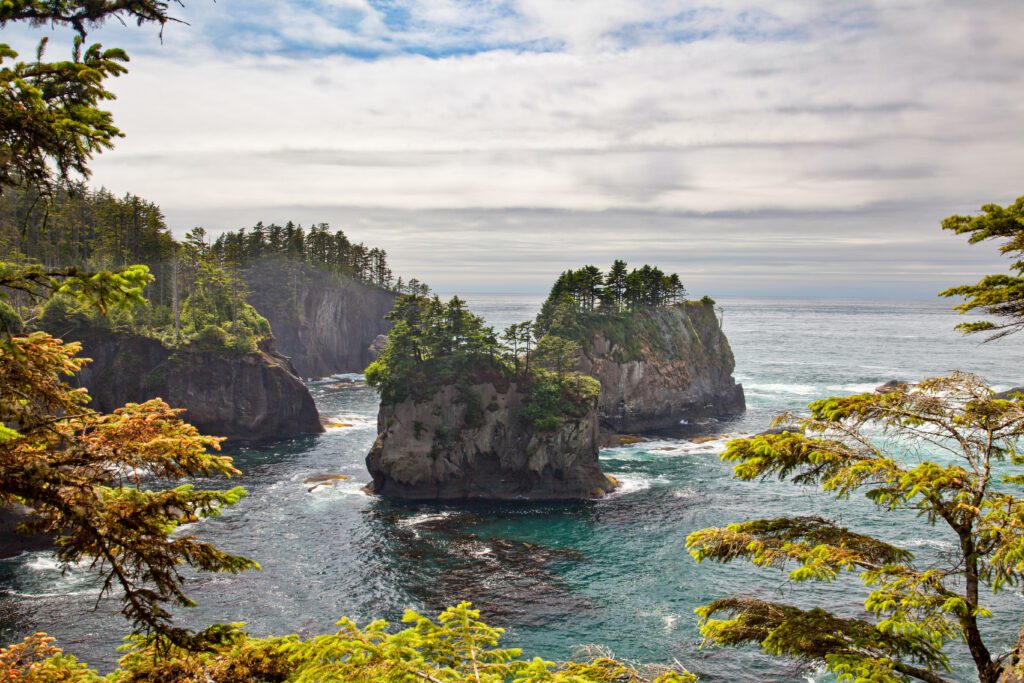
Cape Flattery (Pacific Coast)
- Length: 1.5 miles roundtrip
- Elevation Gain: 200 feet
- Trail Type: Out and Back
- Difficulty: Easy
- Trailhead Location: Cape Flattery Trail Parking
- Pass Required: Neah Bay Recreation Permit
Cape Flattery sits at the northernmost point of the continental United States, which in and of itself makes it a noteworthy excursion. That being said, it is pretty far north from most of the other sights in Olympic National Park.
The hike is short and accessible for everyone, and the views are pretty out of this world—definitely worth the trip. It is important to note that the land belongs to the Makah Tribe, which necessitates a separate recreation pass.
To access the trail to Cape Flattery, drive through Neah Bay, where you can pick up the necessary Makah permit that lasts for the year—and also is valid for visits to Shi Shi Beach.
The hike starts in an open forest on a gentle downhill slope. The trail switches between boardwalk and trail. Along the way, there are three turn-offs that provide you with views.
The final viewpoint is from a viewing platform that provides perhaps the most spectacular view of them all. Look ahead to Tatoosh Island, where you’ll spot a sole lighthouse surrounded by water. In either direction, you’ll find immense boulders.
Cape Flattery is desolate, wild, and windy and is the perfect spot to get lost watching waves crashing against the shore. Sea life is also at its prime here! Keep watch for seabirds, whales, and otters.
Shi Shi Beach and Point of Arches (Pacific Coast)
- Length: 8.0 miles roundtrip
- Elevation Gain: 200 feet
- Trail Type: Out and Back
- Difficulty: Moderate
- Trailhead Location: Shi Shi Beach Trailhead
- Pass Required: Neah Bay Recreation Permit
Shi Shi Beach is without question among the most picturesque of the beaches in the Pacific Northwest, of which there is a fair amount of competition.
It fully encompasses the wild, rugged nature of the Olympic Coast with expansive sands spilling into glistening ocean offset by staggering rocks. Hiking to the Point of Arches makes for a satisfying day hike or a relatively easy backpacking excursion if you wish to linger a bit longer and camp for a night or two.
As this is a beach hike, you may want to use a tide table to plan your visit, so you’re not stuck during high tide.
This trail is spectacular, and the full length is worth the trek because it takes you out to Point of Arches, which is one of the best examples of the rugged and wild Pacific Coast that makes Olympic National Park special.
It’s an eight mile hike, which sounds hard, but there’s very minimal elevation gain – you essentially only drop 200 feet in one go to get down to the beach, and then climb that same amount on the way back. The rest is at sea level, along sandy Shi Shi beach.
This also makes a good backpacking trail if you want to experience camping on the beach. It’s a four mile hike in, and spending the night on the beach means you’ll get to enjoy sunset on the coast and camp on a sandy ocean beach – something you can’t do in too many places in the United States.
Make sure to spend some time at the tide pools near Point of Arches, and look up! Bald eagles love Shi Shi and the other coastal beaches in Olympic National Park. You’ll find them in the treetops, just watching life go by (and patiently waiting for the
The trailhead is on the Makah Tribe’s land, so you’ll need to purchase a parking permit to park at the trailhead near the fish hatchery. You can find more information here.
Cape Alava and the Ozette Triangle (Pacific Coast)
- Length: 9.4 miles roundtrip
- Elevation Gain: 100 feet
- Trail Type: Loop
- Difficulty: Moderate
- Trailhead Location: Ozette Triangle Trailhead
- Pass Required: National Park Pass
The Ozette Triangle gives you a little bit of lake, a taste of the rainforest, and some quality beach time. A blend of the best of the Olympic National Park in one hike!
There are a couple of ways to do this hike, and we wholeheartedly recommend taking the long way, which involves a long (but flat) hike along boardwalks and beaches, making a big triangle that starts and ends at the Ozette Ranger Station.
You could do a shorter version, which is just an out-and-back from the ranger station to the beach, but we think it’s worth taking in the spectacular Pacific Beach. There’s not many places where you can hike three miles on a rugged (and gorgeous) sandy ocean beach.
On both trails from the trailhead to the beach, you’ll walk along a well-marked boardwalk through the dense forest, with occasional breaks in the trees giving you a glimpse of the surrounding landscape. Once you’re on the beach, there’s really no marked trail to speak of, but there’s also no need for one.
A little more than three miles in and you’ll reach the beach. Cape Alava is a wild and somewhat isolated coast with undeniable views, some marine critters, and Tskawahyah Island in the distance.
After three miles on the beach, you’ll reach the turn that takes you back inland, and it’s another three miles from there to the trailhead.
We highly, highly recommend hiking boots for the beach portion of the hike. Walking on the beach in tennis shoes is no fun at all. Believe us.
While there’s only a tiny amount of elevation change on the trail, the sand makes those three miles more difficult than they should be.
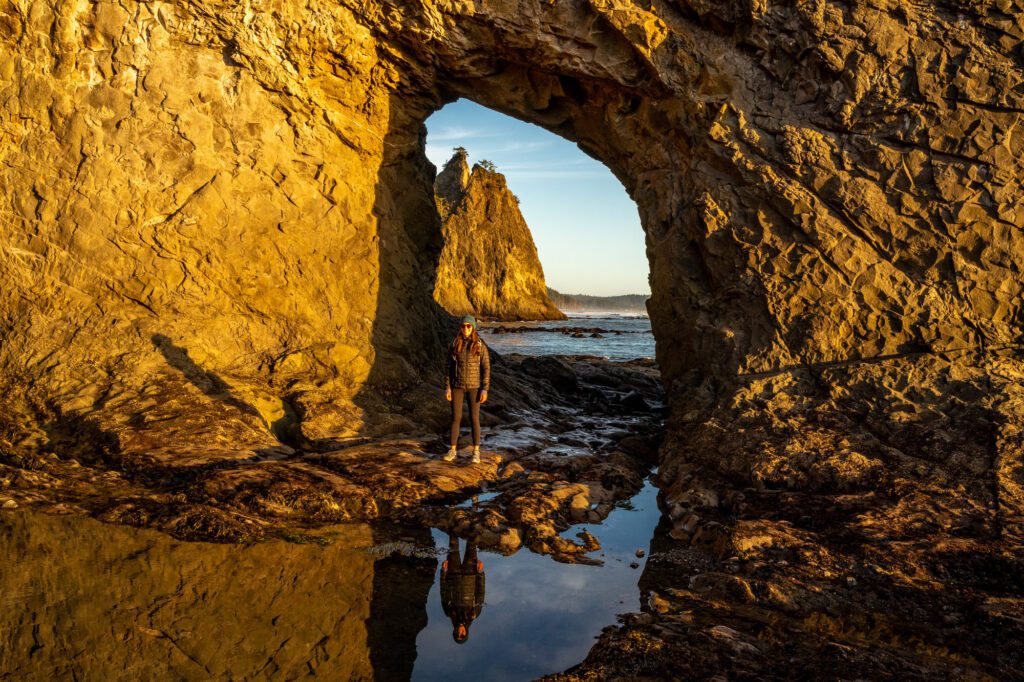
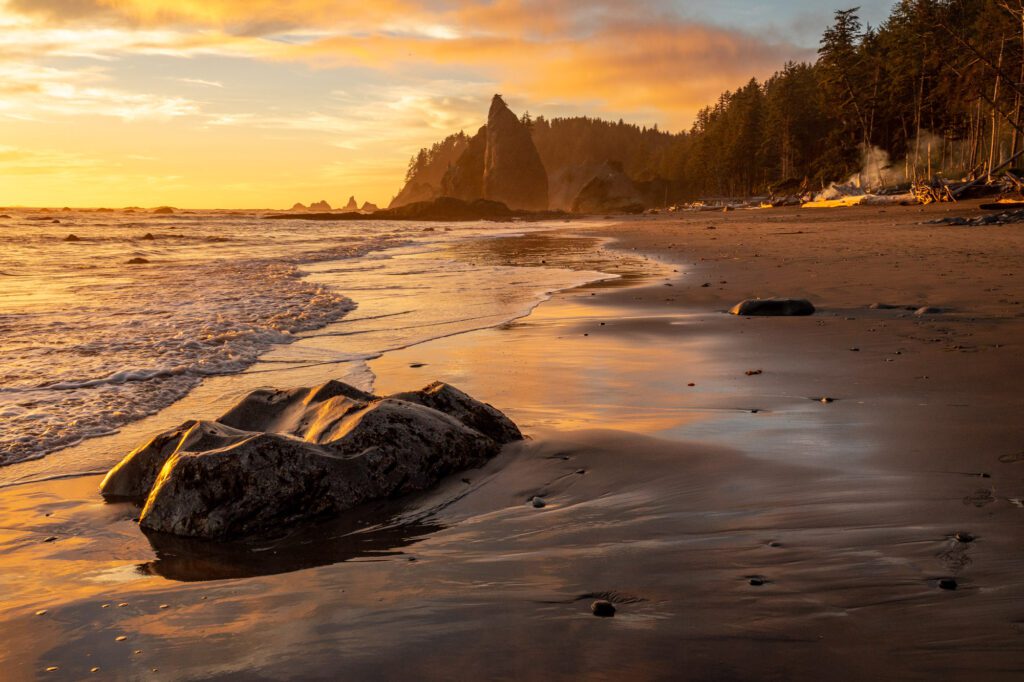
Hole-in-the-Wall on Rialto Beach (Pacific Coast)
- Length: 3.3 miles roundtrip
- Elevation Gain: 300 feet
- Trail Type: Out and Back
- Difficulty: Easy
- Trailhead Location: Rialto Beach Parking Lot
- Pass Required: National Park Pass
This was our favorite hike in Olympic National Park, and we definitely recommend doing it around sunset if it’s not super cloudy (which is a rarity on the Pacific Coast, but we got super lucky the first time we did it).
The hike starts from the parking lot for Rialto Beach, and from there you basically walk two and a half miles up the beach until you reach Hole in the Wall. Which, as you might have guessed, is a hole in a wall formed after thousands of years of erosion from the waves.
There’s no elevation gain to speak of, but walking in the sand is a pain. We’d recommend hiking boots to make it slightly less painful (waterproof + no sand in shoes).
These are the beginner hiking boots we recommend – Alysha has them and loves them, and they’re a solid, affordable pair of boots.
Make sure to check the tide chart before you go – this hike is best done at low tide if you want to be able to walk through the hole in the wall (plus, the tide pools around there are fun too!).
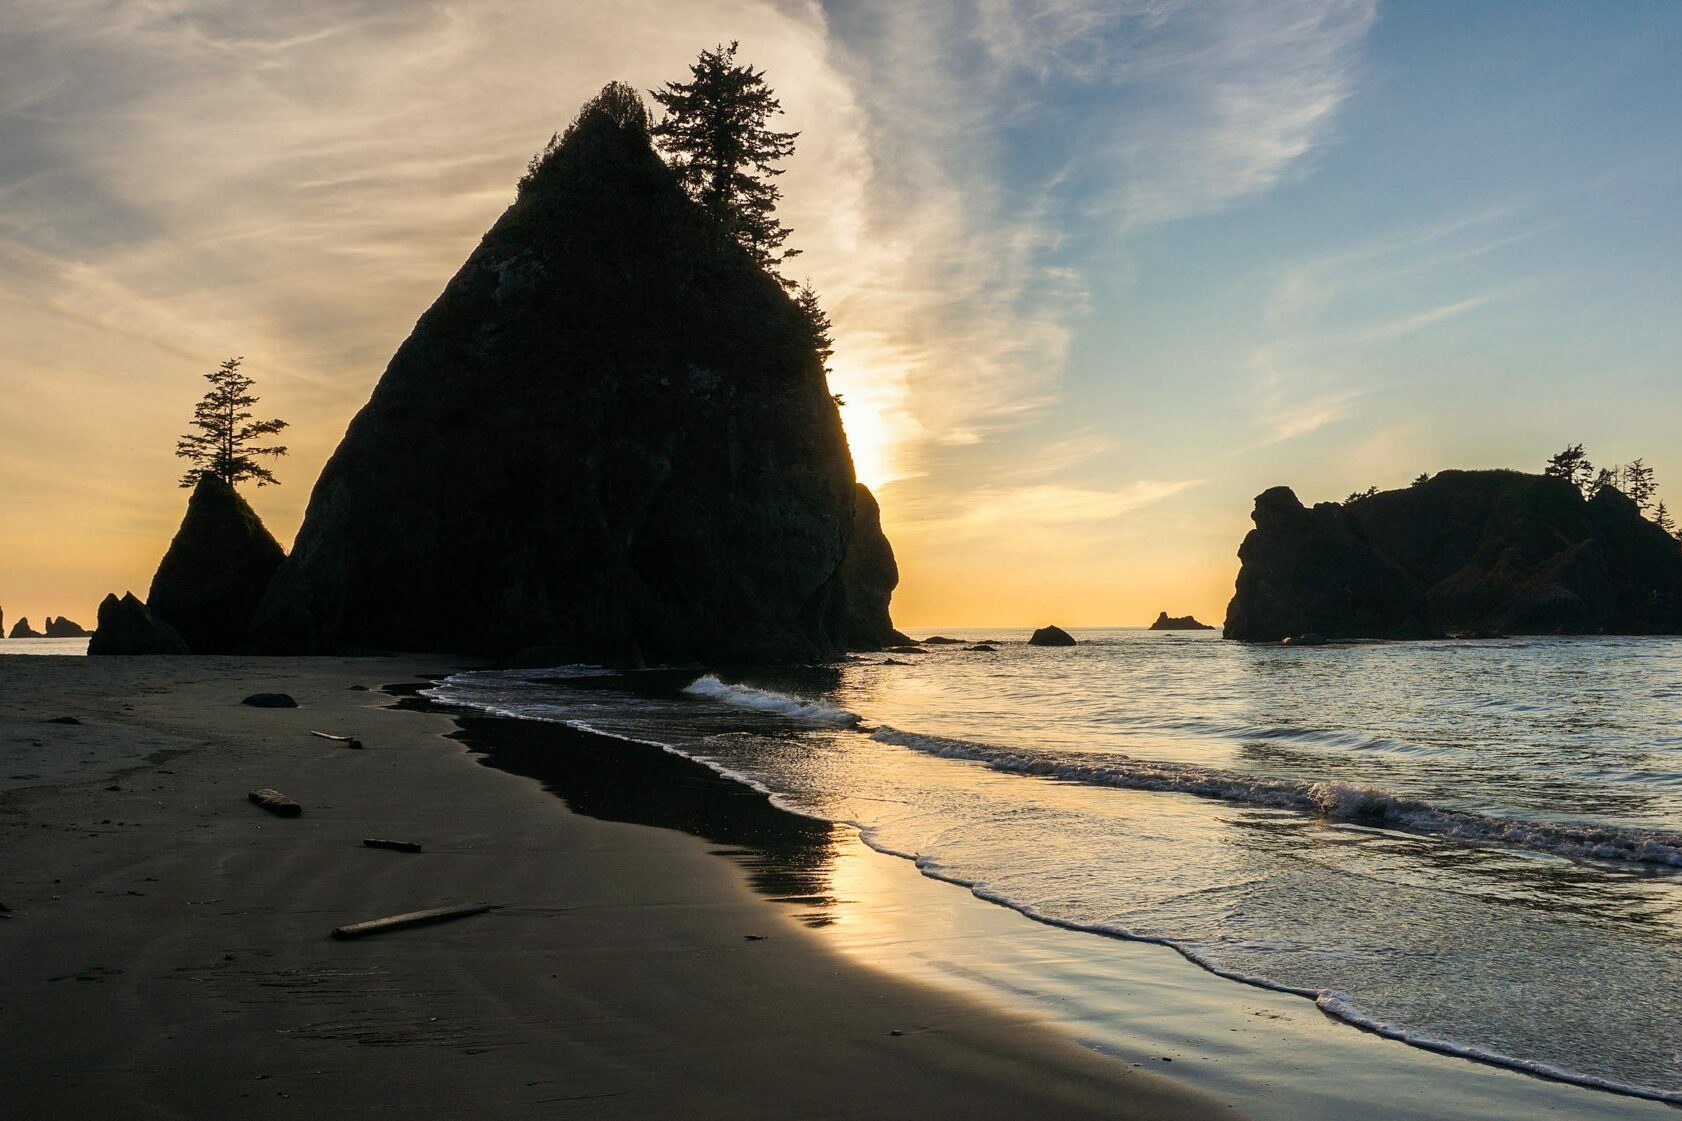
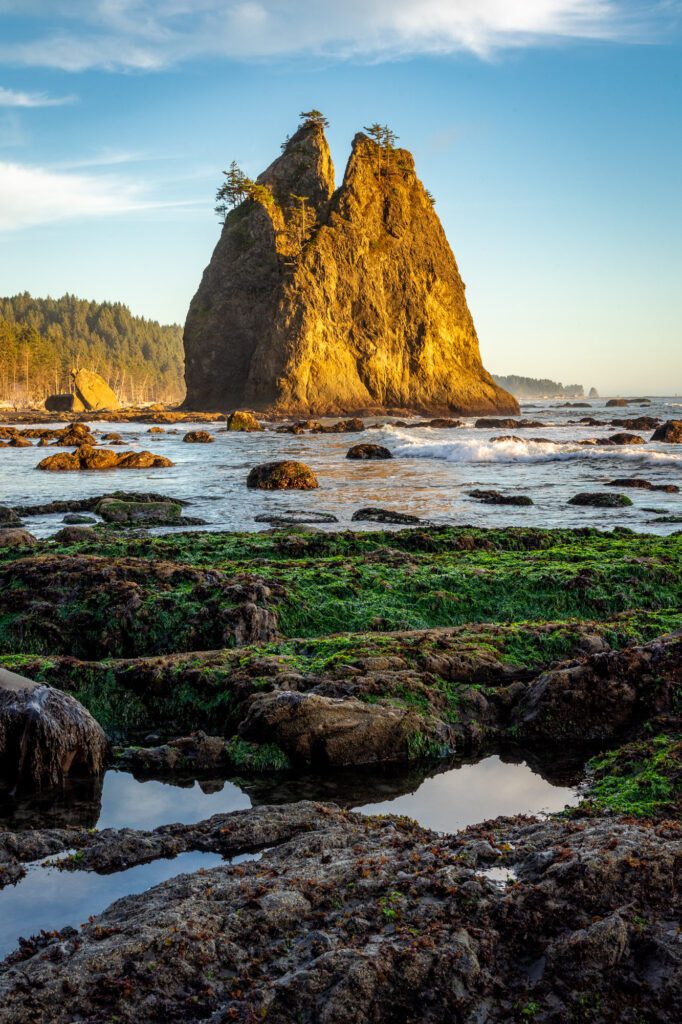
Second Beach (Pacific Coast)
- Length: 4.0 miles roundtrip
- Elevation Gain: 310 feet
- Trail Type: Out and Back
- Difficulty: Easy
- Trailhead Location: Second Beach Trailhead
- Pass Required: None
There are three beaches aside from Rialto in La Push, helpfully named First, Second, and Third Beaches. Of the three, Second Beach is by far the best beach thanks to the sea stacks just off the shore, and it’s a short stroll through the woods to get there.
The parking lot is located just outside of the town of La Push. Don’t worry that the main parking area only has room for a few cars. There’s an overflow lot close by that that can hold many more.
You’ll need to adventure a bit before you reach Second Beach. To catch the trail, head downhill to a hurricane fence and port-a-potty. Continue downhill, cross a creek, and then follow the path up and downhill through trees for a short distance.
Just before you reach the beach, you’ll pass an upturned tree and a tree where visitors have left various mementos from the beach and their travels. Although it may be tempting, please don’t add anything of your own to minimize the impact on the beach.
And now, after zig zagging up and down and through the forest, you’ve reached the beach! The scene is quite something, with sea stacks rising from the water and an arch through which you can hear wind whistling through on stormy days if you listen carefully.
Take your time walking up and down the beach. Both directions offer some interesting sights. The distance you can walk will be impacted by tides. Watch the tides carefully to make sure you’re able to get back and enjoy slowly exploring the treasures on Second Beach.
You can continue walking 1.5 miles south down the beach from there to investigate the driftwood and get different views of the sea stacks and needles offshore before you return the way you came. At the 1.5 mile mark, the beach ends thanks to the headland jutting out into the ocean, and you’ll have to turn around and make your way back.
Like most of the coastal hikes here, there’s very little elevation change to speak of, since you’re at, you know, sea level. The forest is pretty dense, and it’s just over two thirds of a mile to the beach itself.
For the purposes of the numbers below, we’re assuming you hike from the trailhead to the beach, and then head south for a half mile before returning back to your car. The maximum length of this hike would be just under 4.5 miles, and that’s if you go all the way out to the end of the beach and back.
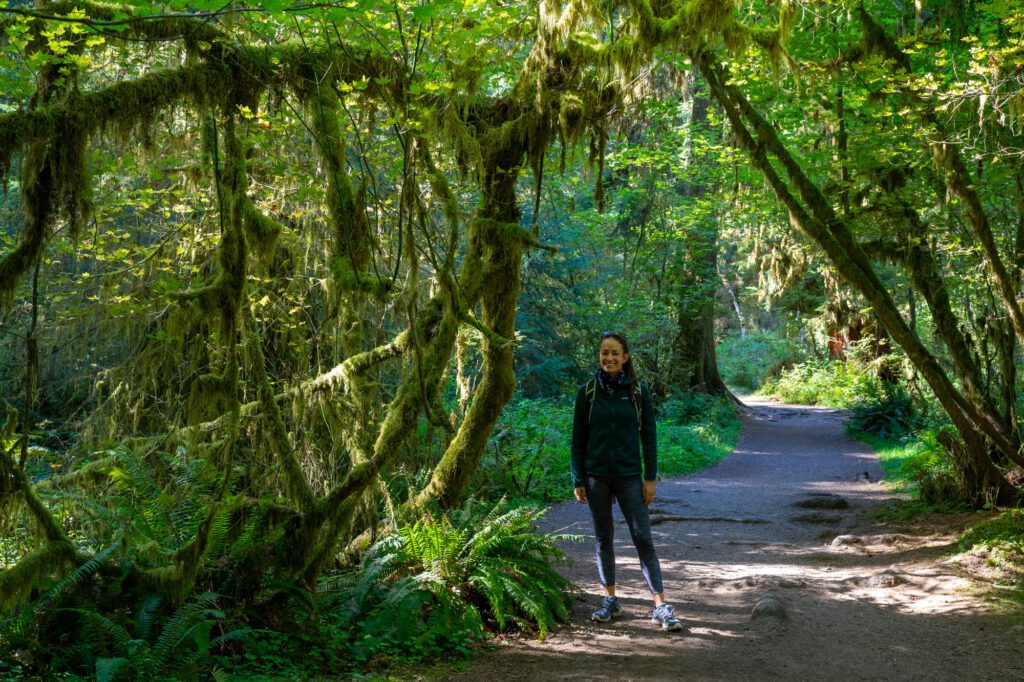
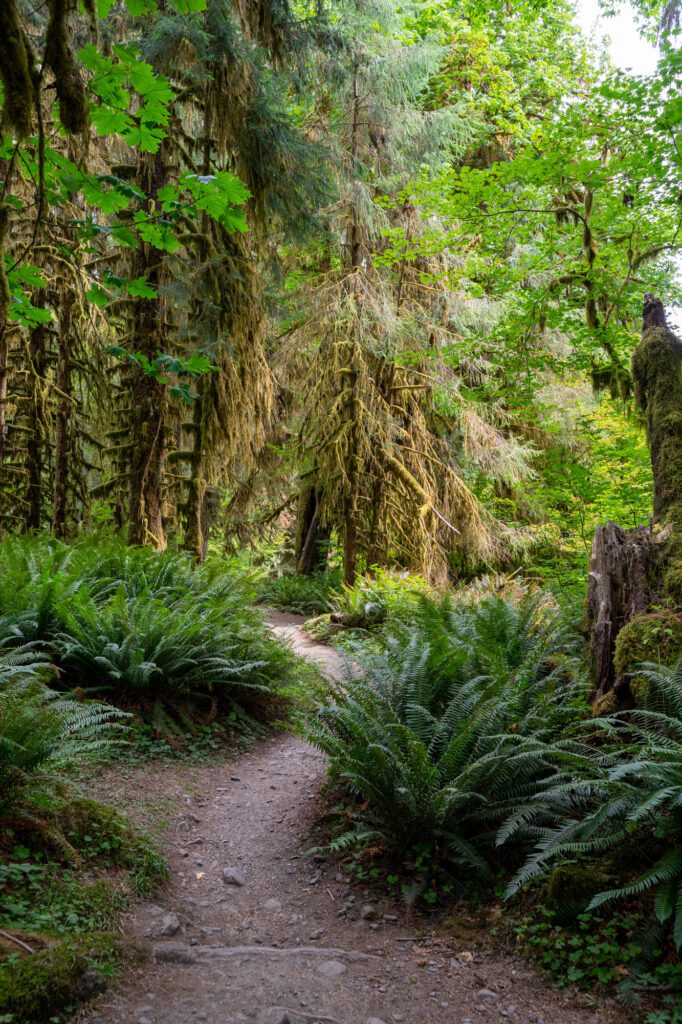
The Hall of Mosses (The Rainforests)
- Length: 0.8 miles roundtrip
- Elevation Gain: 100 feet
- Trail Type: Loop
- Difficulty: Easy
- Trailhead Location: Hall of Mosses Trailhead
- Pass Required: National Park Pass
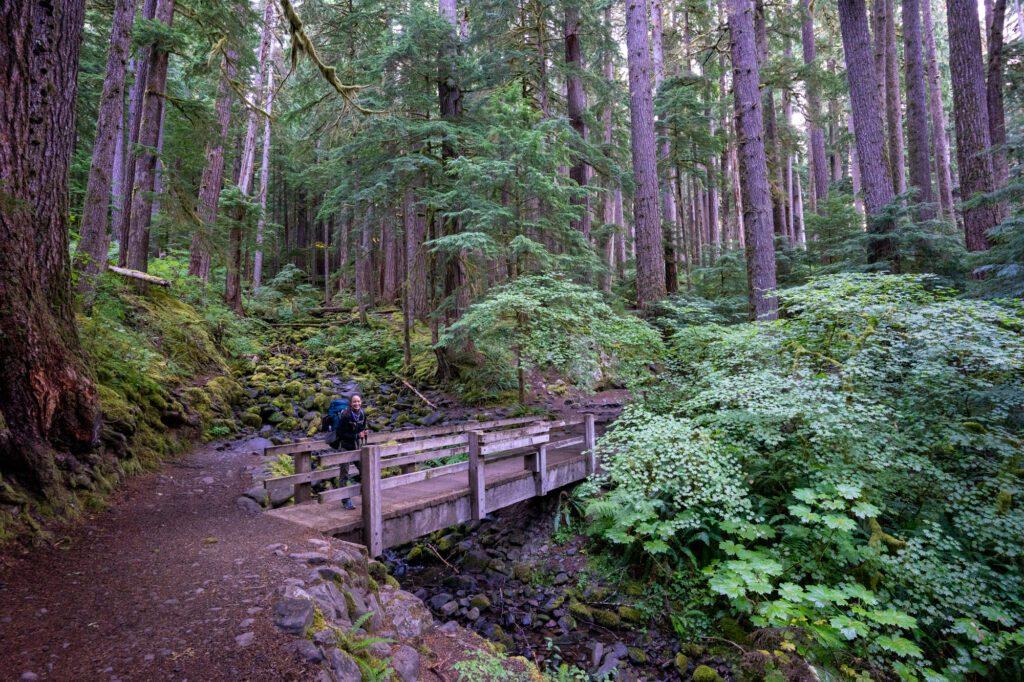
The Hall of Mosses is a short and flat trail that departs from the Hoh Rainforest Visitor Center. If you’re looking for the best introduction to the coastal temperate rainforests that make this place special – and also very wet – this is it.
More adventurous hikers shouldn’t be deterred by the short distance. What it lacks in distance, the hike makes up for in sheer beauty. The trail brings you through an absolutely enchanting verdant forest where statuesque trees are elegantly draped with tangles of thick moss.
Along the way, you can read educational signs with information that teaches you about Washington’s rainforests and all of the flora and fauna thriving within them. If you’re lucky, you may even spot the resident Roosevelt elk along the way!
The Hoh Rainforest parking lot is the busiest in the park, and it is not uncommon to have a line at the rangers station with a “one in, one out” policy that can mean waiting for an hour to get in. We know because we accidentally got a late start with some friends on one of our recent trips, and didn’t arrive until almost 10am.
Get an early start. Not only will you bypass the lines, you will also have a much more tranquil experience in the early morning, when there will be fewer people out and about (and more elk).
The Spruce Nature Trail (The Rainforests)
- Length: 1.2 miles roundtrip
- Elevation Gain: 230 feet
- Trail Type: Loop
- Difficulty: Easy
- Trailhead Location: Hoh Rain Forest Visitor Center
- Pass Required: National Park Pass
The Spruce Nature Trail is another highly accessible hike departing from the Hoh Rainforest Visitor Center.
This trail allows you to walk among the splendor of moss-covered giants on this flat, family-friendly trail. Pair the Spruce Nature Trail with the Hall of Mosses for an introduction to the Hoh Rainforest that is perfect when hiking with kids.
The scenery is splendid, the path is well-maintained and more or less flat, and the educational signs along the way are a great way to learn more about the abundant life within the rainforest.
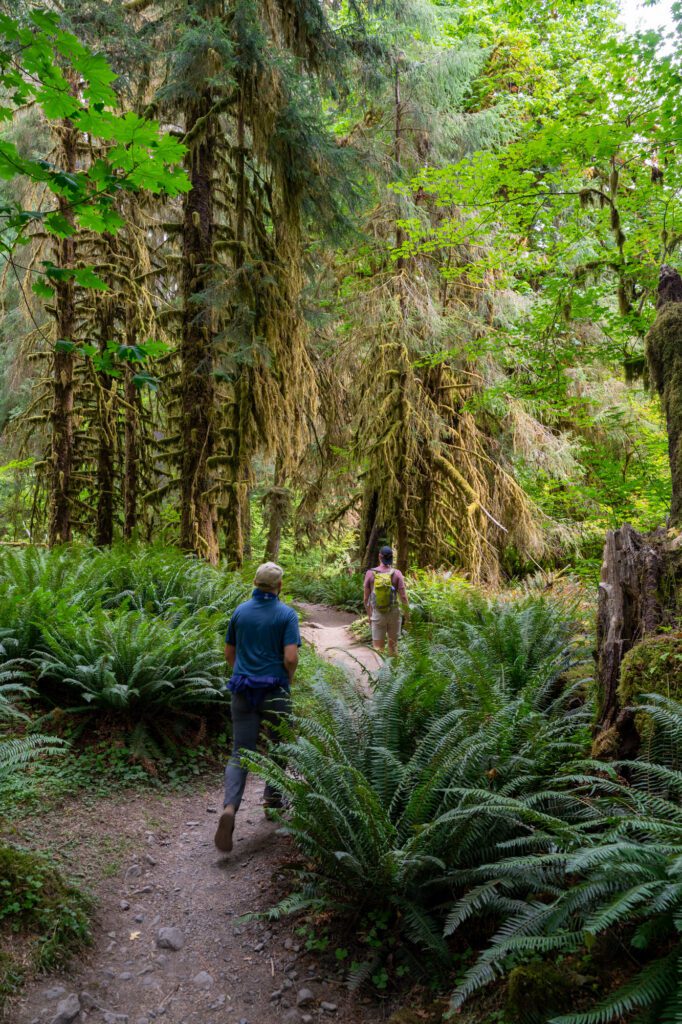
The Hoh River Trail (The Rainforests)

- Length: 10.5 miles roundtrip
- Elevation Gain: 300 feet
- Trail Type: Out and Back
- Difficulty: Moderate
- Trailhead Location: Hoh River Trailhead
- Pass Required: National Park Pass
We really enjoy this trail because it’s a great way to experience the magic of the Hoh Rainforest without the hordes of people on the Hall of Mosses trail.
It’s a short, relatively flat meander through the rainforest along the Hoh River.
The trailhead is located at the Hoh Rainforest Ranger Station, the busiest parking lot in the park.
While the trail brings you to Five Mile Island is on the lengthier side, the relatively flat terrain makes it a very accessible and enjoyable amble through spectacular rainforest. You can also choose to turn around at any point if you’re not up for the full excursion.
Take your time on this hike, walking along the abundant river valley, soaking up the magic of the Hoh as you marvel at the trees covered in layers of moss, search for birds, and drink up views of the Olympic Mountains rising above the river valley.
Stop at one of the many rest points along the way for a snack or lunch break, where you can pause and take in all the sights and sounds of the rainforest.
The trail is accessible year-round and is blissfully free of tourists in the wintertime (although significantly damper and cooler, of course).
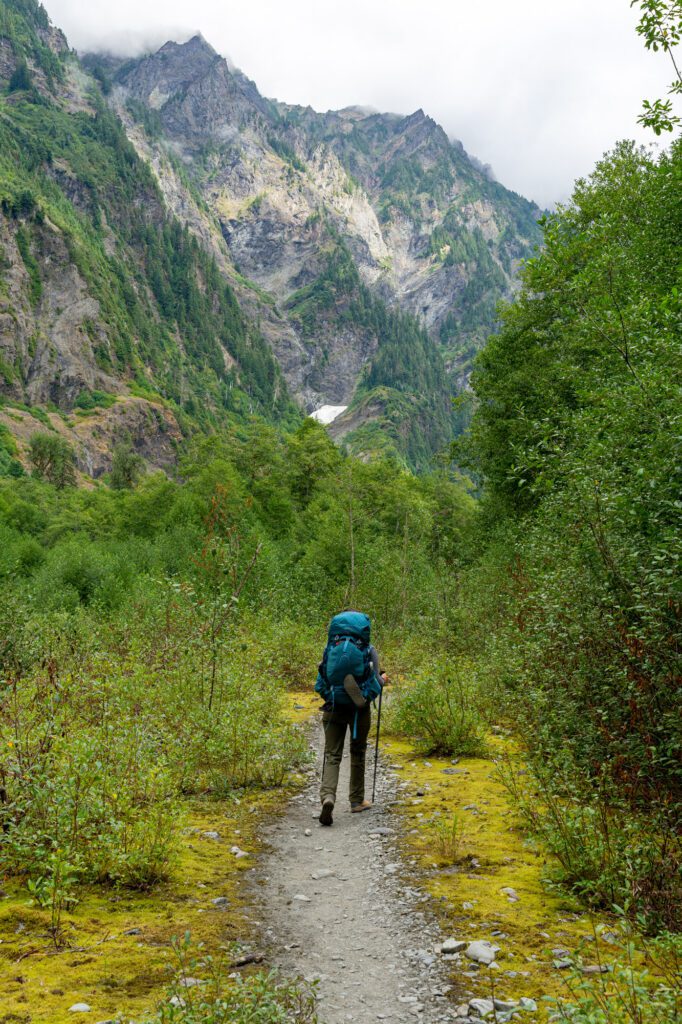
The Enchanted Valley Trail (The Rainforests)
- Length: 27.8 miles roundtrip
- Elevation Gain: 3,700 feet
- Trail Type: Out and Back
- Difficulty: Very Difficult
- Trailhead Location: Graves Creek Trailhead
- Pass Required: None
We snagged permits to do the Enchanted Valley Trail a few summers ago, and we were absolutely ecstatic because they’re not particularly easy to get.
At the end of this long and incredibly picturesque excursion through the lush Quinault Rainforest is a fun reward for those who go the distance.
The Enchanted Valley chalet has been sitting in this lush valley since the 1930’s, when it served as a retreat for hikers and horseback riders.
Currently, it is closed to hikers but still makes for an interesting and historic stop along the trail, surrounded by incredible views of the snow-topped Olympic Mountains.
This is a long hike. It’s not particularly difficult in terms of elevation, but it is certainly not doable as a day hike (at least for most hikers, us included).
Instead, it’s best as a two night backpacking trip, which gives you a night on the way out to the valley, and a night in the valley itself (which you definitely shouldn’t miss).

Now, this is a very popular backpacking trail, so expect to encounter plenty of others around the way. That isn’t necessarily a bad thing, but there were almost 100 people camped out in the Enchanted Valley when we were out there. Set your expectations accordingly.
The hike begins at the Graves Creek Trailhead. You’ll start out along an old road enveloped by towering trees. In the forest roam deer, coyotes, bobcats, bears, mountain lions, elk, and other woodland creatures.
The old road ends after two miles and you’ll continue on a steep descent into forest to the East Fork Quinault River. Cross a bridge and a lovely gorge and follow the winding trail up and down as it runs parallel to the river.
At 6.7 miles in, you’ll reach O’Neil Creek Camp and ahead of you lie several creeks to cross, including No Name Creek and Pyrites Creek, as well as a handful of campsites.
Once you pass Pyrites Creek, continue climbing through woodlands to reach the valley and about half a mile from the chalet, you’ll pass through a gate.
It is important to note that camping permits must be reserved ahead of time, here. Olympic National Park only gives out a limited number of permits, so it is best to plan ahead during peak season.
Bear canisters are required for backcountry camping in Olympic National Park, which can be rented from the Wilderness Information Center in Port Angeles.
We have an entire guide dedicated to hiking the Enchanted Valley Trail, including logistics like how to get permits and what to expect along the way.
The Best Time to Hike in Olympic National Park
In general, the rules about hiking in the Pacific Northwest largely apply to Olympic National Park.
However, because of the lower elevation of most of the park, more of the hiking trails in Olympic National Park are accessible year round than in other Washington national parks and main hiking areas.
Summer is the best time to go hiking in the park. It’s the warmest season with the lowest precipitation (go figure).
Skies are typically blue and sunny, through the rainforest and the coast do receive more rainfall than elsewhere in Western Washington, including during summer.
Rainfall is still much lower than other times of the year and hiking is generally fantastic from mid-June through September.
Extended daylight also means you can maximize your time in the park. Of course, the park is also crowded during summer, so weekday visits and early morning starts are best when possible.
Spring and fall are also pleasant times to go hiking. You’ll need to be prepared for more precipitation (like, a lot more) and plenty of mud, but most of the coastal hikes and hikes around Hurricane Ridge are accessible. Some might have snow in early spring and late fall, but it depends on the year.
Fall is the runner-up for best seasons to hike in Olympic National Park. Temperatures are slightly cooler, and days can be more rainy but overall the conditions are still prime until about mid-late October, depending on the year.
During the fall, you’ll also have the bonus of orange and golden foliage, of course. Lake Crescent and the Hoh Rainforest offer some of the best fall foliage hiking experiences.
Winter is great to beat the crowds, and most trails are actually still accessible. Higher elevation trails, like the ones around Hurricane Ridge, are probably going to be snow-covered, but the coastal hikes are still available to committed hikers.
I say “committed hikers” because it’s very likely going to be raining, windy, and cold.
Backcountry Hiking in Olympic National Park
Backcountry hiking is a phenomenal way to immerse yourself a little deeper into the national park.
As you’re there to stay for a night or two, you’re able to trek a bit further and have the privilege of experiencing the park at night and in the early morning, when it’s most serene.
Backpacking always takes a bit more planning, including advance route research, bringing sufficient food, water, and layers, and camping gear.
These trails are best reserved for more experienced hikers who have both the physical capability and the wilderness knowledge to independently trek in the backcountry.
A couple of things to know before you go:
- Fire Safety. Due to rising temperatures and dry conditions, Olympic National Park has a recently revised fire policy that bans all fires except those in established fire rings in designated areas. No fires are permitted in the backcountry.
- Bear Safety. Bear canisters are required on all overnight trips in Olympic National Park. Keep your food, utensils, cooking supplies, and scented toiletries in the canisters at night and when you’re not at the campsite to keep away bears and other wildlife. Wilderness Information Centers have bear canisters for rent, though they can run out and are reservable in advance, so if you frequent the backcountry, you may want to invest in buying your own.
How to Get a Backpacking Permit in Olympic National Park
In order to limit foot traffic through the park, backcountry permits are required for overnight trekking. Advance reservations are required for the camping season, which lasts from May 15 to October 15th in Olympic National Park.
Reservations for the season open in the spring (in 2023, it was April 15) and can be made online at recreation.gov.
There are a few pieces of information that you’ll need to know before you make your reservations:
- Trailhead (in and out)
- Entry date
- Number of nights
- Group size
Olympic National Park Backcountry Hiking Routes
Here are three popular backpacking routes in Olympic National Park (we’ve done and enjoyed the first two).
- The Enchanted Valley: This nearly 28-mile trek embodies some of the very best of the Pacific Northwest. The trail to the Enchanted Valley runs parallel to the Quinault River for much of the way, through spectacular meadows with views of snowy peaks, and lands you at the Enchanted Valley chalet. Lots of wildlife lives here so if you’re lucky, you may cross paths with deer, elk, or even a bear.
- The High Divide: A 19-mile excursion through the subalpine terrain of the Olympic Mountains, High Divide is a trek where you can happily take your time and soak up the beauty of the wilderness. You’ll cross over many lakes along the way, which are a perfect spot for camping.
- Shi Shi Beach: While Shi Shi is very doable as a day hike, the experience of camping on the beach along the Pacific Ocean is something special and part of the classic experience on the Olympic Peninsula. The hike is flat and follows along the beach, leaving you with plenty of time to soak up the coast. Sunsets here tend to be pretty magnificent (if you can time it for a cloudless evening).
Hi there! Which campsites did you stay in when you backpacked The High Divide / Seven Lakes Basin (Lake Crescent / Sol Duc Valley) and how did you break up the trip?
Hey Ashley! We did three days / two nights, and stayed a night each at Lower Bridge Creek (quiet and private, no toilets) and Deer Lake (more busy). We were booking relatively last minute, so we had to compromise a bit. If we were to do it again, we’d stay at Heart Lake on the way up, spend the night up on the High Divide at Lunch Lake (which is very competitive), and probably do the entire way down in one go and skip Deer Lake altogether. If you can spend a night at Lunch Lake on the Divide, which is the best part of the hike, do it! Hope that helps.