Hiking in Mount Rainier National Park (For First Timers)
If you’ve stumbled upon this guide, you’re probably looking for the best hikes at Mount Rainier. We have great news for you – you’re in the right place!
We make regular trips to Mount Rainier National Park from our home base of Portland, Oregon, and spend at least a couple of weekends every summer and fall on the hiking trails in the park.
Whenever I’m in Seattle, which is fairly often since I grew up in the area and my family still lives there (though we now live in Portland), my favorite days are the ones where you can see Mount Rainier as you’re driving east on I-90 from Bellevue into Seattle.
There’s nothing better than a clear day in Seattle when you can see Mount Rainier to the south, the Olympics to the west, the Cascades to the East, and Mt. Baker to the north. Truly spectacular.
It’s rare enough with the gray and drizzly weather that you often find in Seattle between roughly October and May (okay, July) that it’s always a treat to catch a glimpse of the towering snowy peak.
Well, we’re here to tell you that it’s even better up close, which you can only really experience by heading roughly two hours south of Seattle and hitting the trails in Mount Rainier National Park.
In this guide, we’ll go through the best hikes in Mount Rainier National Park, according to us, two Pacific Northwest locals. I (Matt here!) grew up in the Seattle area, and we have now have settled in Portland, Oregon, which is close enough to Mount Rainier to make an easy weekend getaway.
There are options for everyone in the park – from grizzled trail veterans looking for a rugged climb, to families who want to take in some amazing views with minimal effort – and we’ve done our best to cover them all (both in terms of hiking them, and also writing about them).
Sound good to you? Let’s get into it.
Disclaimer: Some of the links in this post, like hotel links, are affiliate links, meaning at no additional cost to you, we make a little bit of money if you click through and book. That being said, we would never recommend something to you that we don’t stand behind 100%.
A Quick Mount Rainier Geography Overview
Before we get into specific hikes, we really think it’s important to take a second to talk about the geography and layout of the park.
The park essentially wraps around Mount Rainier’s base, and the only way to get between the various regions is to circumnavigate the huge mountain.
There are four main areas of Mount Rainier National Park that we’re going to cover in this guide: Paradise, Sunrise, Ohanapecosh, and Mowich Lake.
They’re not particularly close to each other, so knowing where each hike is located within the park is important for planning a successful visit.
For example, going between Paradise and Sunrise takes a full 90 minutes, and that’s only when the roads are open in the summer (the road closes in the winter around November).
The guide below is organized by region for that reason.
Our point here is that you should think long and hard about which region or regions you want to visit.
Here’s a quick summary of each to help you decide which area is right for your hiking adventure.
- Paradise – Best for first-time visitors: Paradise is the most popular area to visit, located on the southern side of the Mountain, and home to some great day hikes at Mount Rainier. It’s where you’ll find the best waterfall hikes at Mount Rainier, along with countless meadows bursting with wildflowers in the summer.
- Sunrise – Best for hikes with epic Rainier views: Sunrise, which is on the east side of the park, has a large network of hiking trails winding through the rugged yet stunning wilderness. It is also home to the highest point in Mount Rainier National Park that you can drive to. This is probably the part of the park with the best selection of epic, long hikes to tackle.
- Ohanapecosh – Best for family-friendly hikes: This part of the park is at the southeastern corner, near the Stevens Canyon Entrance of the park. There are a couple of family-friendly hikes in the area, a large campground (that’s generally the least competitive in the park), and it’s a good central location between Paradise and Sunrise. However, it’s basically an old-growth forest, so you’re not getting those unobstructed Rainier views.
- Mowich Lake – Best for peace and quiet: Mowich Lake, on the northwestern side of the Mountain, is the quietest area of Mount Rainier National Park. It is free from the tourist hype of Paradise and Sunrise, and the long and arduous bumpy gravel road to get there cuts the number of visitors significantly. There are two great hikes here though that are worth braving the bumpy drive for (in a high-clearance vehicle).
Here’s a map to help you visualize how those regions fit together.

If it’s your first time at Mount Rainier National Park and you only have a couple of days (say, a weekend), our recommendation would be to focus on Paradise (and that’s where you should base yourself).
If you have more than two days, add a day trip to Ohanapecosh. If you have more than three days, spend a day or two hiking around Sunrise.
The Best Hikes in Mount Rainier National Park: A Complete Hiking Guide
There are so many great opportunities to enjoy the incredible natural beauty of Mount Rainier for all levels of experience and fitness.
Here are our top picks, organized by area so you don’t end up with a longer-than-expected drive to a hike you fell in love with.
If you’re making us choose our absolute favorite Mount Rainier hikes, here are our top five.
- The Skyline Trail (Paradise). A classic, with wildflowers strewn about sweeping meadows, a tough climb with views that only get better, and an up-close-and-personal view of Mount Rainier.
- The Burroughs Mountain Trail (Sunrise). Similar views to the Skyline Trail, but instead of hiking through meadows, it’s a barren alpine landscape.
- The Comet Falls Trail (Paradise). By far the most impressive waterfall in the park, and it’s a lovely hike following the creek up to the viewpoint. Plus, a second waterfall, which was a nice surprise.
- The Naches Peak Loop (Sunrise). The best bang for your buck hike in the entire park (maybe the entire state?).
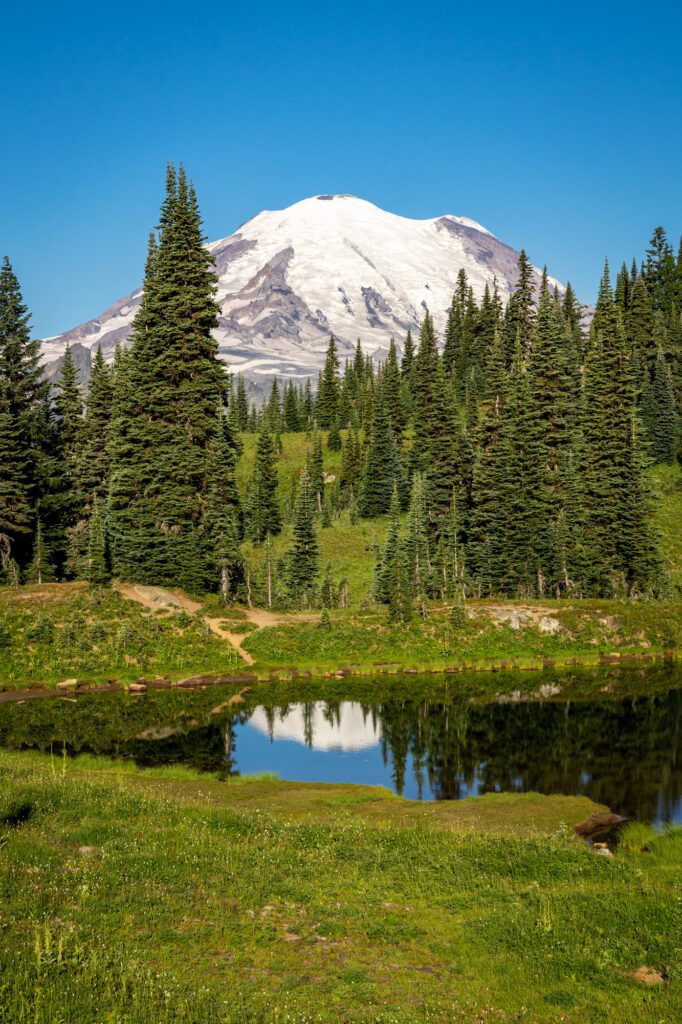
- Bench and Snow Lakes (Paradise). A relatively less trafficked hike in Paradise with two alpine lakes and a picture-perfect Rainier reflection.
If you’re looking for wildflowers in late July / early August, head to Berkeley Park near Sunrise, or the High Lakes Trail near Paradise, which is where we’ve had the best luck.
The best thing to do though is to talk to the rangers stationed at the visitor center when you arrive to ask where they’ve heard wildflowers are blooming.
Important for 2024: To deal with the ever-increasing crowds visiting Rainier each year, the park has instituted a timed entry permit for visitors to the Paradise and Sunrise corridors in 2024. For more information, head to the NPS website (linked above).
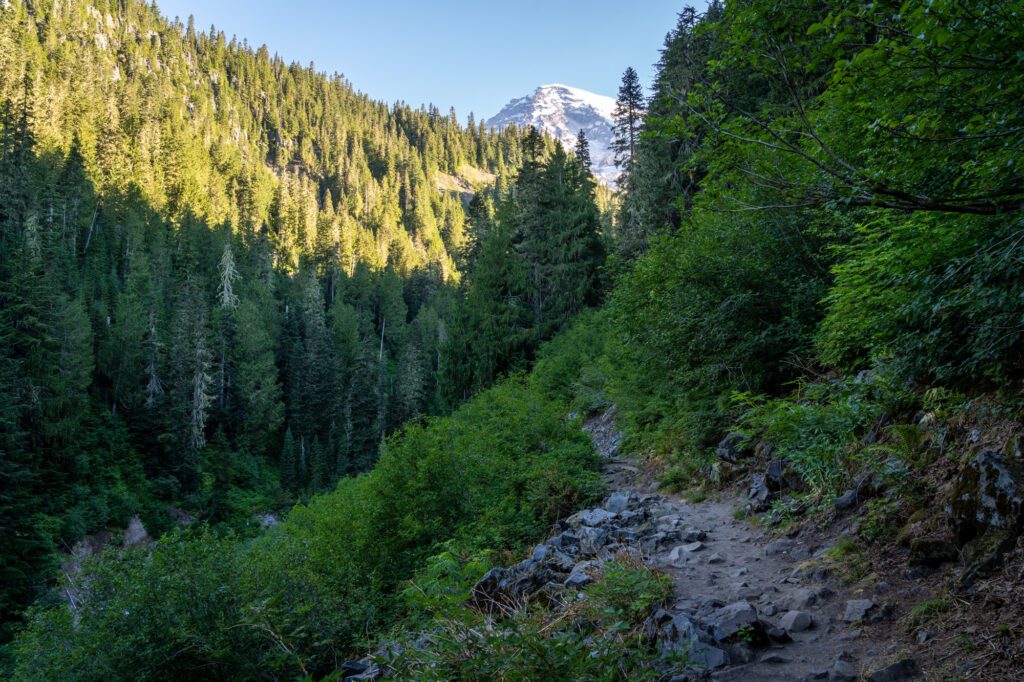
The Best Hikes at Paradise
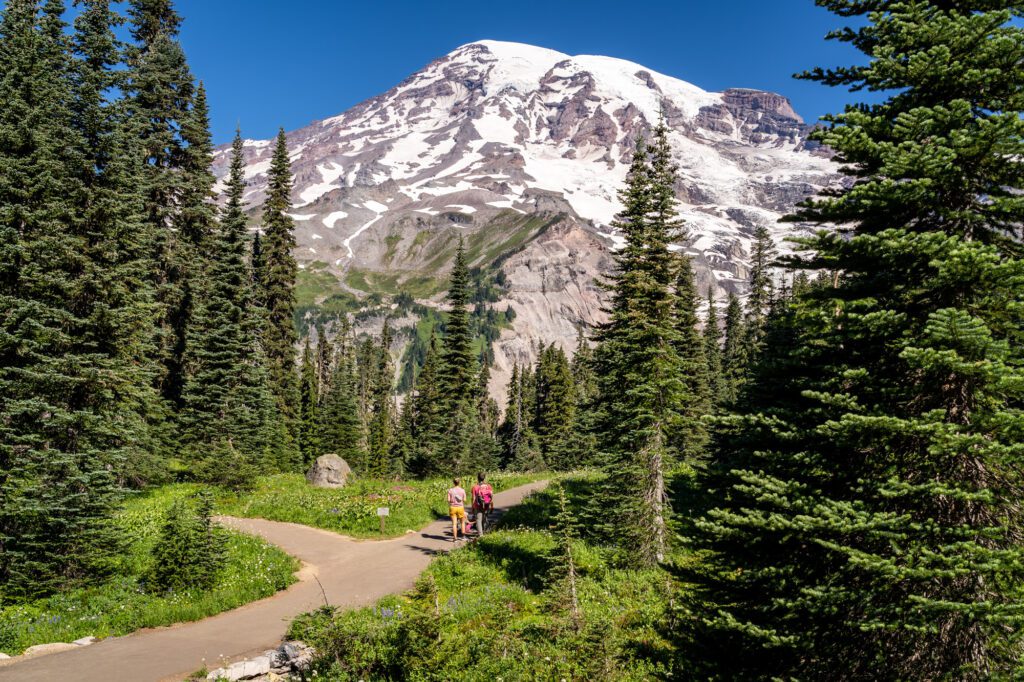
Paradise is the most popular part of the park, and is our top recommendation for first timers. In this southern part of the park, you will find some of the best hikes for first-time visitors.
There’s a good blend of moderate and easy hiking trails here, so whether you’re a trail veteran or a new hiker, you’ll find something for you. And it will have spectacular views of Mount Rainier.
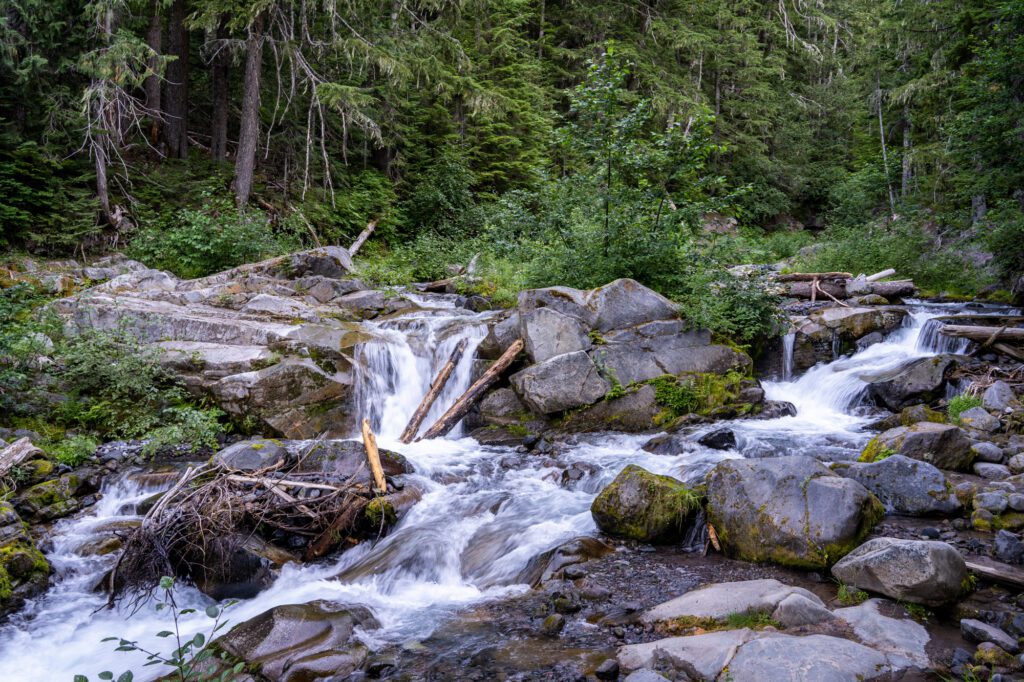
This is also the part of the park that has the highest concentration of waterfalls. Though we’re not including them as separate hikes here (because they’re basically a short walk from the parking lot), Christine Falls, Narada Falls, and Myrtle Falls are all well worth a visit.
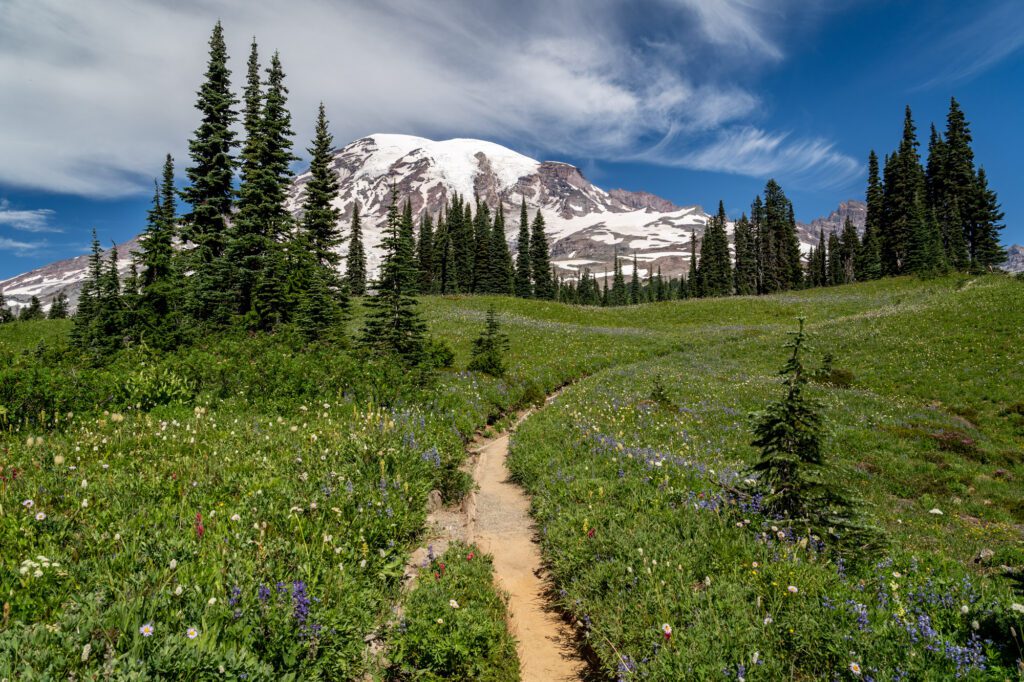
The Skyline Loop Trail
- Length: 6 miles
- Elevation Gain: 1,800 ft.
- Trail Type: Loop
- Difficulty: Moderate
- Trailhead Location
We’ve done this hike twice now – once in each direction – and it’s our favorite hike in the park, full stop.
In fact, it’s in a two or three way tie for the best hike in Washington State.
If you only have time for a single long hike when you’re in the park and you haven’t done the Skyline Trail before, this is the one you should do.
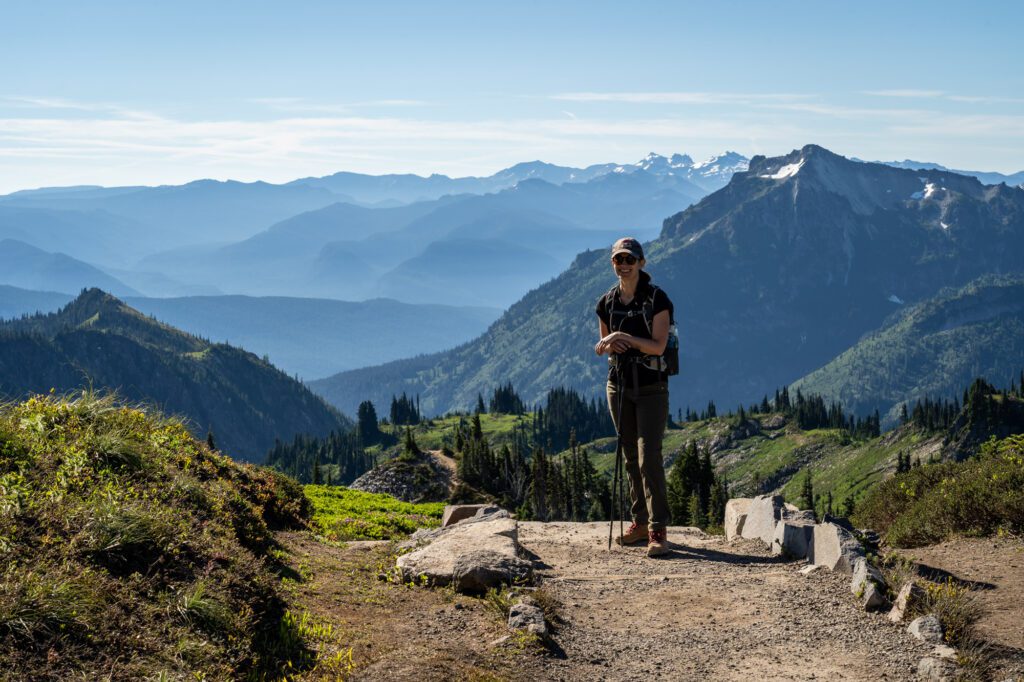
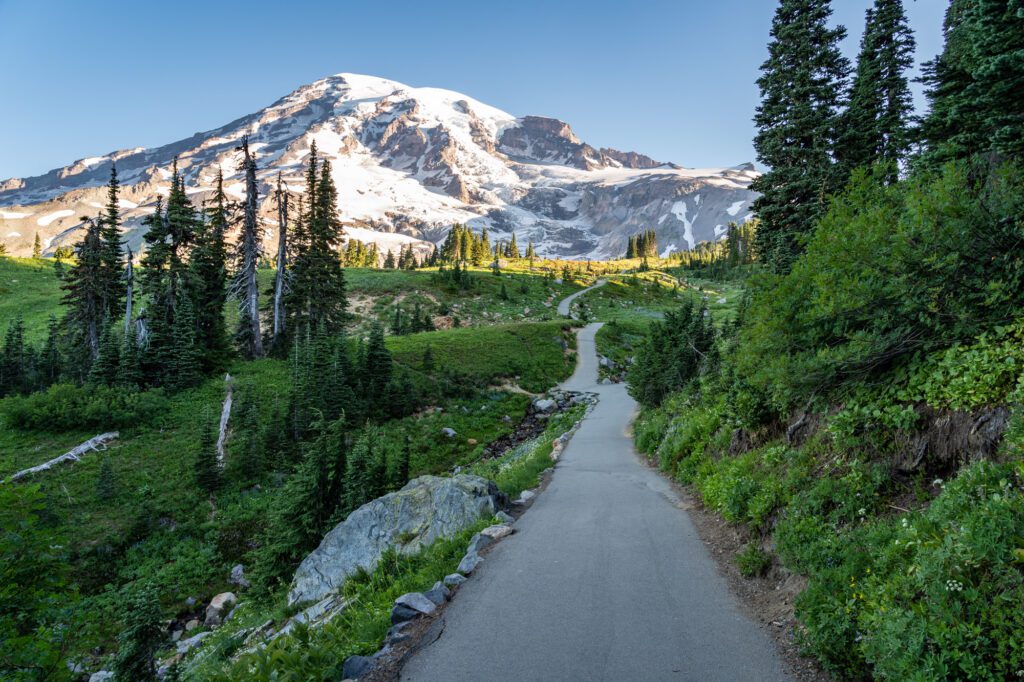
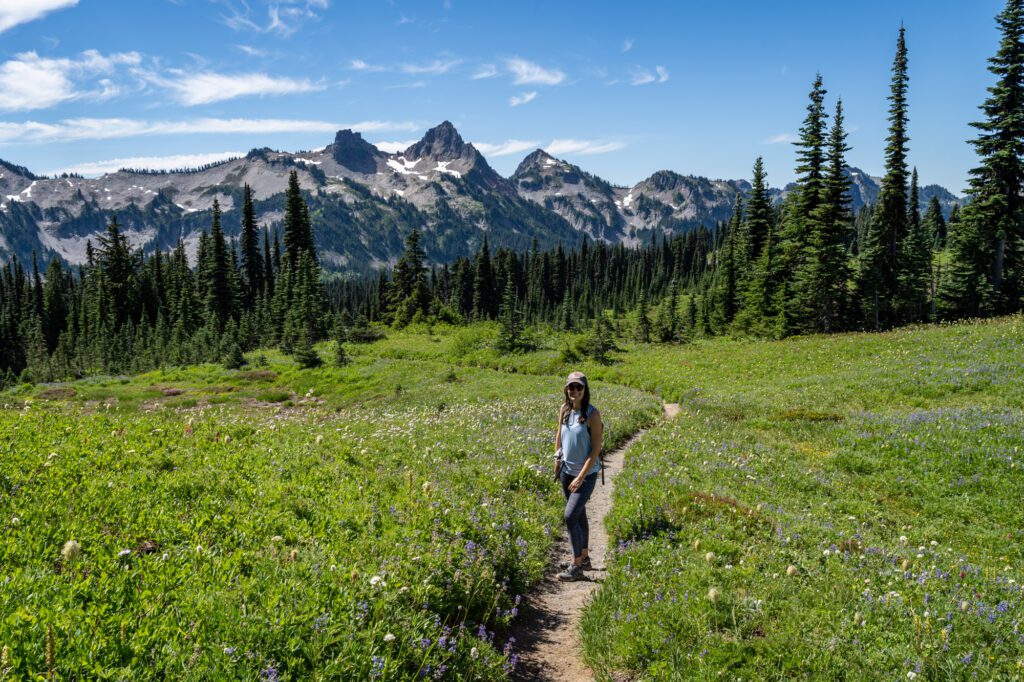
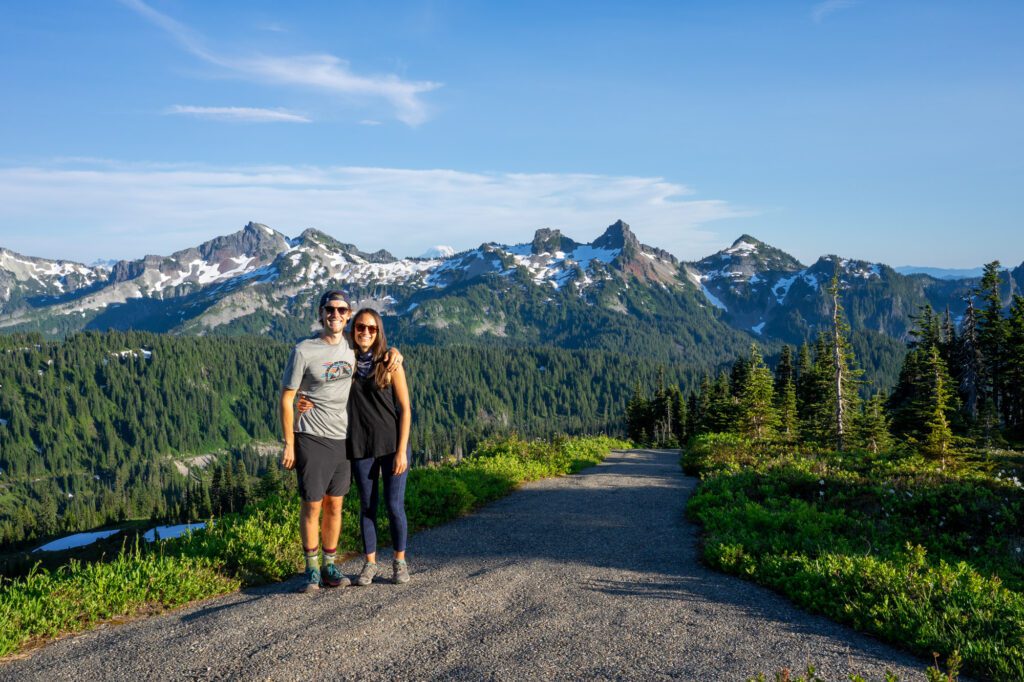
The views of Rainier and the surrounding Tatoosh Range from Panorama Point are simply spectacular, and along the way you’ll be treated to blooming wildflowers (in the summer) and an abundance of wildlife, with cute and fuzzy marmots harassing you for snacks on the way up. DO NOT FEED THEM.
It’s a VERY busy trail, so you’ll want to get on the trail relatively early. We started right around 7:00 am, and the parking lot was already half full.
Before we went, we read various recommendations on which direction to go – clockwise or counter-clockwise. We’ve now done it both ways, and here’s the gist.
Basically, if you can get an early start, go clockwise where you’ll have the view of Mount Rainier straight ahead throughout the steeper climb.
If you’re getting a later start, go counterclockwise so that you’ll have three miles of relative solitude on the eastern half before making your descent on the busiest part of the trail
Definitely make sure to stop by Myrtle Falls on the way up, which is probably the most spectacular waterfall I’ve ever seen thanks to the snow capped peak of Mount Rainier in the background (though Comet Falls, which we’ll get to in a bit, is more impressive as a standalone waterfall).
We have an entire guide to hiking the Skyline Trail, which has far more detail and covers everything you need to know to hit the trail confidently and safely.
The Bench and Snow Lake Trail

- Length: 2.4 miles
- Elevation Gain: 600 ft.
- Trail Type: Out and Back
- Difficulty: Moderate
- Trailhead Location
While nearby Reflection Lakes is nice (and it’s right off of the road), the Bench and Snow Lakes Trail is worth the extra effort because that effort means there will be far fewer people at either of the lakes.
They’re not going to be deserted – you’re still in a national park, after all – but the short hike in means you’ll have relative solitude compared to the popular Reflection Lakes spot.
We did this hike mid-afternoon on a summer weekday, and found only a few groups sharing the trail with us.
The trail starts out from the parking lot along Stevens Canyon Road, just east of Reflection Lakes, where there is room for 12-15 cars. Get there early for parking, or later in the day when people on a day trip from Seattle have started to leave.
The first quarter mile of the trail starts with an uphill climb, ascending 200 feet via a set of stairs.
There are some nice parts of the trail where you’ll find yourself in an open meadow – make sure to look over your shoulder to see Mount Rainier looming behind you.
From there, the trail descends back to the level of the parking lot, which is where you’ll find the first of two nice lakes on this hike, Bench Lake, at just under a mile in.
This is the lake where you’ll find amazing reflections of Rainier on the surface of the water, at least on a calm, clear day.
Another quarter of a mile on the trail brings you to Snow Lake, the second lake on your hike.
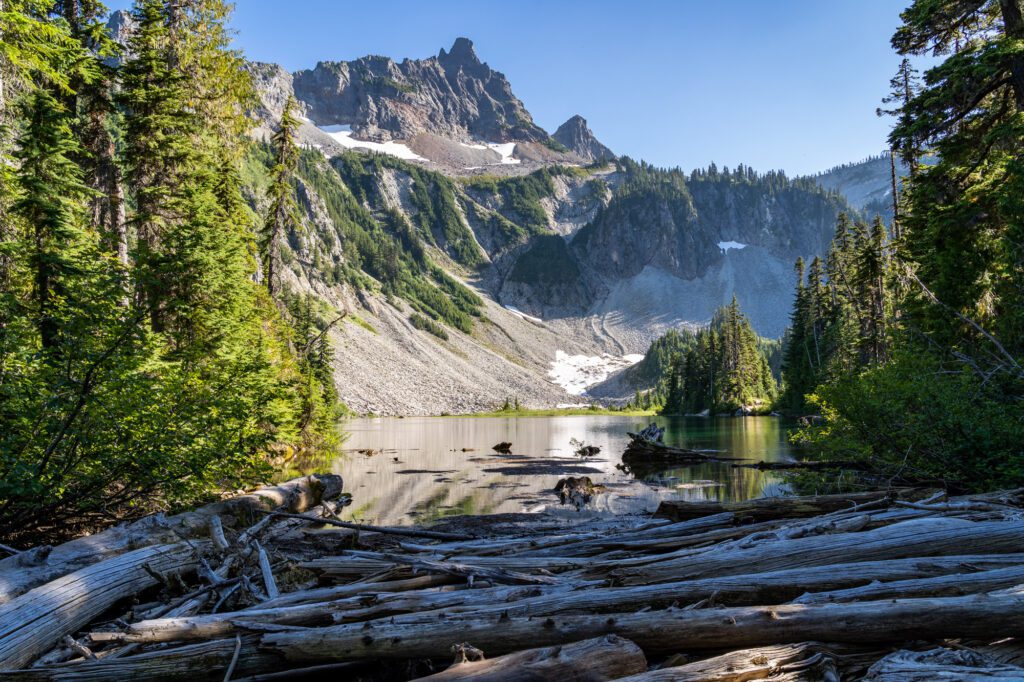
If you take a left you can walk along the northwestern shore of the lake, which is where you’ll have the best view of the lake itself. You can also head right, where you’ll be able to get down to lake level.
The Lakes Trail Loop
- Length: 6.3 miles
- Elevation Gain: 1,800 ft.
- Trail Type: Loop
- Difficulty: Moderate
- Trailhead Location
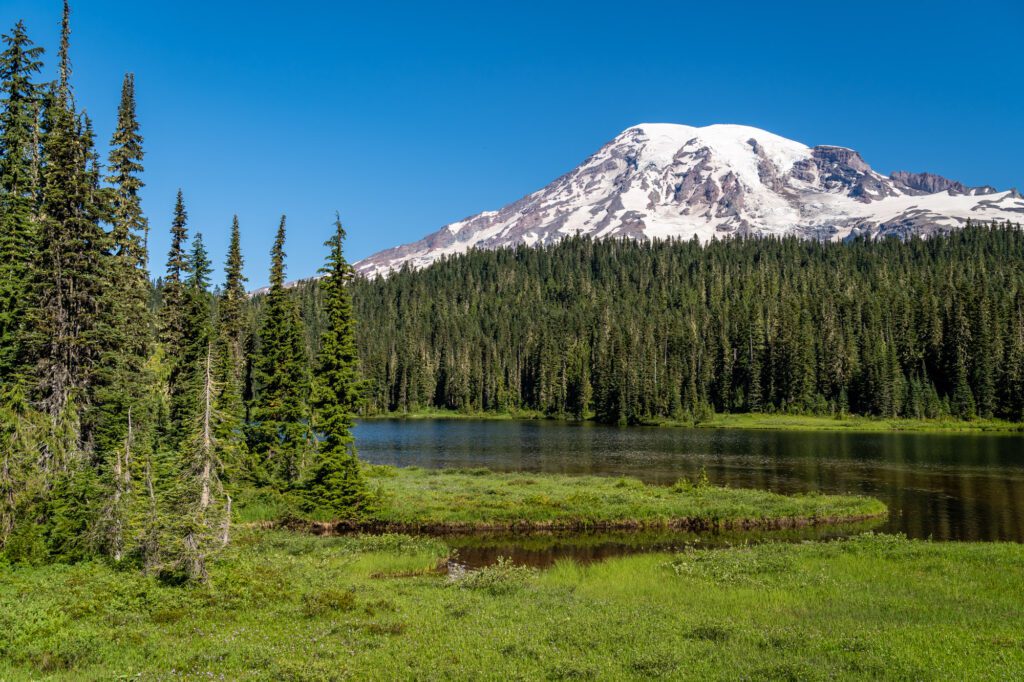
The highlights of this trail are Reflection Lake and Myrtle Falls, be sure to spend some time at both so you can admire the views. We also like that it’s super customizable, with a few different add-ons you can do if you’re feeling up for it.
You’ll start from the southeast part of the parking area at the Henry M. Jackson Visitors Center, where you’ll head south away from the Mountain on the Lakes Trail.
Take a left at the first fork, then a right at the second fork to stay on the Lakes Trail, which will continue to Reflection Lakes.
The views here are nothing short of spectacular – we came here for sunset and sunrise on our last visit, and the picture-perfect reflection of Mount Rainier in the water is a stunner.
You can drive here, if the hike sounds like too much for you.
Loop around the south end of the lakes, admiring the views the whole way around, and start the return journey, heading north along the Lakes Trail to meet up with the Skyline Trail.
Take a left at the junction with the Skyline Trail and stop by Myrtle Falls on the way back to the car.
If you want a longer hike, add the 1.2 mile out-and-back to Narada Falls for one of the best waterfalls in the park, or the 1.4 mile lollipop on the Nisqually Vista Trail (below) which has incredible views of Rainier and the quickly receding Nisqually Glacier.
The Pinnacle Peak Trail
- Length: 3 miles
- Elevation Gain: 1,600 ft.
- Trail Type: Out and Back
- Difficulty: Moderate / Hard
- Trailhead Location
Full disclosure here – we haven’t gotten around to hiking the Pinnacle Peak trail ourselves just yet. However, it was on our list for this last trip because a friend told us that it was their favorite view of Rainier in the entire park.
The climb here is no joke, and is the reason we ended up skipping it (it scared us off, since we had done the Skyline Trail in the morning).
This hike is essentially straight up, then straight back down again. However, the end point at Pinnacle Peak gives you a view across the valley to Rainier’s south face.
One thing to know here: You can (and should) stop at Pinnacle Saddle, which is a mile or so into the hike, if you’re an inexperienced hiker who isn’t comfortable navigating a narrow trail with loose gravel.
The last half mile or so of the climb up is essentially a scramble up loose rock, which can be a little hard to navigate.
The Alta Vista Trail
- Length: 1.8 miles
- Elevation Gain: 600 ft.
- Trail Type: Out and Back
- Difficulty: Easy / Moderate
- Trailhead Location
This is a short but intense hike up to a nice viewpoint, where you’ll have an unobstructed view of Rainier’s south face and, arguably more impressive, the Tatoosh range.
The trail to get up here is incredibly steep. To the point where Alysha and I were remarking that it’s the steepest trail we’ve ever encountered. It is paved, though, which probably helps.
Keep an eye out for marmots up here!
Also, this would make an excellent snowshoeing trail in the winter time.
The Nisqually Vista Loop
- Length: 1.1 miles
- Elevation Gain: 200 ft.
- Trail Type: Loop
- Difficulty: Easy
- Trailhead Location
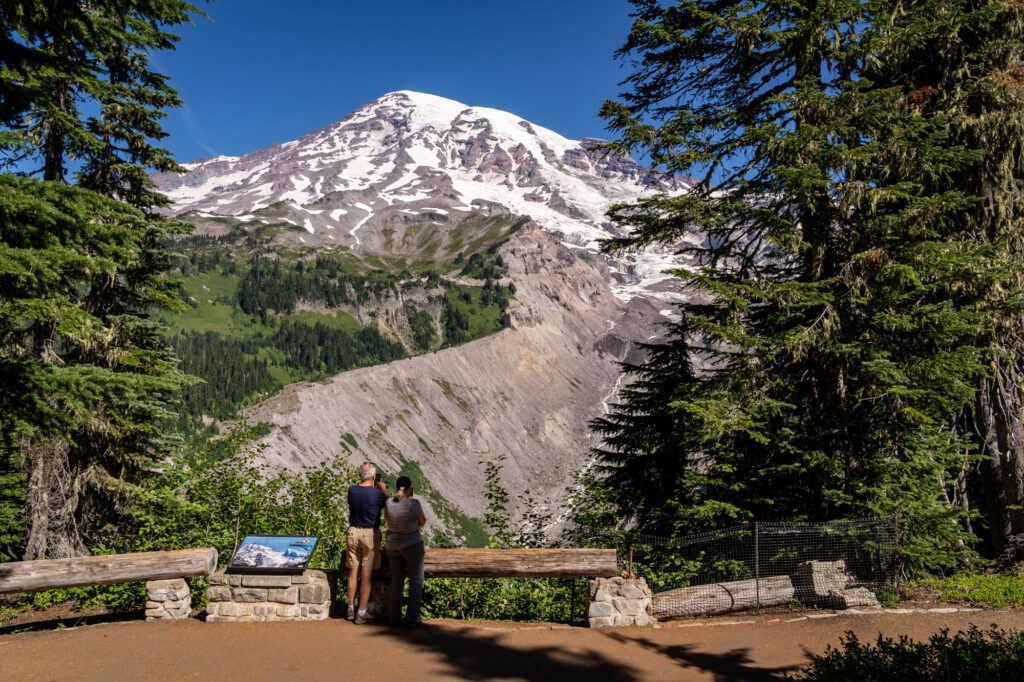
The Nisqually Vista Trail is a really easy hike, perfect for families with kids who aren’t super interested in hiking, that is paved most of the way up to the viewpoint.
It overlooks the Nisqually Glacier, which has mostly receded now, and the Nisqually River Valley which was carved out by the Glacier.
There are some really nice wildflowers to be seen here in the summer, and it makes for a nice afternoon excursion after a longer morning hike.
Comet Falls
- Length: 3.8 miles
- Elevation Gain: 1,250 ft.
- Trail Type: Out and Back
- Difficulty: Moderate
- Trailhead Location
We really like the hike to Comet Falls, and it’s one that we hadn’t done until our most recent trip to Mount Rainier National Park.
The parking lot here, which is tiny, only has room for 10-15 cars, which means an early start is a good idea. We camped at nearby Cougar Rock Campground and got here at 7:00 am and were the second group on the trail.
Along this entire trail, you’ll have the sound of Van Trump Creek to keep you company (and drown out any noise coming from the road or hikers carrying speakers). It’s a very peaceful journey from the parking lot up to Comet Falls.
It’s a steady climb the entire way, with only one tricky spot: you’ll scale a steep section of trail using a ladder that is maintained by park staff.
Nothing too crazy, but something to know going in if you’re apprehensive about heights.
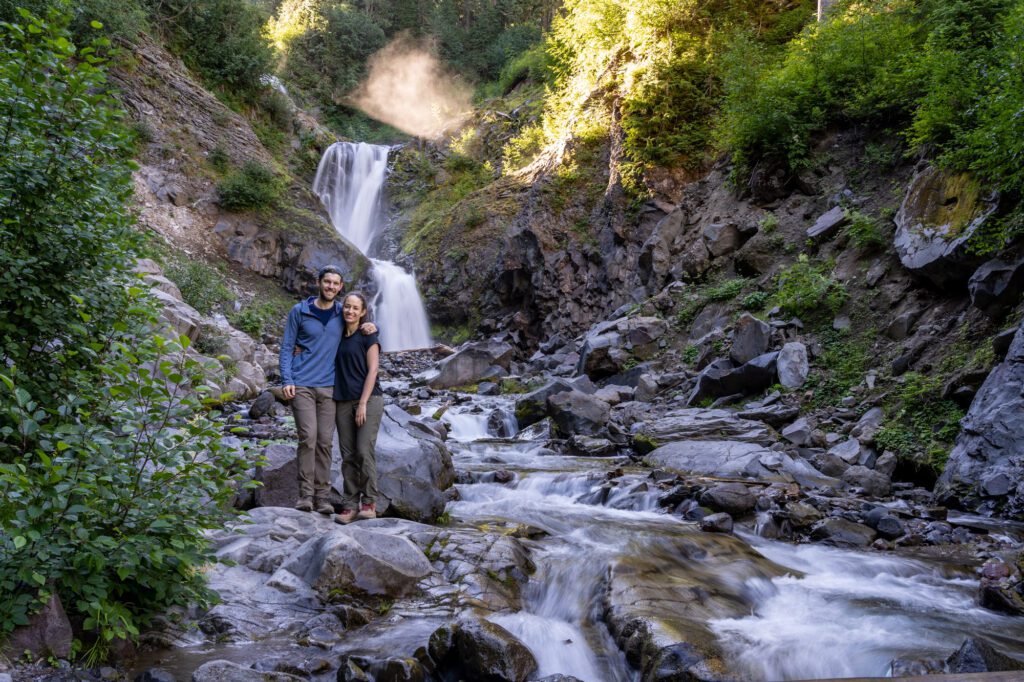
The best part about this hike is that there’s a second waterfall immediately before you reach Comet Falls. It’s called Bloucher Falls, and if Comet Falls wasn’t right around the corner, it would probably be a destination in its own right.
As you approach the falls, you’ll get your first view of the 300 foot high Comet Falls from the overlook, and then you can continue to get closer by hiking along the trail that hugs the hillside to the right.
A Note: In the late fall, winter, and spring, the bridge over Van Trump Creek about a quarter mile in can be washed out due to the raging water of the rising creek, and it becomes dangerous to cross the creek. Read trail reports to check trail conditions before you go!
Van Trump Park
- Length: 6 miles
- Elevation Gain: 2,000 ft.
- Trail Type: Out and Back
- Difficulty: Moderate
- Trailhead Location
If you want to get a little further away from the crowds and take in some less-visited views, this is an excellent add-on to the Comet Falls Trail (above).
It leaves from the same parking lot, and does some extra climbing to reach one of the most beautiful meadows in the entire park.
Van Trump Park sits at about 6,500 feet above sea level with great wildflowers in early August (ish – it depends on the year) with views of Rainier looming in the distance.
It follows the trail out to Comet Falls, then adds an intense 0.5 mile climb that covers 600 feet of elevation gain, which puts you in prime meadow territory.
Unfortunately, we tackled the hike to Comet Falls on our last morning in the park, and had to skip this addition since we had to get back home by the afternoon.
However, Van Trump Park in particular is on our list for our next foray into Paradise!
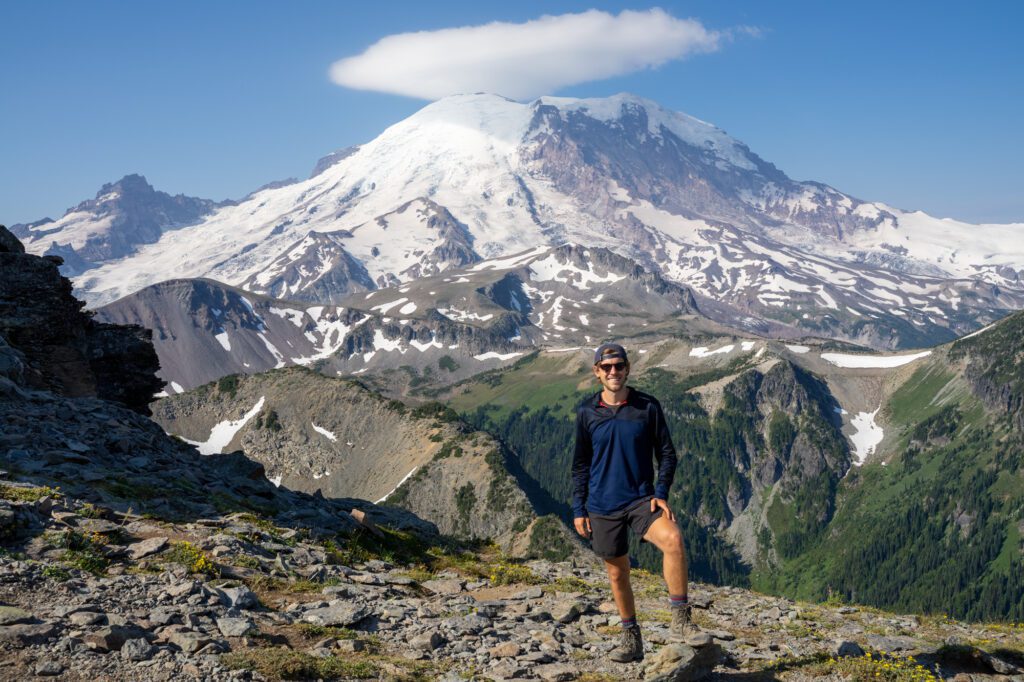
The Best Hikes at Sunrise
Sunrise – specifically the parking lot at the Sunrise Visitor Center – is the highest elevation in the park that’s accessible by car.
This area is home to the best collection of epic hikes in the park, most of which leave right from the Sunrise Visitor Center (though you’ll find a few trailheads along the road in).
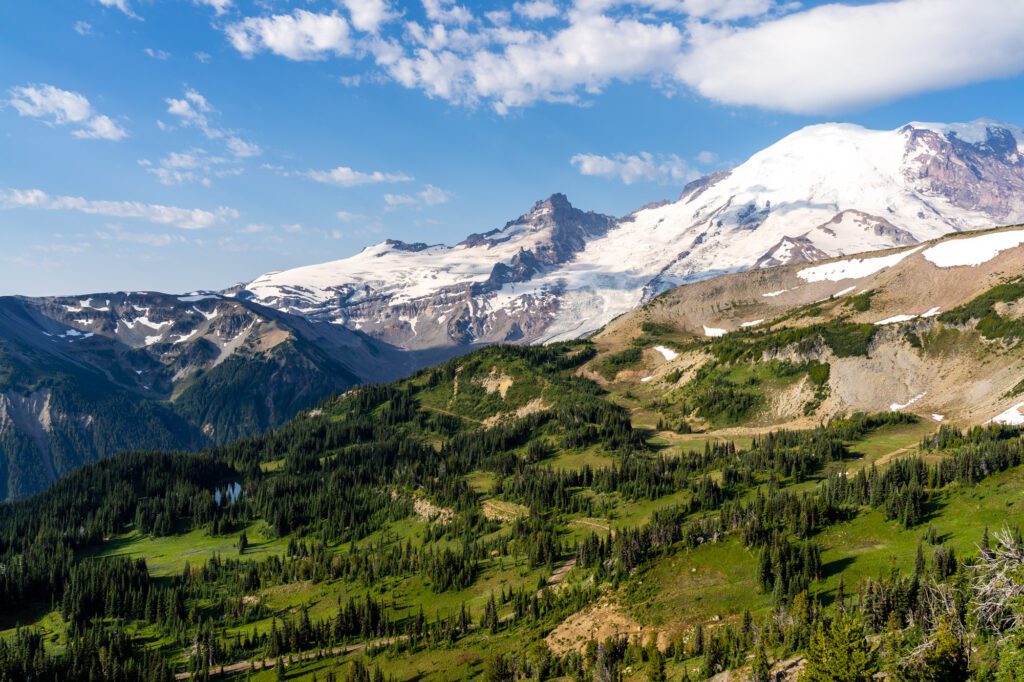
If you’re looking for those in-your-face views of Mount Rainier, Sunrise is a good place to find them.
Particularly on the Mount Fremont Lookout trail, and the Burroughs Mountain Trail, both of which rival the Skyline Trail in terms of showing off the Mountain in all its glory.
The Mount Fremont Lookout Trail
- Length: 5.6 miles
- Elevation Gain: 1,200 ft.
- Trail Type: Out and Back
- Difficulty: Moderate
- Trailhead Location
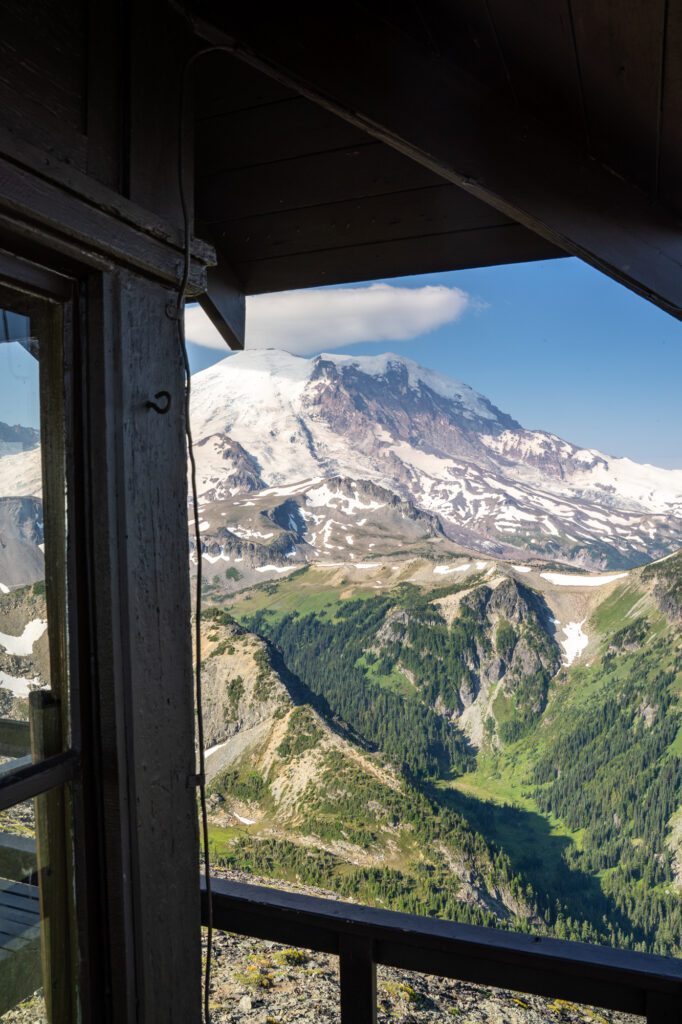
The Mount Fremont Lookout is one of only four remaining fire lookouts in Mount Rainier National Park. It is one of the best hikes at Mount Rainier for panoramic views because rangers used to be stationed here to watch for forest fires.

The hike up to the lookout is just as sensational, with wildflowers, a herd of curious mountain goats, and the ruggedly beautiful mountain terrain. It can be busy but it is well worth braving the crowds.
You’ll start from the Sunrise Visitor Center and head out along the Sourdough Ridge Trail to the junction at Frozen Lake. Spoiler alert: the next several hikes all follow this route and split off at the Frozen Lake junction.
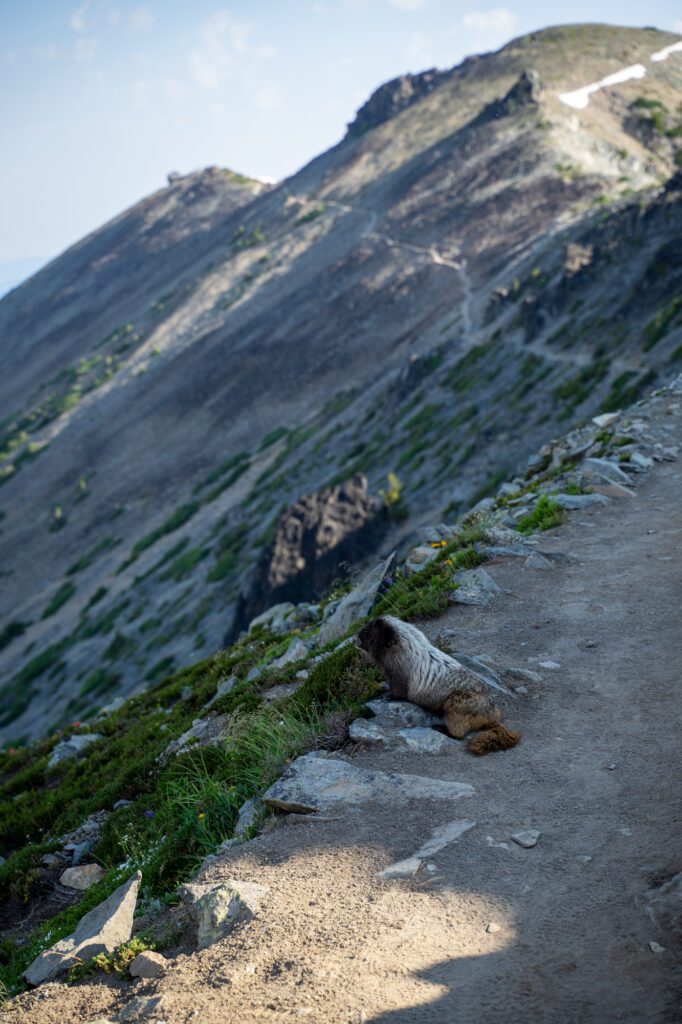
To head to the Mount Fremont lookout, you’ll head right and start the climb up the rocky ridge, which is a great place to see marmots and, if you’re lucky, mountain goats. You’ll follow the ridge as it levels out and eventually brings you to the fire lookout.
Bring binoculars for the view and bug spray for the mosquitos who also enjoy the vistas at the lookout. Seriously, the bugs are no joke.
Oh, and you should go for either sunrise or sunset – although expect to share the sunset with 100 of your new best friends, at least during the summer.
The Sourdough Ridge Trail to Frozen Lake
- Length: 3.0 miles
- Elevation Gain: 600 ft.
- Trail Type: Out and Back
- Difficulty: Easy
- Trailhead Location
If all of these long, strenuous hikes near Sunrise are making your palms sweat a little bit, here’s a good alternative for you.
Sourdough Ridge is the, uh, ridge that sits up above the Sunrise Visitor Center, and most of the hikes here follow this exact route out to Frozen Lake before splitting off.
The views along this section of the Sourdough Ridge Trail are spectacular, with Rainier towering over the White River Valley in the distance.
It’s a very, very highly trafficked trail though (as stated above, most of the big hikes here follow this route), so don’t expect to have the trail to yourself.
There is another option, which is to hike from this parking lot all the way out to Frozen Lake and back with a side trip up to Dege Peak, which is almost 9 miles.
Hardly an easier alternative, but definitely worth doing if you’re looking for something a little different.
The Berkeley Park Trail
- Length: 7.7 miles
- Elevation Gain: 1,700 ft.
- Trail Type: Out and Back
- Difficulty: Moderate
- Trailhead Location
To be completely honest, we only really did this hike because my mom was with us, and she wasn’t quite up for hiking the Burroughs Mountain trail. Boy, are we glad we chose this hike.
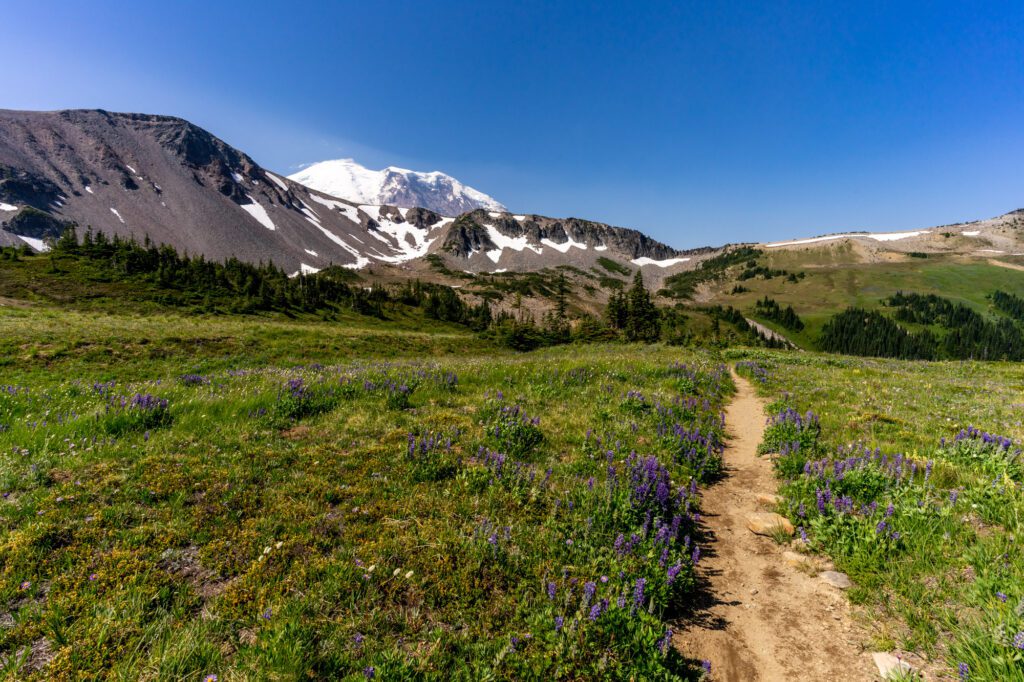
This is the best Mount Rainier hiking trail for wildflowers in late July. It is an upside-down hike, which means it is mostly downhill there and mostly uphill back, which is unique for hiking trails in Washington.
Go on a weekday if possible as it can be really difficult to get parking on the weekend, especially during July when the wildflowers are at their peak.
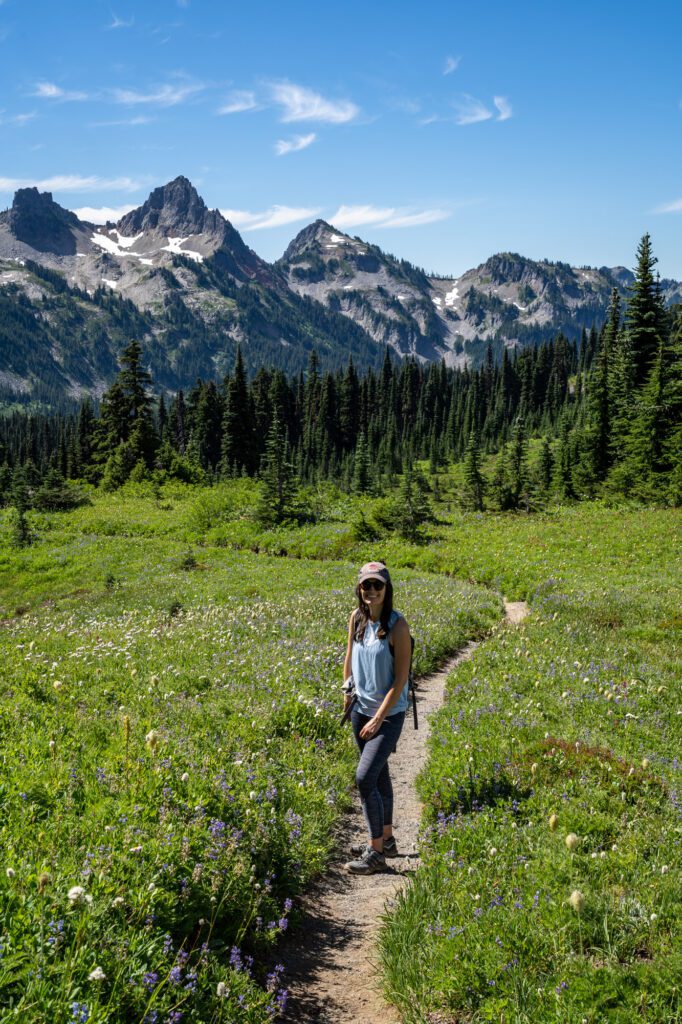
The first bit of the hike is rugged alpine landscape, which soon gives way to lush meadows, babbling creeks, and waterfalls.
If you do this hike at peak wildflower timing, you’ll climb along Sourdough Ridge to the same trail junction as the two hikes above, and as you start to drop down into the valley below, you’ll see a couple of bunches of lupine here and there. Then a few more.
Until you’re surrounded by wildflower meadows absolutely bursting with purple, red, white, and yellow flowers blanketing the landscape around you.
Continue the descent down into the valley all the way to the babbling brook on your left, which is a perfect lunch and turnaround spot.
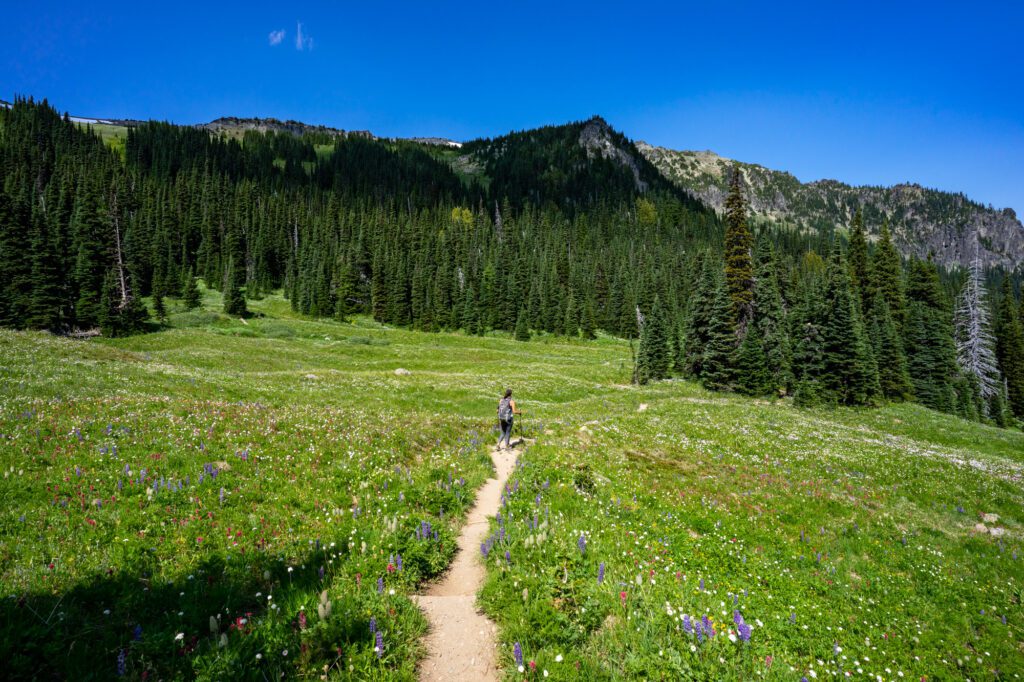
This is a supremely picturesque hike, at least when the wildflowers are in bloom, and is at the top of my recommendations list for hikes in the Mount Rainier National Park.
Outside of wildflower season, I’d look elsewhere – you lose the Mount Rainier views behind Burroughs Mountain as you descend from the trail junction.
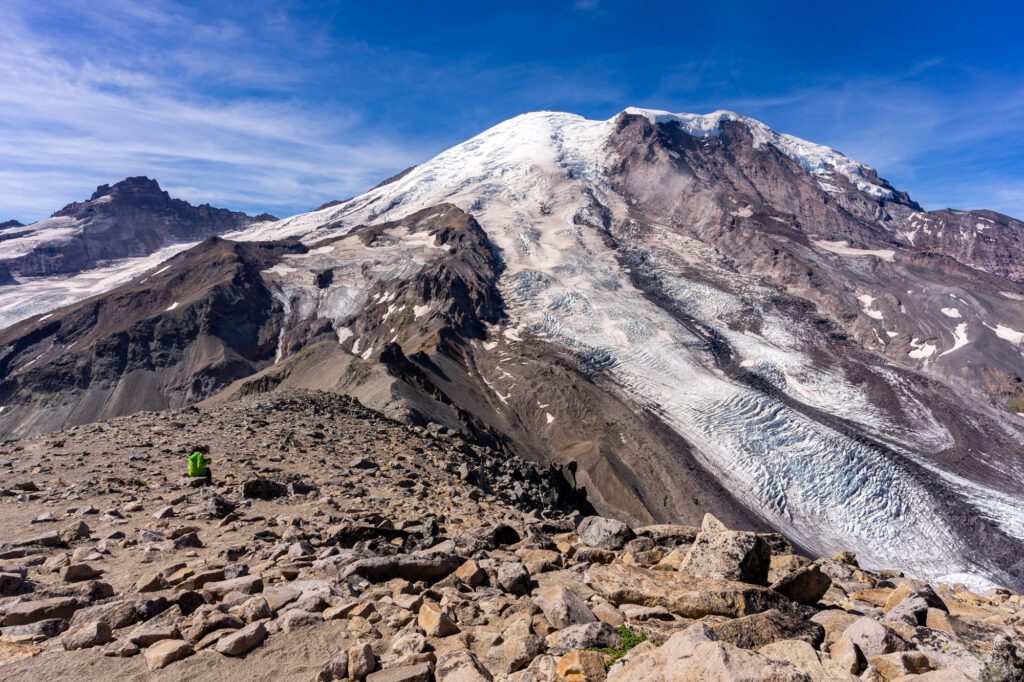
The Burroughs Mountain Trail
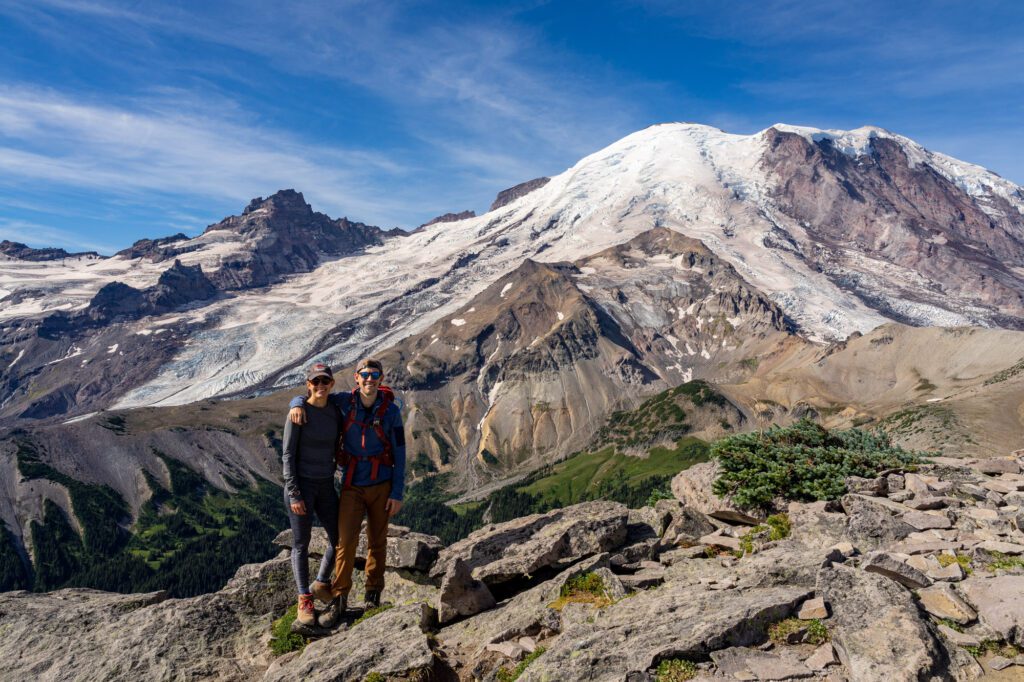
- Length: 9 miles
- Elevation Gain: 2,500 ft.
- Trail Type: Out and Back
- Difficulty: Hard
- Trailhead Location
You’ll see some guides that have this hike ending at the second of three burroughs, which are mini-mountains at the eastern edge of Rainier.
And we think that’s a mistake.
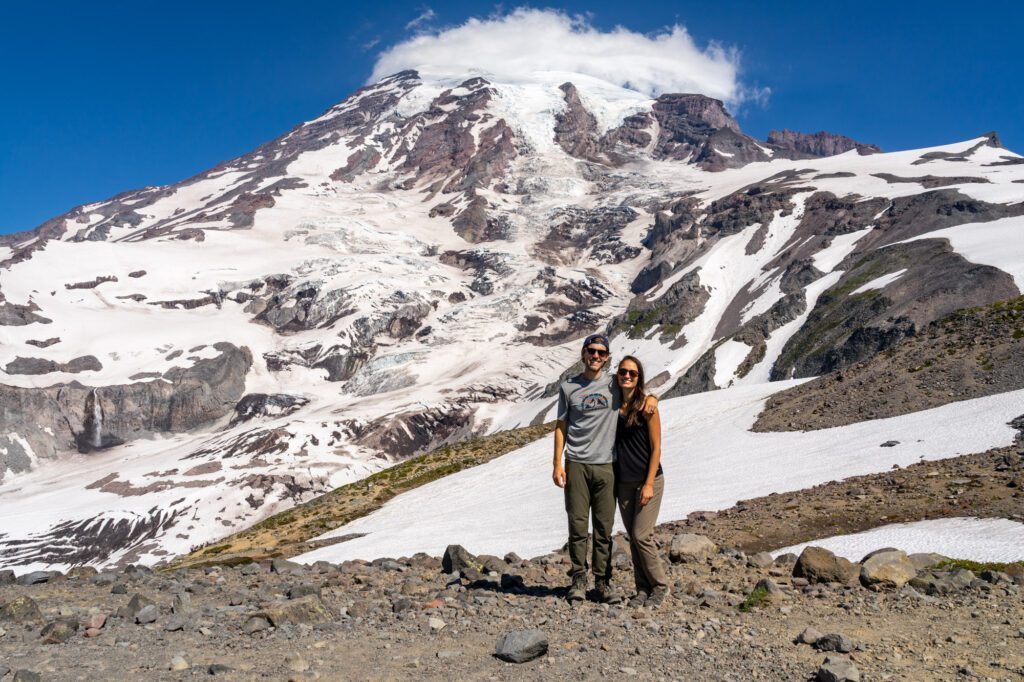
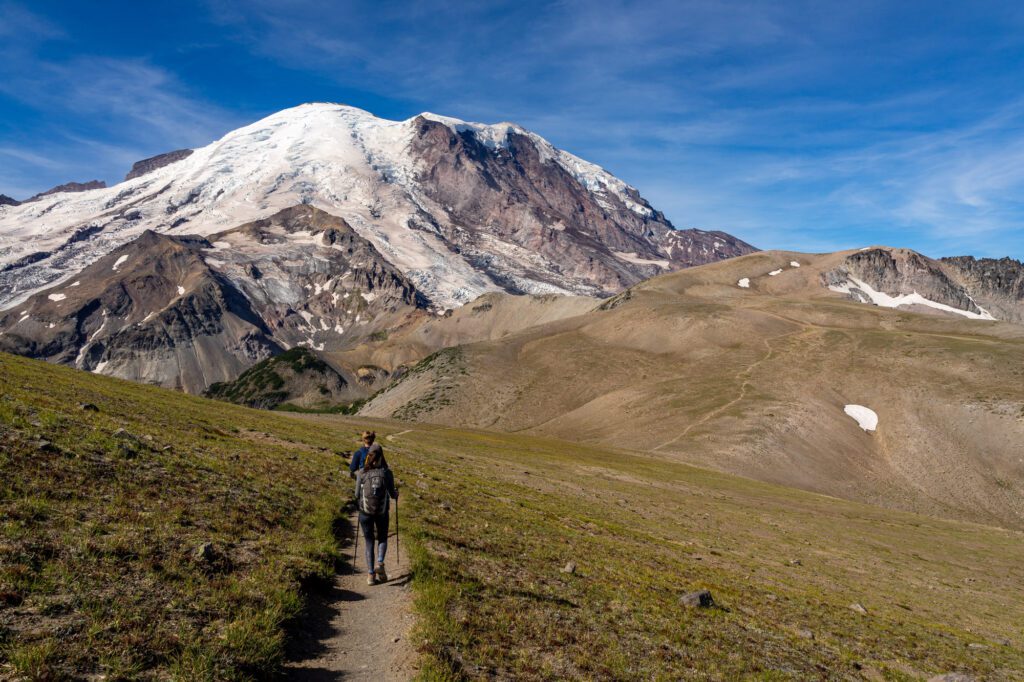
If you have gas in the tank, make sure to go all the way to the third burroughs for even more spectacular views of the White River Valley with Rainier towering above it.
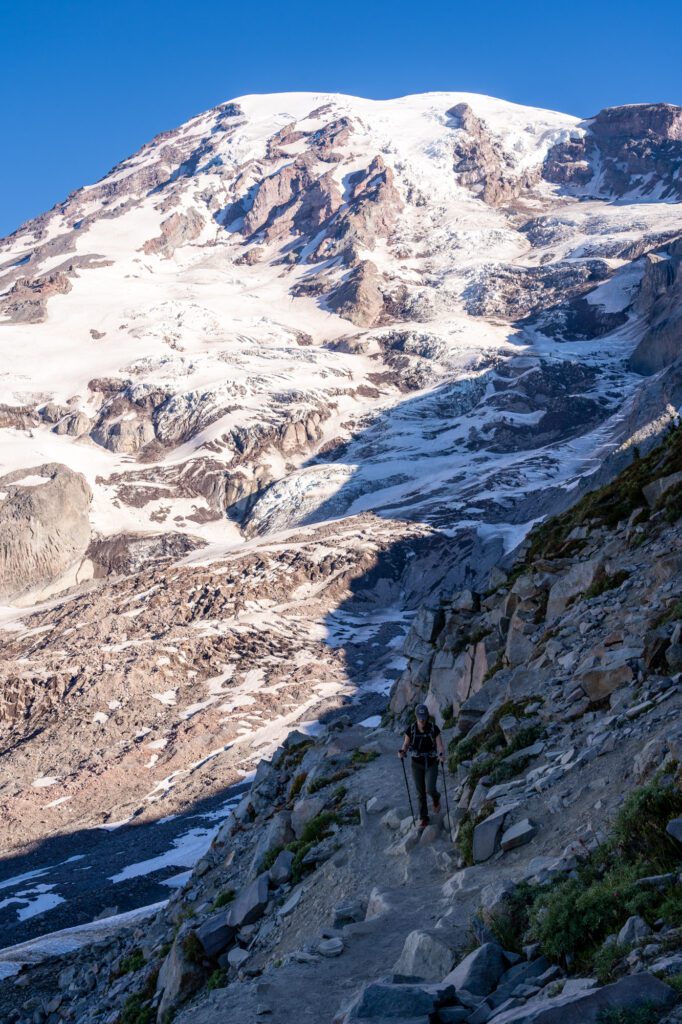
Let’s be super clear – this is not an easy hike. But if you’re up for a challenge, it offers some insane views of Mount Rainier, but makes you work hard for them. Which, in our opinion, is the best kind of hike.
Throughout the whole hike, there are views across the whole eastern side of the park to keep you going, and when you get to the third burroughs, the view will knock your (hiking) socks off. Mount Rainier looks almost close enough to touch.
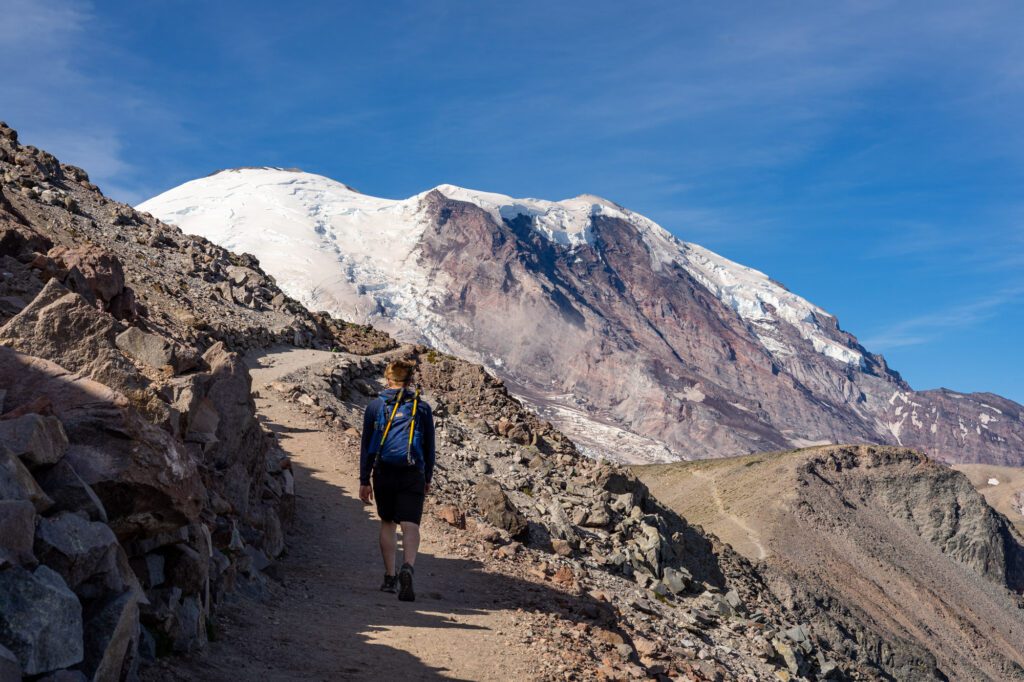
Even in summer some of the trail may be covered in snow, so it is important to head out mid-summer once the snow has had a chance to melt. Aside from that, the trail is popular enough that it is in good condition.
Technically the last part of the trail to the third burroughs is unmaintained, but it’s easy enough to follow.
The distance and elevation gain above reflect the hike to the third burroughs, which adds a significant amount of elevation (it nearly doubles it!) because you have to descend into a valley after the second burroughs before you make the final climb to the third one.
To the second burroughs, it’s six miles and just under 1,200 feet of elevation gain.
Read More: Hiking the Jaw-Dropping Burroughs Mountain Trail at Mount Rainier
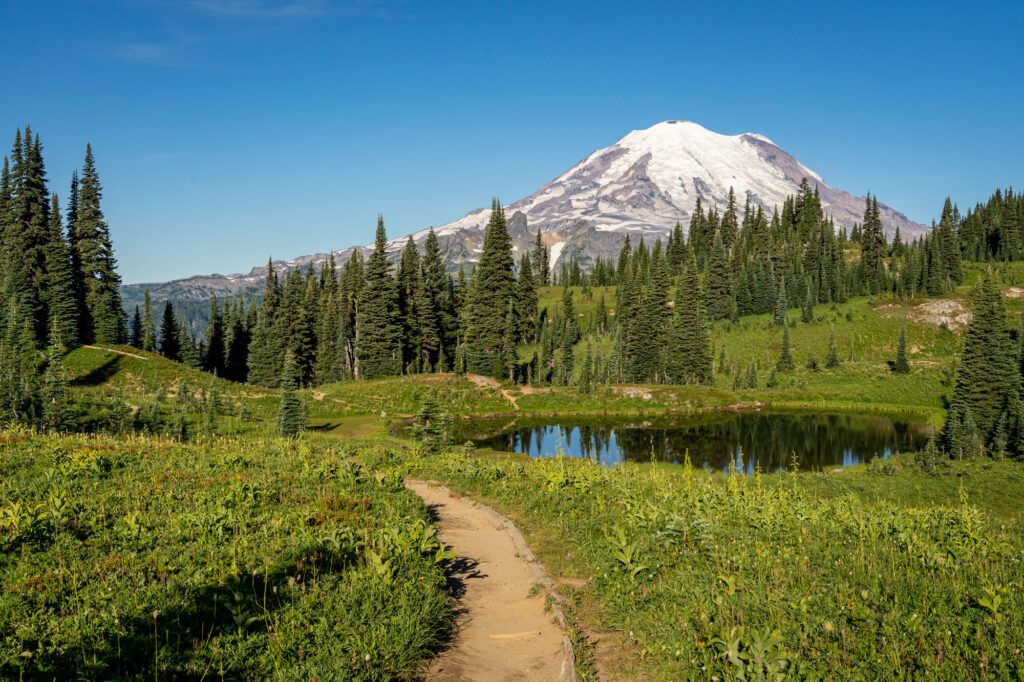
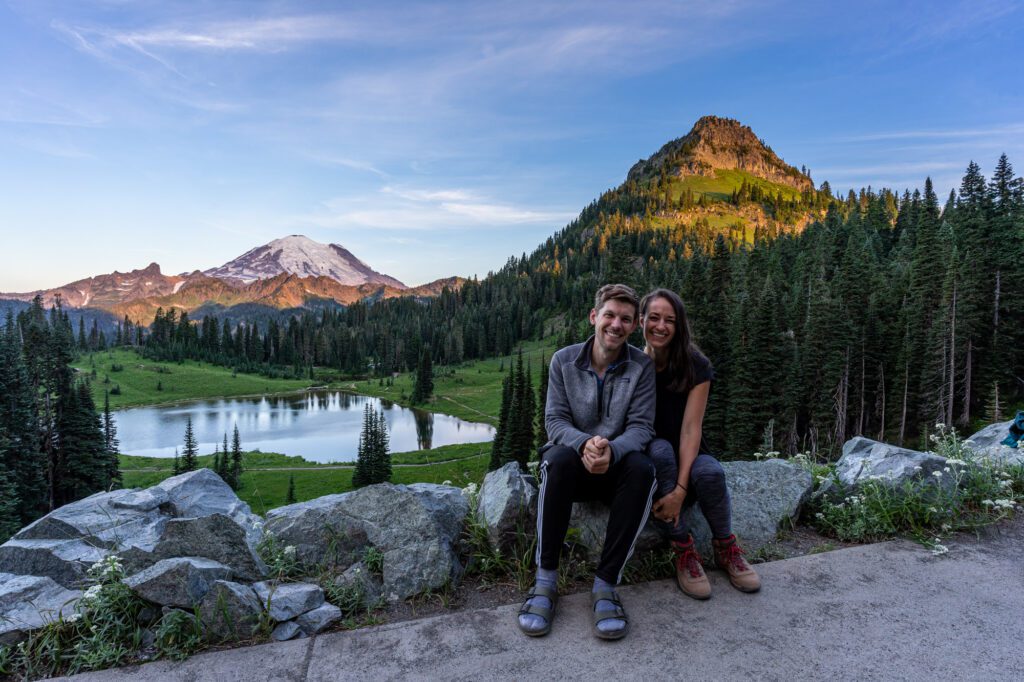
The Naches Peak Loop Trail
- Length: 3.4 miles
- Elevation Gain: 600 ft.
- Trail Type: Loop
- Difficulty: Easy / Moderate
- Trailhead Location
The Naches Peak loop might be the best bang-for-your-buck hike near Rainier, and maybe even in the entire state. It certainly makes our list of the best easy hikes in Washington, however you slice it.
It is another easy hike in Mount Rainier that is super family-friendly and the short loop gives a great introduction to hiking in Mount Rainier National Park. It also gives you a nice taste of the Pacific Crest Trail, which you’ll hike along for a portion of the loop.
The scenery is full of wildflowers in the summer, with fantastic views of Mount Rainier reflected in Tipsoo Lake that have photographers flocking here to capture the perfect reflection photo.
We’d start at the parking lot at Tipsoo Lake, which has a bathroom and the biggest parking lot. For the best views of the mountain, take the loop in a clockwise direction.
Tipsoo Lake is also a fantastic place for sunrise or sunset, depending on what your schedule looks like.
Source: we went there for sunrise before tackling the trail. Here’s a picture.
The trail climbs steadily for the first half, passing a couple of picturesque tarns and blooming meadows on the way up to the high point, where you’ll find yourself up above Dewey Lake, which sits in the valley below you.
From there, the trail turns west, and you’ll have a fantastic view of Rainier for the next stretch of trail.
The trail descends back down to Tipsoo Lake for the last quarter mile or so, and the Rainier views end as you get below the treeline.
Read More: Hiking the Naches Peak Loop: A Complete Trail Guide
Summerland to Panhandle Gap
- Length: 12 miles
- Elevation Gain: 2,950 ft.
- Trail Type: Out and Back
- Difficulty: Moderate / Hard
- Trailhead Location
This is a section of the multi-day Wonderland Trail, which circumnavigates Mount Rainier in 93 gorgeous miles.
The whole 93 miles seems a little much for a day hike at Mount Rainier, though, so this route gives you a taste of the trail that will have you dreaming about a future backpacking trip all the way around the mountain.
You will join day hikers and backpackers in enjoying the gradual changes in the landscape as you hike along this trail.
It feels like you see all the different terrains of the area, starting in meadows and forests and crossing streams before reaching steep rocky outcrops with spectacular views of Mount Rainier.
You are very likely to come across mountain goats who love the steep rocky terrain; it is a joy to sit and watch them climb and frolic, although while we were hiking the Enchantments in Washington we were harassed by a male mountain goat with a serious case of toxic masculinity.
He even headbutted our tent while we were in it – so keep your wits about you (and keep your distance) in their presence!
While this hike is very enjoyable, it is also quite challenging, and I would recommend hiking poles as it can be steep and gravelly in parts.
The Two Hikes at Mowich Lake
In this remote northwest edge of the park, you will find the best hikes at Mount Rainier for a little more solitude.
Why the peace and quiet, you ask?
You should know that the roads to get here are notoriously bad, which cuts the visitors in this part of the park significantly.
Either the roads are closed altogether, which is usually the case with the treacherous Westside Road (and is the reason Gobbler’s Knob isn’t on this list despite being an awesome hike – the closure adds eight miles to the hike!), or they’re borderline impassable in passenger vehicles.
The road into Mowich Lake is open in peak summer, and is a white-knuckle journey over a potholed road that will probably take you longer than you planned.
Still, two of the best hiking trails in Mount Rainier are at the end of that road, so it’s worth the journey if you have the right kind of car. Take a high-clearance 4WD vehicle (it’s doable in a normal passenger vehicle, but it’s not going to be pleasant), go slow, and you’ll be fine.
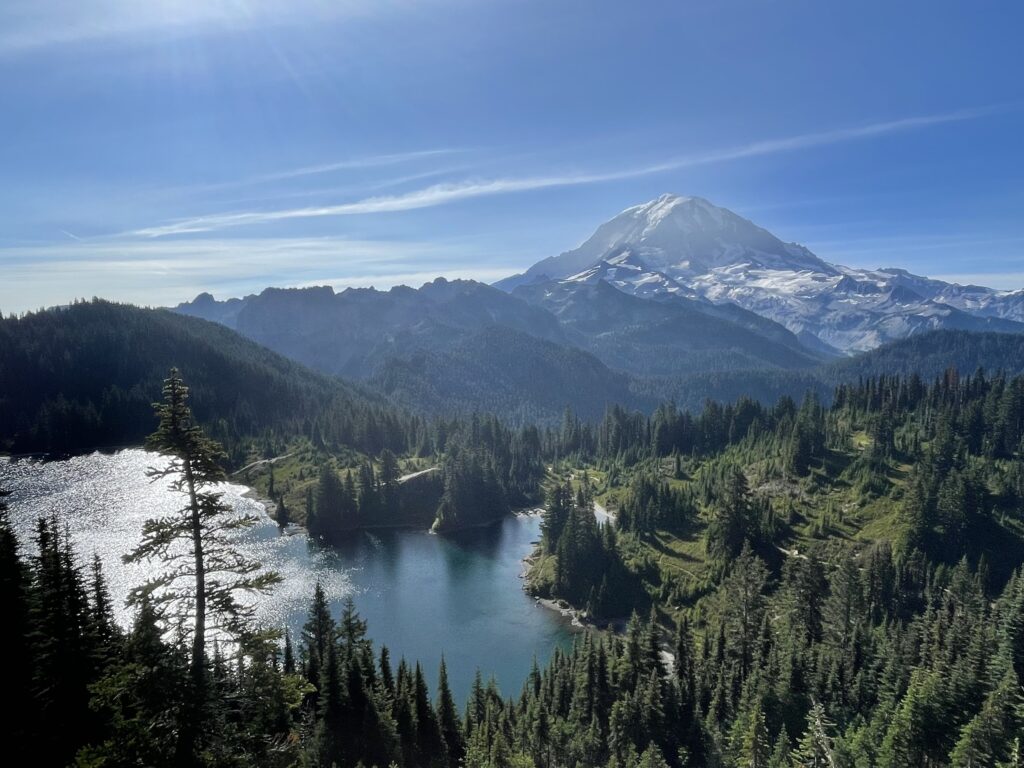
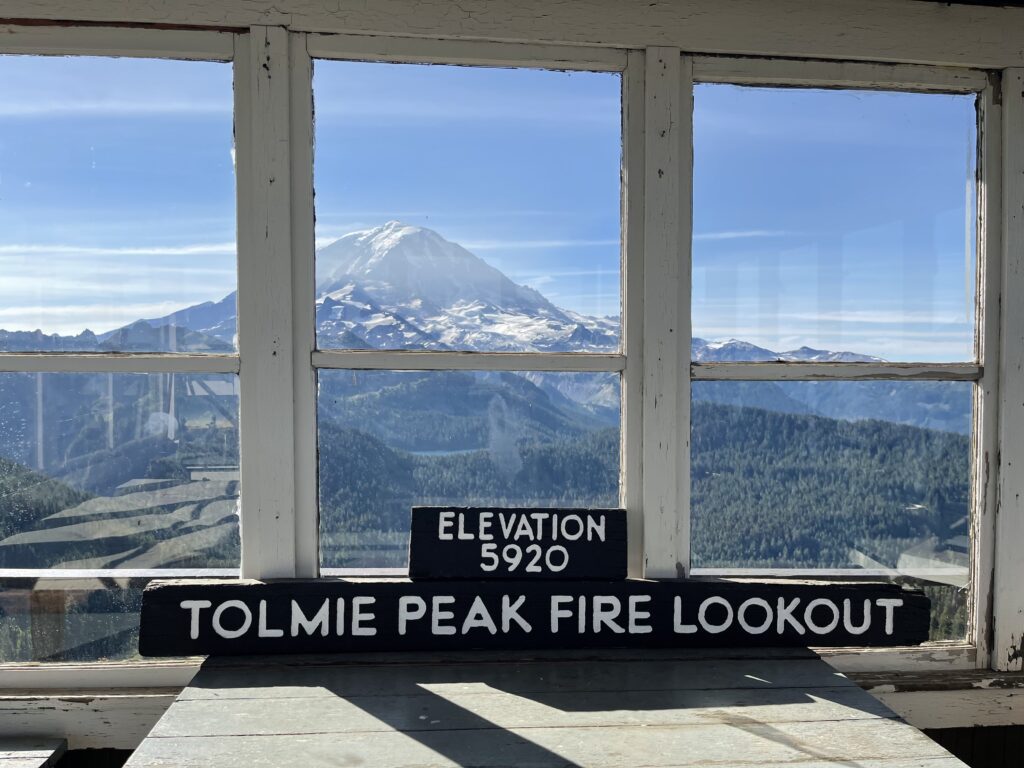
The Tolmie Peak Trail
- Length: 7.5 miles
- Elevation Gain: 1,100 ft.
- Trail Type: Out and Back
- Difficulty: Moderate
- Trailhead Location
The views of Rainier from Tolmie Peak are pretty spectacular. The Tolmie Peak fire lookout sits above a stunning blue lake, with Mount Rainier towering over both.
You’ll park at Mowich Lake Campground, and start your hike by heading left around the lake, where you’ll find the start of the trail up to Tolmie Peak. You’ll hit a fork in the trail a little ways after the lake – head left here (right puts you on the Wonderland Trail that circumnavigates Rainier).
The trail starts out easy enough, basically flat for the first mile and a half, before starting the ascent up to the fire lookout at the peak. You’ll climb 1,000 feet in just over a mile. It’s nothing terribly difficult, but it’s definitely in the moderate category.
Eunice Lake, the aforementioned blue lake that you see from up above, is a great lunch spot after the climb to the Tolmie Peak fire lookout. Bring bug spray though – the bugs in the summer are no joke.
Note that there is no overnight camping here, so you won’t be able to backpack in this area.
The Spray Park Trail
- Length: 8 miles
- Elevation Gain: 1,700 ft.
- Trail Type: Out and Back
- Difficulty: Moderate / Hard
- Trailhead Location
While the hike to Tolmie Peak heads north from Mowich Lake, this one heads off to the south. It’s the same idea though, you’ll meander along a mostly flat trail through the forest for about two miles, where you’ll find powerful Spray Falls. From here, the real climb begins.
You’ll climb a hair under 1,500 feet in a mile and a half – that’s 1,000 feet per mile, for those of you counting – which is why this hike earns a “moderate / hard” rating from us.
The breathtaking views from the top of Mt. Pleasant are worth it, although you’ll be feeling this hike in your thighs and butt for a few days afterwards. This is one of the best sections of meadows in the entire park, and the proverbial juice is definitely worth the squeeze (we think).
The Two Hikes at Ohanapecosh
There are two hikes in this part of the park that are worth doing, but know going in that you’re not going to be getting the epic mountain views that you might get at Sunrise or Paradise.
Instead, it’s a dense forest – including an impressive old-growth forest – with rivers running through it, and some nice family-friendly hikes through the woods.
Grove of the Patriarchs
- Length: 1.5 miles
- Elevation Gain: None
- Trail Type: Loop
- Difficulty: Easy
- Trailhead Location
This is one of Mount Rainier’s best hikes for families, but instead of spectacular views of Rainier, you’ll get a little something different.
It has a fun suspension bridge, towering Douglas firs, and interpretive signs teaching you all about the ecosystems.
It is one of the best easy hikes in Mount Rainier National Park and can get particularly busy on weekends as families escape the city.
If you’re going over a weekend, do it early, which is also the best time to be exploring the forest anyway. Going during the week, particularly earlier in the day is best if you want to avoid crowds, but obviously not everyone can pull that off.
Important Update for 2022/2023: This trail is closed due to a washed out bridge. It’s not expected to be open until 2024.
The Silver Falls Trail
- Length: 3 miles
- Elevation Gain: 700 ft.
- Trail Type: Loop
- Difficulty: Easy
- Trailhead Location
This is a nice little loop that leaves from the Ohanapecosh Campground, making this a great morning or afternoon hike if you’re camping there and you’ve been out exploring the other parts of the park for the bulk of the day.
It’s an easy stroll along the river that climbs gently for the first mile, before leveling off and following the river to Silver Falls. You’ll descend a quick set of switchbacks to get from the ridge you’ve been hiking along down to the river – don’t miss the overlook about half way down the switchbacks.
From there, loop back along the other side of the Ohanapecosh River, and it’s a slight downhill walk back to the campground and Visitor Center.
The Best Mount Rainier Hikes, Mapped
As promised, here is a map of the hikes featured in this guide, color-coded for the four different regions of the park (Paradise, Sunrise, Ohanapecosh, Mowich Lake).
To view a full size version of the map, click on the “expand” icon in the top right.
Things to Know Before You Visit Mount Rainier National Park
Here are a few things to know before you hit the trail.
No dogs allowed on any hiking trails at Mount Rainier. No exceptions. This is par for the course in national parks. They can be in campgrounds as long as you’re there with them, and they can basically go anywhere a car can go. That, crucially, means they cannot go on any hiking trails.
Summer means mid-July through September. We have a section on the best time to visit above, but this is worth repeating here because it’s so unusual to visitors who are new to the Pacific Northwest. While summer technically begins on June 21, summer in the Cascades really begins in mid to late July, which is when you can expect high elevation hiking trails to be snow-free.
Do not, under any circumstances, feed the wildlife. Yes, that means you. Yes, that means the chipmunks. No, you don’t need an Instagram picture with a chipmunk eating from your hand. The chipmunks at Mount Rainier are fearless at this point, and they will steal your food. Keep an eye on your pack!
Pack a lunch and snacks. There are only a few places to eat inside the park, and they’re fairly mediocre and expensive. You could head outside the park to Packwood or one of the other bordering communities, but that’s a long drive (an hour or more).
Any hike with a lake will have mosquitoes in the summer. Come prepared with long sleeves and bug repellant.
Entrance fees for the park. Like nearly all national parks in the United States (including all three national parks in Washington State), you’ll have to pay to enter. You have a few options here, and at the most basic level it depends on how many national parks you think you’ll visit in the next 12 months.
- If the answer is three or more, buy an America the Beautiful Pass. It will cost $80 and gets you entrance to every national park in the US (and national forests and monuments, we learned recently) for a full year from the time you buy it. Buy it online at REI in advance, or in person at one of the entrance stations.
- If it’s two national parks or less, then pay the $30 entrance fee, which covers entrance to Mount Rainier for your car for seven days from the time you buy it.
The Best Time Go Hiking in Mount Rainier National Park
Like most hikes in the Cascades, there’s a very short and very specific timeframe where the trails in Mount Rainier National Park are snow-free.
The important thing to know is that between late October and mid-July, most higher elevation trails in the park are covered in snow.
I know several people who have shown up in late June, which is technically summer, only to be disappointed that the hikes they wanted to do are largely inaccessible.
Even when we were hiking at Mount Rainier during the last week of July a couple of years ago, there was still snow on the famous Skyline Trail! And not just a dusting – a LOT of snow.
Summer brings blue skies and warmer days, making it the best time to hit the hiking trails in Mount Rainier National Park.
July to August is the ideal time to visit for the most consistently nice hiking weather, but it is also peak tourist season – expect accommodations and flights to be the most expensive if you’re coming from out of town.
During these peak summer months, most if not all trails will be snow-free and the wildflowers will be in full bloom for 7-10 days (the exact timing shifts yearly, but we’ve had good success in the last week of July).
Try not to visit on Labor Day and any other major holidays if you can – the crowds are going to be borderline unbearable.
Mosquitoes are common near bodies of water during summer, so don’t forget to pack some bug spray.
September and October can be nice if you want to avoid premium prices and crowds, but there will definitely be a higher chance of gray and drizzly days (or even some early snowfall).
In addition to the weather, which holds into October most years, you’ll have fewer people on the trail with you as most families with kids are back in school.
Add to that the fall colors that descend on Rainier in October resulting in blankets of orange and red covering the many meadows around the Mountain, and fall is a fantastic time to visit.
The winter months offer a lot of cool things to do and see at Rainier, but hiking isn’t one of them. Though, there is some good snowshoeing to be had!
Planning a Trip to Mount Rainier National Park? You won’t want to miss our detailed guides to visiting Mount Rainier that are all based on our own personal experience exploring the park.
- All the Best Things to Do in Mount Rainier National Park
- How to Plan an Unforgettable Day Trip to Mount Rainier From Seattle
- Where to Stay near Mount Rainier National Park: A Complete Guide
- The Best Hikes in Mount Rainier National Park: A Helpful Hiking Guide
- Hiking the Skyline Trail: Is This the Best Hike in the Entire State?
- Hiking the Jaw-Dropping Burroughs Mountain Trail at Mount Rainier
- Hiking to Towering Comet Falls in Mount Rainier National Park
- The Naches Peak Loop: The Best Bang-for-your-Buck in Washington